Ikea Play Kitchen Hack Tutorial + What You Should Know Before You Start!
Learn the paint, supplies, and techniques I used for my IKEA Play Kitchen Hack. Plus, I’ll share what you absolutely need to know before you get started!
Please note that this post contains affiliate links which allow me to earn a small commission when a purchase is made at no additional cost to you. Read more here.
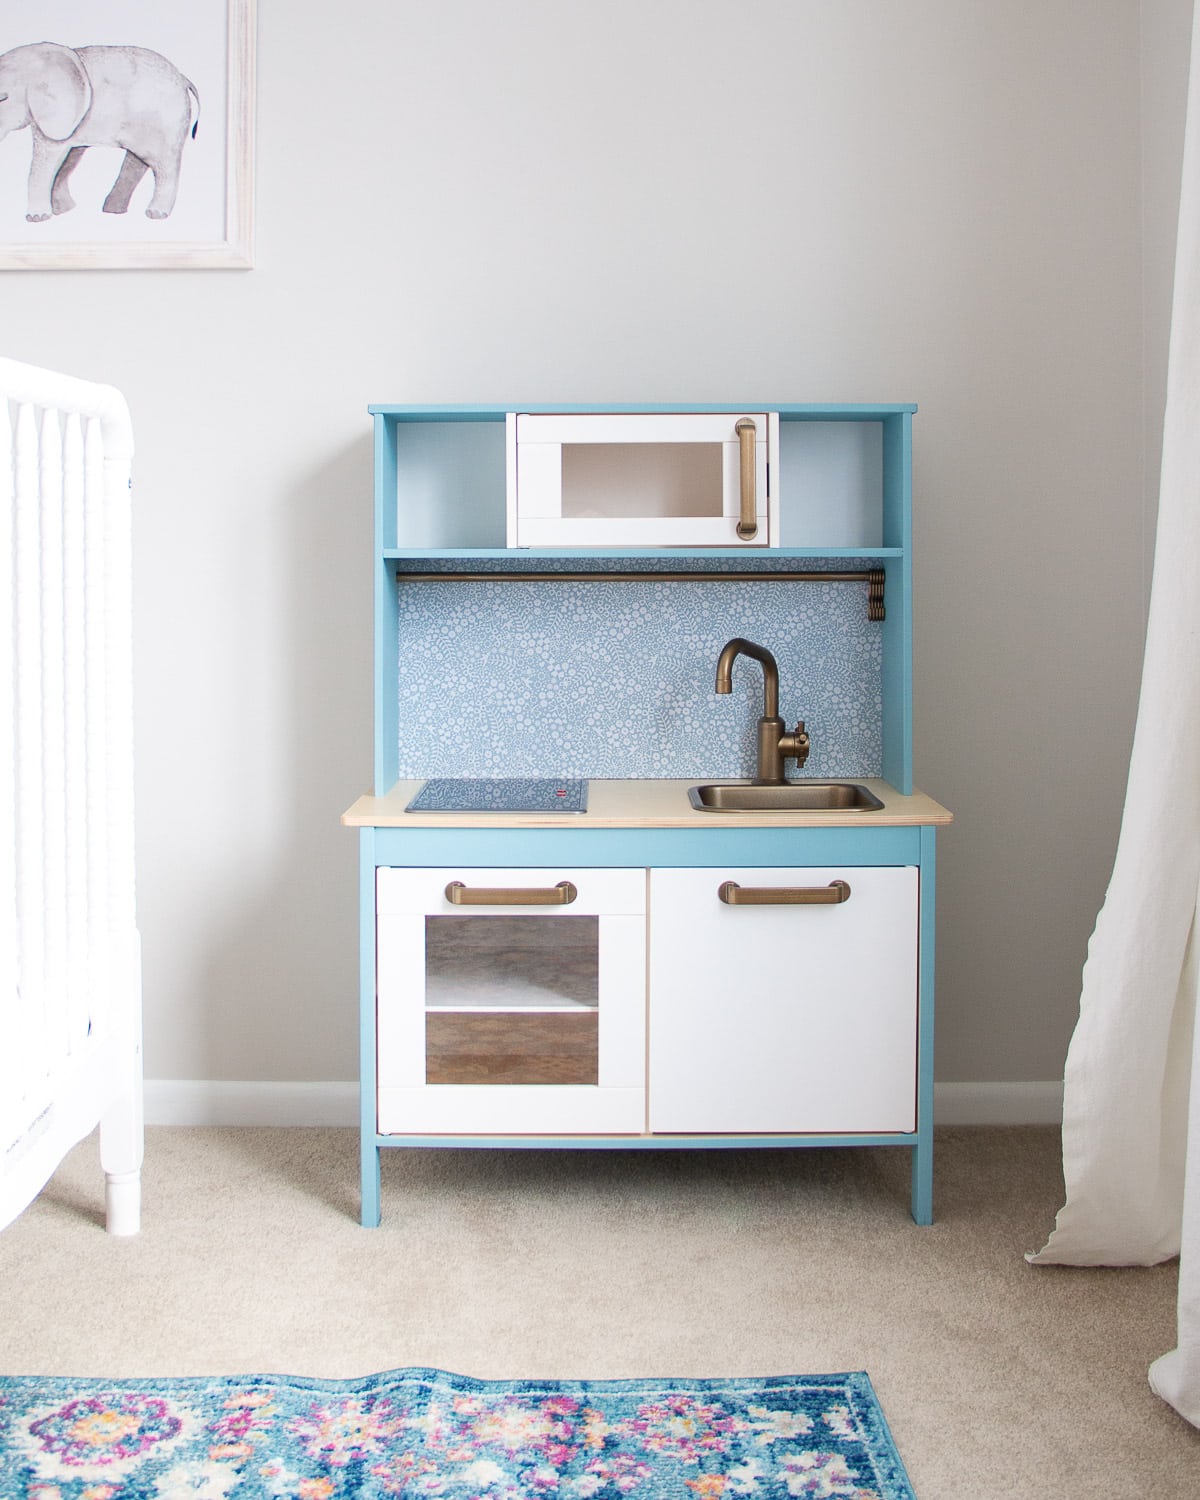
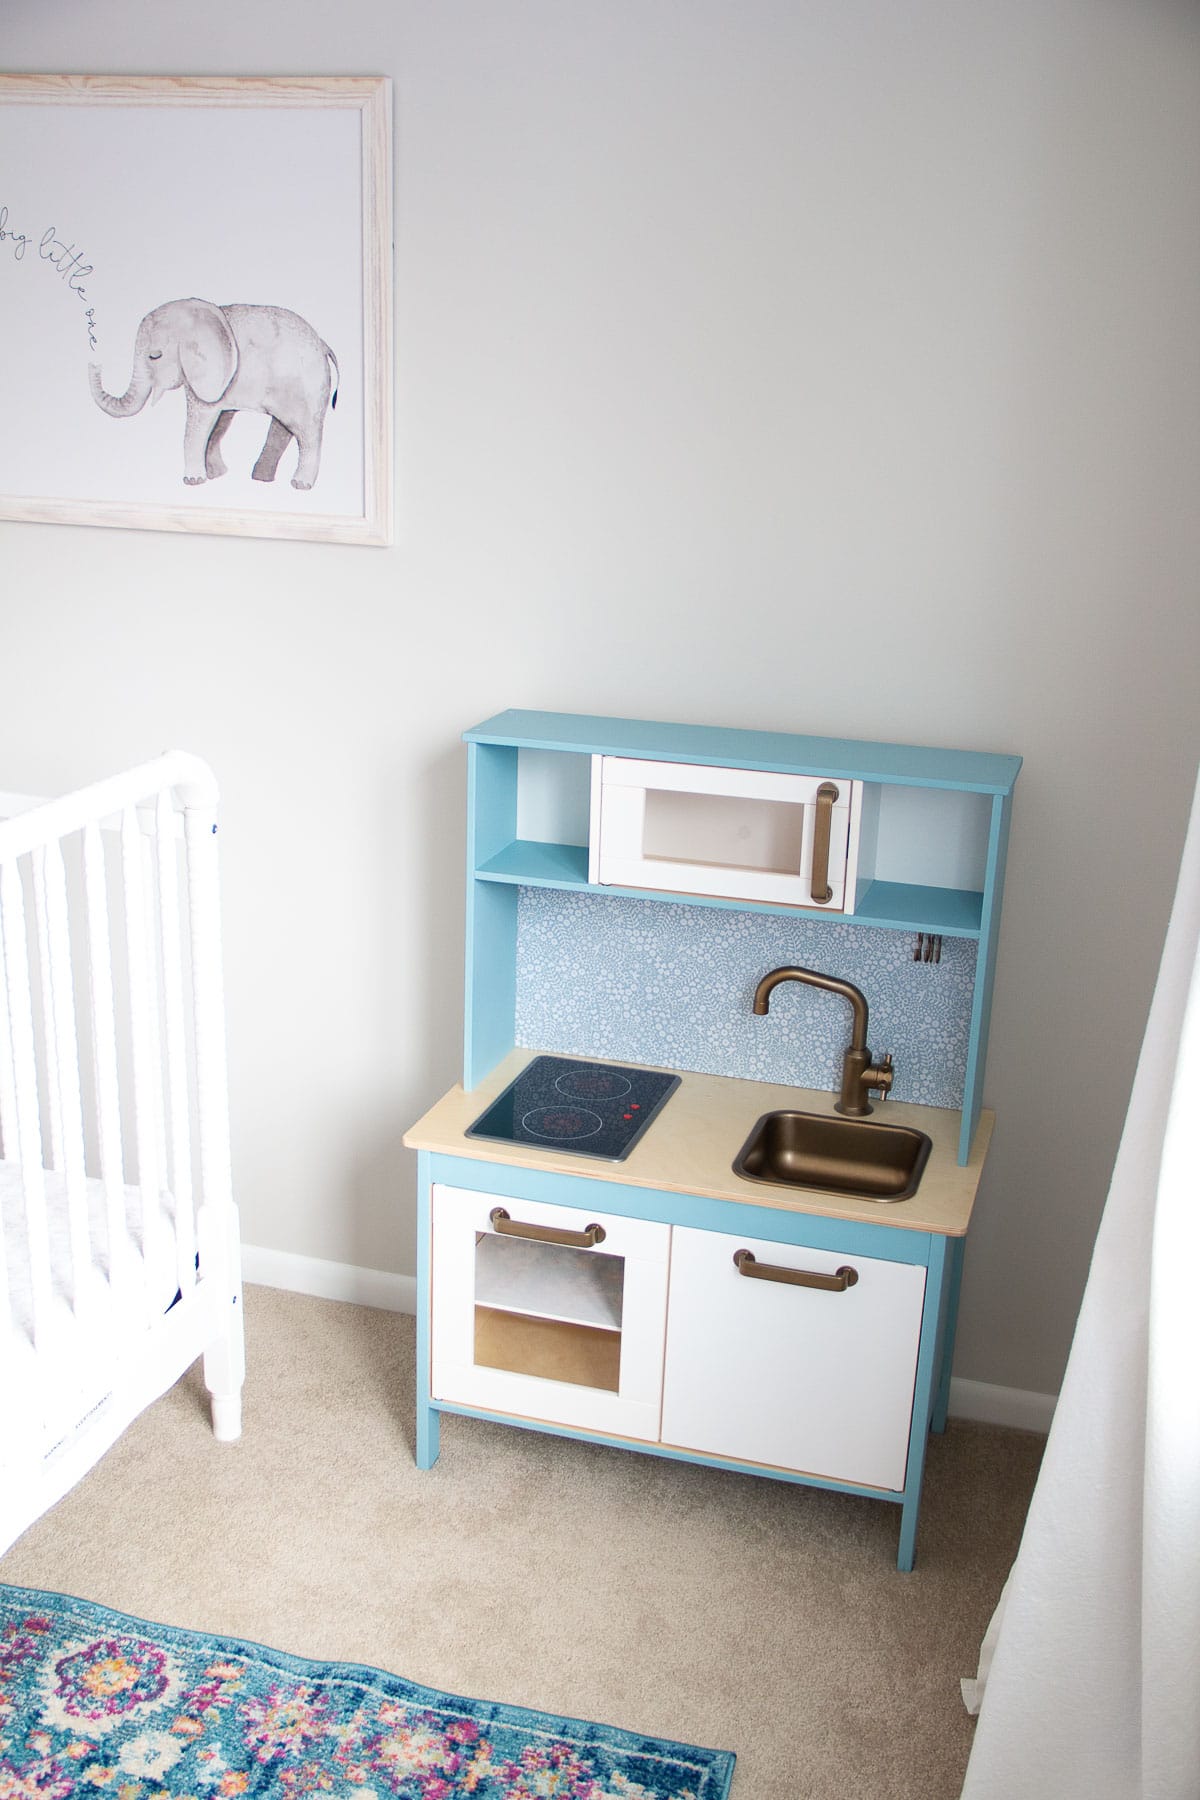
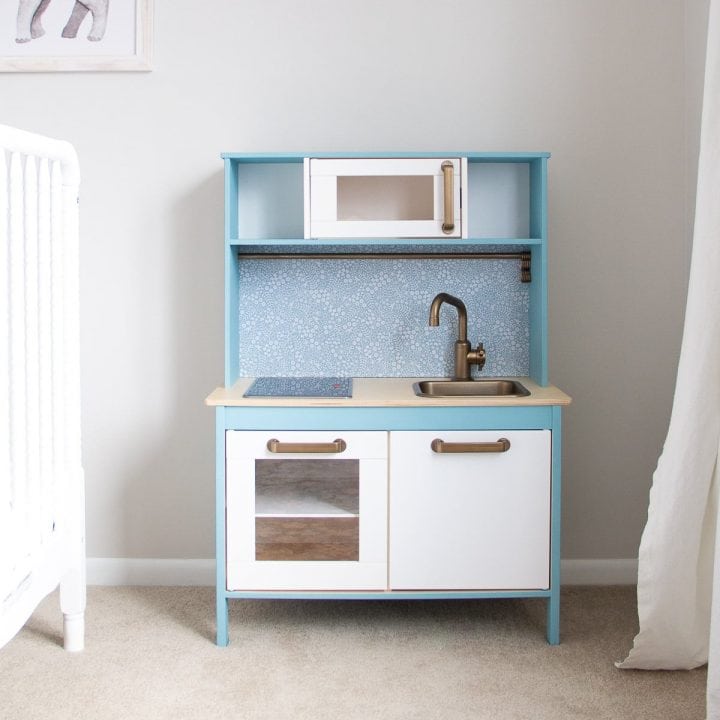
Learn how I DIYed this Ikea Play Kitchen Hack, mistakes I made, and a few tips to know before you get started.
Want More IKEA Hacks? Check out my roundups of Best IKEA Hacks, Favorite KALLAX Hacks, and IKEA Spice Rack Hacks for more!
IKEA Play Kitchen Hack: What You Should Know Before Starting
Before diving into my step-by-step, I wanted to share a few things that didn’t go well with this project. Hopefully you can learn from my mistakes!
Chipping Spray Paint After Painting the IKEA Play Kitchen Hardware
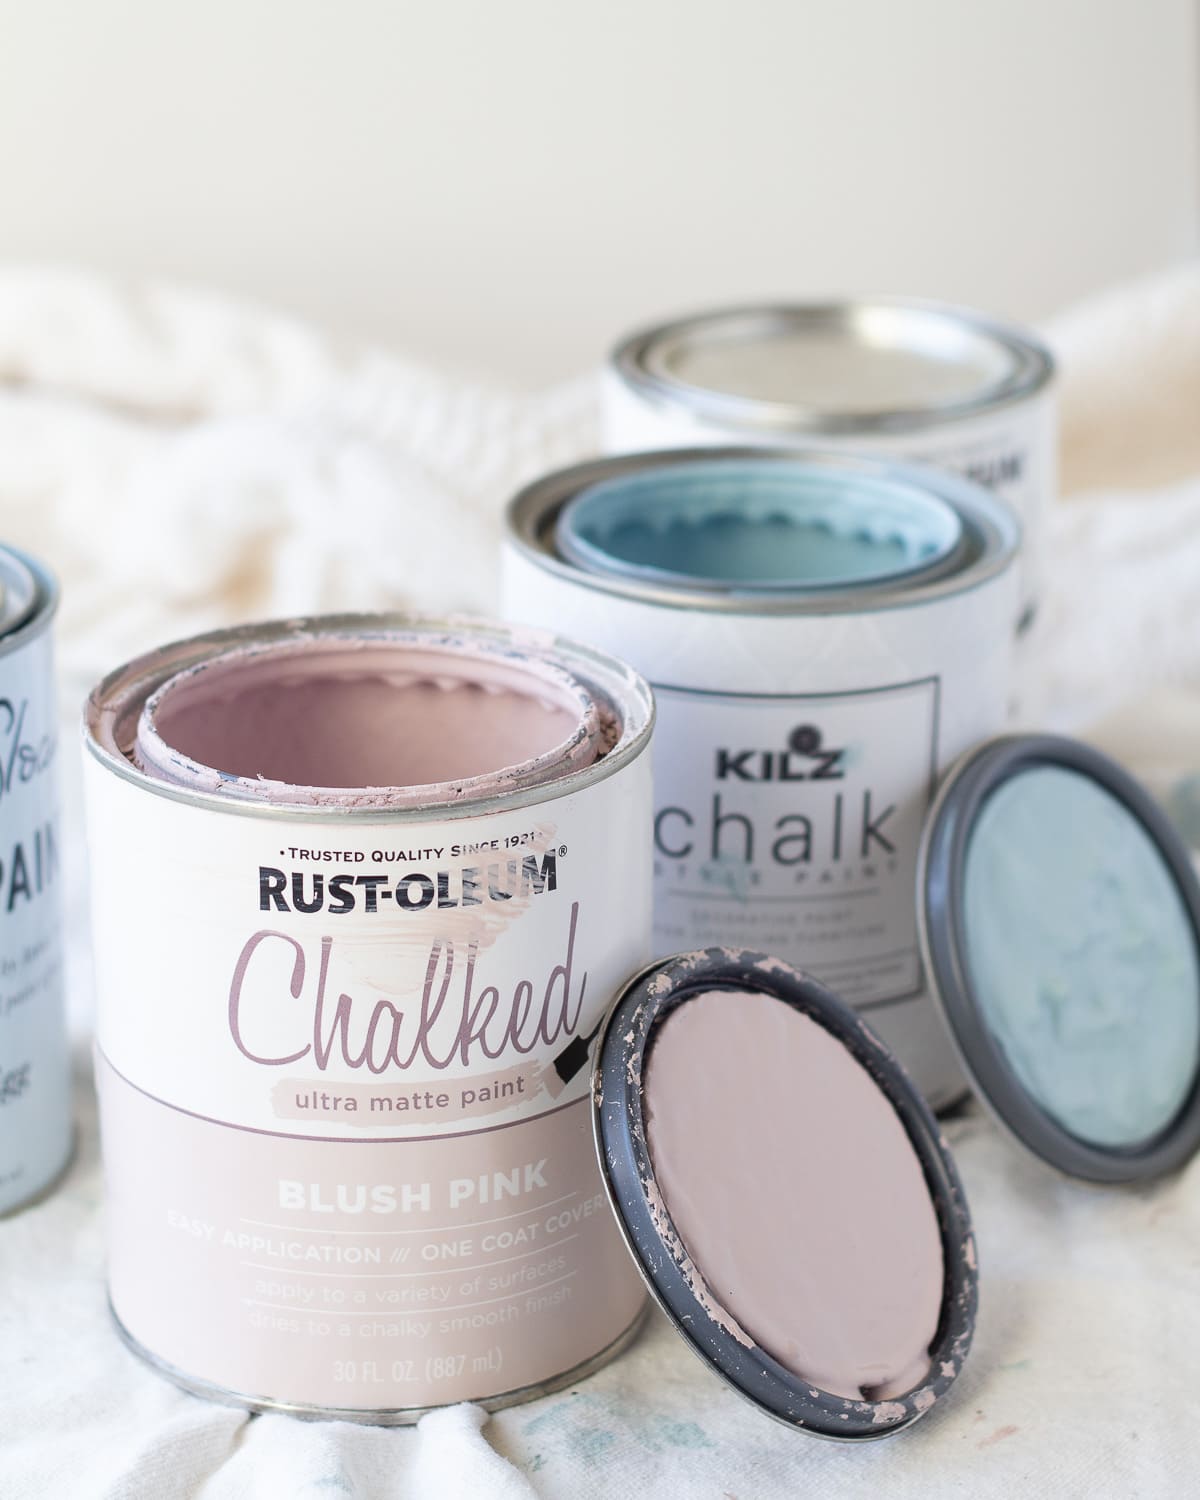
Ok, so for me, the spray paint did not adhere well to the “hardware” (sink, handles, faucet, etc). I used spray paint rated for plastic, but I’m just not happy with the way it turned out. I later realized that this Rust-Oleum paint lists plastic right on the front of the can–so maybe that would be stronger?

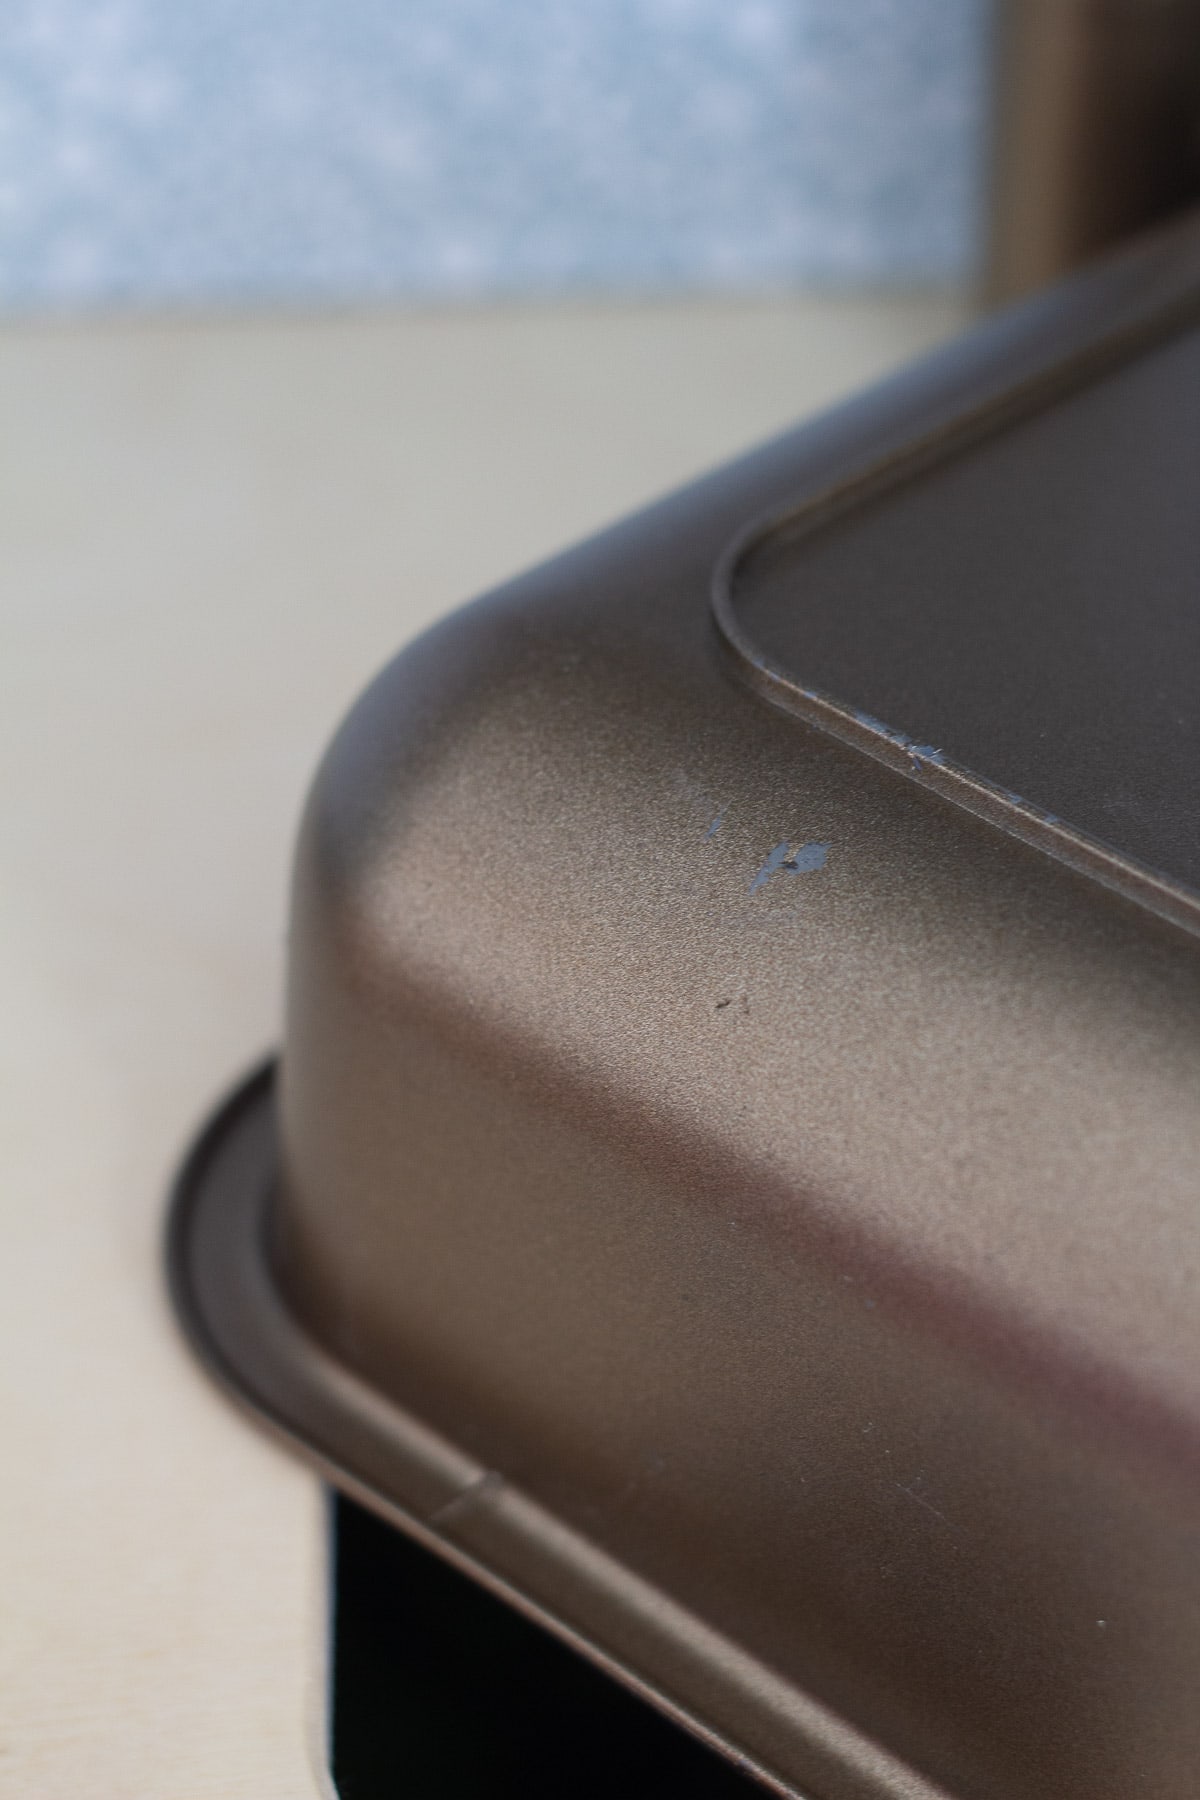
Note: With the plastic pieces, I opted to start with a spray primer, followed by a metallic spray paint, and finish with a matte clear top coat.
I worked on this kitchen during winter in MN and spray painting in a cold garage is never ideal. The paint ended up sticking occasionally when I flipped pieces over and I had to touch up all the pieces at least once.
But the worst thing was realizing that the sink was chipping after our toddler began to play with it. The sink comes in and out of the kitchen, which is likely part of the problem. Perhaps the situation would be improved with different spray paint, or even sanding the sink down first?
I have since removed the sink from the kitchen (the other hardware pieces don’t seem to get as much wear and tear). Maybe I will just sand it down and try again. A toy that has chipping spray paint is definitely not child-safe, so I wish I would have realized that the spray paint wouldn’t hold up with daily play. I will be sure to update this post if/when I try other methods. And if you have had success, please share in the comments!
Still Want to Spray Paint?
If you still want to spray paint your IKEA play kitchen hardware, here’s some ideas to consider that might give your project more success than mine:
- sand the pieces first
- use a spray paint specifically designed to stick to plastic
- consider leaving the sink/faucet gray and replacing just the handles with real hardware
- glue the sink into the kitchen to reduce wear and tear
Backsplash and Paint Color Don’t Match
Ugh, this one makes me sad. In a rush to finish before Christmas, I was scrambling to find a backsplash and a matching chalk paint. In retrospect, I wish I would have painted the kitchen with a good primer and then matched the color at Sherwin Williams.
What ended up happening was my paint was a much brighter blue than the “backsplash” contact paper I purchased. In some lighting it works, but you can see it quite a bit in the photographs.
Now, this is an easy fix if you purchase your backsplash material and then choose your paint color (or get it matched). Unfortunately, because I was rushing and wanted to use chalk paint, I had a limited selection of colors.
My usual process for a project like this would have been to lightly sand the pieces, prime, and then paint. A simple latex paint would have worked fine in that case. And I would have been able to purchase a perfect match. I’m still considering getting my backsplash paper matched at Sherwin Williams and painting this kitchen one last time!
Another tip: Choose a white backsplash (I couldn’t find one I liked, but I know they are out there!), such as a subway tile or penny tile and then whatever paint color you go with should work. This makes it easier to use chalk paint, which I liked using for this project.
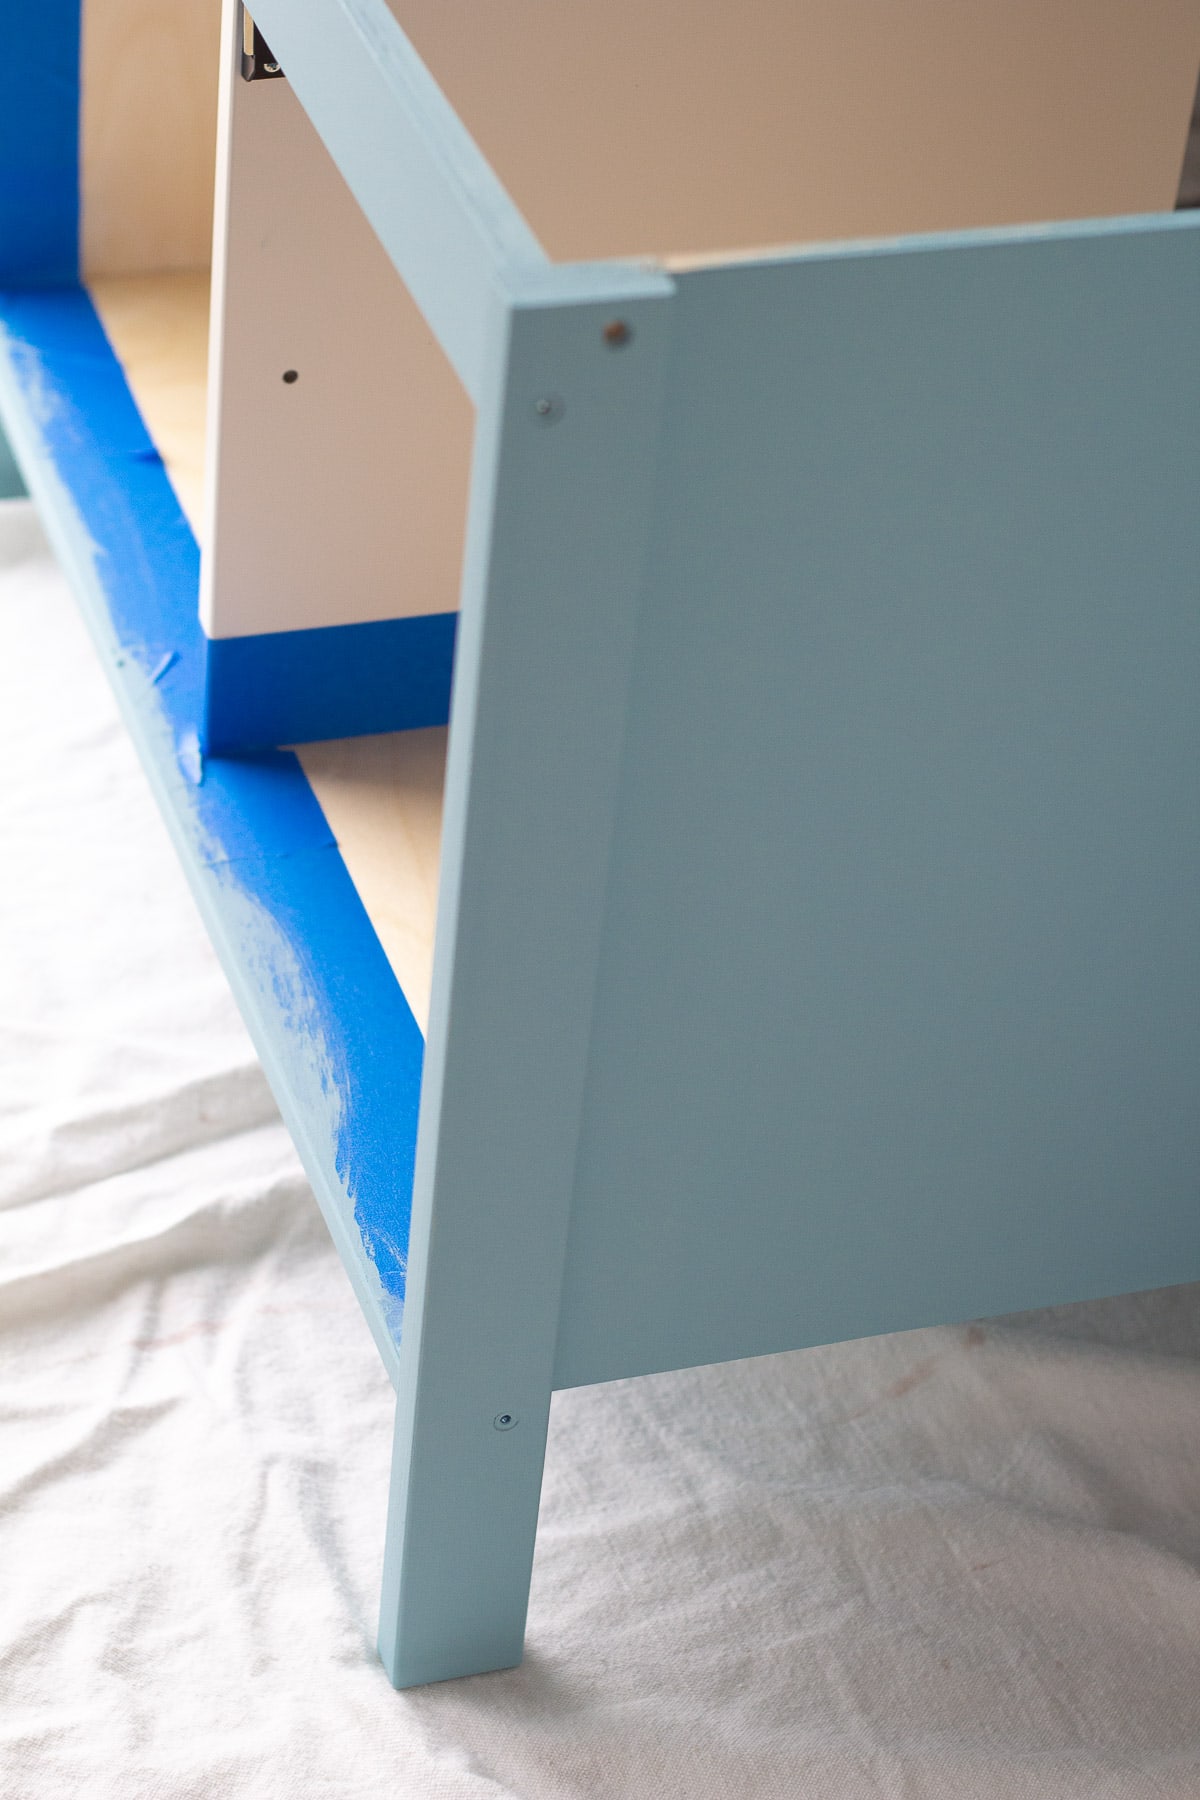
Painting Gaps Around the Doors of the Kitchen
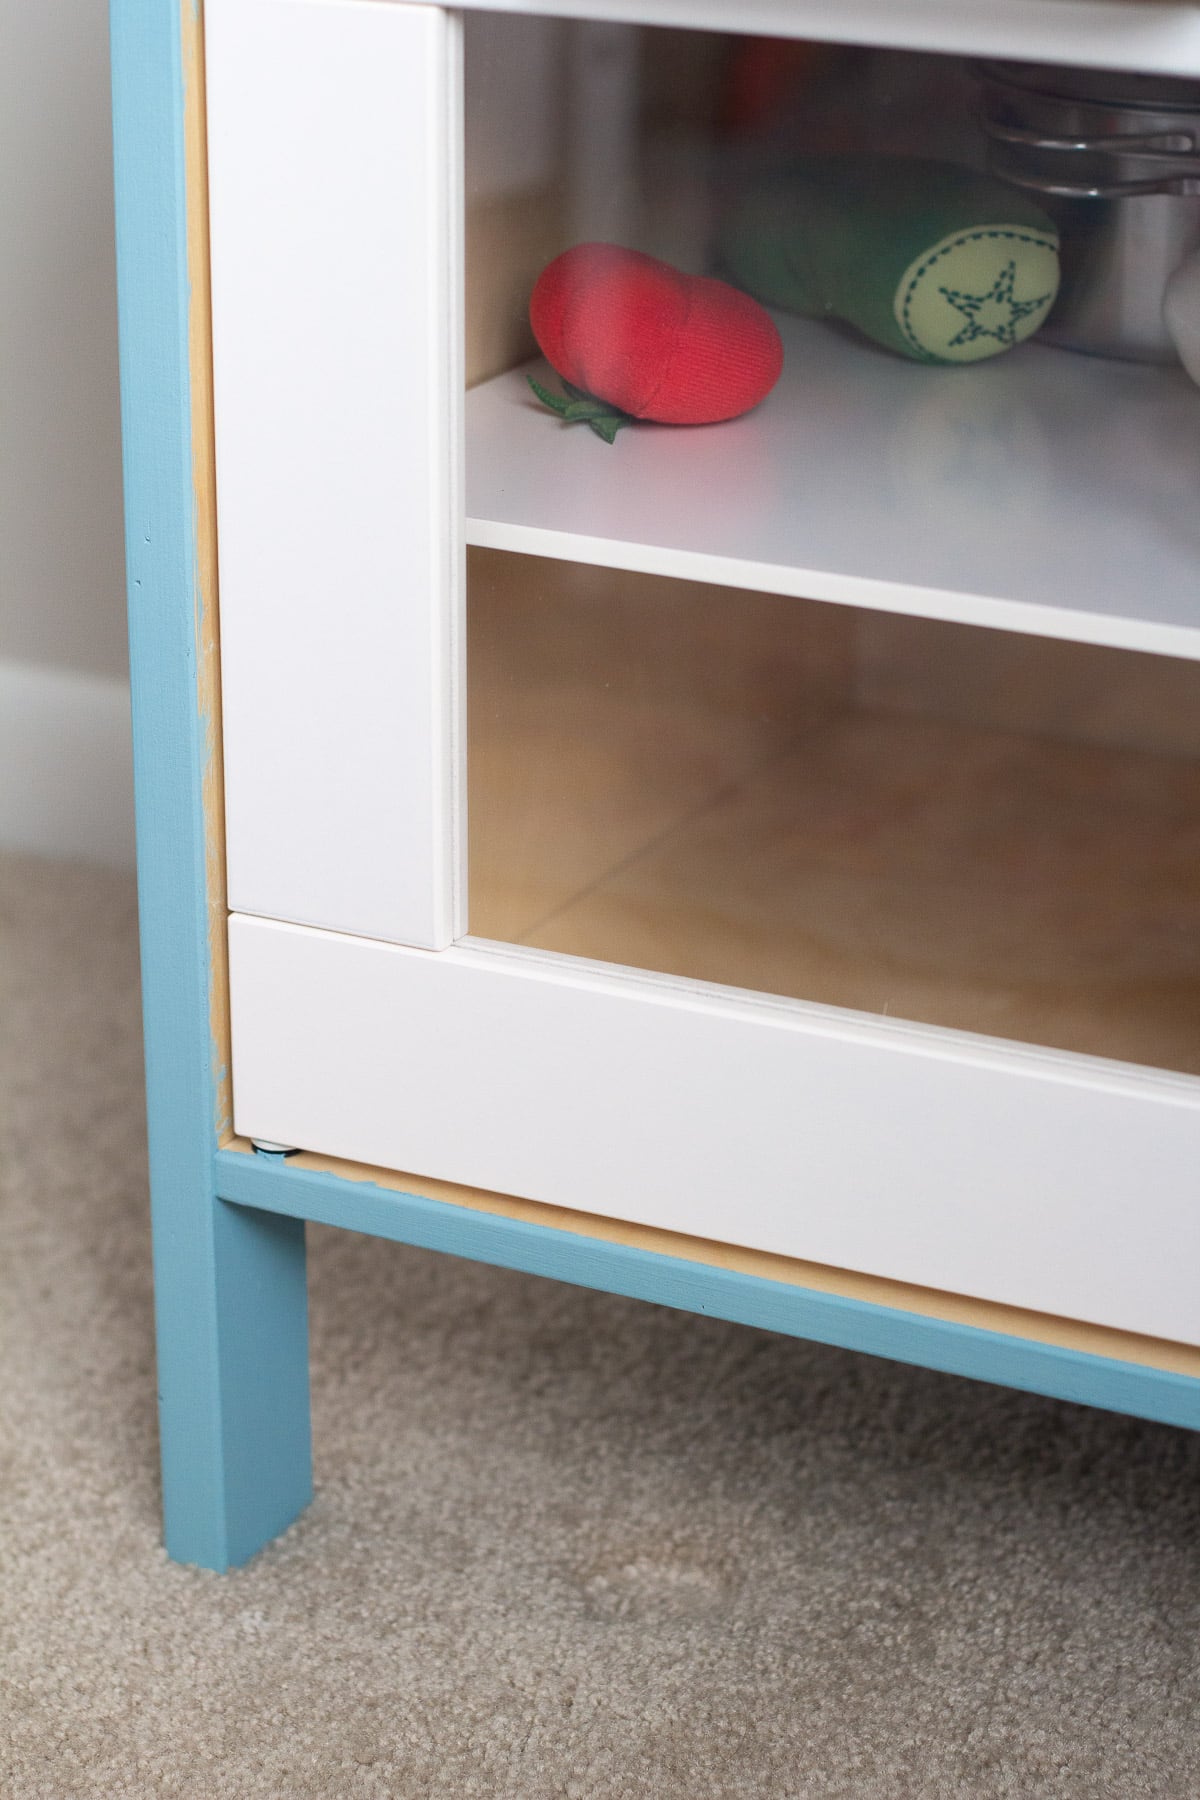
I realized too late that I had not painted in far enough around where the doors would go. I recommend insetting your painter’s tape about 1/2″ or so (place one of the doors to get a feel for how far into the kitchen’s interior you want to paint) around where the doors will be. This way you will get a clean finish and can avoid painting the entire interior of the kitchen.
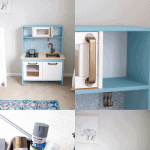
IKEA Play Kitchen Hack Tutorial – What Worked
Now that we’re done talking about the sad stuff, here’s a few things I’m really glad worked!
Leave the Countertop As Is
I’ve seen some IKEA DUKTIGs that have been updated with a beautiful marble countertop made from contact paper. After the frustration with the spray paint, I’m glad I had planned to leave the countertop as is. When using contact paper, it’s tricky to smooth around the corners neatly and I could imagine my toddler picking away at those corners all the time. Plus, I think the original wood is pretty and works with a variety of designs anyway!
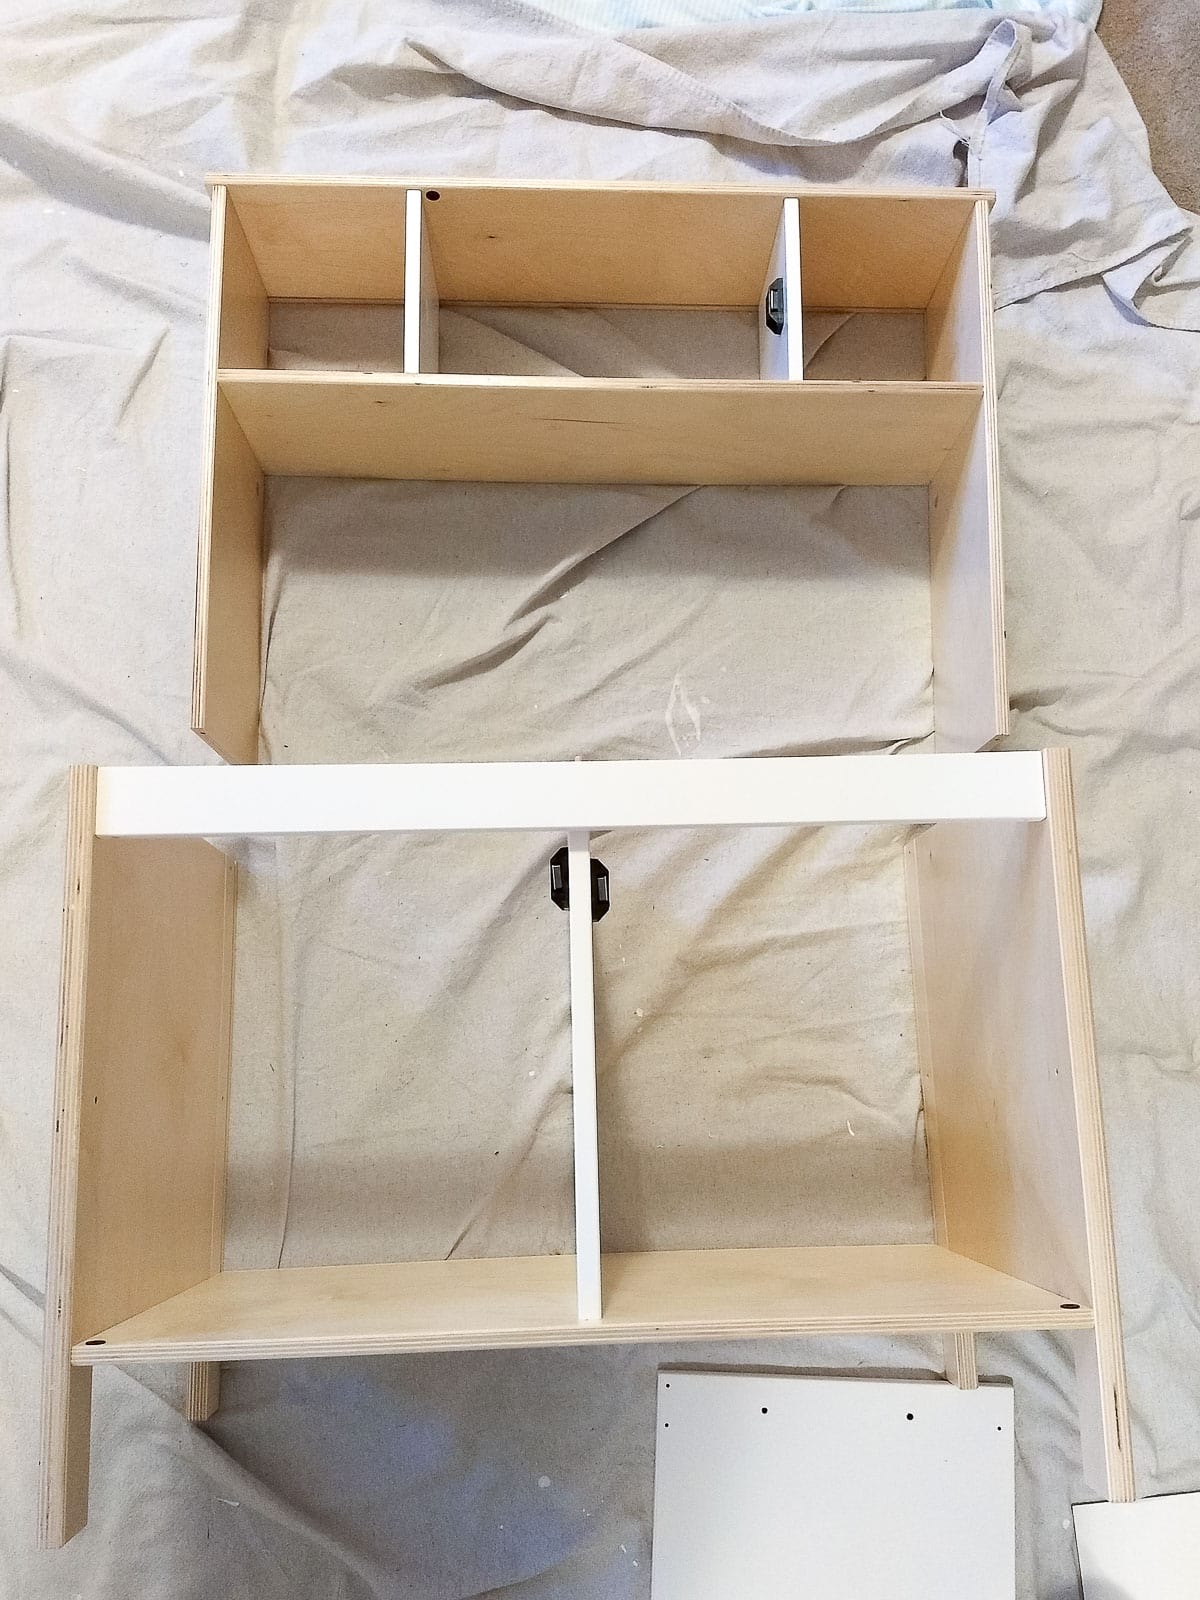
Partially Assemble the Kitchen Before Painting
I’ll admit when I opened the DUKTIG box I was a bit overwhelmed! How many pieces are in there again? It’s confusing to view the pieces and decide which sides should be painted and which sides should not. I found that partially assembling the top and the bottom made it clear what I needed to paint. It was very quick to flip the assembled top and bottom to paint underneath (and it takes up less room while you paint too!).
Using Brush-On Paint Instead of Spray Paint
After the fiasco with chipping hardware, I was glad that I chose chalk paint for the body of the play kitchen. While I generally do like to sand + prime when I use chalk paint, I decided to just start right with the chalk paint for this kitchen. The paint applied well and seems like it is holding up.
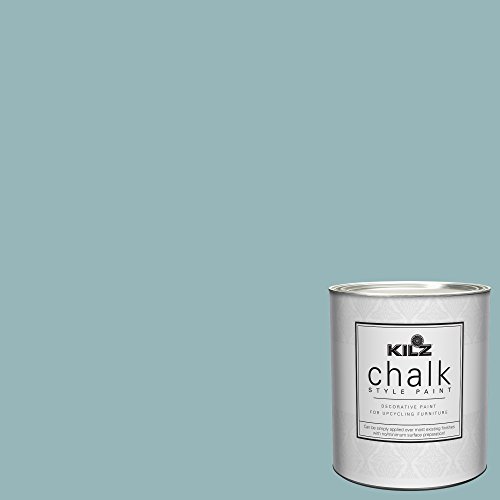
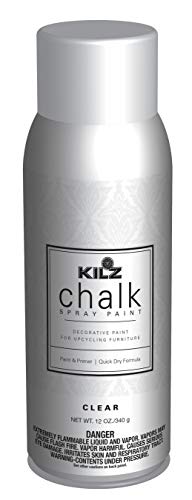
I used KILZ Chalk Style Paint and then I topped it off with a clear coat. The clear coat is a spray paint and I generally prefer a brush-on, but again I was ordering supplies last-minute and I ended up going with what was in stock. Sidenote that the KILZ chalk paint is very affordable!
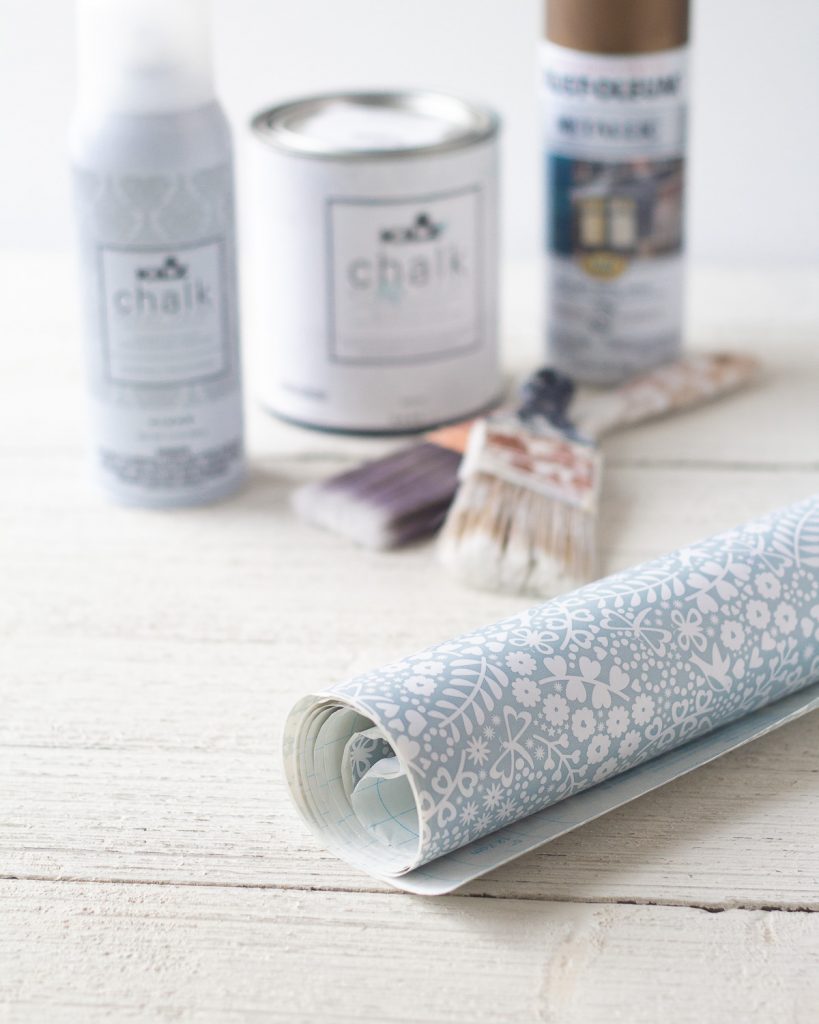
How to Paint Your IKEA DUKTIG Play Kitchen – Supplies
Looking for my sources? I used KILZ Chalk Style Paint in Blue Juniper for the kitchen, followed by the KILZ Spray Clear Coat. I used this floral contact paper for the backsplash. I’ll note that they are each very cute on their own, but be warned they are NOT an exact match.
What to Use for the IKEA play kitchen backsplash
First, you need to decide on a backsplash material. Contact paper is easy, but I found the selection limited to outdated prints and colors. Fabric, wallpaper, wrapping paper, and tile stickers are all good options too.
I suggest choosing your backsplash and then your paint color. However, if you are using chalk paint, you may want to choose the backsplash and paint color simultaneously to get the best match possible. Chalk paint comes in limited colors, so it may restrict backsplash choices.
Tip: If you go with a print with multiple colors, it’s easier to hide if the backsplash and the paint color aren’t a perfect match. Because I chose a pattern with only one color it’s more obvious it doesn’t match the paint.
Tip: A white backsplash (such as penny tile or subway tile) will match well with almost anything.
Second, decide on a spray paint scheme for the fixtures/hardware if you choose to paint it. Don’t want the hassle of chipping paint? A middle ground could be to choose “real” hardware (like from Hobby Lobby) for the handles and then leave the sink/faucet the original gray color.
What Is the Measurement to Cut An IKEA Kitchen Backsplash?
For my backsplash I cut a piece of cardboard 13.5″H x 26.5″W and covered it in contact paper. Note: I quick measured the opening before finishing this post and it measured 12″ H by 25 & 7/8″ W.
What Kind of Paint Should I Use for an Ikea Play Kitchen Hack?
You basically have three options: spray paint, latex paint (paired with a strong primer), or chalk paint. If you use spray paint, you’ll want to use a spray primer and sealer as well. I found that the flipping of pieces back and forth to spray new coats was annoying while working on the hardware, so I appreciated using a brush on paint for the body of the kitchen.
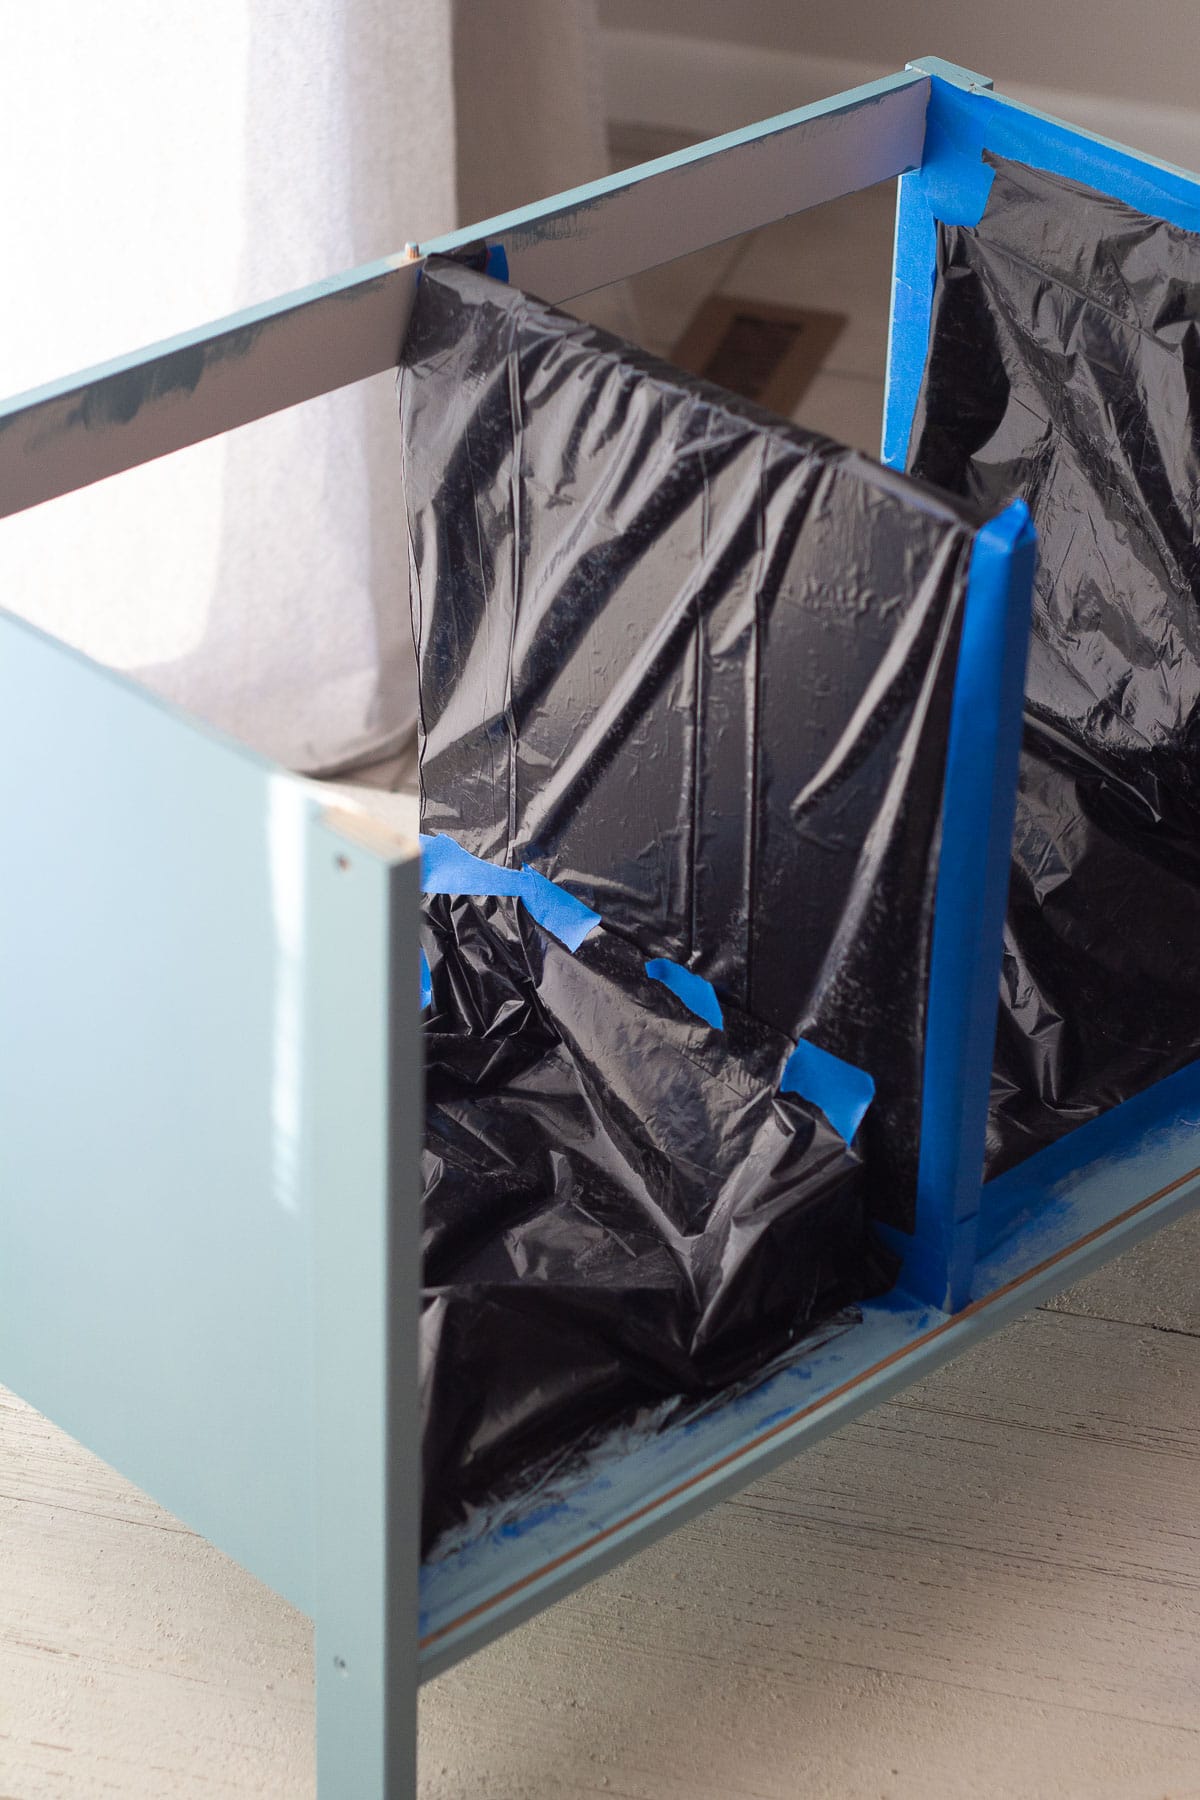
I ended up partially assembling the kitchen and using chalk paint. After two coats of chalk style paint, I masked off the sections I hadn’t painted and sprayed a clear coat on top. If you wanted to use spray paint, you could do it this way for the whole piece to avoid the constant flipping of the smaller kitchen pieces.
How to Paint Your IKEA DUKTIG Play Kitchen – Step by Step
Looking for a step-by-step walkthrough of how to get started painting your IKEA kitchen? Find my video and printable instructions below! I hope these tips and cautions are helpful as you begin your IKEA play kitchen makeover.
Ikea Play Kitchen Hack Tutorial
Learn the paint, supplies, and techniques I used for my IKEA Play Kitchen Hack + what you absolutely need to know before you get started on your IKEA play kitchen makeover.
Materials
- chalk paint (OR a good primer + latex paint)
- top coat (if using chalk paint)
- spray paint for hardware: primer, metallic paint, and top coat
- cardboard for backsplash (hint: snag some from your IKEA box)
- contact paper (or similar) for backsplash
Tools
- a good paintbrush
- painter's tape
- scissors
Instructions
- Decide on your color scheme and purchase materials. Hint: It can be easier to purchase a backsplash first and then match the paint to that. However, chalk paint has a more limited selection, so if you are using chalk paint, it may be best to choose at the same time.
- Partially assemble the IKEA DUKTIG so that you can work on the top and bottom separately (I think it's much easier to tell what needs to be painted if the kitchen is partially assembled instead of flat).

- Tape off sections you won't be painting. Note: I realized I need to paint further into the kitchen (around where the doors fit) so tape off accordingly to avoid gaps.

- Paint desired sections with main color. I used two coats of KILZ chalk style paint in Blue Juniper.
- Finish with sealer as needed. I used a spray sealer so I masked the kitchen with garbage bags before spraying.
- Spray the hardware if desired. Note: If you didn't catch it in the post, I was unhappy with the way my hardware turned out and had a lot of problems with the sink chipping during play. See the note at the end of the post for some ideas that may work a bit better. Know that I haven't tried these out, but thought it would useful to offer some ideas at least!
- Finish assembling kitchen and cut “backsplash” from cardboard to fit the opening of the kitchen. I measured a piece 13.5"H x 26.5" W (the opening measures: 12"H by 25 & 7/8" W)
- Cover the cardboard with contact paper (or whatever material you choose for a backsplash).
- Staple or nail the backsplash to the back of the kitchen. Finished!

Notes
Partially assembling the play kitchen makes it easier to paint in my opinion, but it is optional.
On spraying the hardware: If you still really want to spray paint your IKEA play kitchen hardware, here's some ideas to consider that might give your project more success than I had.
- sand the pieces first
- use a super strong spray paint (I think this one is a level up from the option I originally went with?)
- consider leaving the sink/faucet gray and replacing just the handles with real hardware
- glue the sink into the kitchen to reduce wear and tear
Recommended Products
As an Amazon Associate and member of other affiliate programs, I earn from qualifying purchases.
-
 My Fav Paintbrush! Wooster Brush Q3211-2
 -
Ditsy Floral Pattern Self-Adhesive Vinyl Contact Paper (Powder Blue)
-
KILZ Interior Chalk Style Ultra Flat Decorative Paint for Furniture, 1 Quart, Blue Juniper
-
KILZ L540046 Chalk Spray Paint for Upcycling Furniture, 12 oz. Aerosol, Clear
-
Rust-Oleum 261415 Surface, 11 oz, Champagne Universal Mist Metallic Spray Paint


Hiya, I wondered how much paint you needed for this project? I didn’t want to buy too much 😂
I bought one (quart-size) can of the chalk style paint and I think I easily had half the can leftover. One can of the spray top coat was plenty too. =)
Hope that helps!
Hi! Really appreciate the suggestions or feedbacks. Do you remember what size the hardware is if I just wanted to replace them? Trying not to plaster holes and redrill..
I just checked mine and the hardware measured 5″ between the screws–so if you can find something that is the same you can probably skip the re-drilling holes.
Hope that helps! =)