How to Cover Mason Jar Lids with Washi Tape
Learn how to cover mason jar lids with washi tape in this step-by-step tutorial. I’ll show you how to apply the washi tape and how to make sure it sticks. An easy washi tape craft you can use for storage or a gift-in-a-jar!
Please note that this post contains affiliate links which allow me to earn a small commission when a purchase is made at no additional cost to you. Read more here.
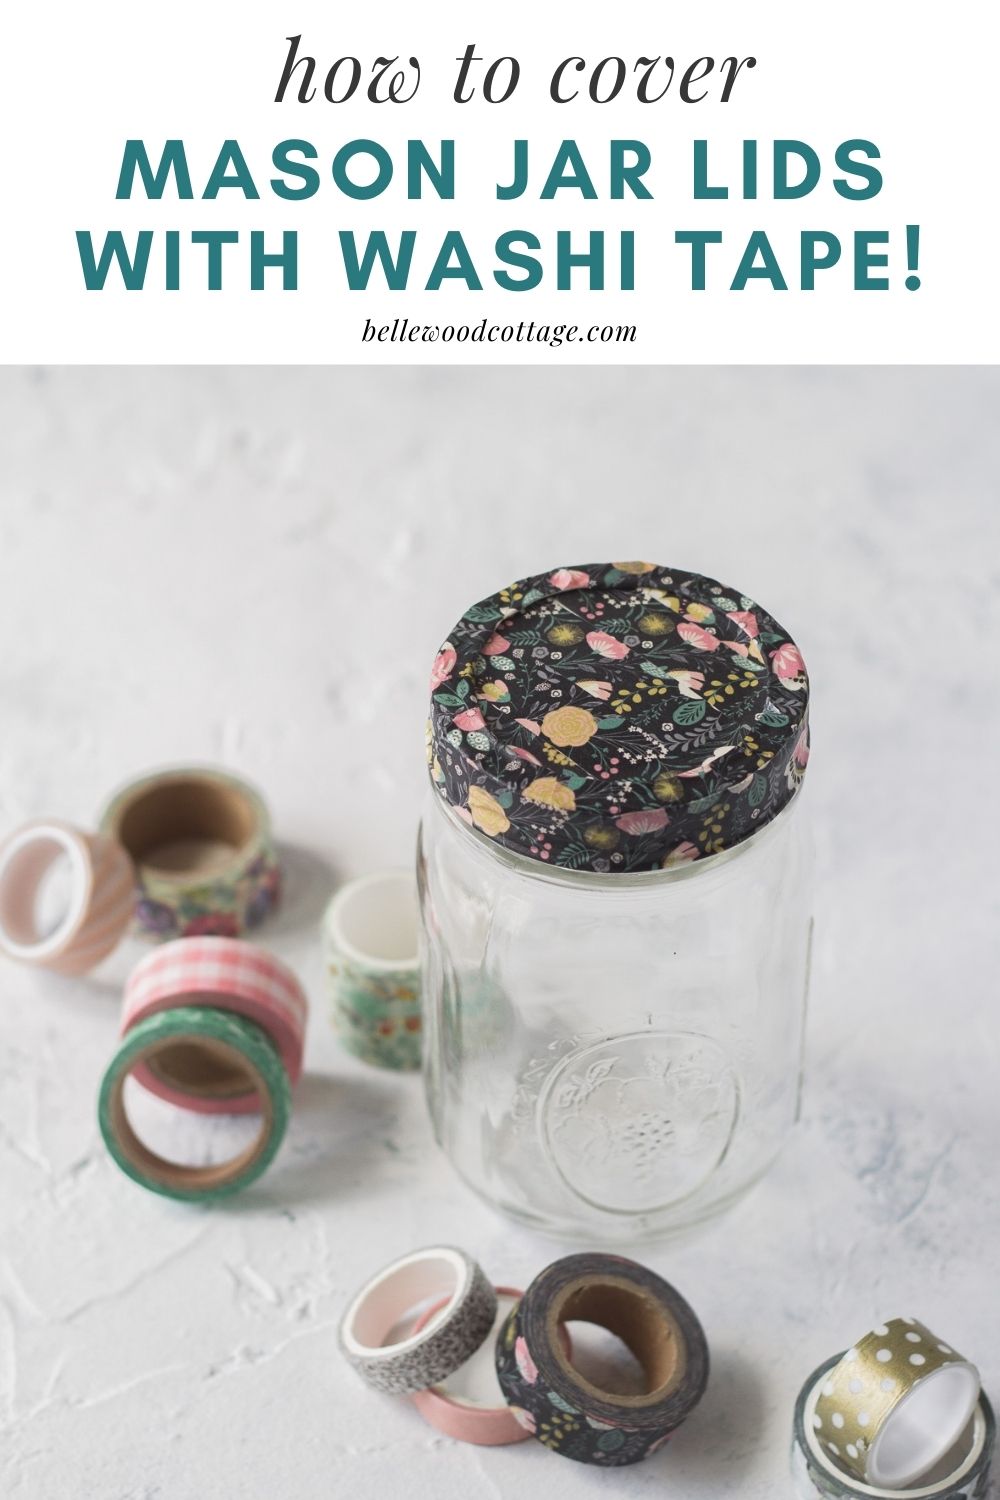
How to Cover Lids with Washi Tape
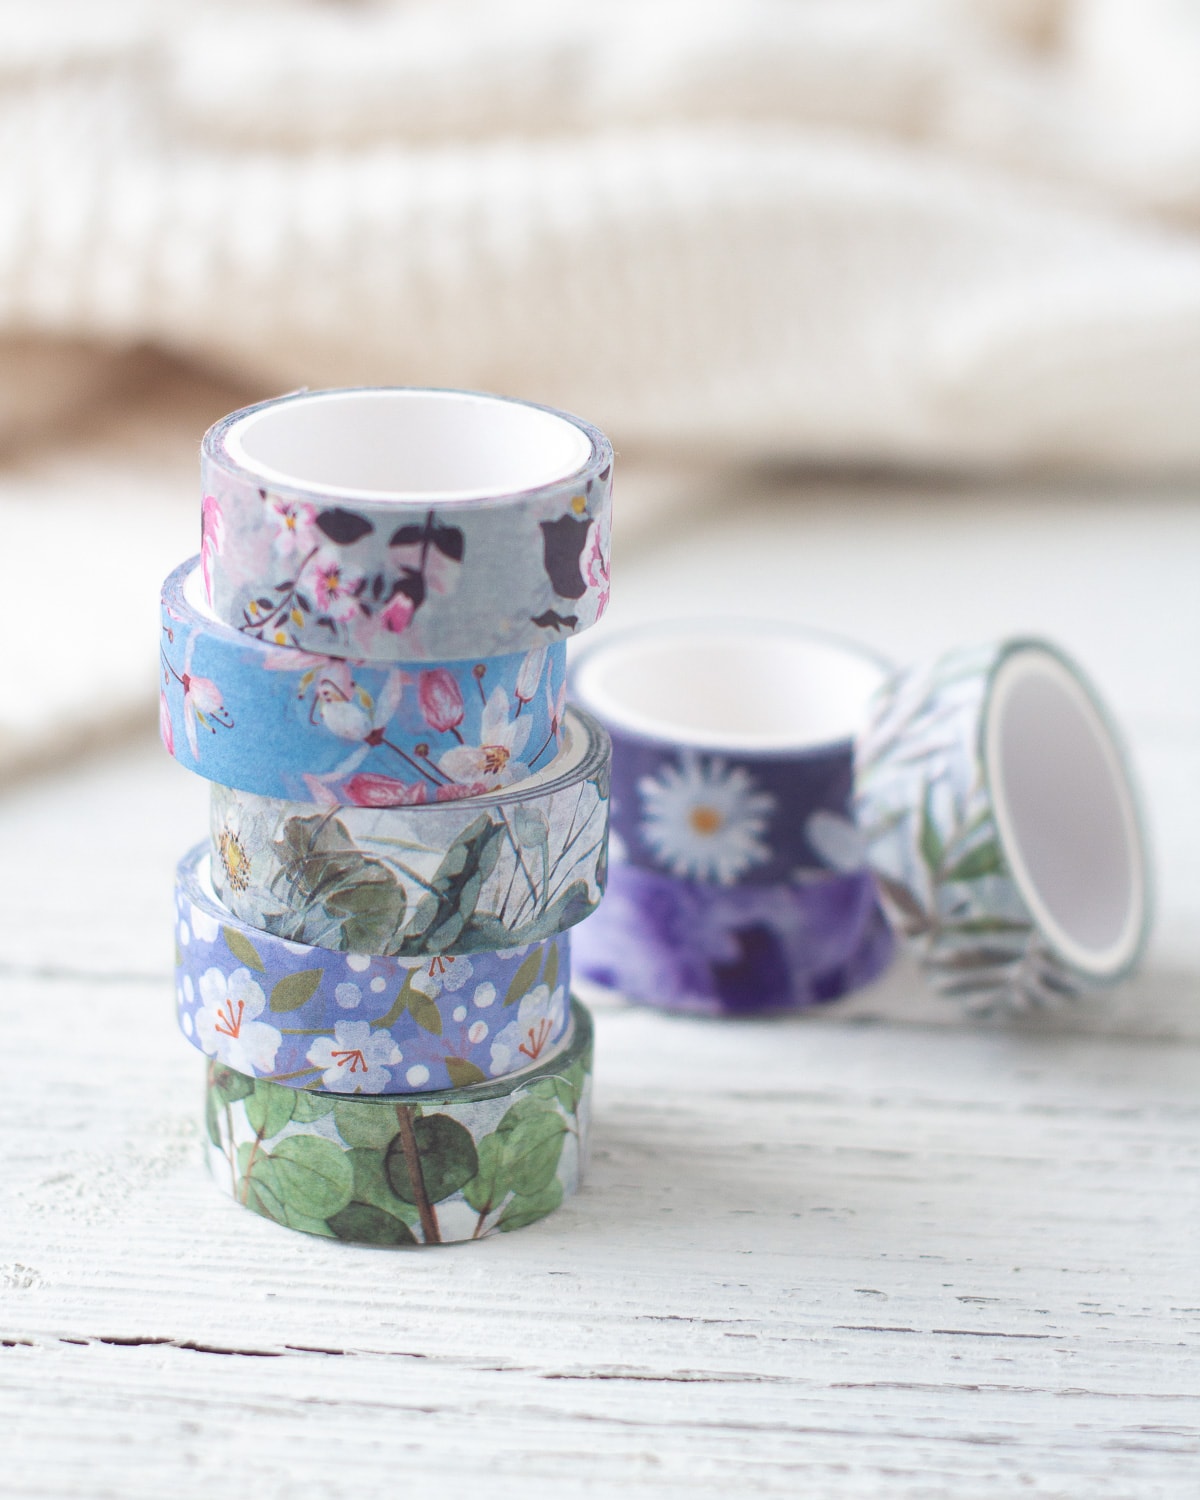
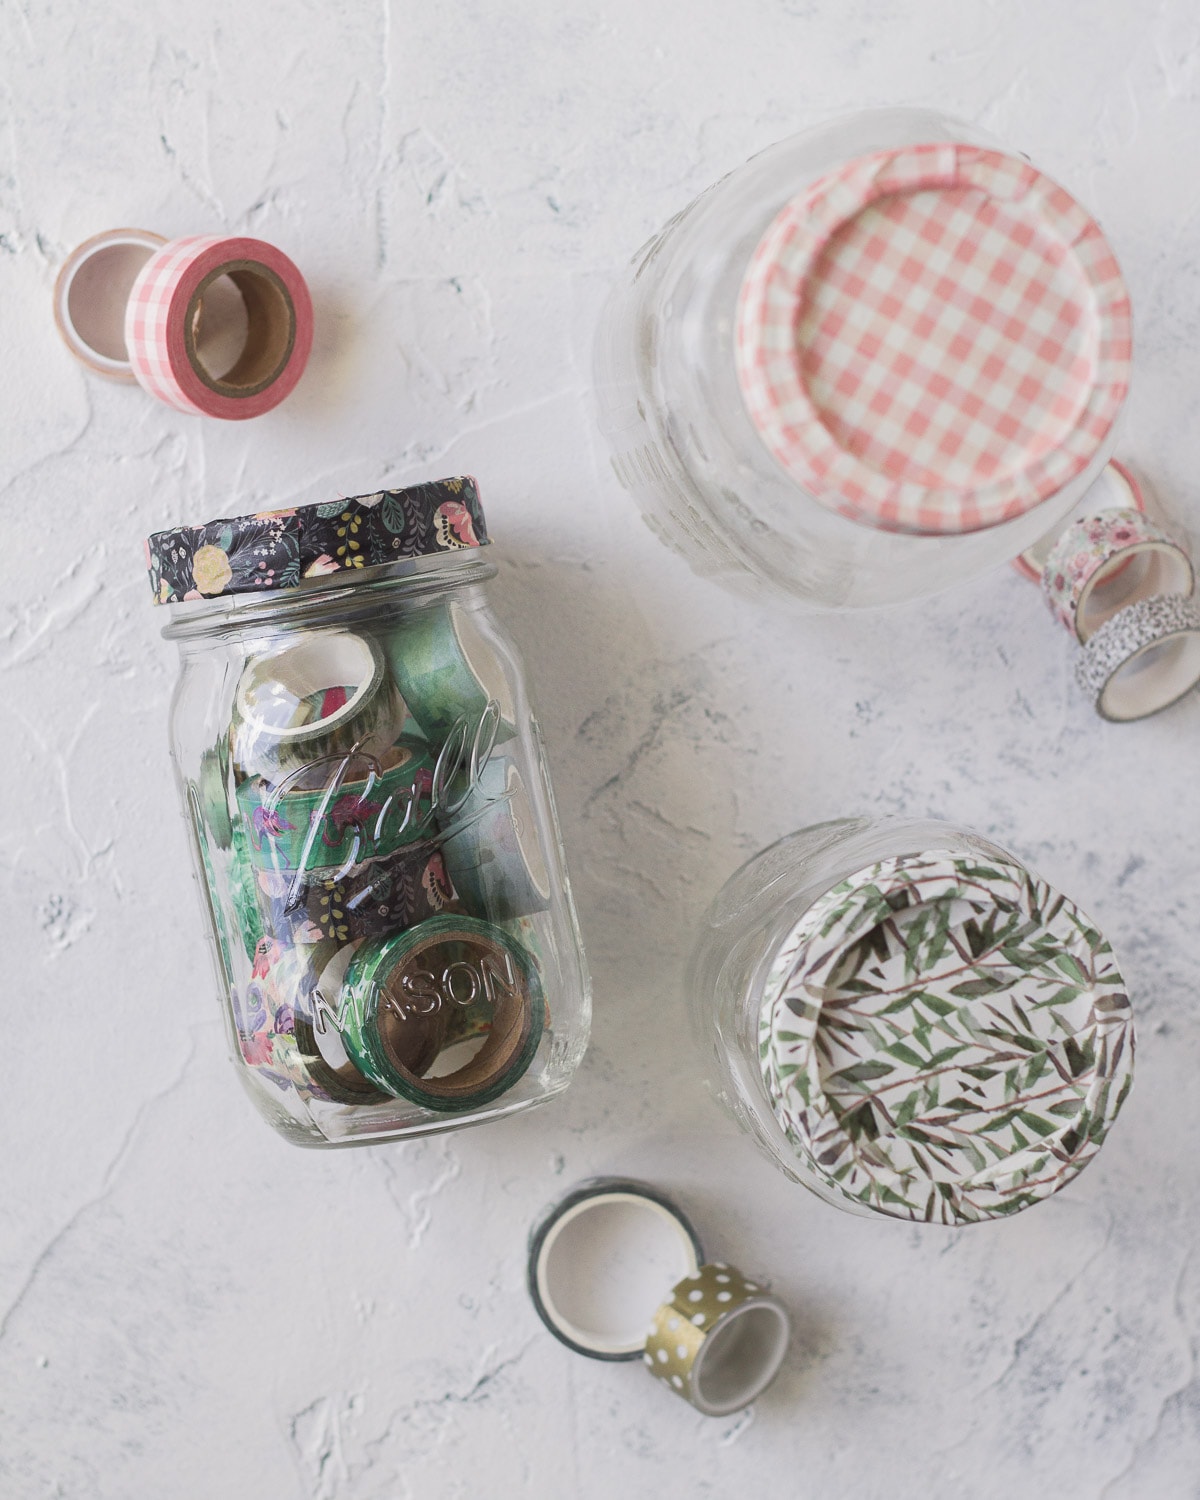
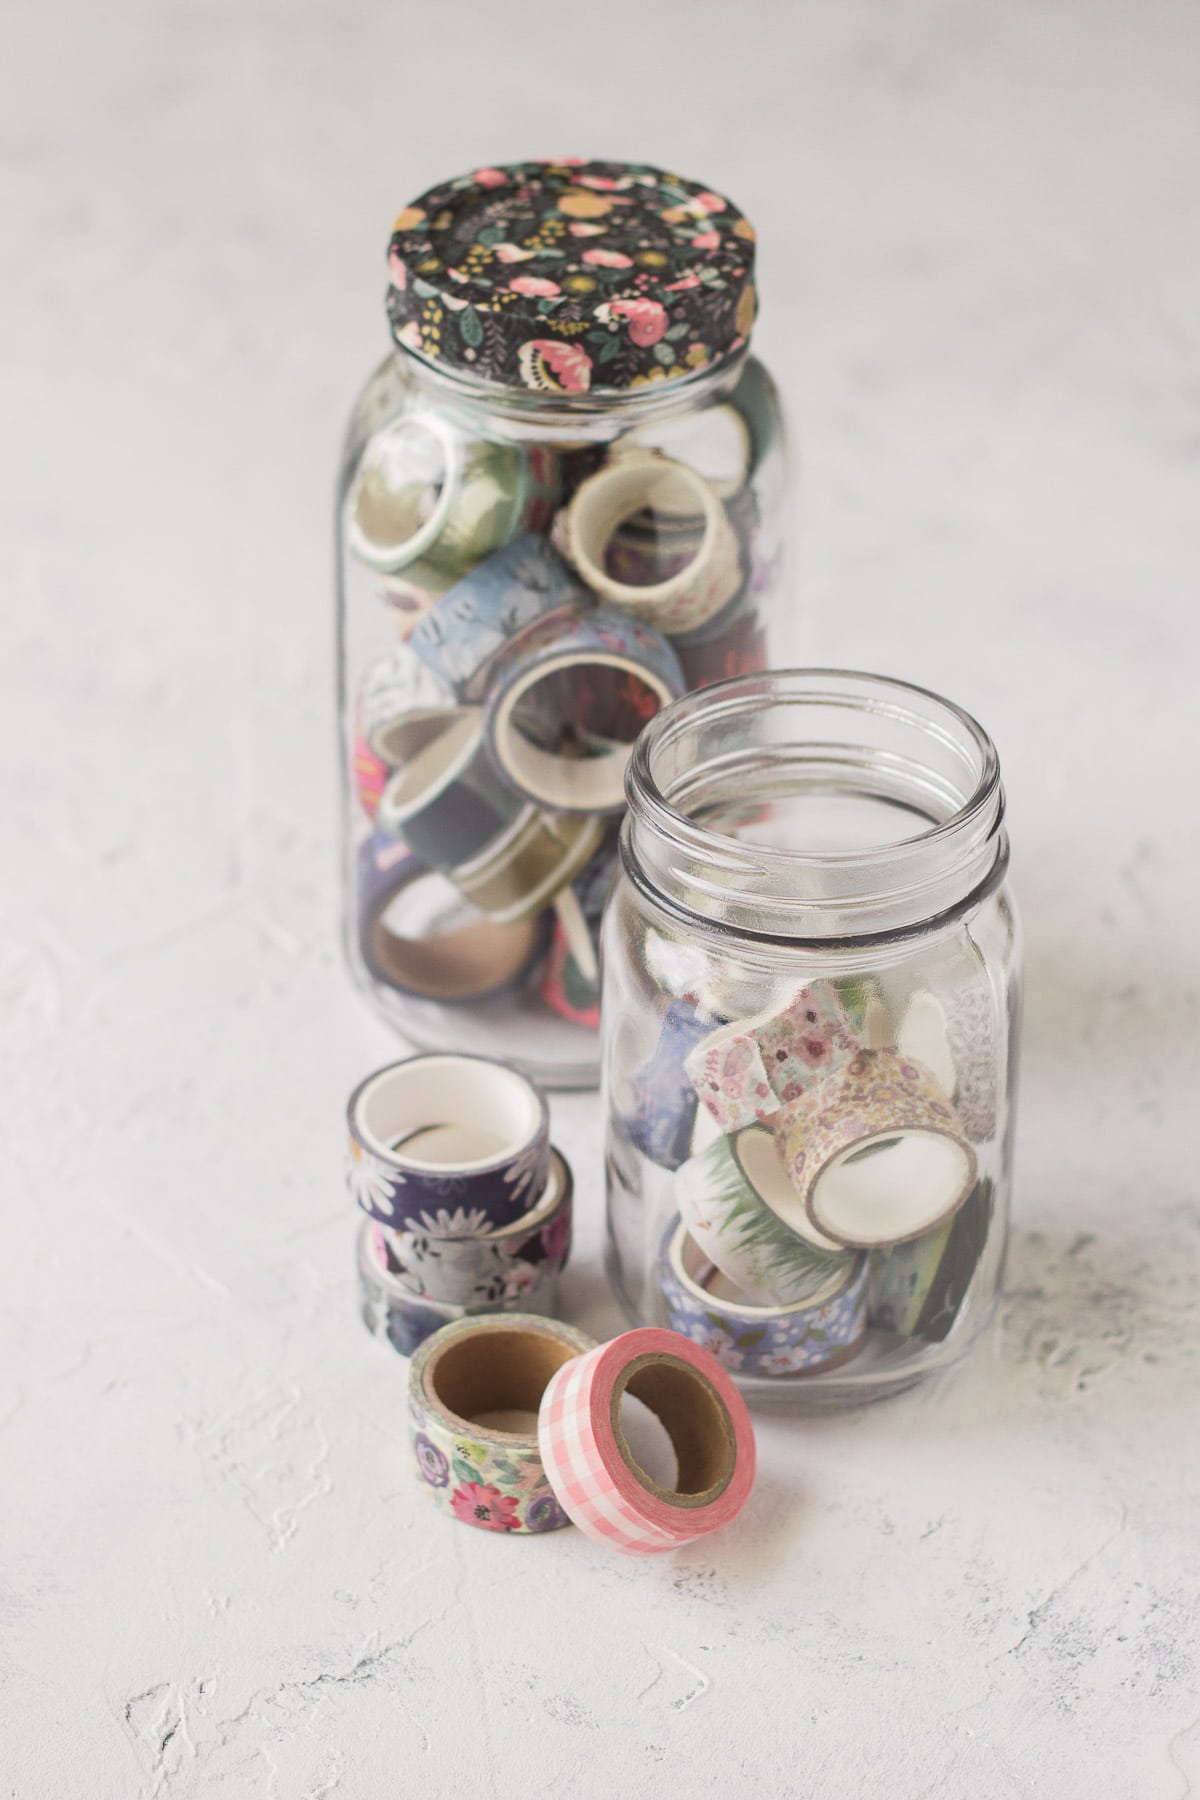
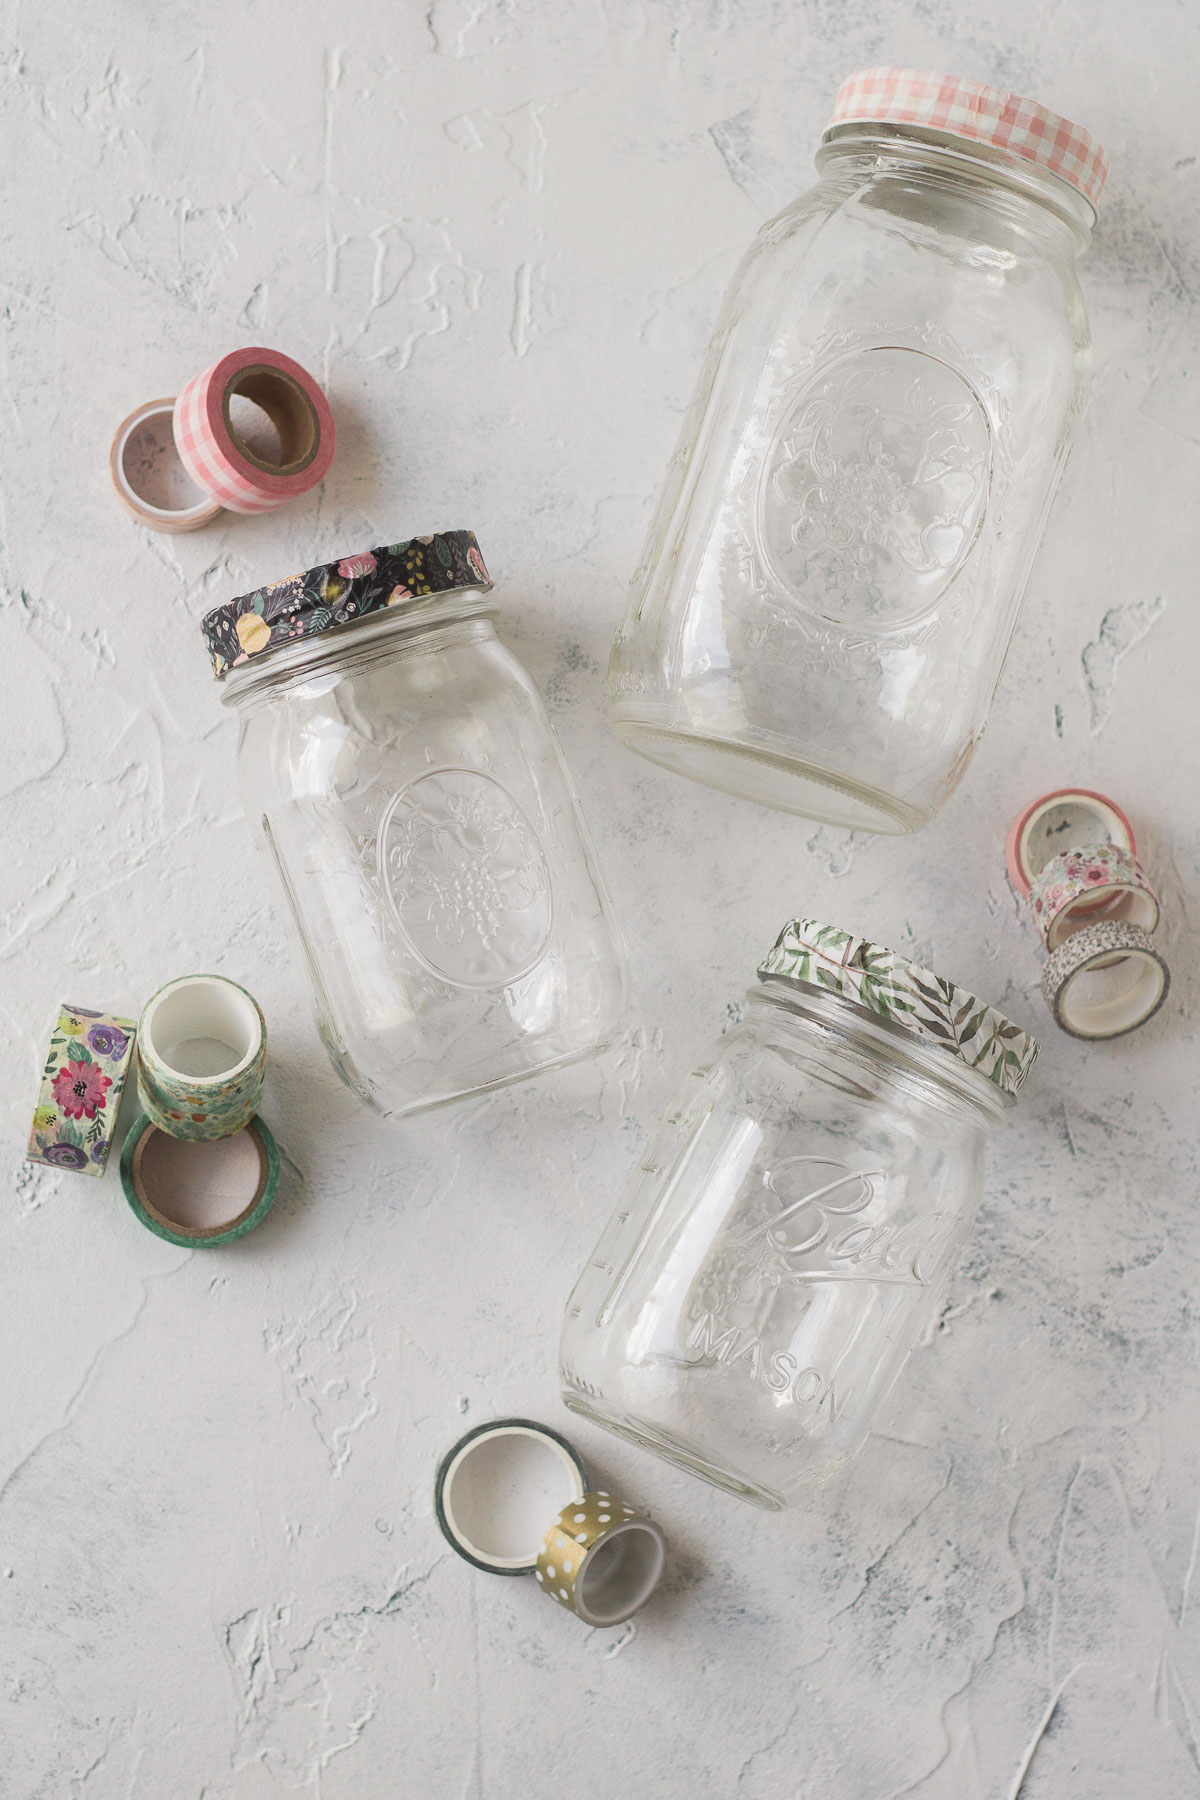
Whenever I find an especially pretty spool of washi tape, I always want to find a way to feature it. Covering mason jar lids is a great way to showcase your favorite tape…and then you can even use the covered jars for cute washi tape storage.
Packing up some washi tape into a jar also makes a great handmade gift idea–and it’s even cuter with a matching lid topping the jar!
Where to get washi tape? If you don’t already have some favorites on hand, I love shopping Etsy, local craft stores, and Amazon. Washi tape usually comes in color-coordinated sets which is great for project like this. You can use a different spool (from the same set) for each jar and they will coordinate wonderfully.
Here’s a few of my favorite washi tape sets:

Durability of the Jars
Alright, let’s talk durability! When I first came up with this idea I wondered if the washi tape would stick. I figured, no better way to find out than to try! So I gave it a go and found that with no heat-setting or sealer, the washi tape sticks…okay-ish.
So, I brought in my hair dryer! A little heat-setting and the washi tape stuck MUCH better. It holds up to opening and closing the jar well. The lids are still going to be a bit delicate, but you can also tack down the edges of the tape with a little glue to prevent peeling.
After heat setting (which I definitely suggest taking the time for) you can also apply a coat of Mod Podge (I like the matte Mod Podge, but you could also use glossy) for even more security.
The lids shown here have just been heat-set (not sealed) if you are curious.
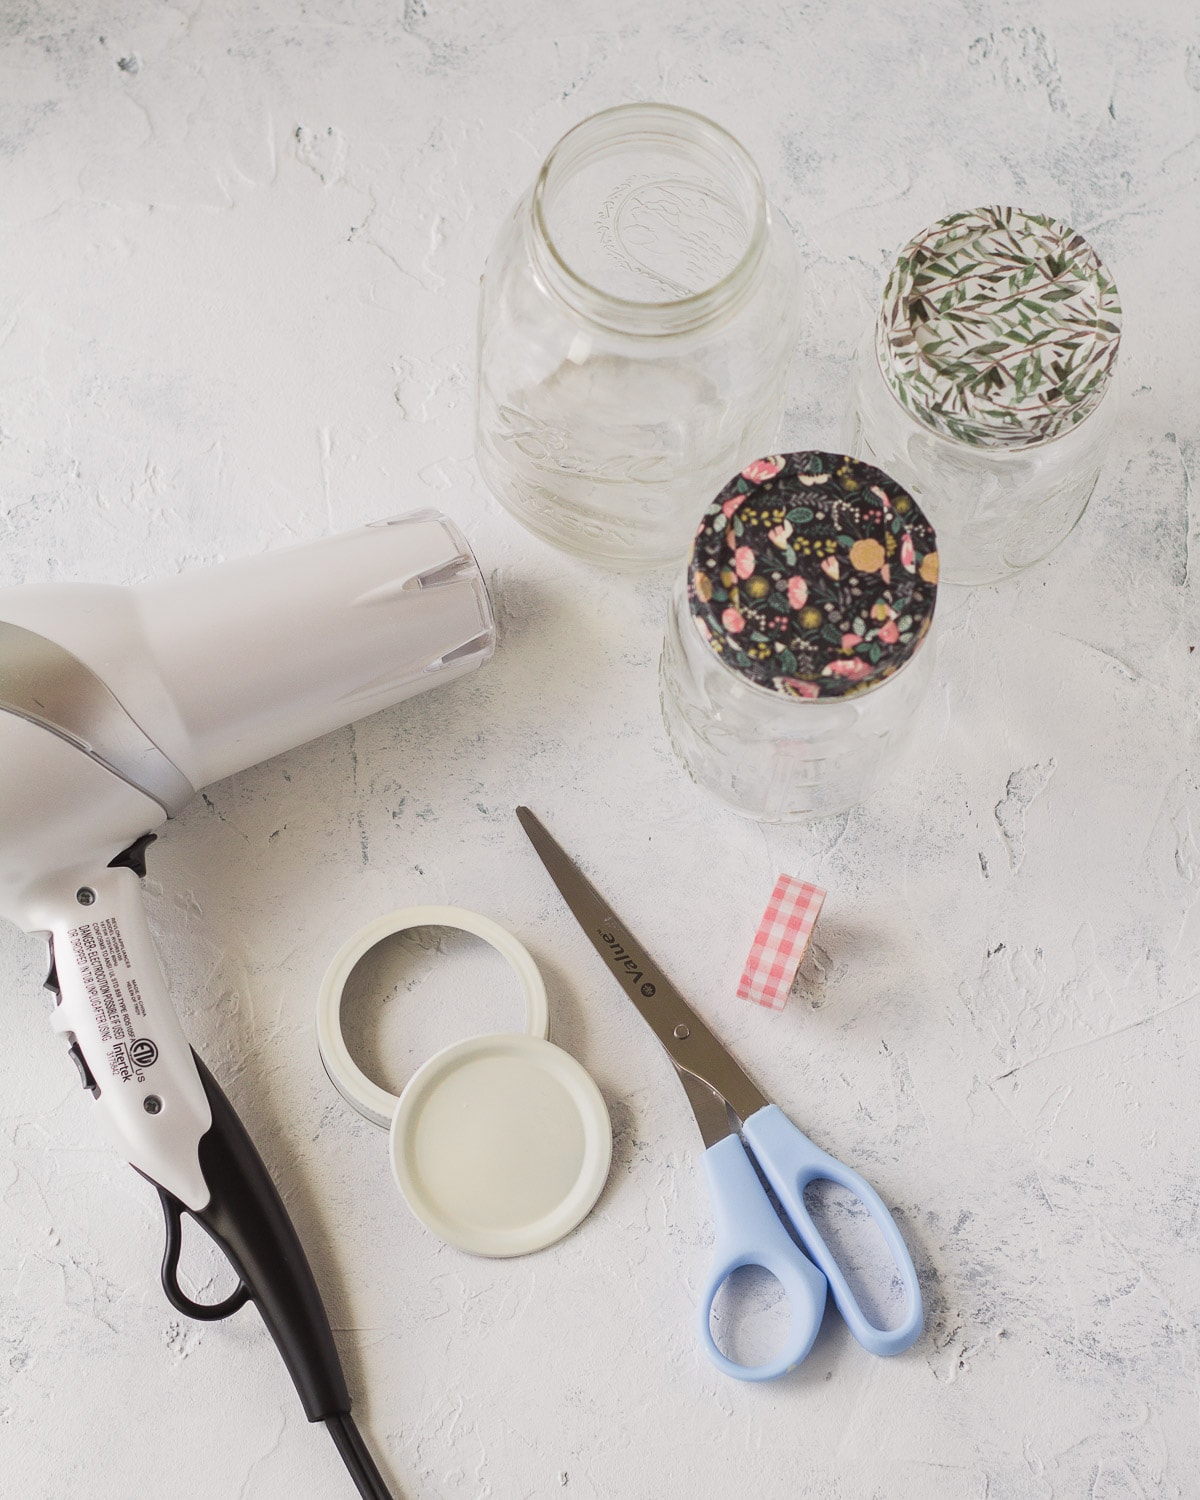
Supplies You’ll Need
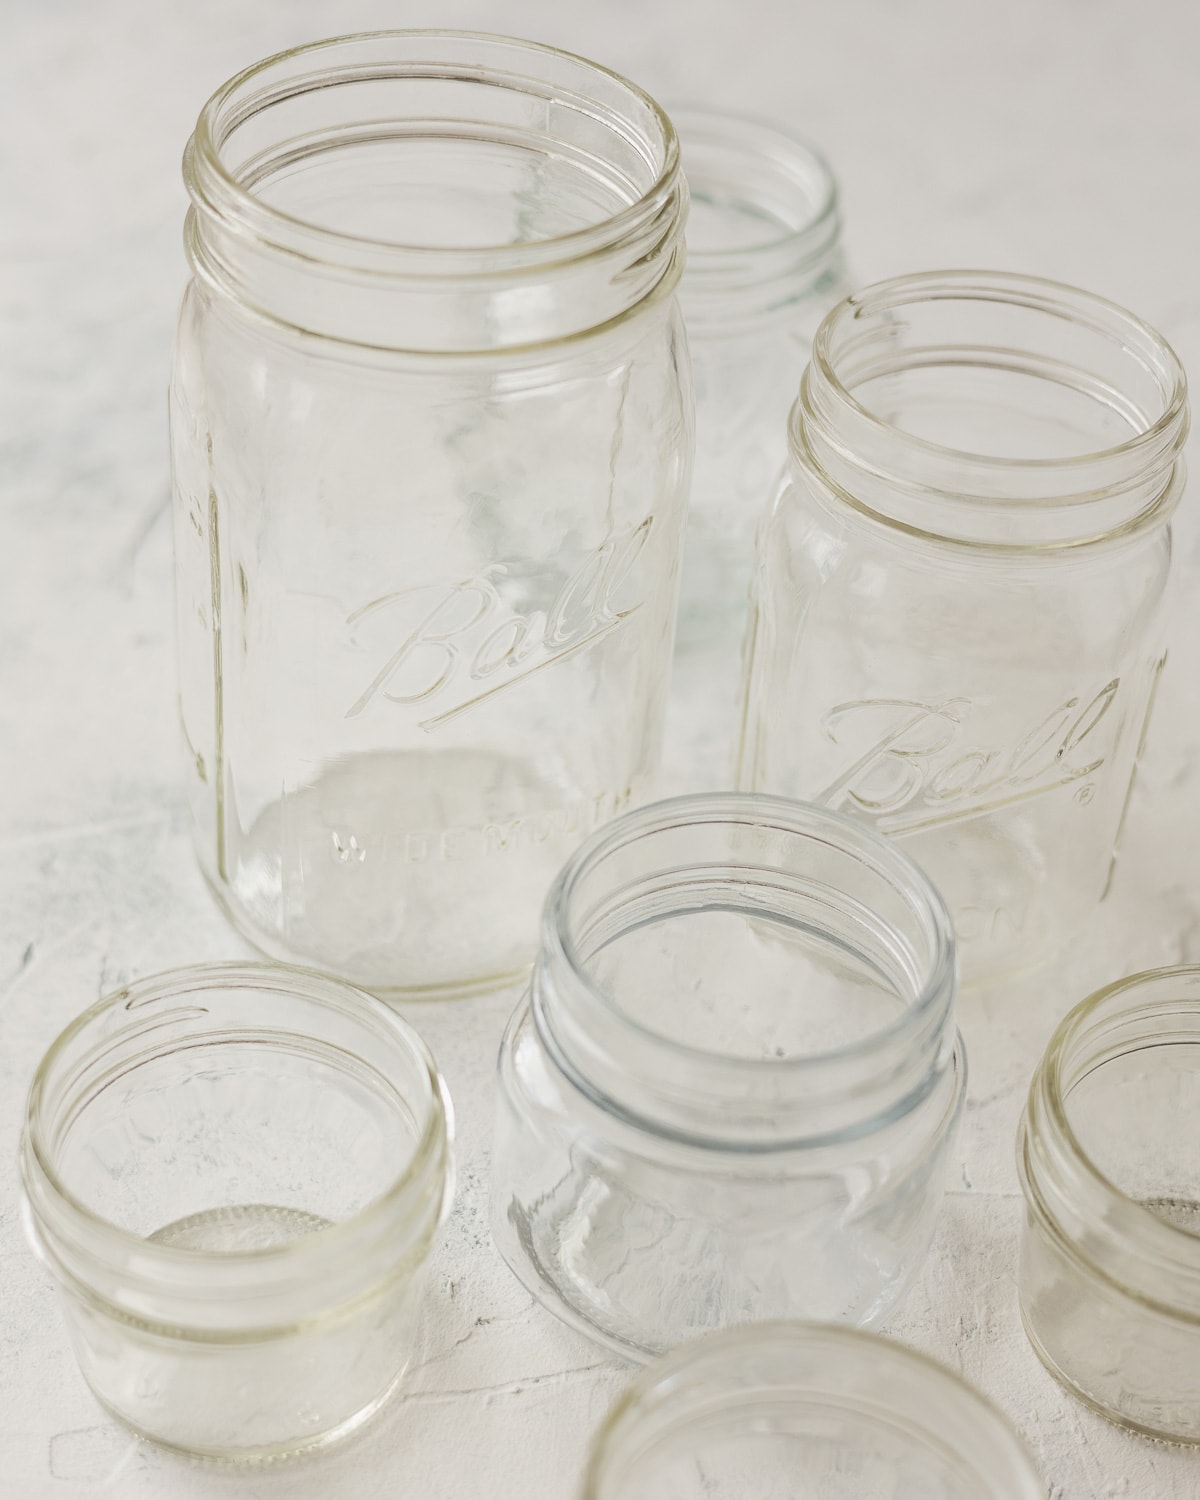
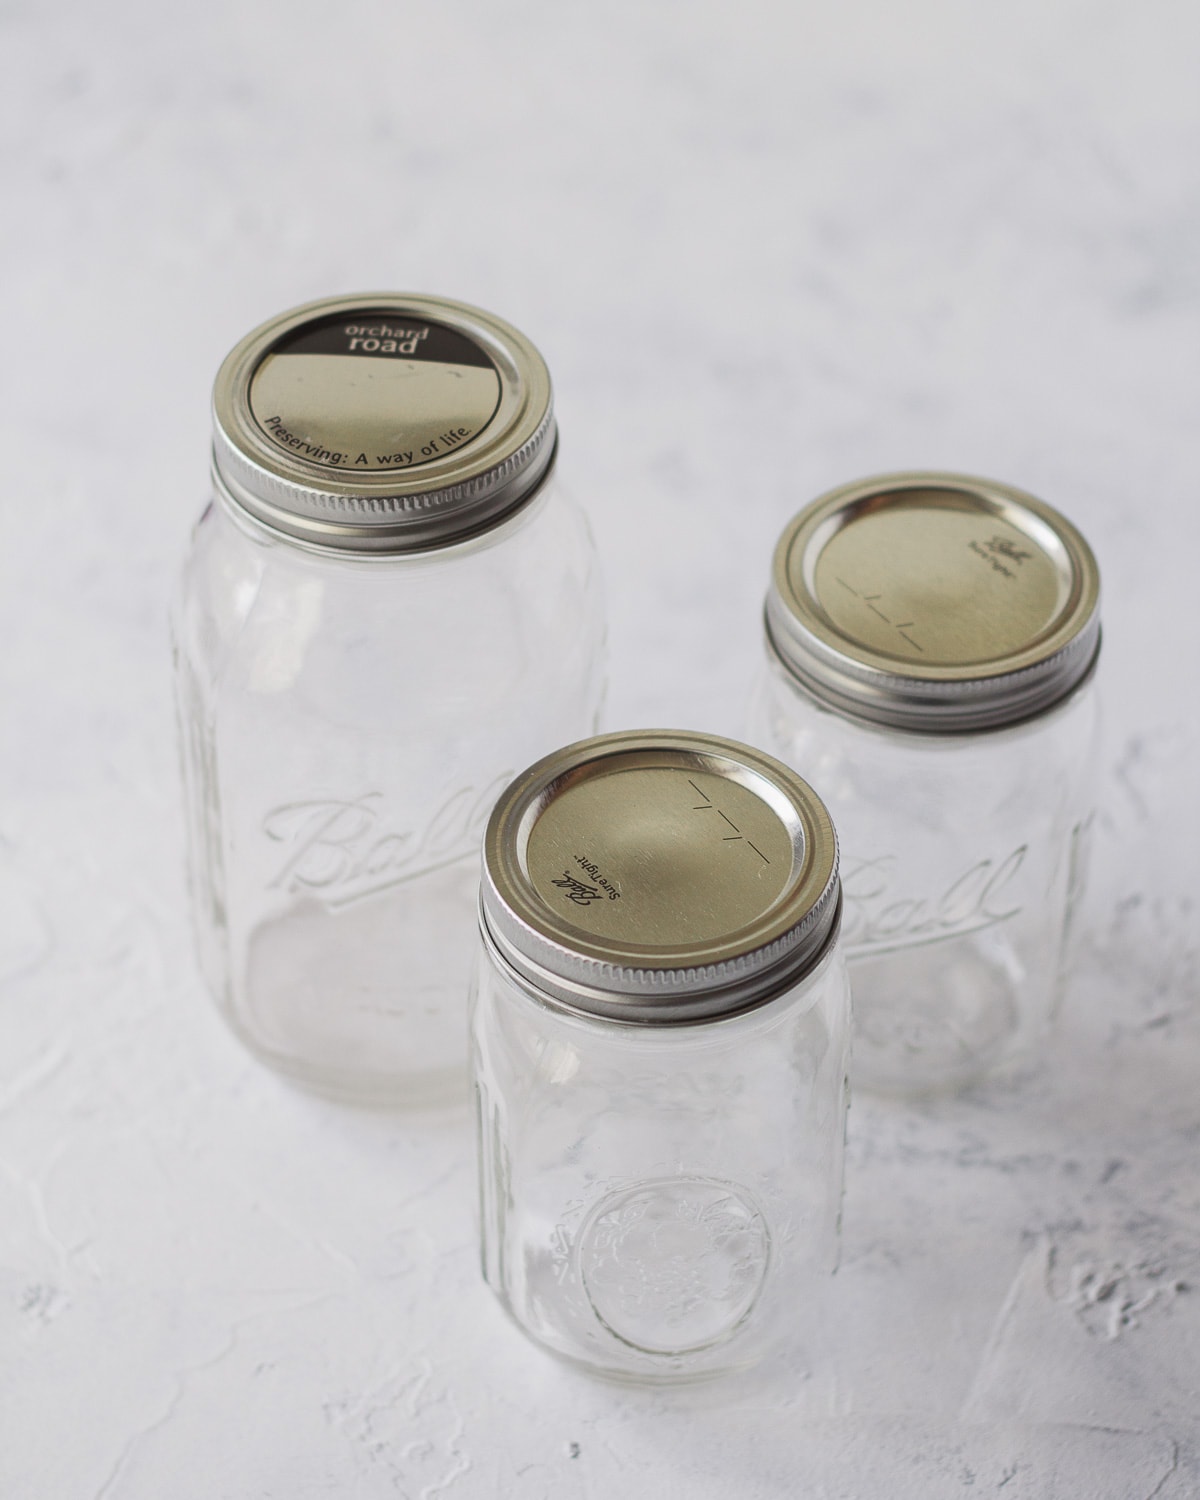
- jars and jar lids (here I used pint-size mason jars)
- white paint (I like using spray paint)
- washi tape
- scissors
- a hair dryer
- Mod Podge (optional)
Washi Tape Jar Lids Step-by-Step
Alright, time to upcycle some mason jars! Before getting started with the jar lids, I have a step that will make the washi tape look crisp and clear on the jar lids.
The first thing we need to do is paint the jar lids white. Since washi tape is semi-transparent, the white paint gives a better blank canvas to work with than the metal lids (that often have printing on them).
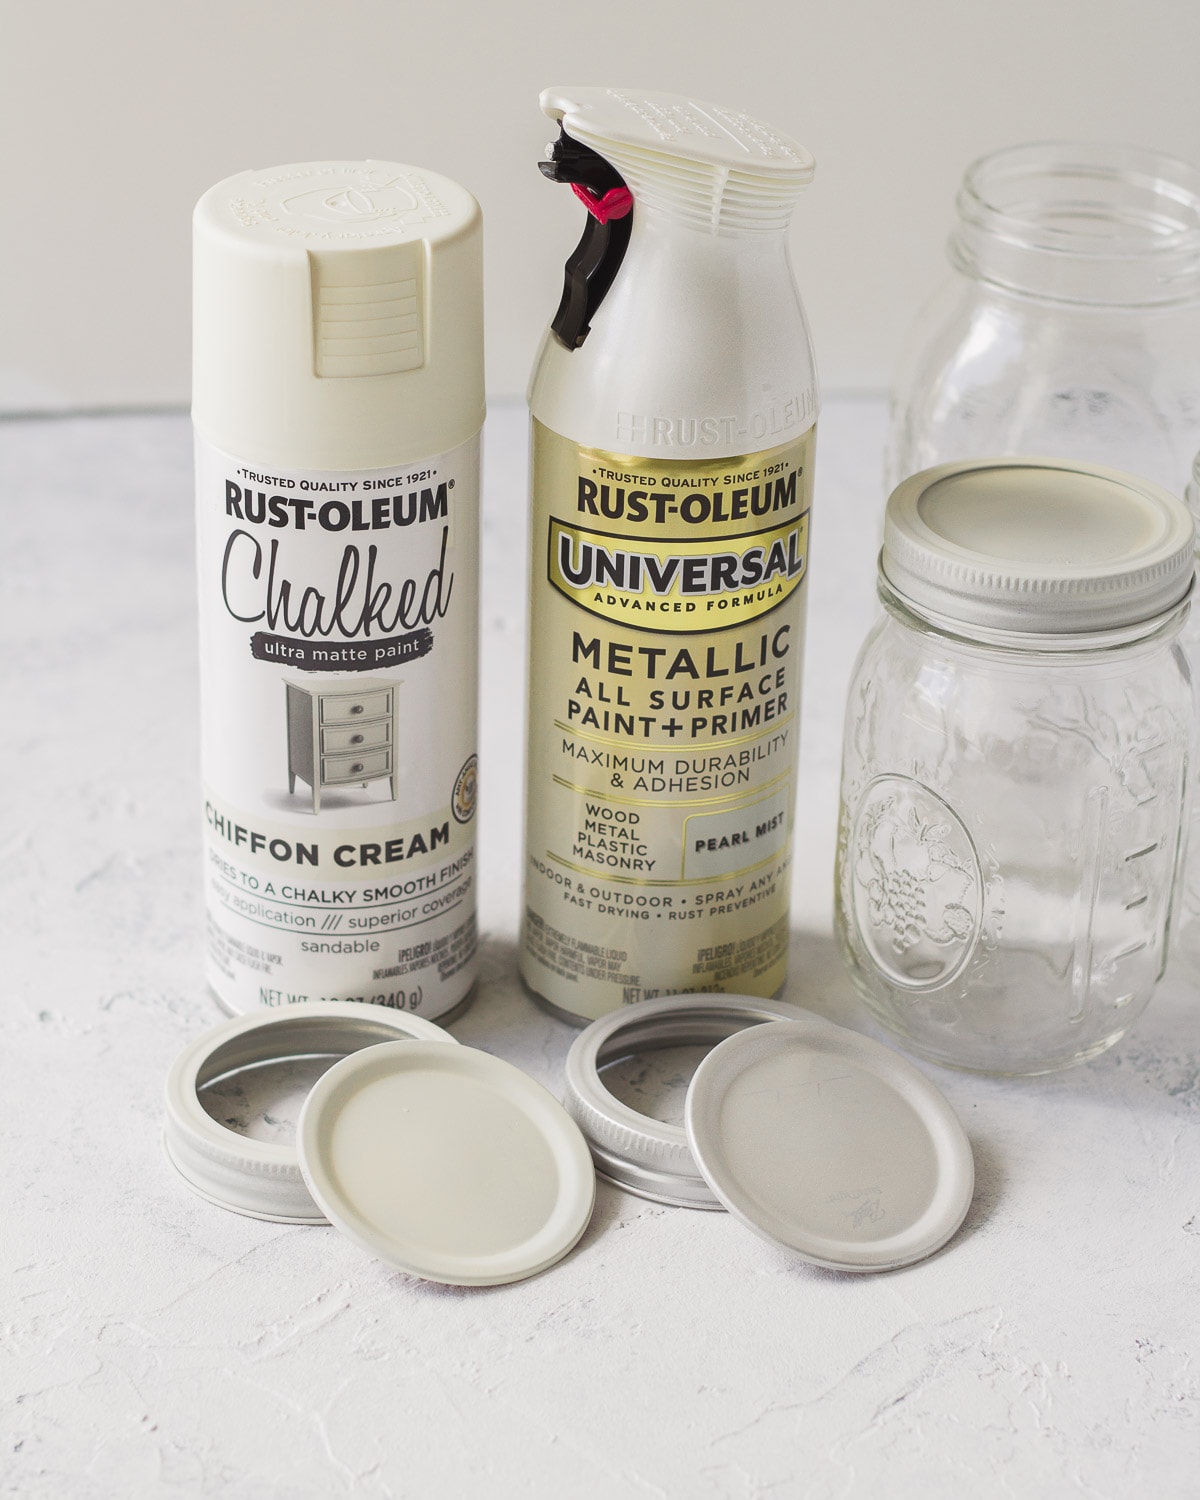
I used some spray paint I had around already, though it took a couple of coats to get the opacity I was hoping for. Any paint designed to stick to metal should work well. Actually, even regular brush-on chalk paint would probably be good for this too.
Note: If I was buying a new can of spray paint for this project I’d probably grab this Universal All Surface Spray Paint in Satin White from Rust-Oleum.
Cover the lids with paint using multiple coats (let dry in-between, following your paint can’s instructions) until they are no longer see-through.
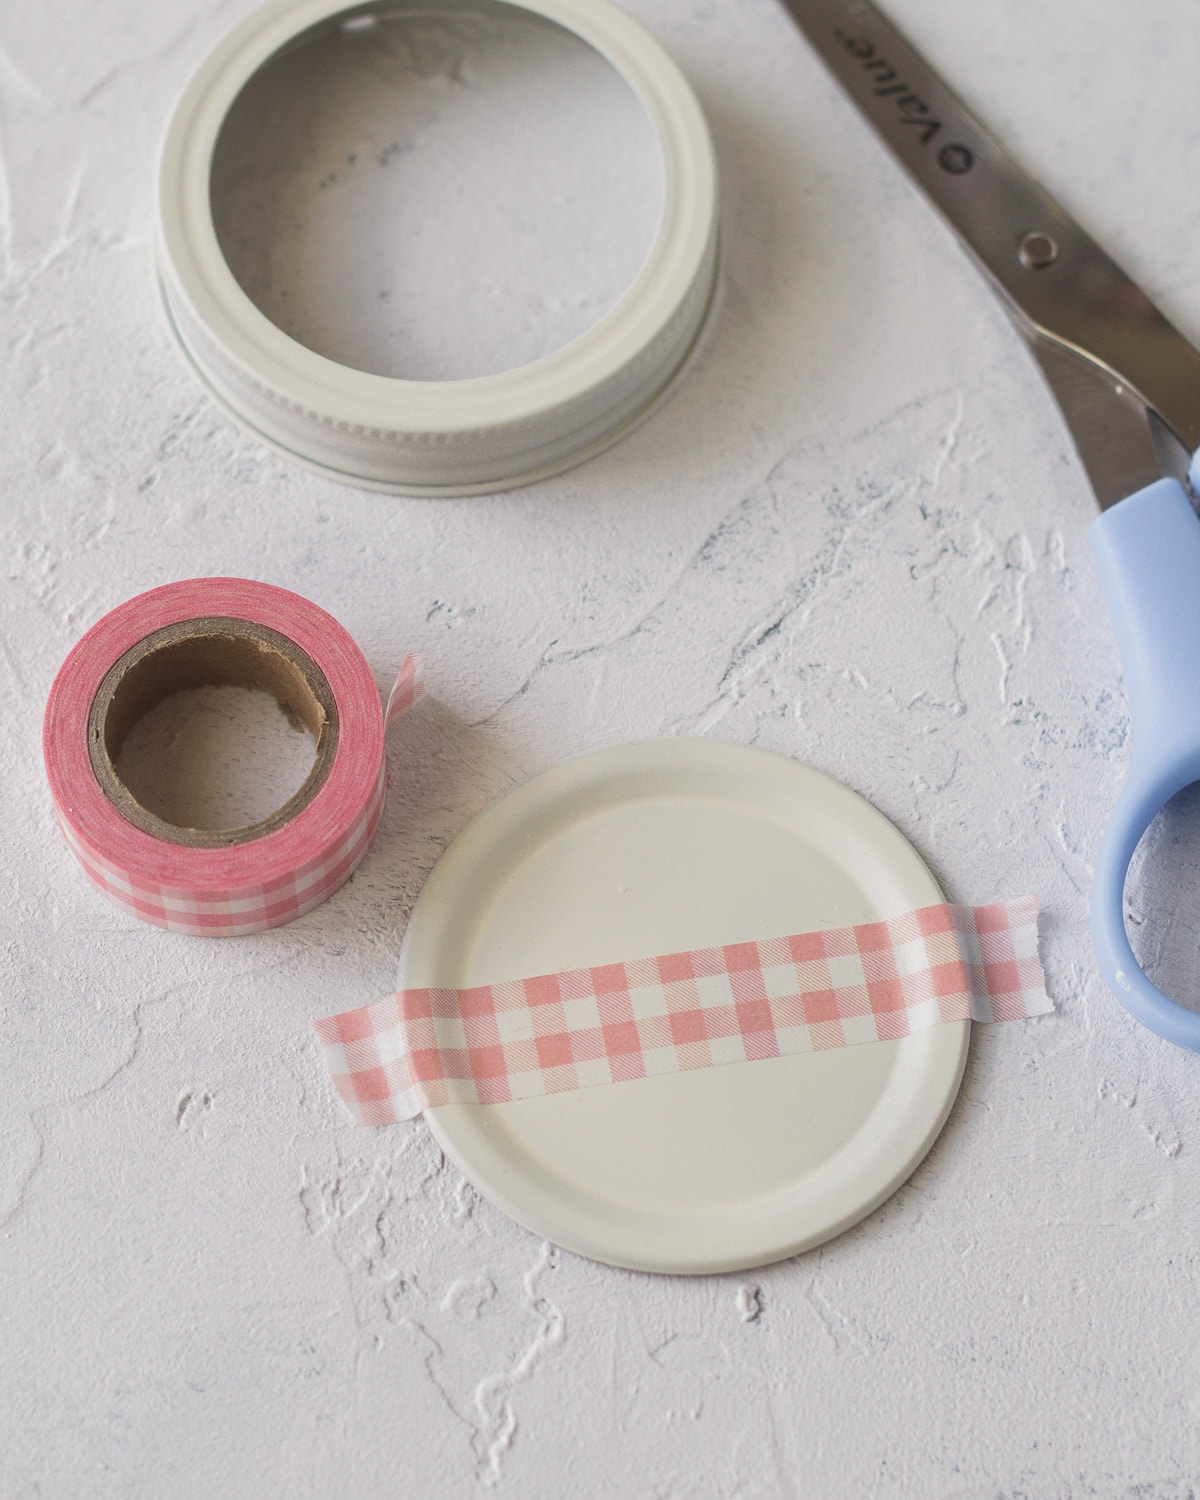
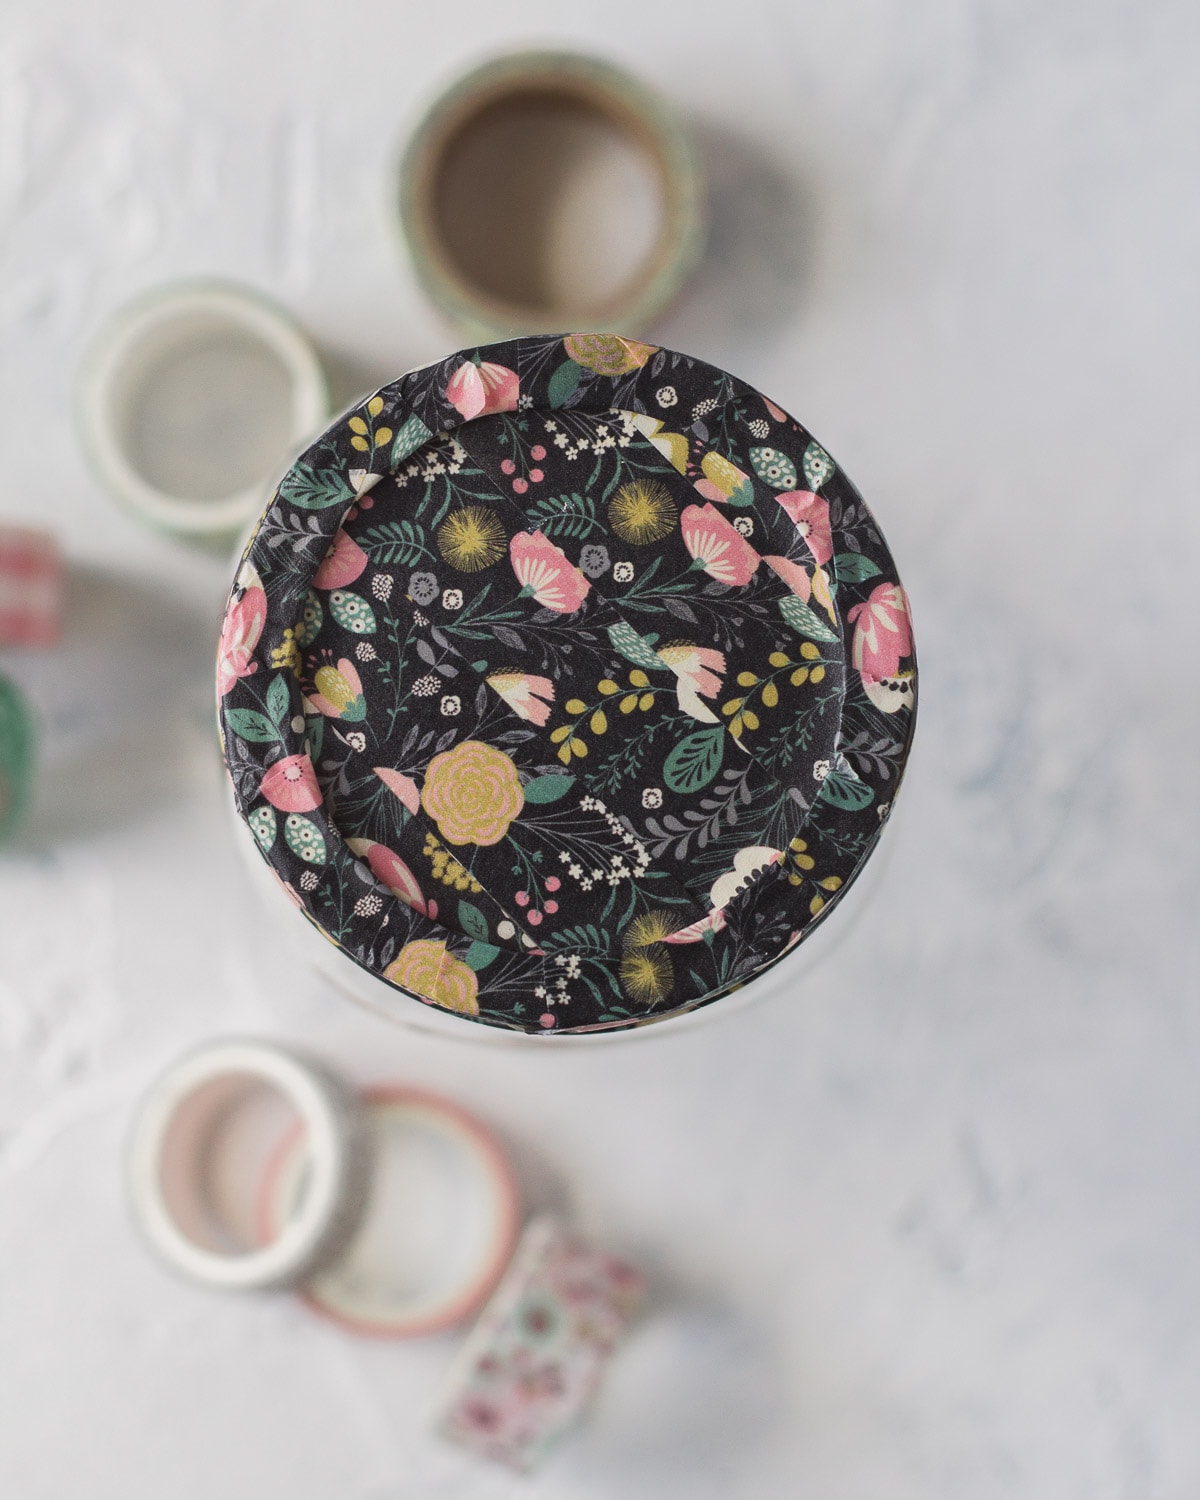
After the paint is completely dry, it’s time to apply the tape! I start in the middle and apply strips across the whole lid. The tape I used was a little bit wider than 1/2″.
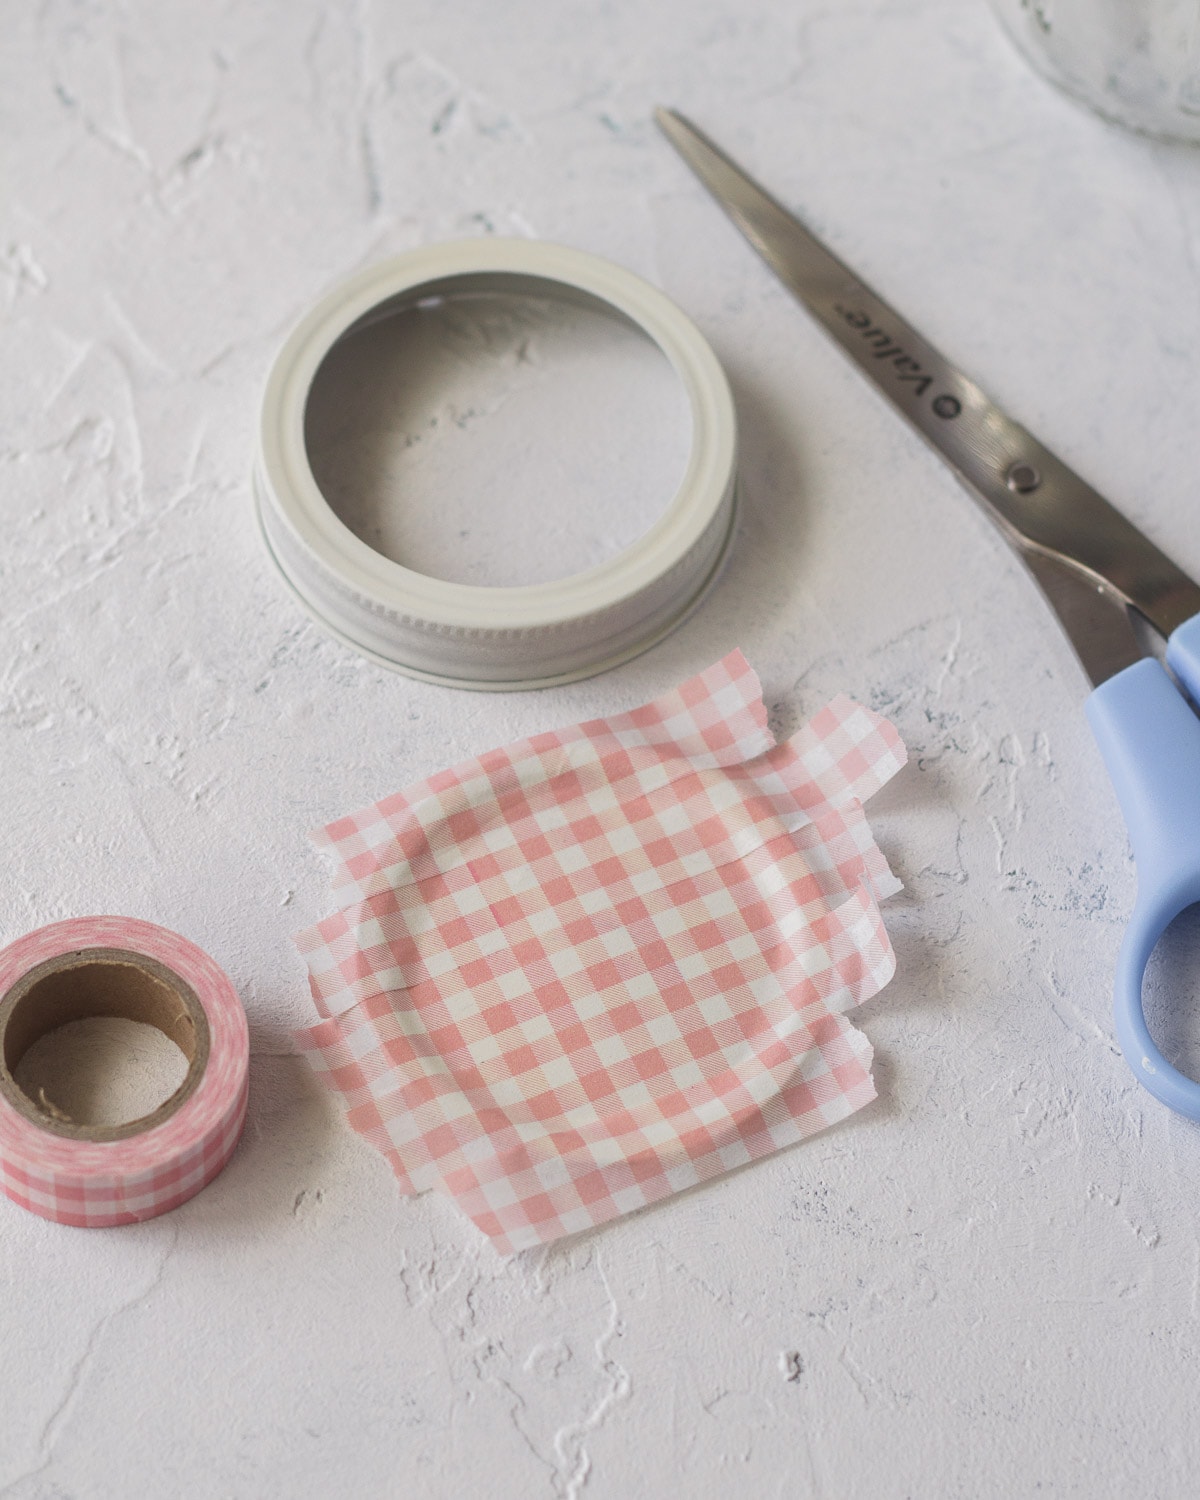
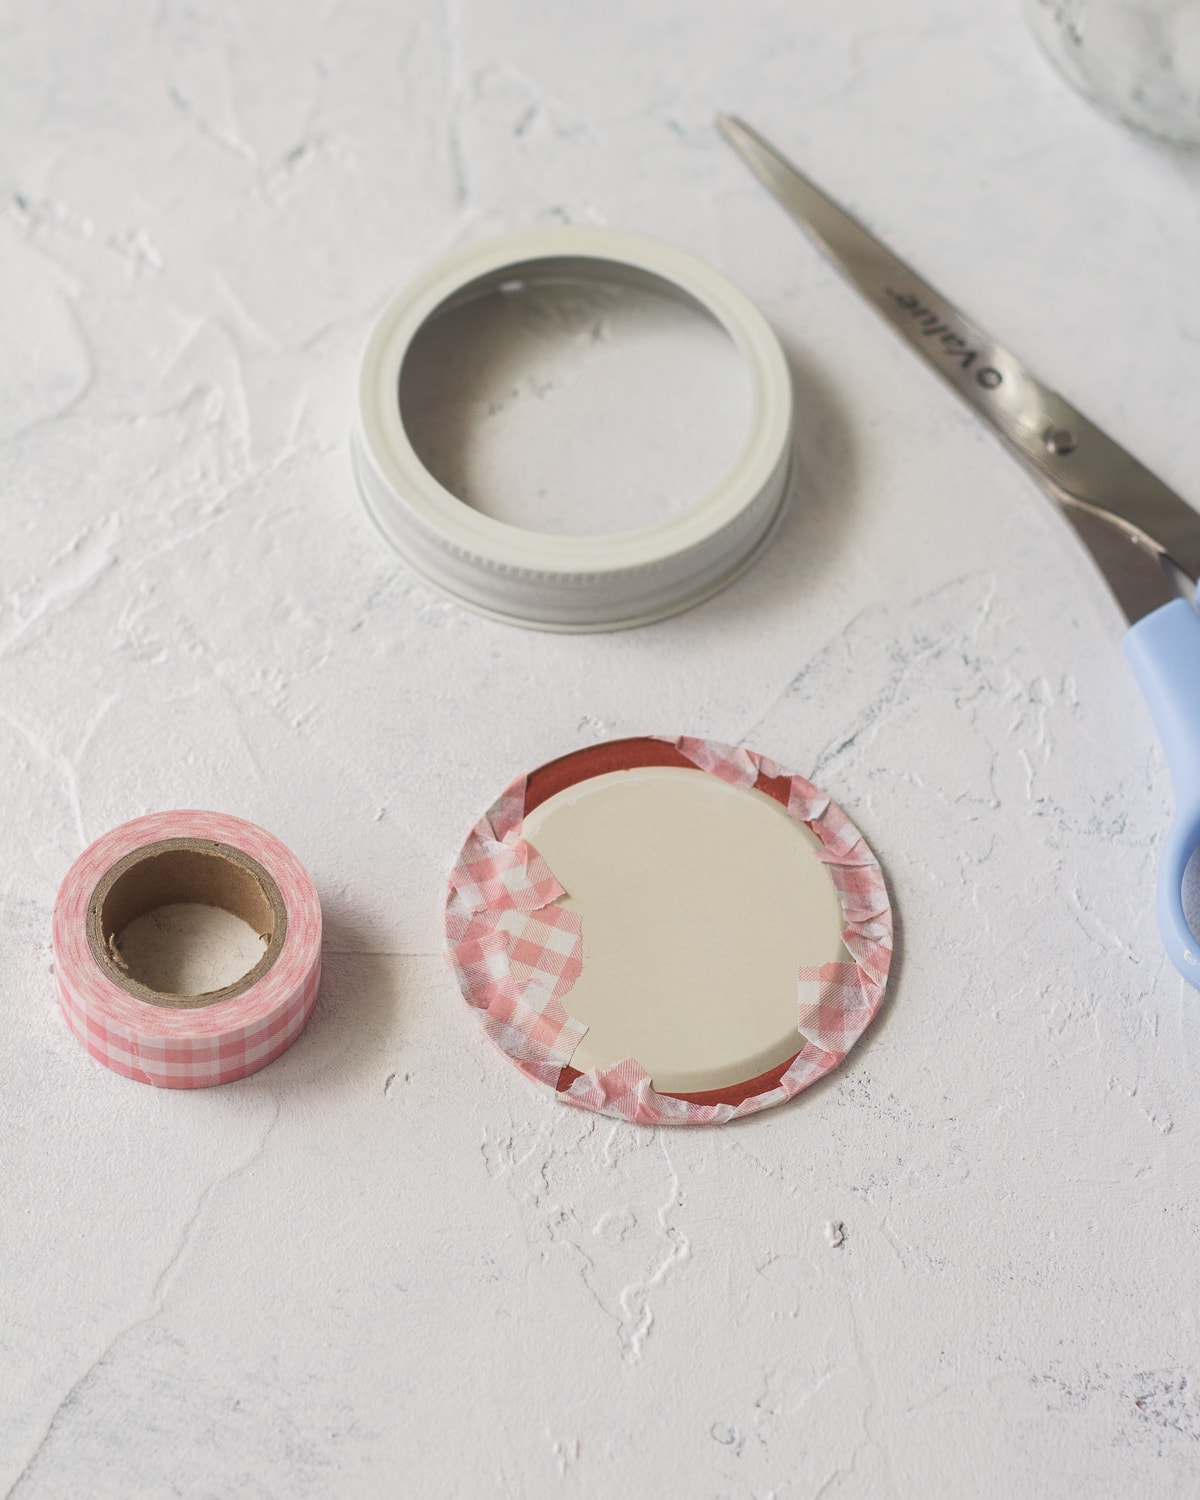
You can trim the excess, but I think it sticks better if you wrap it around to the reverse. It looks a bit untidy though so you could also neaten up the edges underneath with a craft knife.
Next we need to tackle the ring of the lid. I start by wrapping the washi tape all the way around the top of the lid. I place the tape high enough on the lid that I can then wrap the excess around the inside edge.
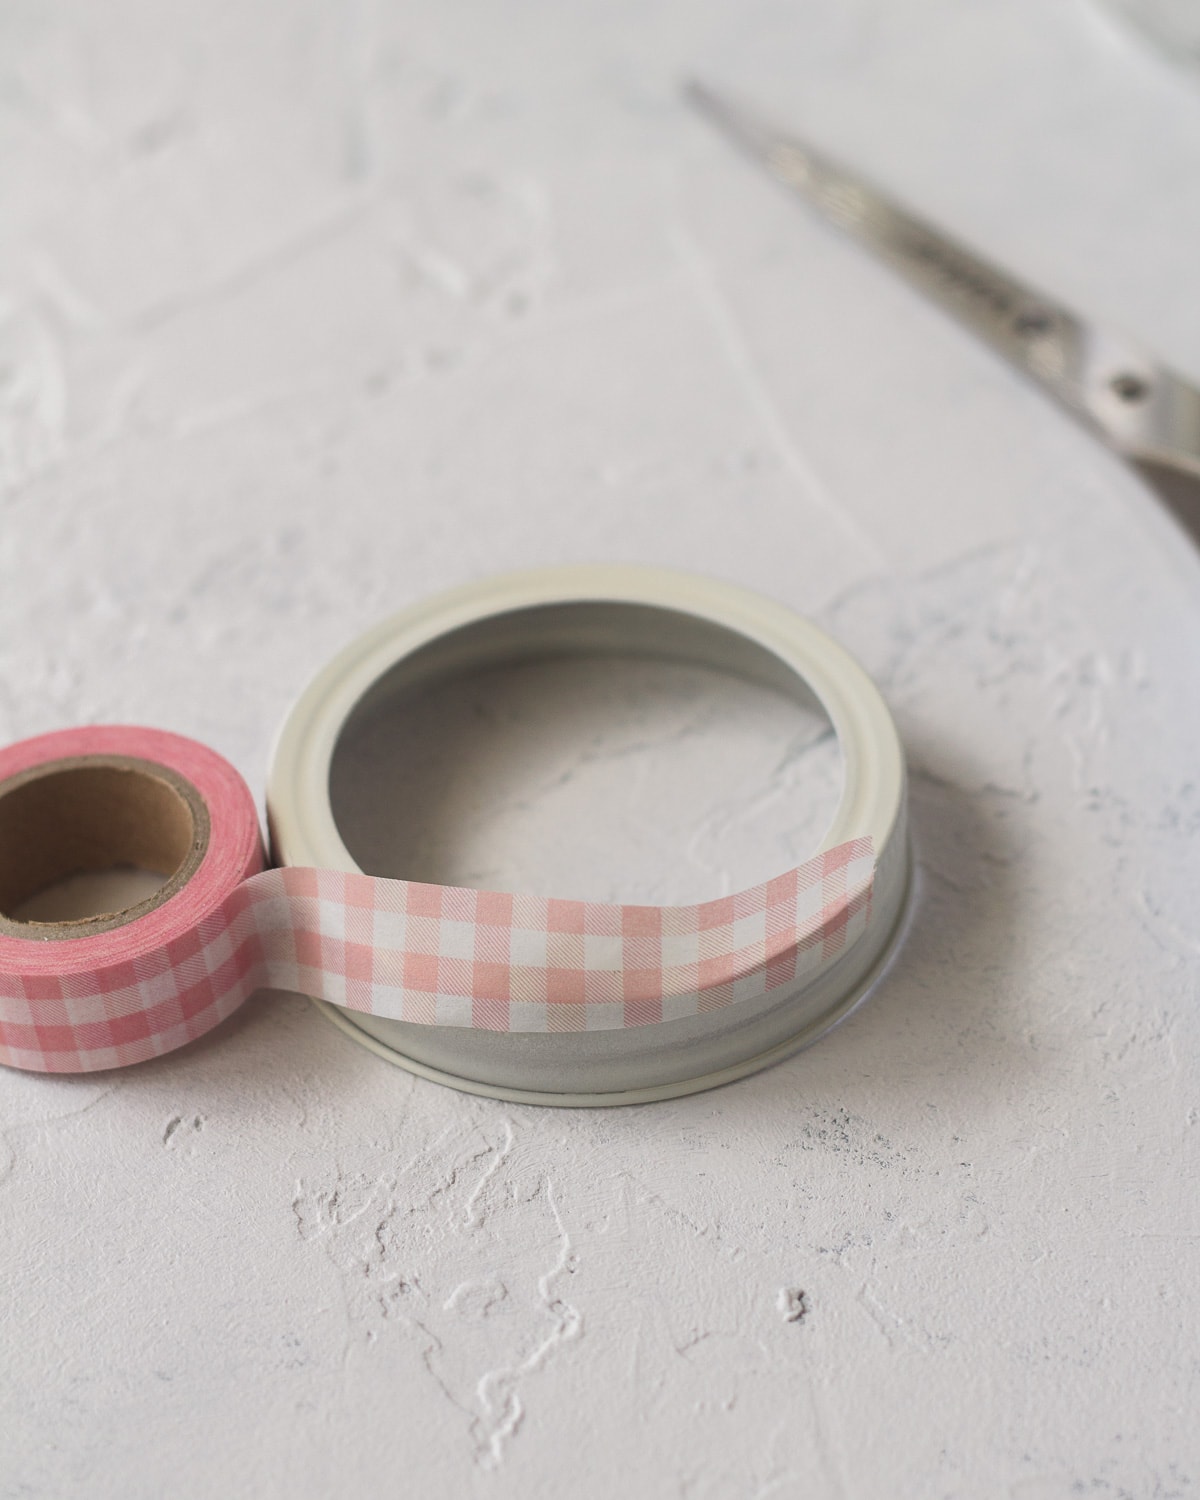
After I’ve secured the tape, I make cuts all the way around. I space the cuts about 1/2″ apart and cut down to the edge of the lid.
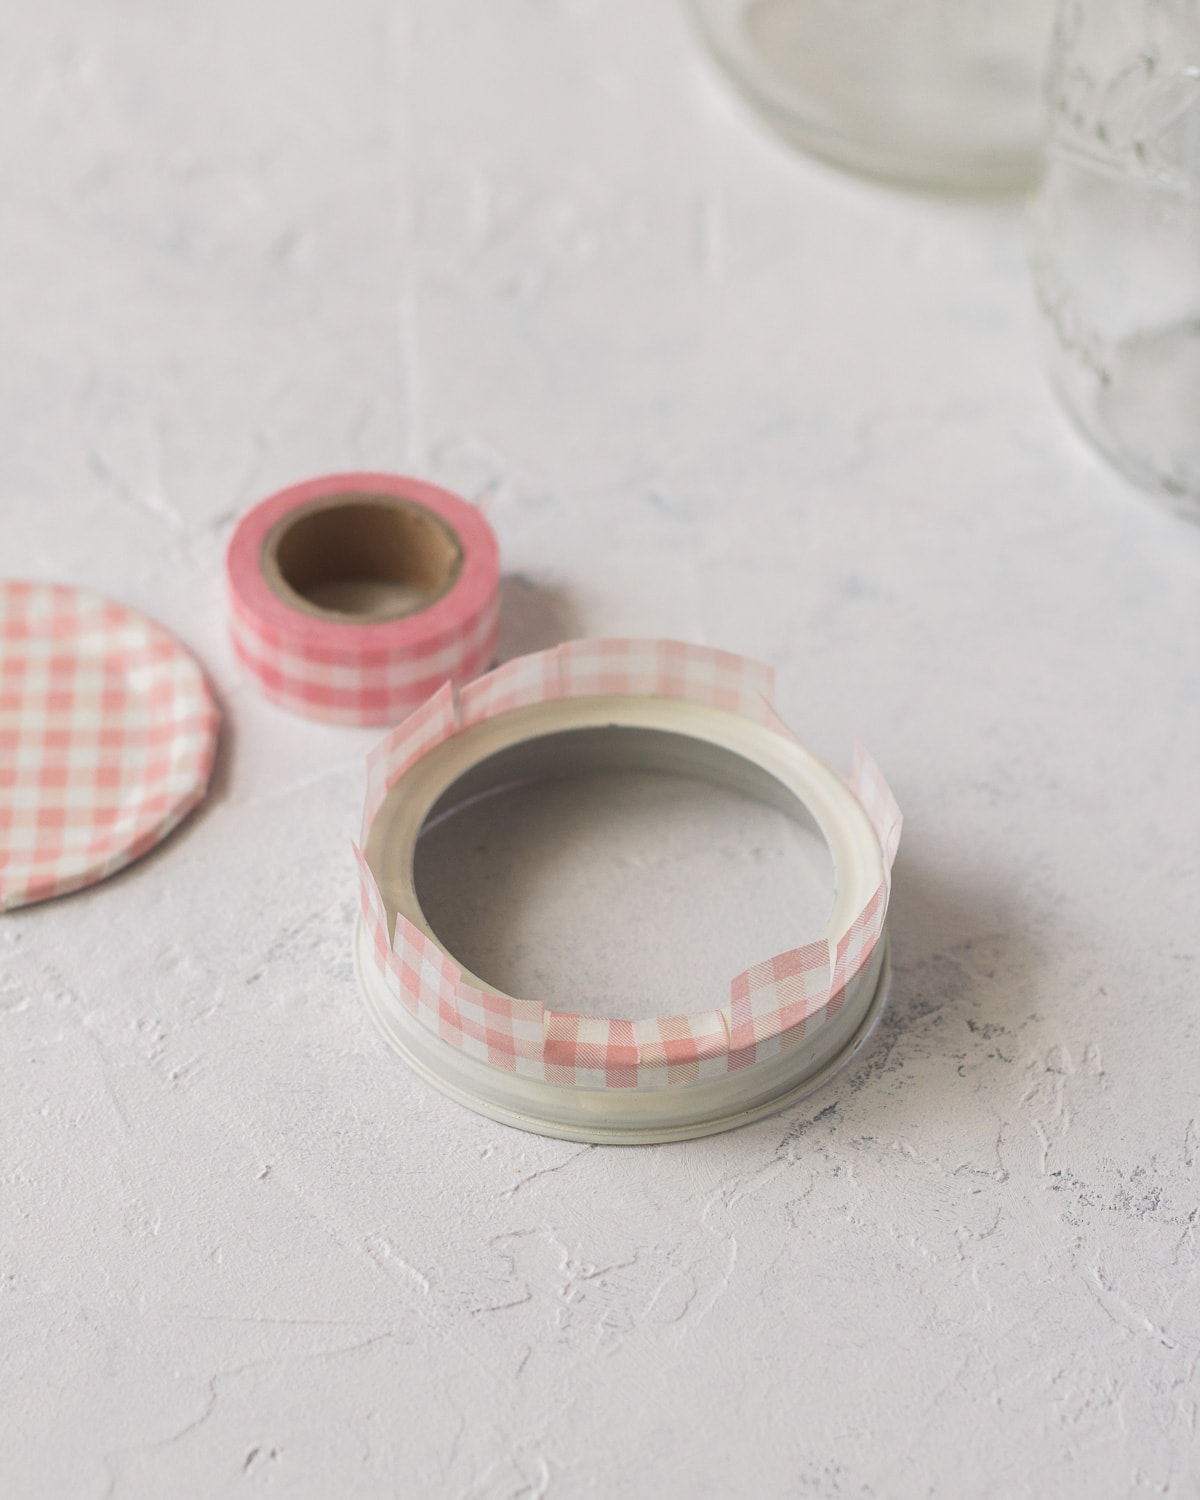
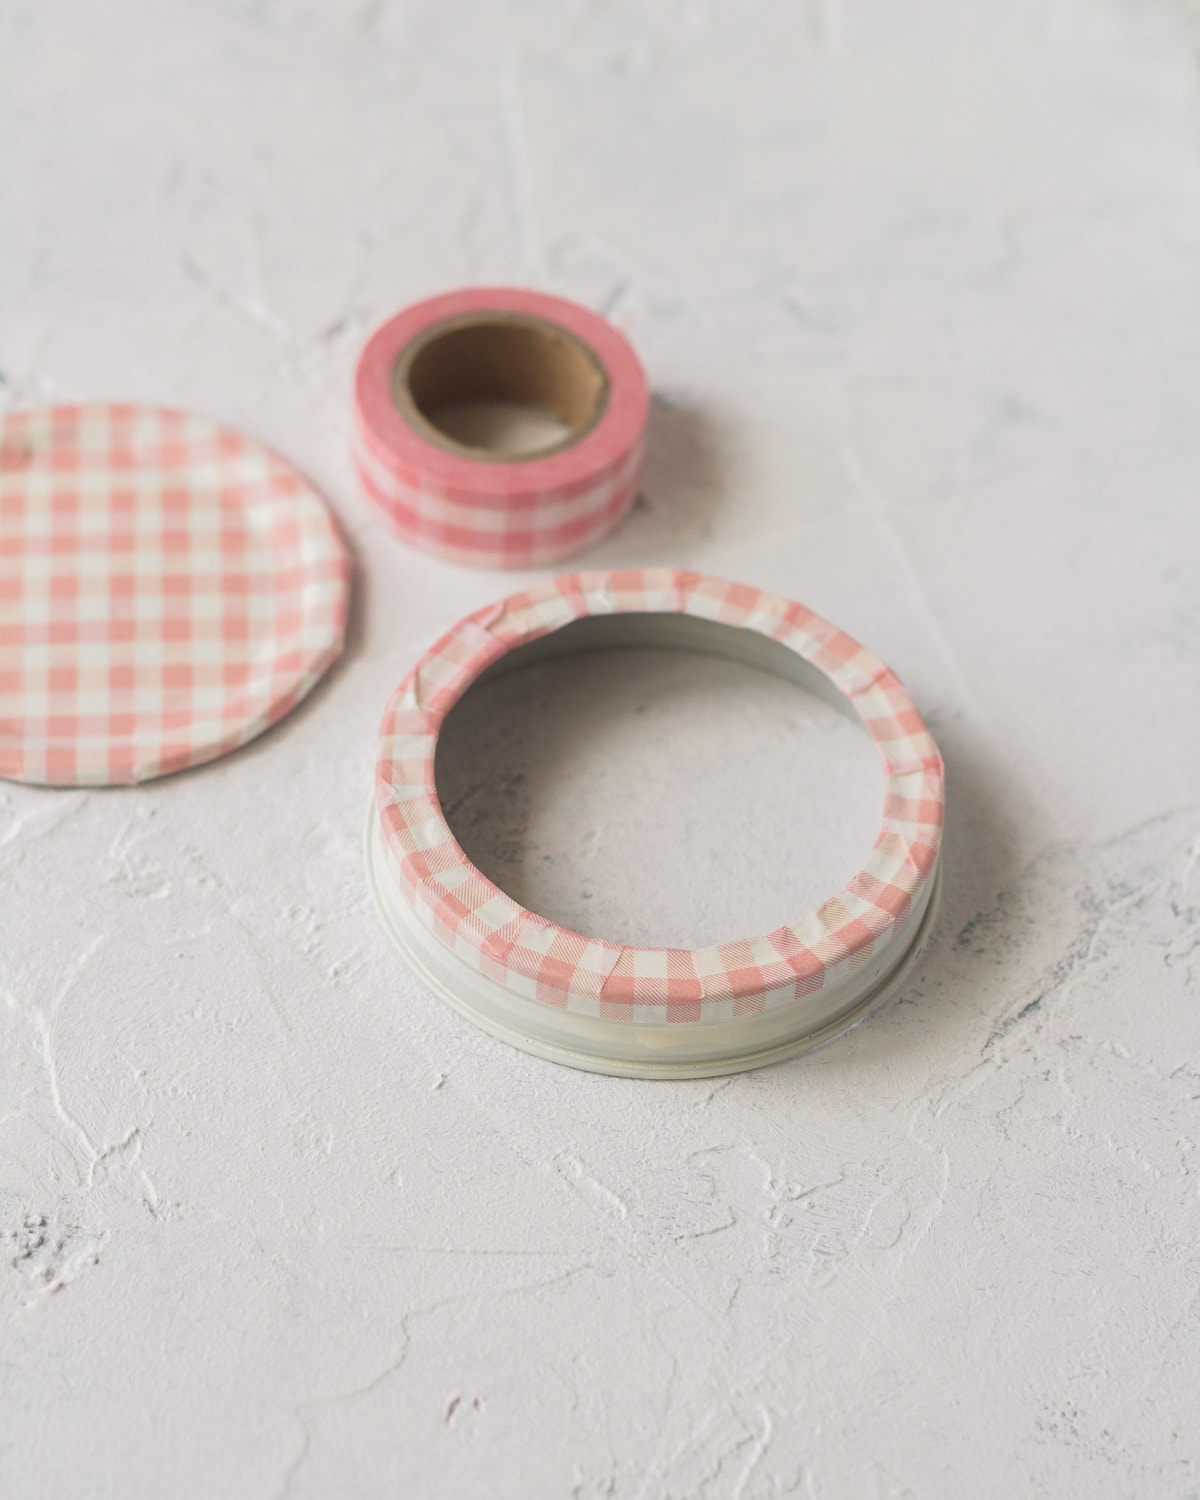
Then, just wrap the sections of tape around to the inside of the lid, overlapping to fit.
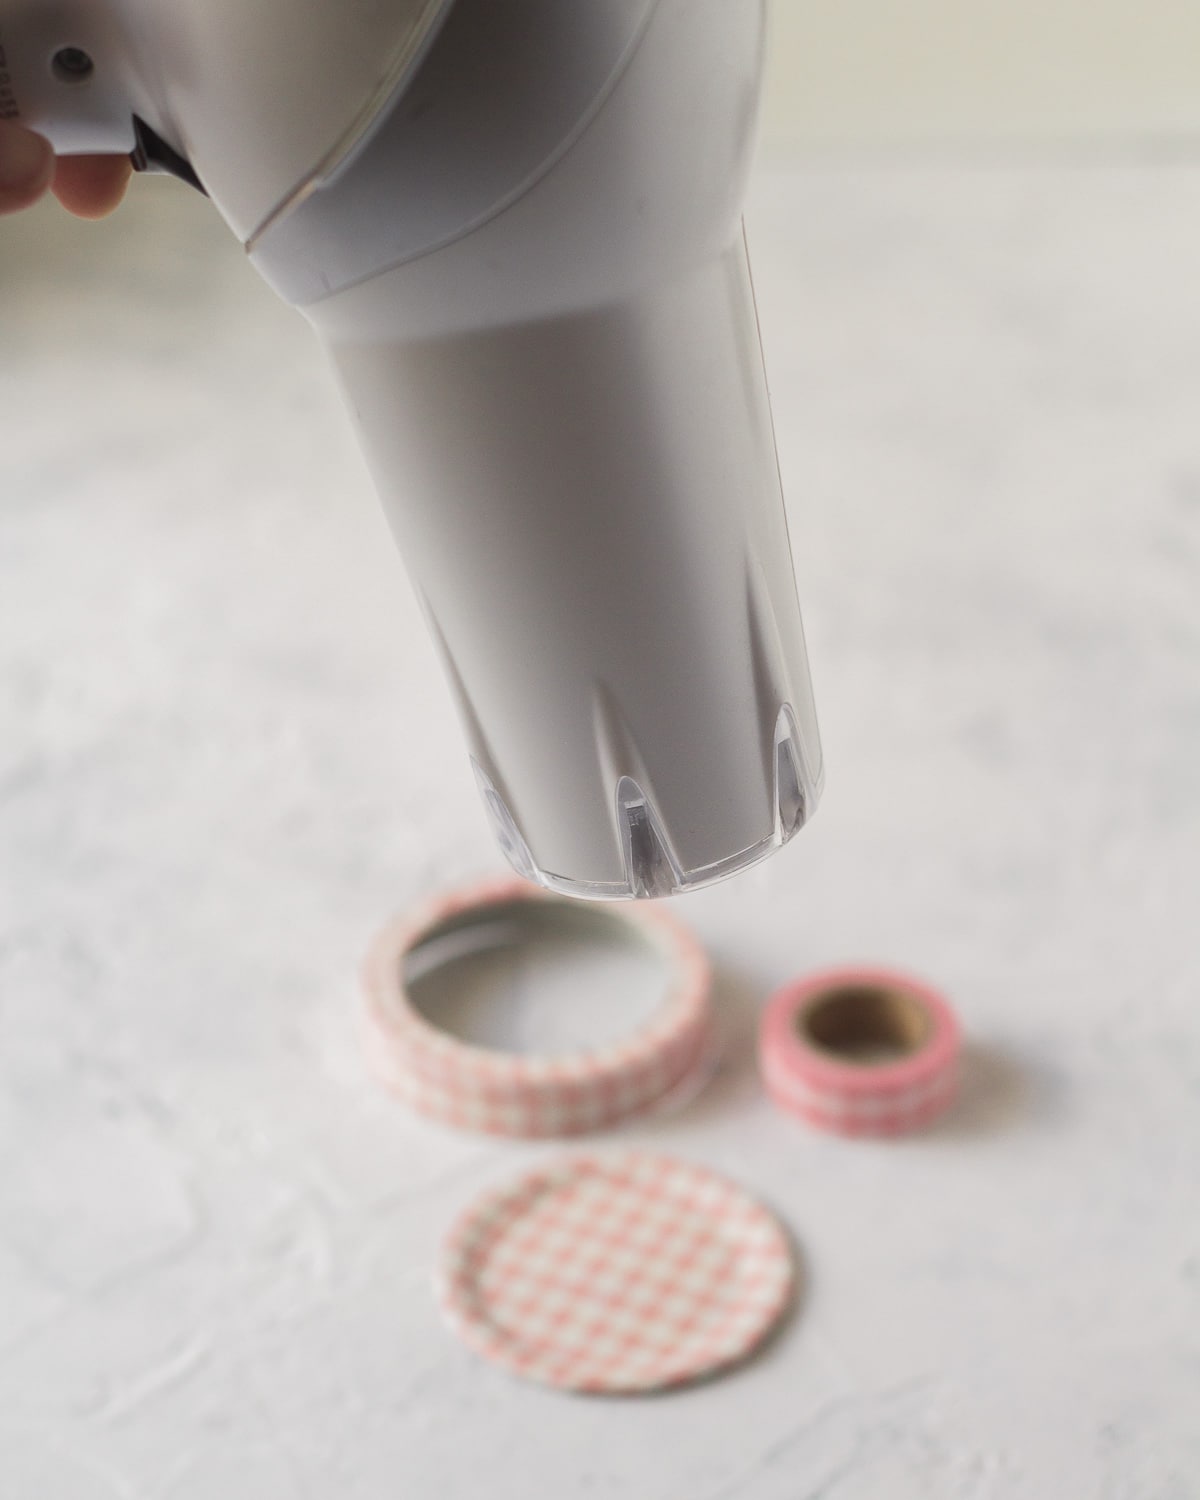
Next, it’s time to heat set! I set my hair dryer to low speed, hot temperature. You’ll want to be careful that your dryer isn’t overly hot, so start on warm and move up if needed.
Careful because the lids will get hot. I applied the heat for several seconds (probably 15-30) until the tape was very warm to the touch. Be sure to set the ring of the lid all the way around.
Like I noted above, you can also apply a coat of Mod Podge for even more durability. I like the matte finish Mod Podge to maintain the look of the washi tape.
And your jars are finished!
I hope you enjoyed trying this simple washi tape craft! Try my easy Washi Tape Bud Vases tutorial next!