Home State Washi Tape Wall Art
Show some love for your home state with this easy washi tape wall art idea. Use a piece of cardstock, your favorite washi tape, and a craft knife to create this fun artwork for a room in your home.
Supplies
- 8"x10" piece of cardstock (trim down a larger piece if necessary)
- ruler
- washi tape see notes
- template of your home state (trace from a map or print a free-for-personal-use template)
- craft knife
Instructions
- Cut out your home state template.
- Tear off a small piece of washi tape, roll it (sticky side out), and adhere it to the back of the state template. Arrange the state template as desired on your cardstock and press to temporarily adhere (washi tape is low-tack and removes easily).
- Organize your washi tape spools in the order you plan to apply the colors (if you are using multiple colors). Carefully peel the first tape to cover the lowest short edge of the cardstock, leaving some tape for overlap on the edges. Apply the tape and fold over the edges to neaten.
- Use your ruler to space the next line of washi tape. For my example, I used washi tape that was just over 1/2" wide and spaced the strips about 1/4" apart. On my last two pieces of washi tape I had to space them just a bit wider to allow the last piece to meet the top edge of the cardstock.
- Continue adding washi tape, sticking it in spaced lines right on top of your template.
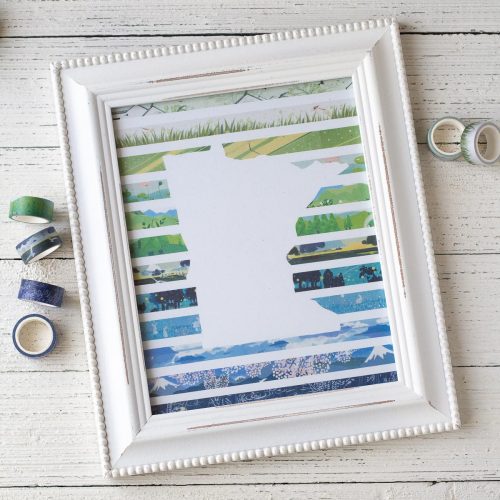
- After adding all the washi tape, grab a sharp craft knife and carefully cut through the washi tape layers (not the cardstock!) that meet the template. Essentially you are just releasing the template to reveal the shape of your home state.Go slowly and carefully and try to avoid scoring the cardstock as you trim away the template from the washi tape. Only use your knife where there is washi tape so you don't create extra marks on the cardstock.
- I like to release the template little by little and ensure that the washi tape is fully cut as I do so. While I remove the template, I also press down on the washi tape on the cardstock to keep it secure.
- Remove the template and set aside. Note: I don't like to waste washi tape so I save the whole template and peel off and reuse the smaller sections of tape as I encounter projects (often decorating envelopes or something similar) that can use it.
- Place your finished art in a frame and you are done!
Notes
I used washi tape that measured a bit over 1/2" wide, but you can use any width you like. Play around with the spacing to get a look that you like. If your state has a lot of detail, you'll want to have the washi tape closer together in the design so that when you cut away the edges the state still has plenty of detail.