How to Add a ConvertKit Email Opt-In to the Kadence Theme Homepage
Learn how I added a ConvertKit Opt-In to my Kadence Theme Homepage with no additional coding or plugins. It’s quick, easy, and looks good on mobile too.
Please note that this post contains affiliate links which allow me to earn a small commission when a purchase is made at no additional cost to you. As an Amazon Associate I earn from qualifying purchases. Read more here.
When I first purchased the Kadence theme I was thrilled with the functionality and the ease with which I could change things. Things like the fonts, global color palette, and the header options (note: there is also a completely free Kadence Theme option which is nearly just as useful!). My biggest frustration at the start was getting my ConvertKit Opt-ins on my site.
I played around with installing different plugins for forms, popups, etc. etc. Some plugins worked, some didn’t. Most required paying a yearly fee for the features I wanted. Sigh. I belatedly realized I made things harder than necessary.

So, this is my simple solution. It’s not fancy (at all), but it works! And, it looks good on mobile too (see the screenshot at the end of the post).
Please note that I am NOT an expert on any of this! I muddle my way through to get the results I want and I try to learn as much as I can in the process. This method of adding an opt-in to your front page has the benefit of not requiring any additional paid-for third-party Wordpress plugins, which for me is a big plus.
Note: this solution is best for your homepage or another stand-alone page. If you are trying to get a form to appear on all blog posts for instance, or in some conditional way, there are going to be other better options for getting that done. Though you don’t need it for this tutorial, using the ConvertKit plugin for Wordpress is definitely worth your time as well.
Is ConvertKit Compatible with Kadence?
Yes, if you have ConvertKit as your email provider, you can absolutely use it with the Kadence theme. With that said, depending on what you want to do you may need to enlist some third-party plugins (or just follow along this tutorial for a quick hack).
Again, I am no expert. So, here’s the thing. Kadence Blocks (which is a free plugin that you can upgrade to Pro for more features) has a fantastic “Forms” block. It’s great. It offers several integrations (some with free, some with pro) with various email services (Mailerlite is integrated with the free version).
However, Kadence Forms is not yet integrated with ConvertKit. So, if you want to add a ConvertKit form you need to build a form over in ConvertKit and then get it onto your site from there. Generally the ConvertKit plugin is fine for this (like having a default inline form at the end of all your posts for instance). For a homepage though, I was hoping to customize things a bit more…and since I don’t know CSS, I was a bit stuck.
After playing around with several different plugins and not really getting the results I wanted (without paying more, argh), I decided to simplify. This is not the prettiest email opt-in you’ll ever see, but hey, it works!
How to Add a ConvertKit Email Opt-In to the Kadence Theme Homepage
Note that I am using Wordpress, the Kadence Theme, and Gutenberg blocks for this tutorial.
First, let’s create a form in ConvertKit.
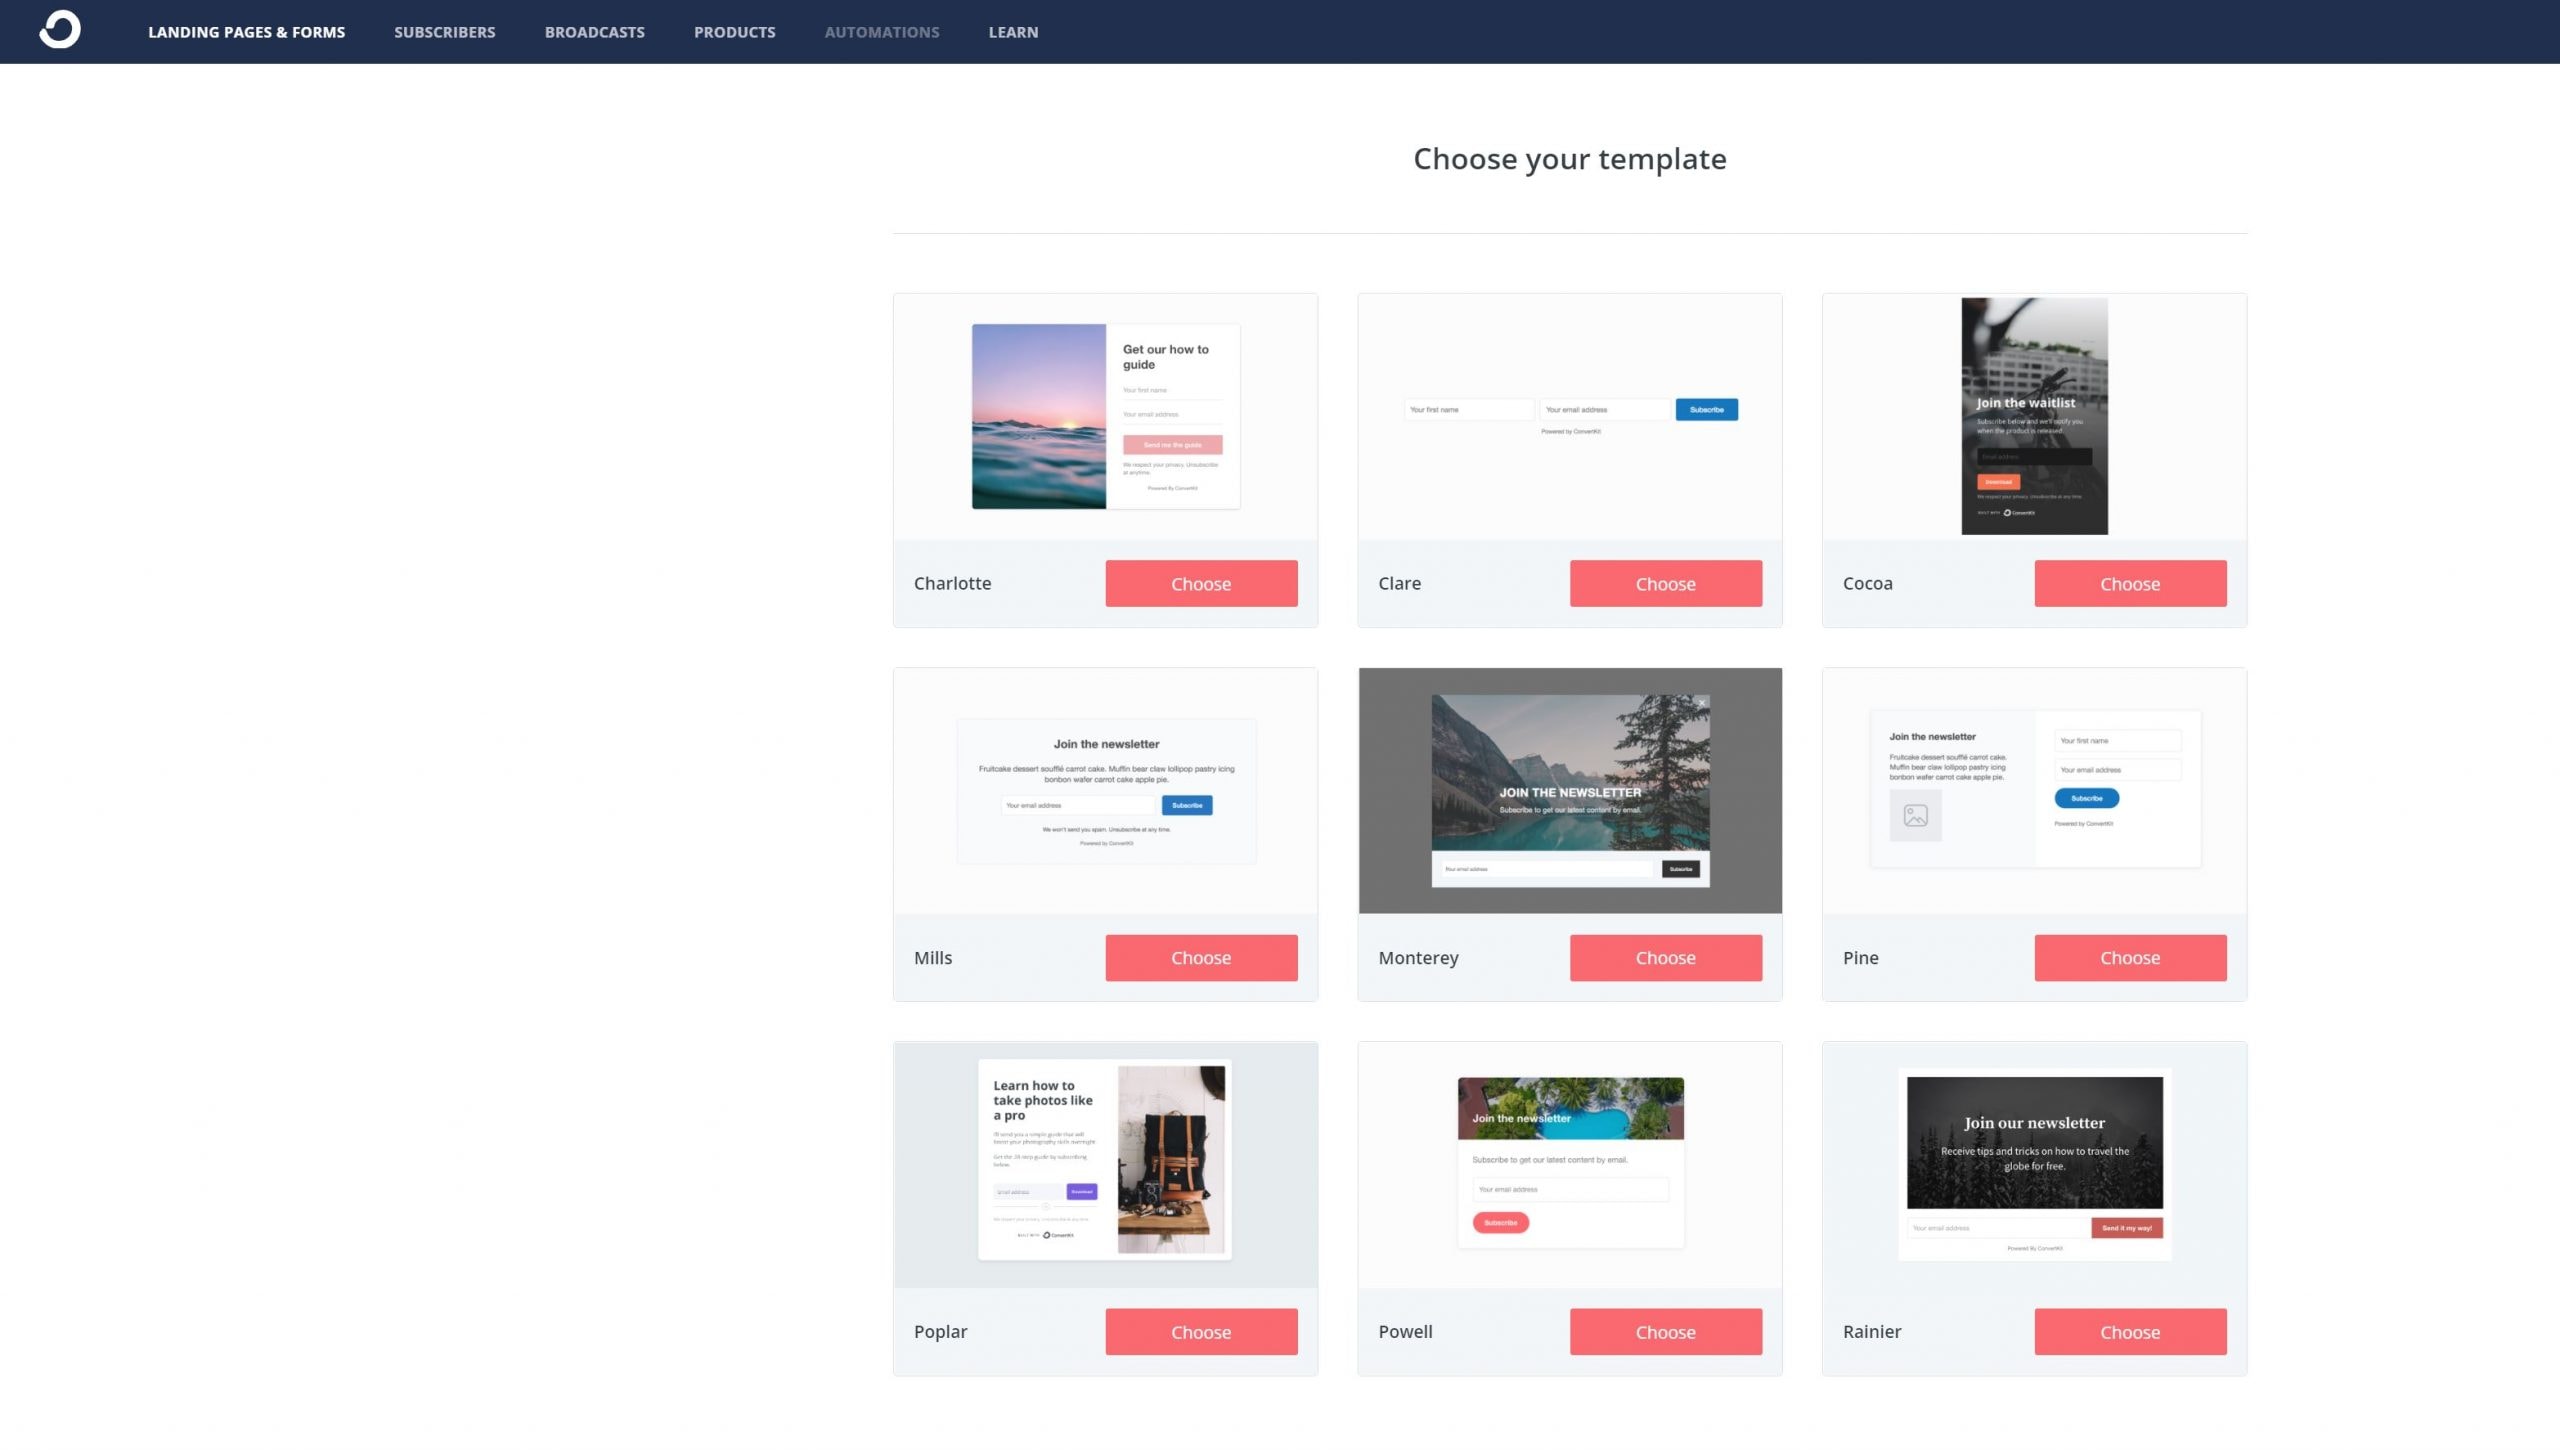
Go to “Landing Pages and Forms” and click “Create New”
Select “Form” and then “Inline”.

Choose “Clare” as your form.
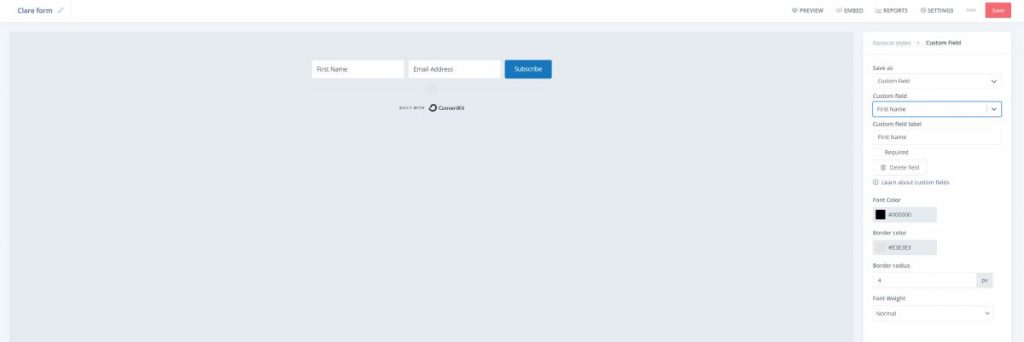
Use the “+” button to add as many fields as you need. In addition to the email address field, I like to add one for “first name” too.

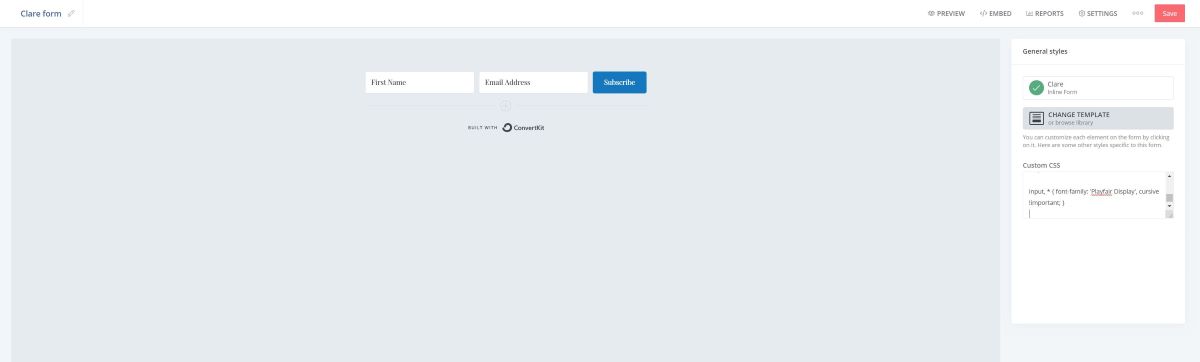
In the “General Styles” tab, I add in some custom CSS to change the fonts to my site fonts (in this case, Playfair Display). Convertkit provides the code and instructions for how to do this here.
Now, click the subscribe button and edit the colors to match your website.

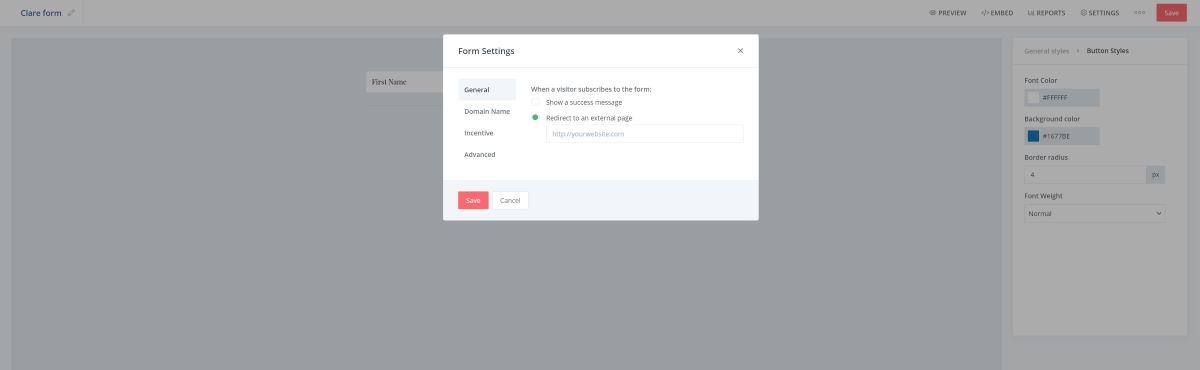
Head over to Settings and update the subscriber’s journey. I set mine to send a new subscriber to a thank you page on my website that includes a reminder to check their email and confirm their subscription.
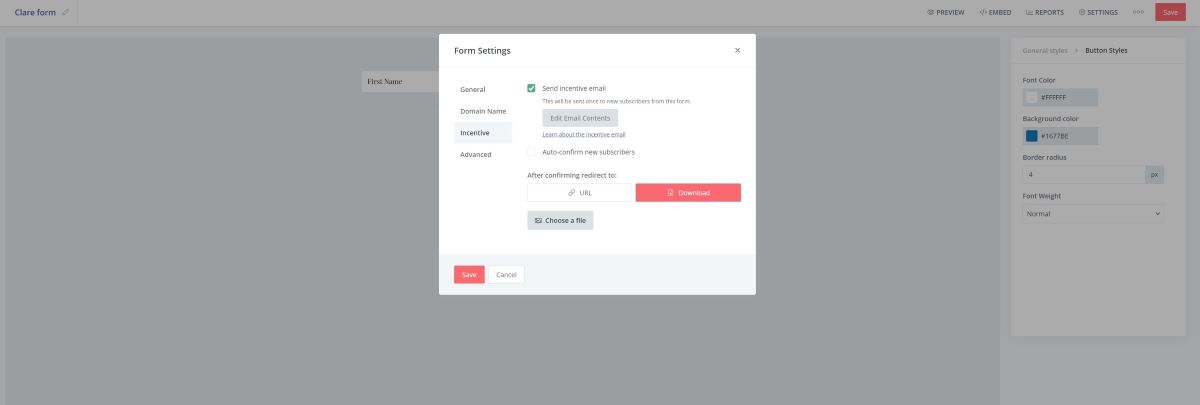
Under “Incentive” I also change the settings of “After confirming, redirect to” to “Download” and I upload my pdf there. Don’t forget to update the “Edit Email Contents” area as well.
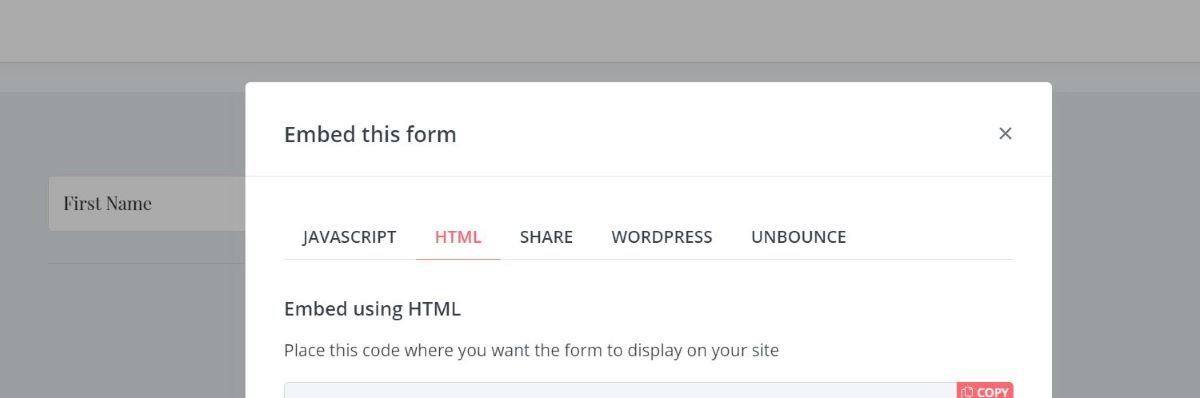
Now it’s time to grab the code. Click “Embed” and then “HTML” and copy the code. Paste it into a text file to keep it handy for a bit while we set up the Kadence block.
Set Up a Kadence Block for a ConvertKit Email Opt-In
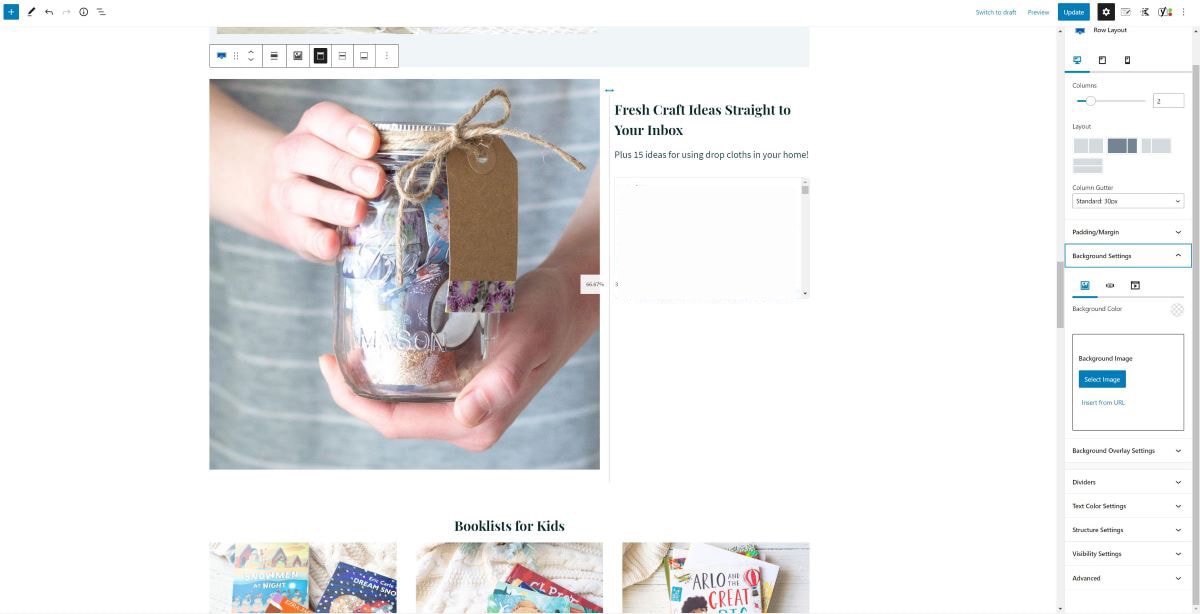
On your homepage (or other stand-alone page) add a block and search for “Row”. Select “Row Layout.”
(these screenshots show the block that is present on my homepage, and then as we build a repeat of the block I used a different photo/text so you can see the process)
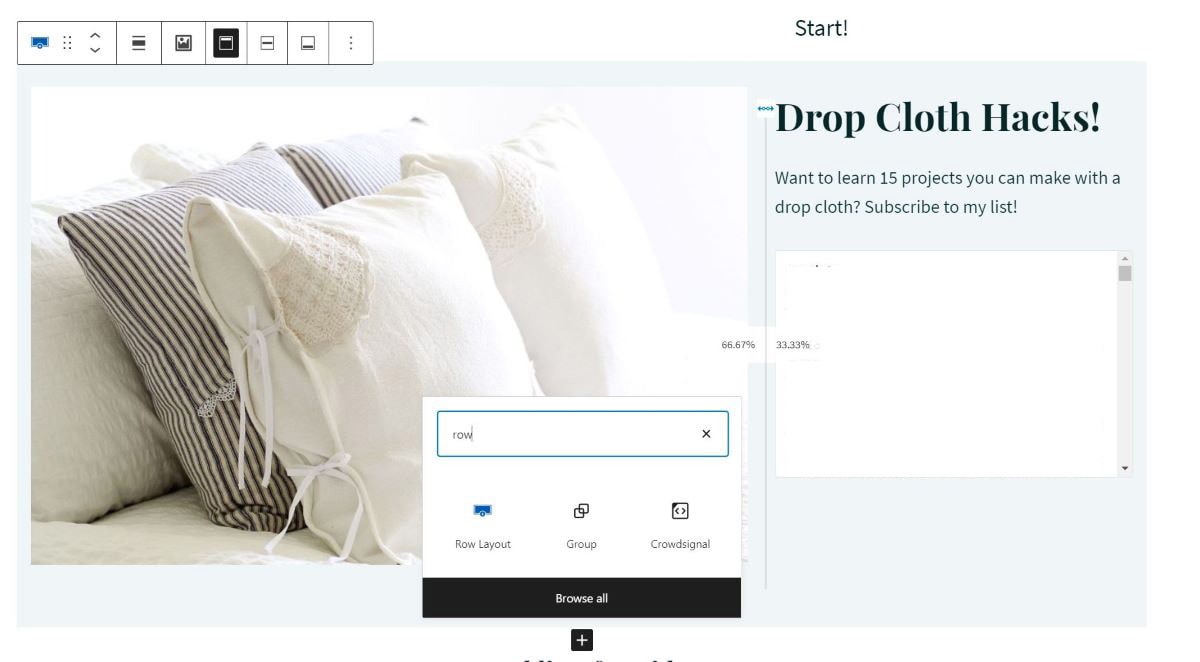
Choose your desired row layout. I chose “Two: Left Heavy 66/33”. You can see the empty blocks this has created, ready for inserting a photo and text.
On the large/left side, I added an image block (click the “+” to add) and then selected the image I wanted to use. Tip: A landscape image tends to work well here. You can crop your image to avoid too much white space after the opt-in text on the right side.
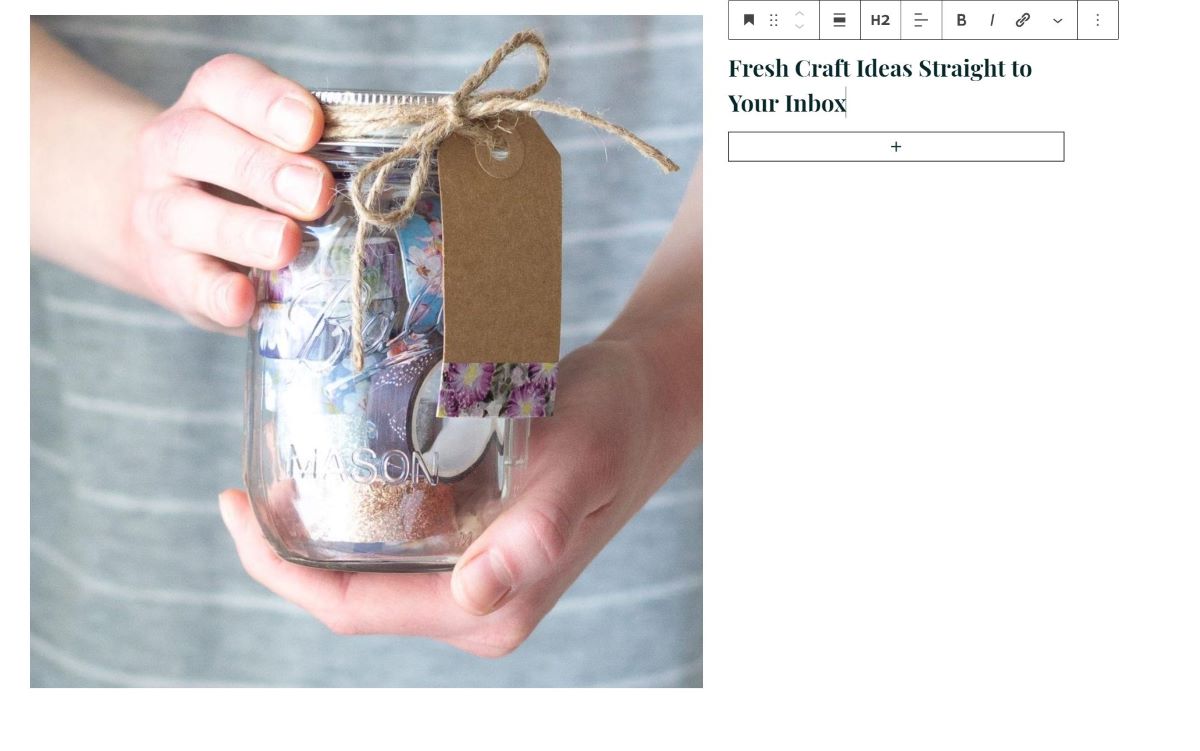
Then I added a H2 to the right side and wrote my opt-in text.
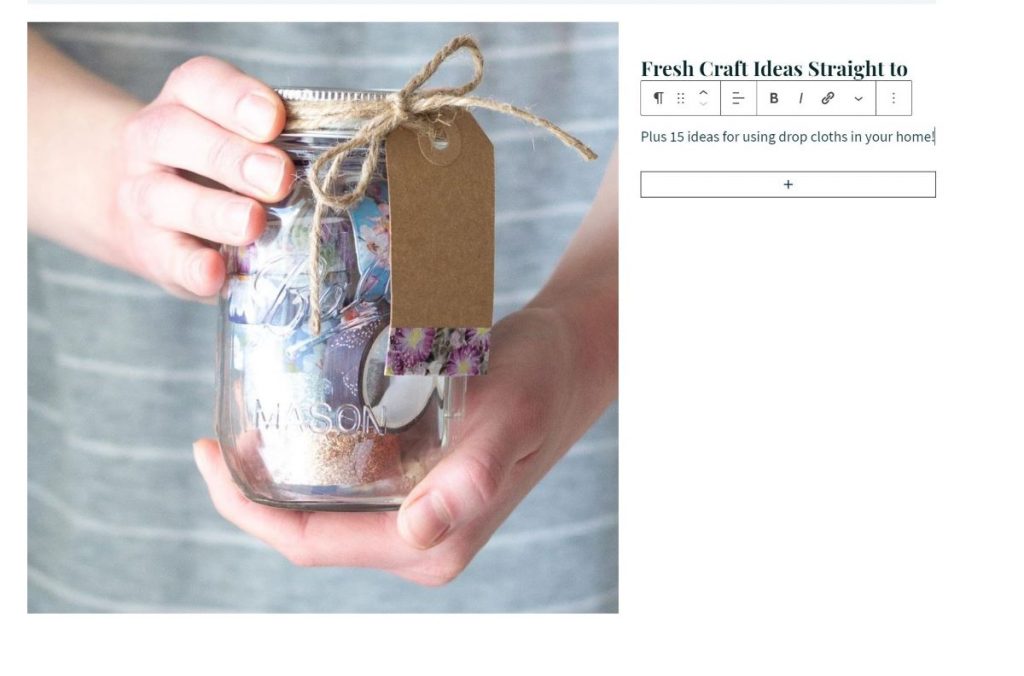
I also added a paragraph block to describe a small freebie that comes along with an email sign up.
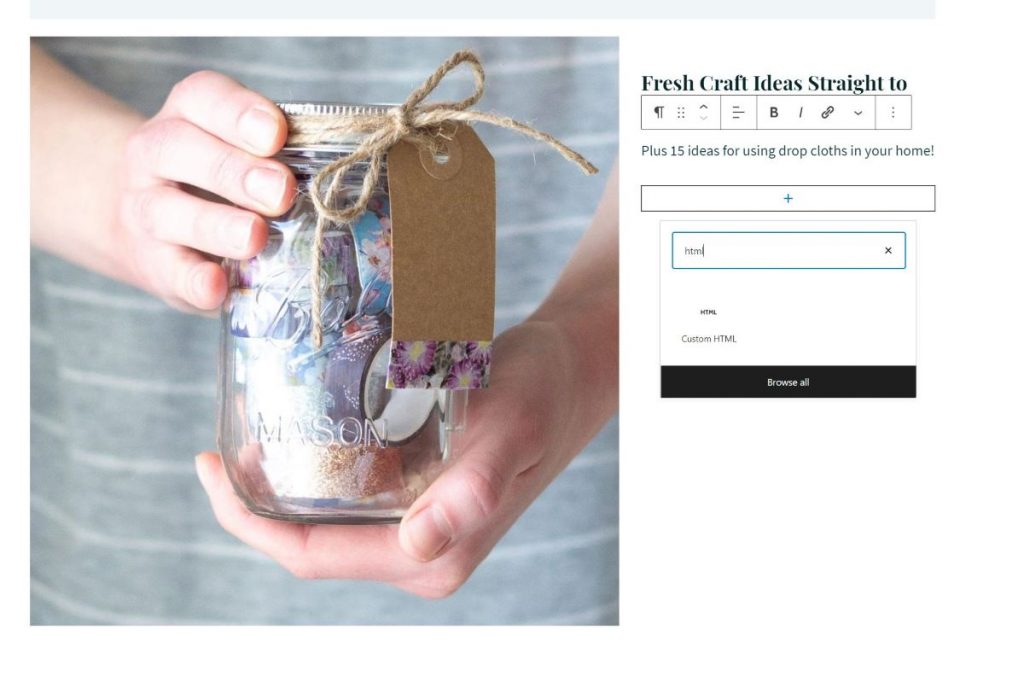
Then I added an HTML block and pasted in my ConvertKit code.
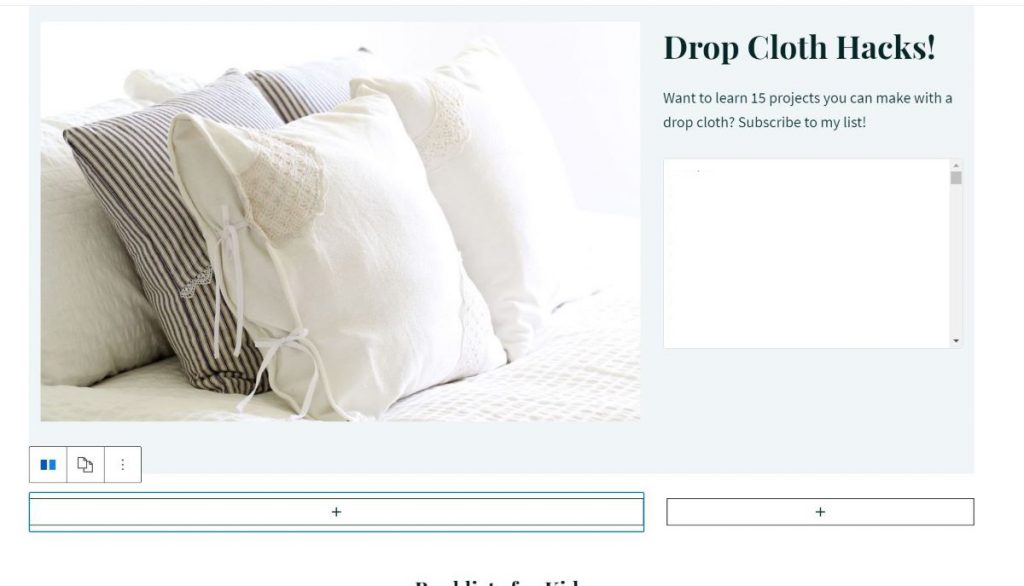
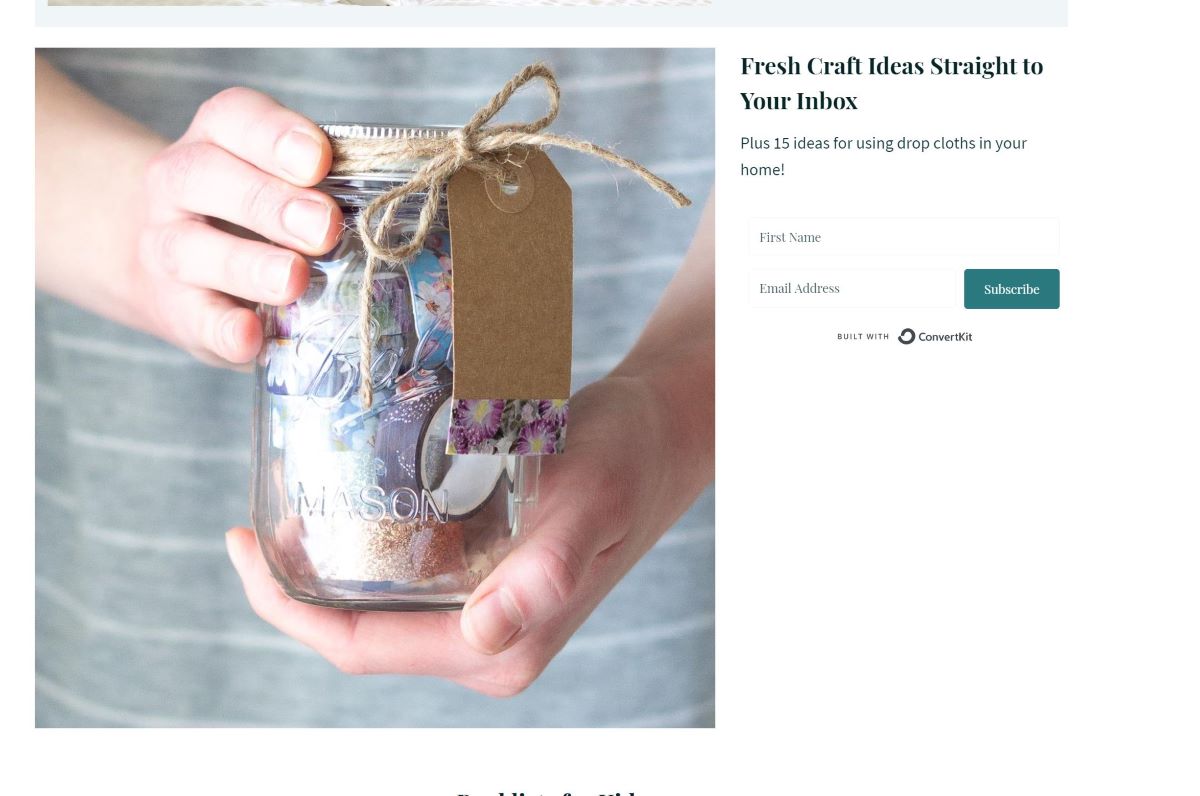
View a preview of your page to see the finished result. Now, it looks ok, but giving the whole block a colorful background will clean things up a bit.
Select the whole block and view “Background Settings” in your block settings area.
Use the Kadence Global Color Palette to select your desired color.
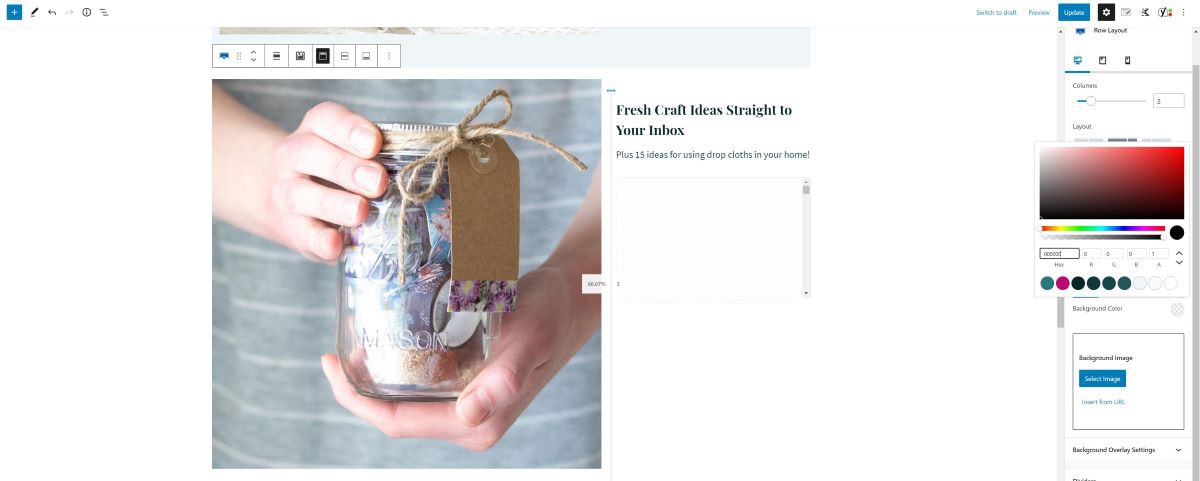
And there it is!
You can play around with resizing your photo, blocks, opt-in text as you wish, but that is the basic idea. Using the simple Clare form allows you to place the form where it’s needed without a lot of extra design around it–so it’s a bit more customizable than using a different form template from ConvertKit.
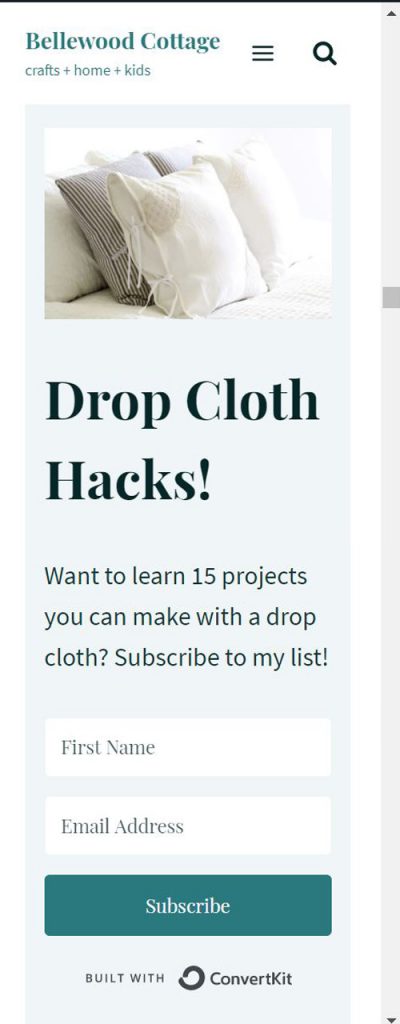
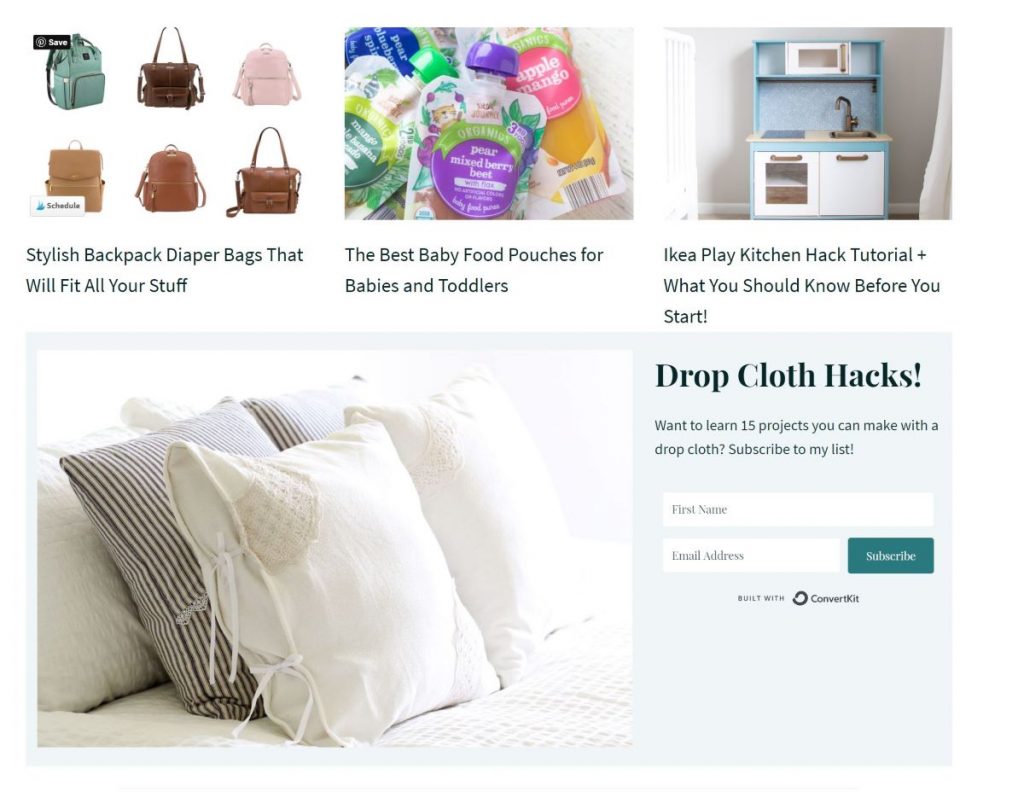
Here is how the form looks on mobile (I like the look of it here–it stacks neatly and it would be easy to make it pop even more with a darker background color etc.):
Here is how it looks on desktop:
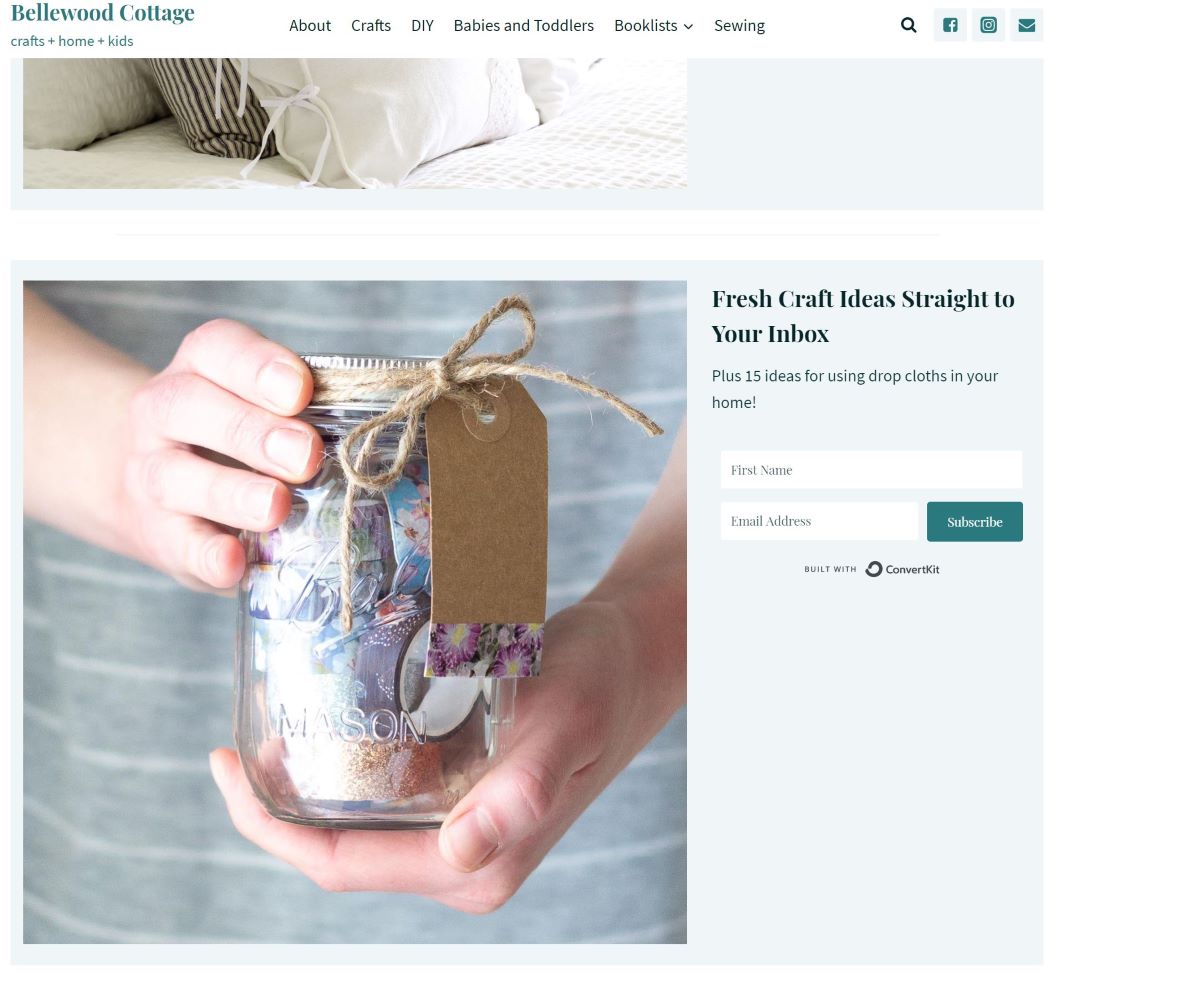
This is the opt-in block I’m currently using on my homepage:
And that’s it! A quick step-by-step of how I got a ConvertKit Email Opt-In on my Kadence Theme Homepage with no additional coding or plugins necessary.
Hope this helps! And by the way, if you have any tips for a better way of accomplishing this, I’d love to hear them! =)

More About Blogging
- My Honest Review of Restored 316 Themes
- The Best WordPress Plugin for Pinterest (From a Fellow Content Creator)
- 11 Things I Learned From My First Year Blogging
- Should I Start a Blog? 12 Things to Consider Before You Begin
Weekly Crafting Fun!
Join my list and get a weekly email with relaxing craft ideas, freebies, sewing tutorials, and more!


You have no idea how much this tutorial of an email sign up box helped me! I was ready to give up!
Thank you so much from a 62 year old blogger!
Rose Thomas
http://www.cookiesfromyourkitchen.com
Oh yay! I’m so glad it could help another blogger! =)
~Ellen
This was super helpful! My re-design is missing just the sign-up forms to be published and now I got them too.
I love Kadence but this part was very frustrating. Have you tried to make a reusable block of this for single blog posts?
I’m so glad it could be helpful! Since the reusable blocks have been a bit buggy I don’t always use them. What I do instead is design some blocks I like and keep them in a draft post/page. Then I open that when I need them and just copy/paste the blocks into my new blog post or page. I’ve made some blocks similar to this tutorial, but I’ve also made some that are just a paragraph of text that link out to a landing page. Hopefully that helps!
~Ellen 🙂
That sounds really useful! I’ve been wanting to add an opt-in to my homepage without the hassle of extra coding or plugins. Glad to hear it’s mobile-friendly too—thanks for sharing the tip!