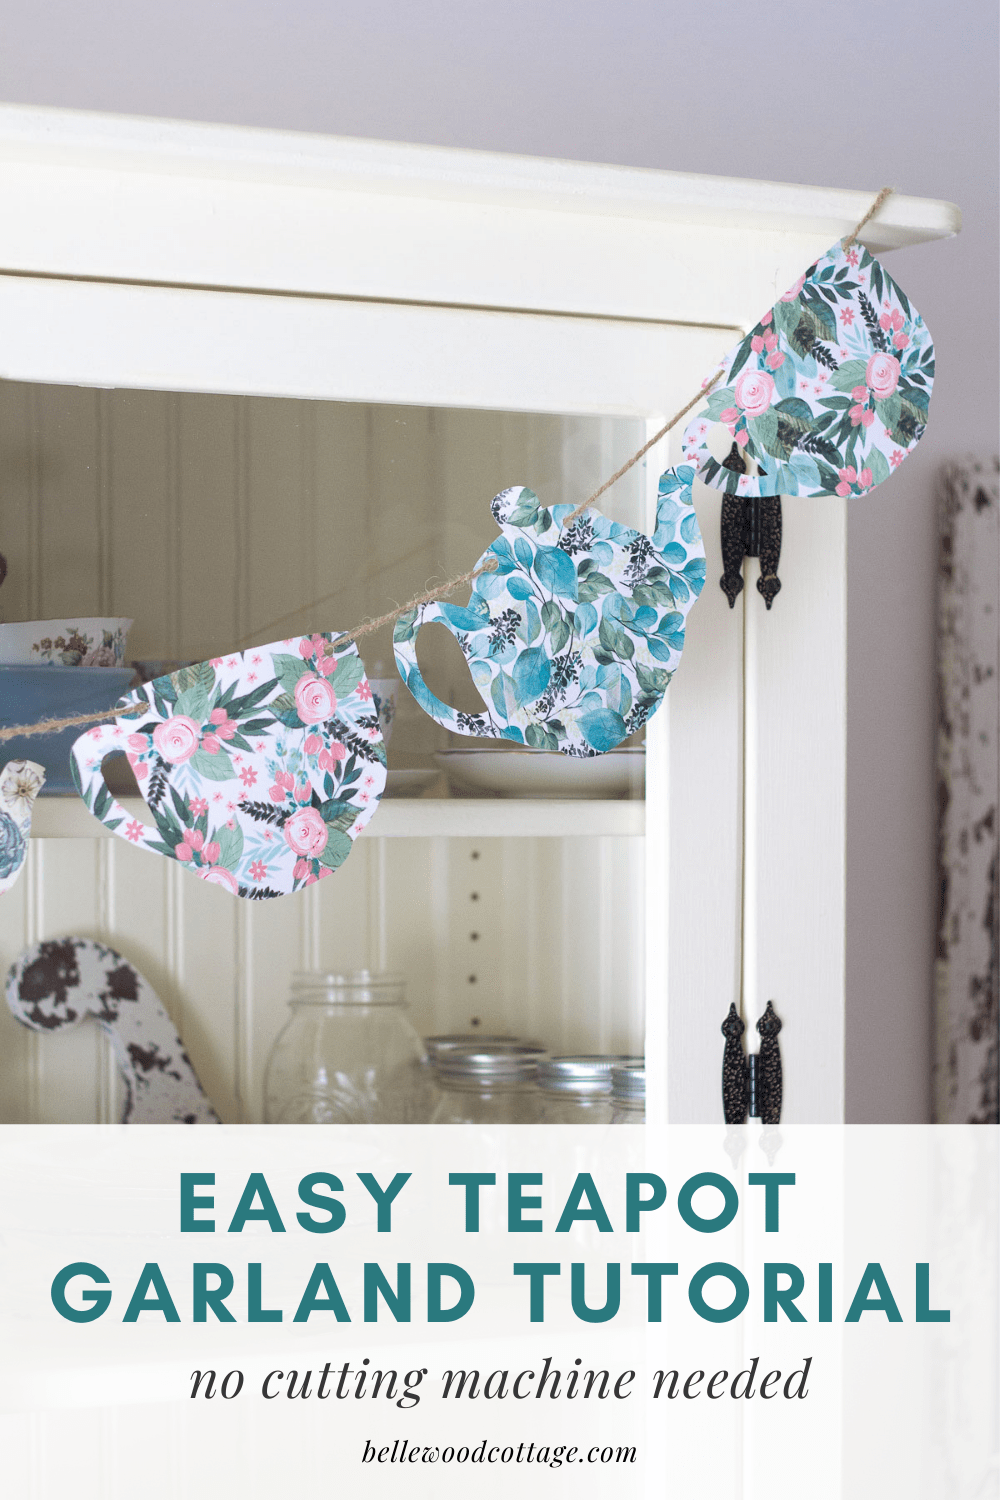
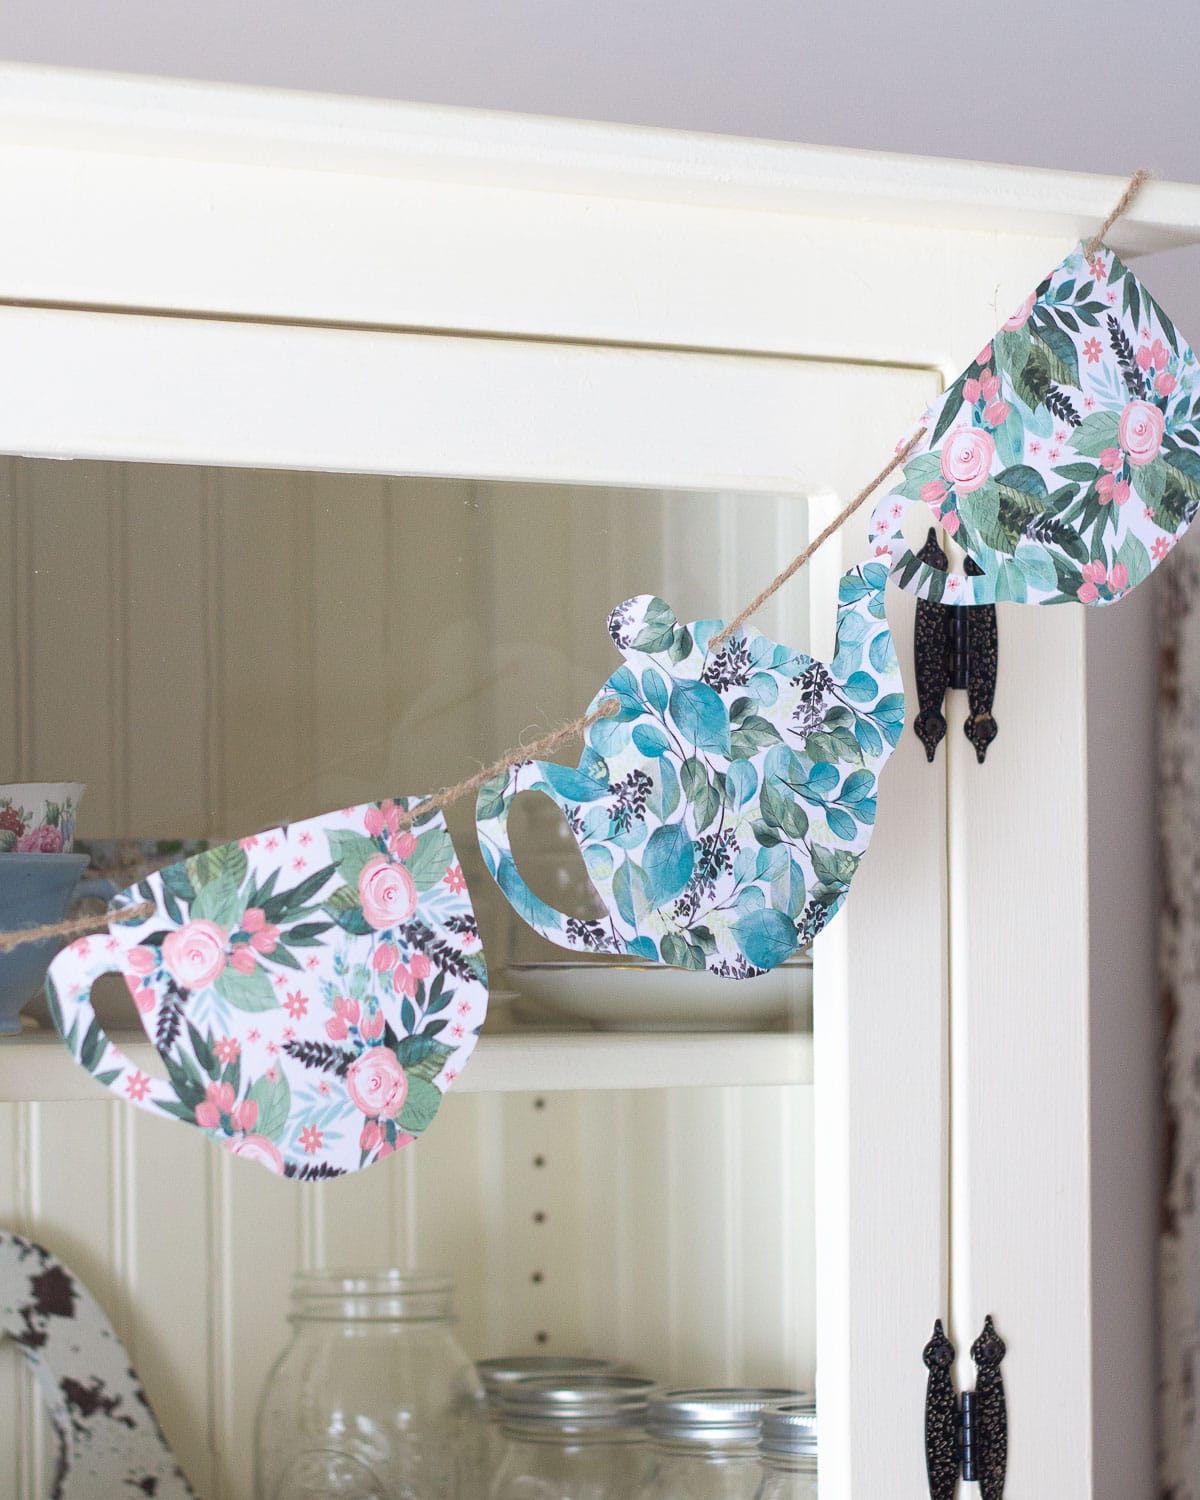
Easy Paper Teapot Garland…No Cutting Machine Required!
For this teapot garland (perfect for your next tea party themed event!) we are going old-fashioned. No cutting machine required for this easy tea party banner!
Please note that this post contains affiliate links which allow me to earn a small commission when a purchase is made at no additional cost to you. As an Amazon Associate I earn from qualifying purchases. Read more here.
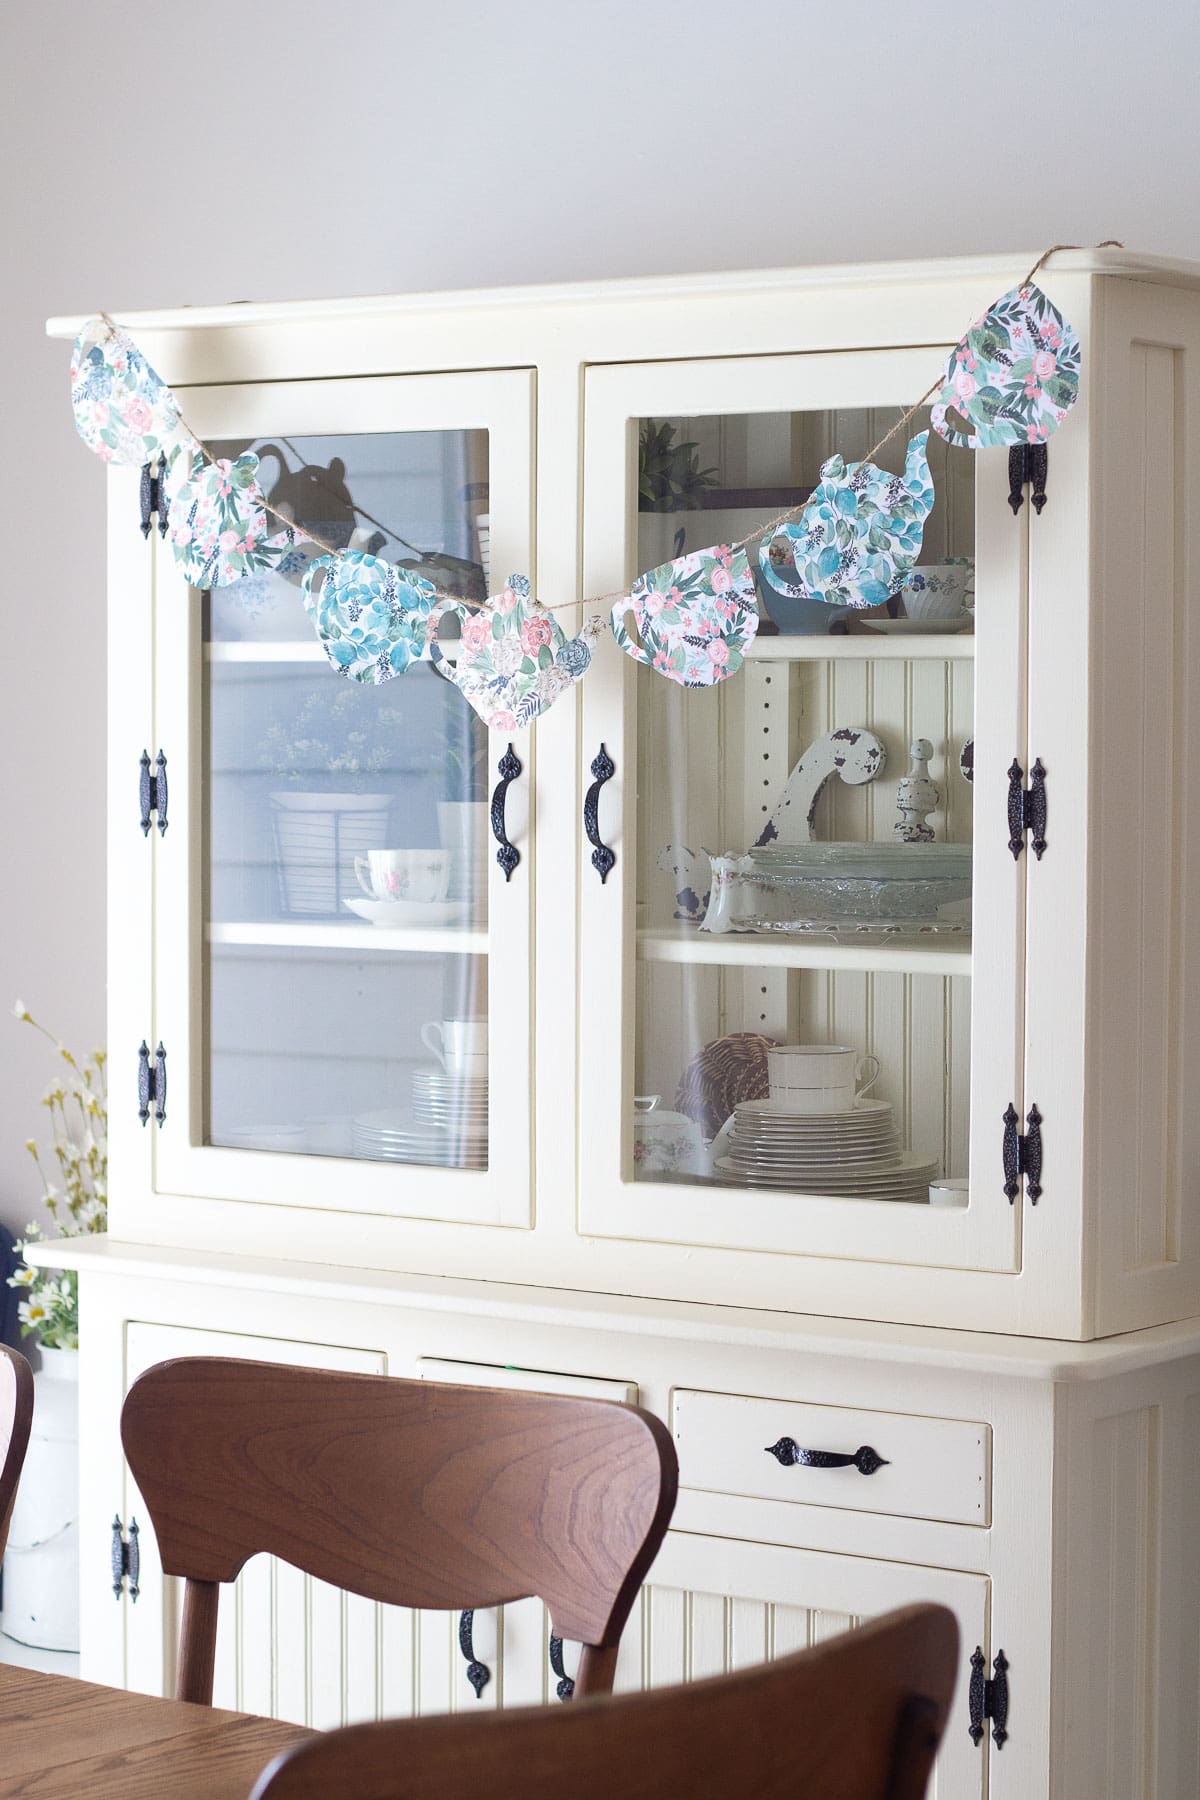
If you love easy party decorations–and budget-friendly decorations too–then you’ll love this simple tea party banner. I was planning a small tea party themed birthday party for my toddler and I wanted some simple décor that would get the theme across without spending aaaall the money on tea party decorations like these cute ones I found on Amazon. Sigh. They really are cute though.
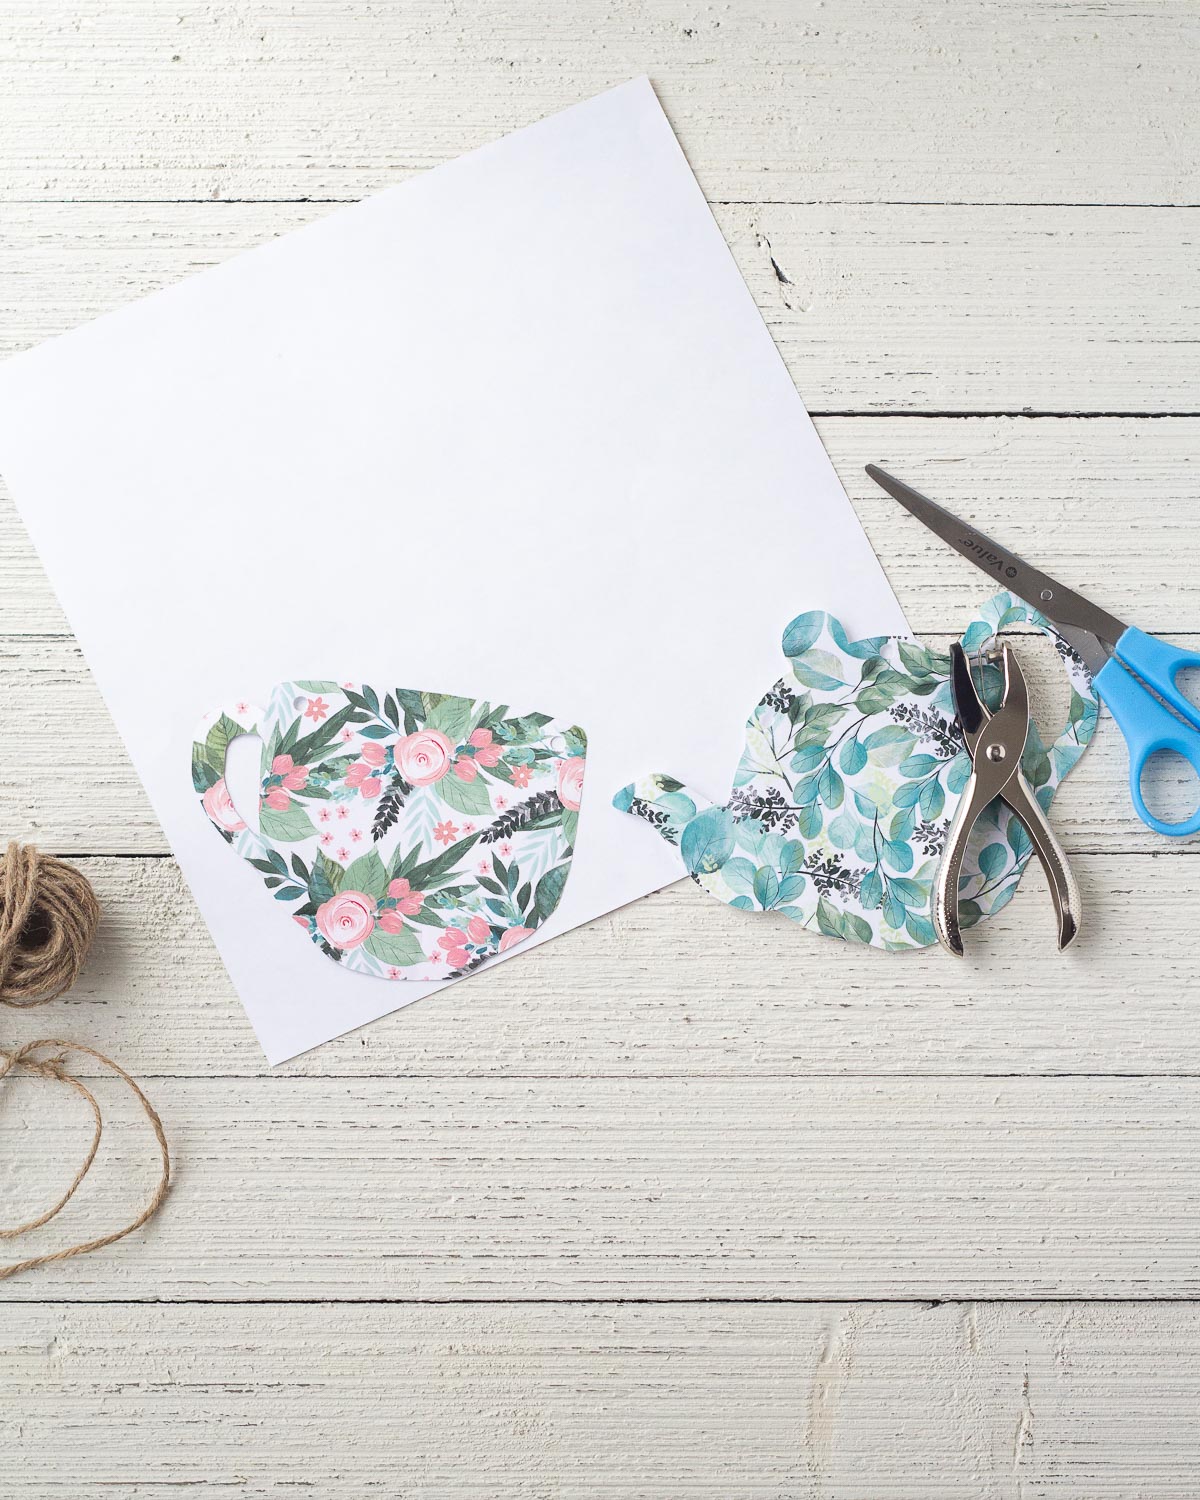
This easy tea pot garland is made by tracing out teapots and teacups onto the back of scrapbook paper and cutting them out. A few punches with a hole punch in each cut-out and a little bit of twine for the garland and you have a quick tea party banner you can easily make while watching Netflix.
Weekly Crafting Fun!
Join my list and get a weekly email with relaxing craft ideas, freebies, sewing tutorials, and more!
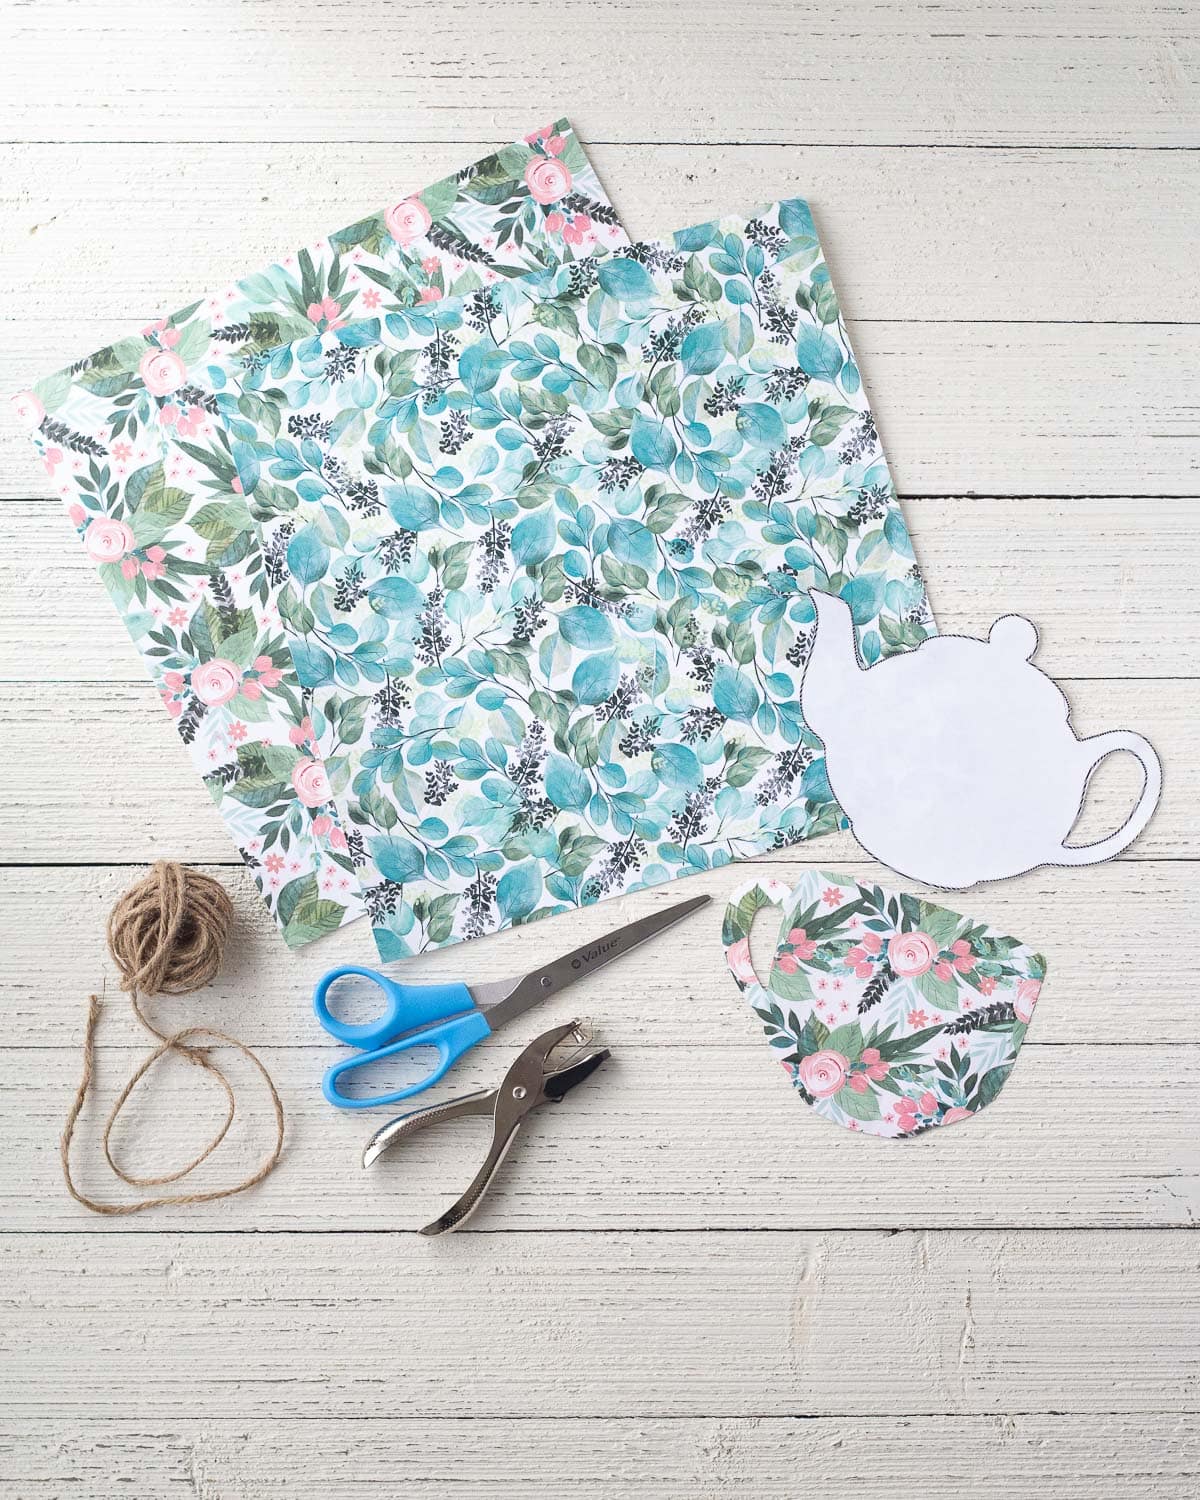
A few ideas for customizing: I just grabbed some floral scrapbook paper from my local craft store, but you could also use glittery scrapbook paper, or opt for cardstock and then add additional embellishments like stickers, lace, buttons, etc.
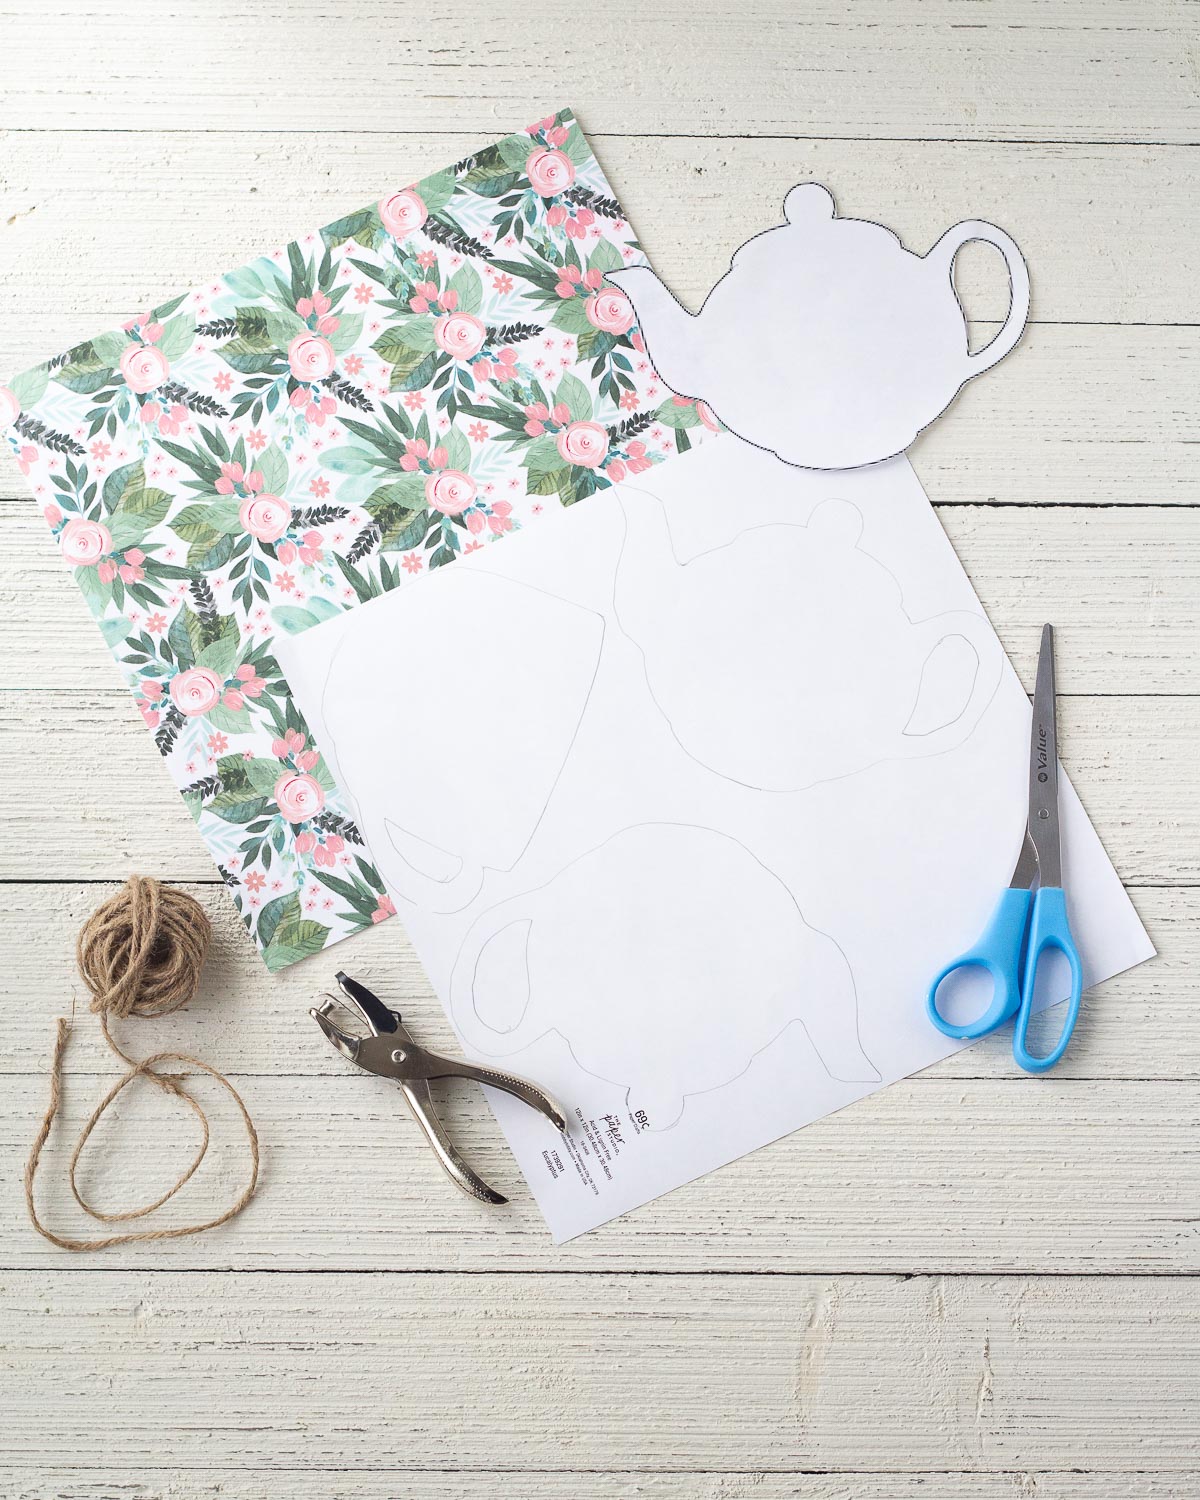
You will need a teapot template, so you can certainly freehand one, or otherwise I just used this teapot template I found here. I drew the teacup freehand to match the sizing of the teapot.
I suggest roughly cutting out the template to see how many you can fit onto a piece of scrapbook paper and then adjusting your template accordingly (the quickest way is just to adjust the print sizing percentage). Fitting about 2-4 teapots per piece of 12×12″ paper will yield a nice-sized banner.
What You Will Need to Make This Teapot Garland
- a teapot template like this one (note that it is for personal use only)
- 12″x12″ scrapbook paper (florals, glittery, or something like this would all be really fun)
- twine
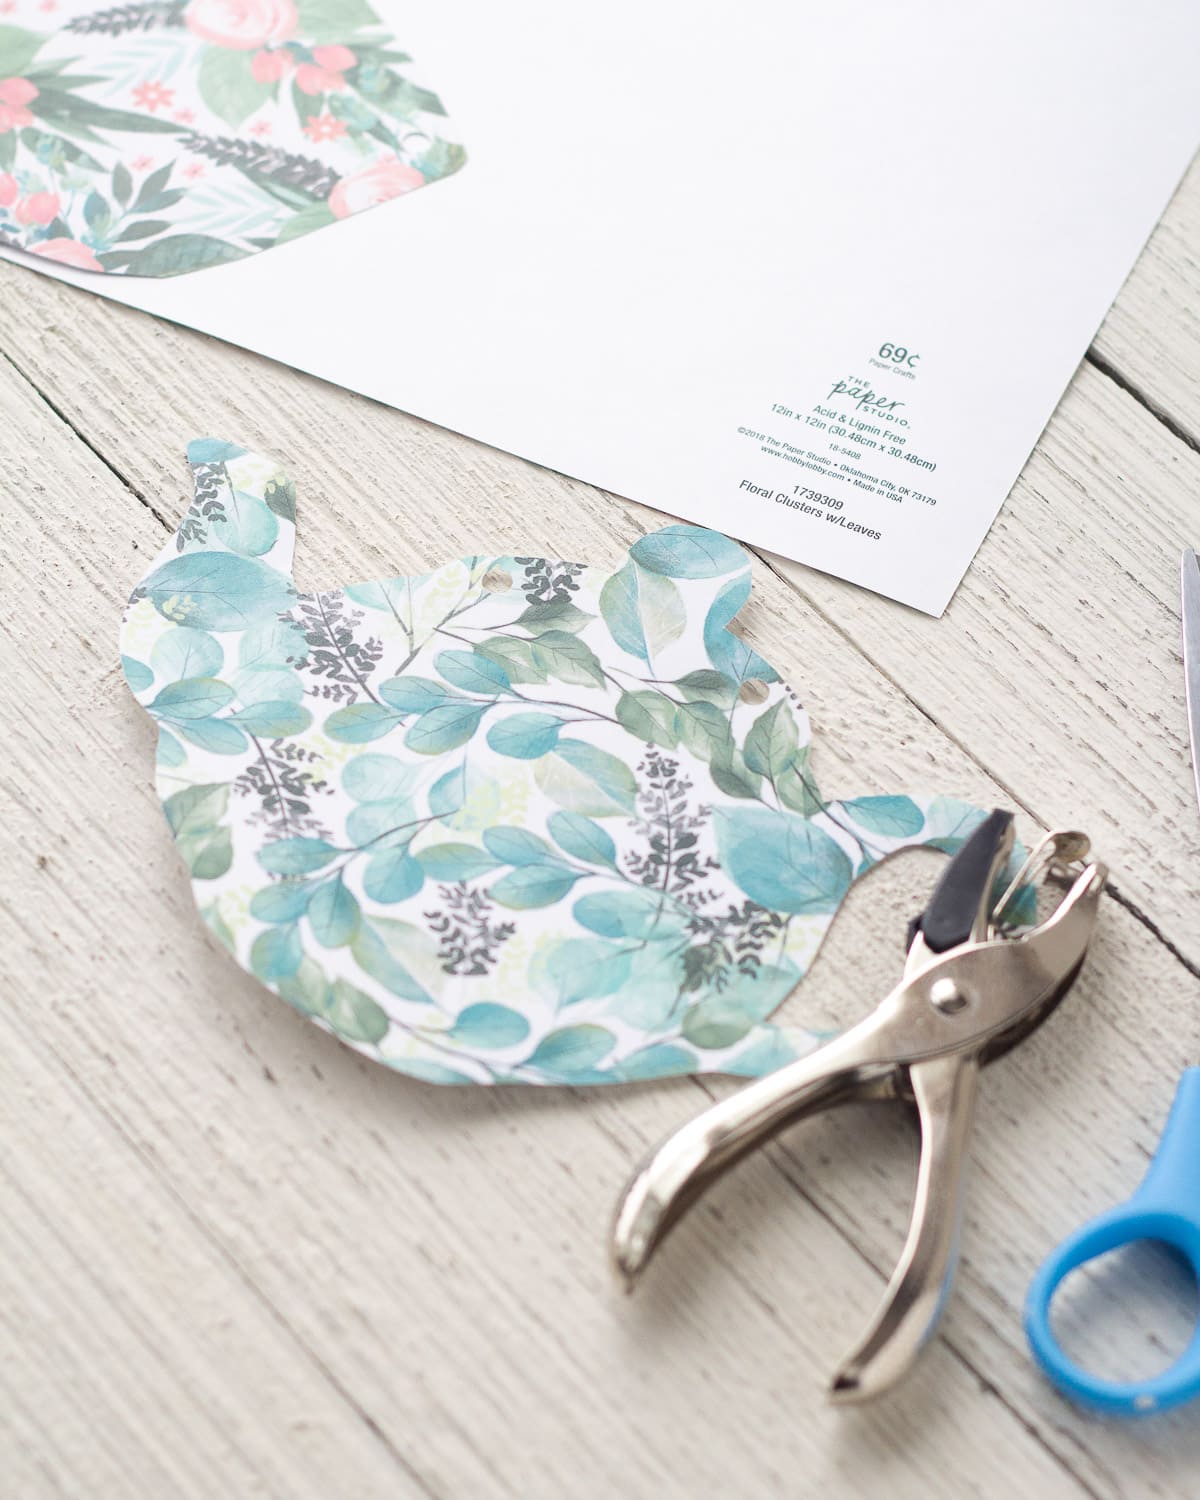
- 1/4″ hole punch
- scissors or craft knife for cutting
I also snagged these pretty floral plates from Target and added paper doilies and vintage tea cups for some fun accents that I already had on hand.
Need More Tea Party Decorations? Here Are Some of My Favorites That I Found While Shopping!

Easy Teapot Garland with Scrapbook Paper

For this paper teapot garland (perfect for your next tea party themed event) we are going old-fashioned. No cutting machine required for this easy tea party banner!
Materials
- 12"x12" Scrapbook paper (1 sheet yields about 2-4 cut-outs)
- Twine for hanging
- Templates
Tools
- Scissors and/or craft knife
- 1/4" hole punch
Instructions
- First off, if you didn't already print a teapot template, this is the one that I used. I also freehanded a simple teacup (they are faster to cut out than the teapots). Using a 6-8" template is great because you'll be able to fit at least a few onto a piece of scrapbook paper.

- Trace templates onto your scrapbook paper (see notes for how many you will need).
- Cut out pieces using scissors or a craft knife. Cutting out the inside of the teapot handle is the trickiest part, so go slow.
- Punch two holes at the top of each piece.
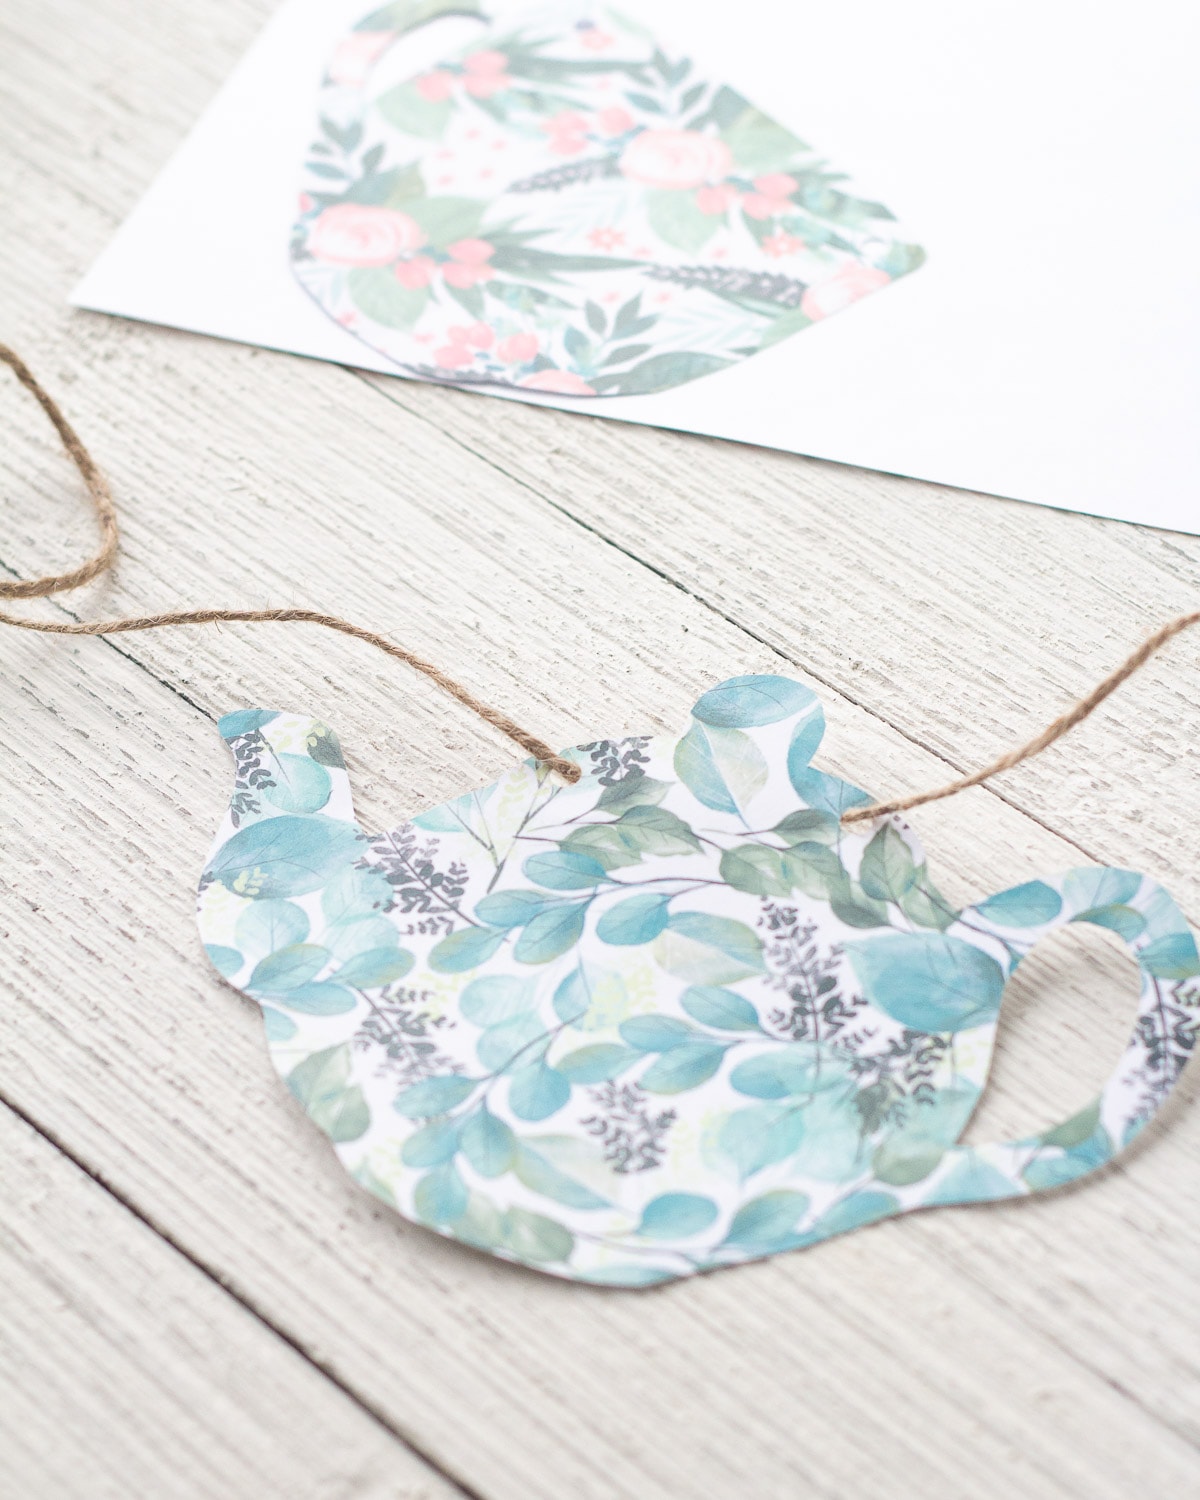
- Thread twine through the cut-outs.
- Adjust spacing for the area you will be hanging the garland, cut twine, and you are done!
Notes
Garland sizes: I used 12 cutouts for an 8' garland and 7 cutouts for a 50" garland. On each of the garlands I added 12-18" of extra twine on each side to give room for securing it and having some extra hang down on the ends.
Recommended Products
As an Amazon Associate and member of other affiliate programs, I earn from qualifying purchases.
-
 328Feet 3Ply Natural Jute Twine, KUTONTECH Arts and Crafts Jute Rope, Durable Brown Gift Wrapping, Heavy Duty Industrial Packing Materials for Gardening, Recycling, Bundling and More.
 -
Stamperia Double-sided Paper Pad 12"x12" 10/pkg-shabby Rose, 10 Designs/1 Each
-
Scrapbook Customs Themed Paper Scrapbook Kit, Burlap & Lace
-
McGill 2" Reach Punchline Hole Punch, 1/4 Inch Round, Chrome/Purple (MCG52500C)
-
Cricut TrueControl Knife Kit
-
Diecuts with a View 12 inches by 12 inches Solid Glitter Paper Stack


More Crafts from Bellewood Cottage
- 10-Minute No-Sew Paper Garland
- DIY Bias Tape Hair Bows for Babies, 7 Ways
- Washi Tape Mason Jar Gift Idea
- Vintage Milk Bottle Décor Idea for Spring
- Easy Ways to Gift Wrap with Washi Tape
Weekly Crafting Fun!
Join my list and get a weekly email with relaxing craft ideas, freebies, sewing tutorials, and more!