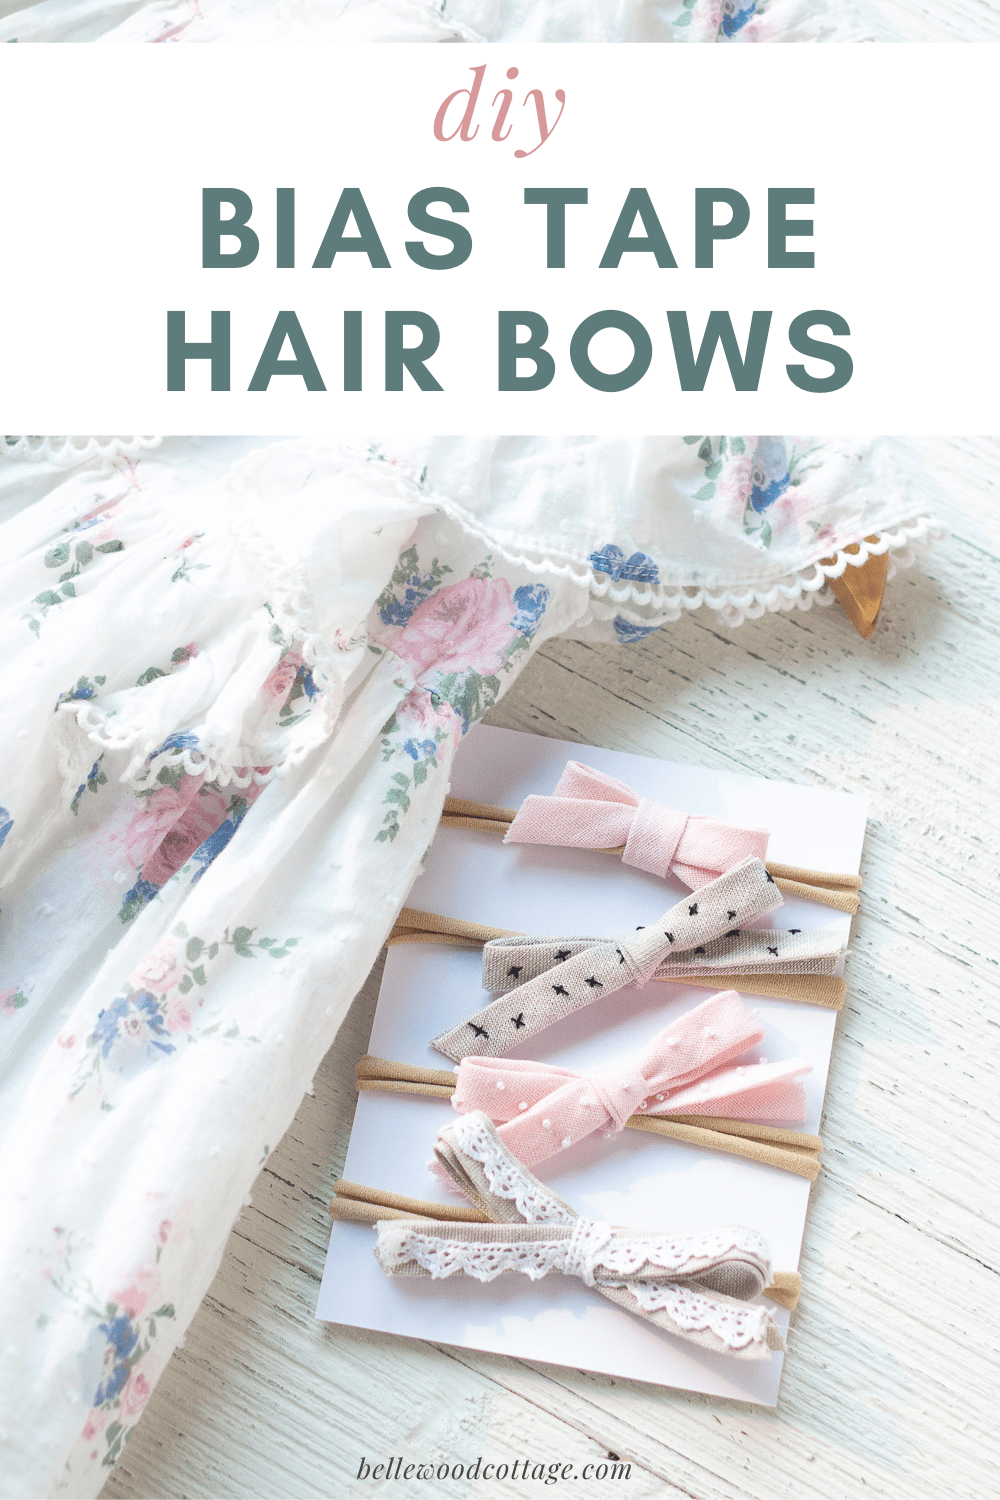
DIY Bias Tape Hair Bows for Babies, 7 Ways
These bias tape hair bows for babies are a snap to make! Learn 7 ways to DIY hair bows for your baby with this quick tutorial. You can use these bows on either headbands or clips. Plus, learn my favorite Etsy shop to purchase handmade bias tape!
Please note that this post contains affiliate links which allow me to earn a small commission when a purchase is made at no additional cost to you. As an Amazon Associate I earn from qualifying purchases. Read more here.
How Do I Make These Bows?
All of these bows are made using bias tape! If you’ve dabbled in sewing you are probably familiar with using this sewing notion, or even making your own bias tape. But, fun fact, it makes really great hair bows.
You get a chance to use all kinds of beautiful fabrics without needing to sew a thing. Unless of course, you want to add beads or embroidery, like I’ll show you how to in this tutorial.
Weekly Crafting Fun!
Join my list and get a weekly email with relaxing craft ideas, freebies, sewing tutorials, and more!
Joyful Homeschooling
Join my homeschooling email list to receive homeschooling ideas and encouragement straight to your inbox!
1/2″ wide double fold bias tape is ready to tie into bows without a pattern, hemming, or any other sewing steps. Keep reading for my favorite places to get bias tape!
Where Can I Buy Bias Tape?
While you can buy bias tape from the craft store, the real beauty of this method is that you can purchase gorgeous handmade bias tape from places like Etsy.
My favorite shop for bias tape is Bessie Pearl Textiles, and this shop carries a variety of beautiful bias tapes, like this yellow floral, this floral from Robert Kaufman, and plenty of linen bias tapes like this one. You honestly won’t be able to resist!
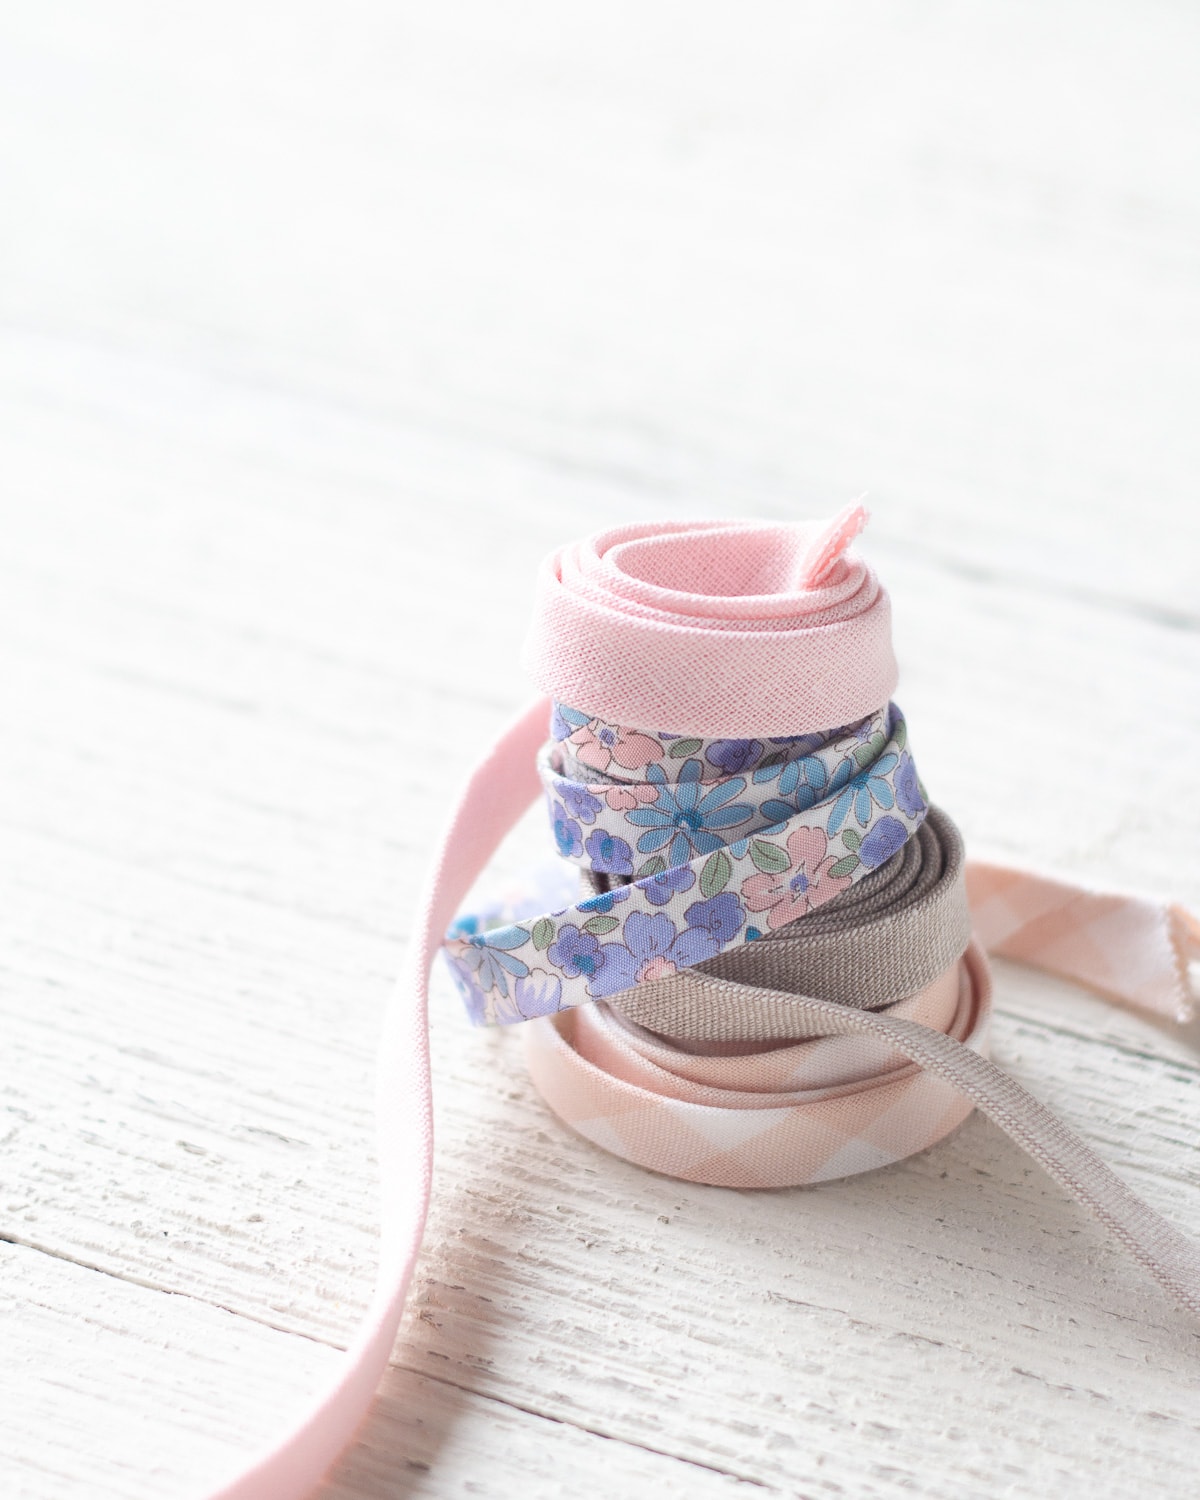
You can also make your own bias tape for these hair bows from any woven fabric you want. If you have a baby girl (or one on the way), buy some bias tape (or fabric and bias tape makers to make your own) and get crafting!
Other places to buy bias tape:
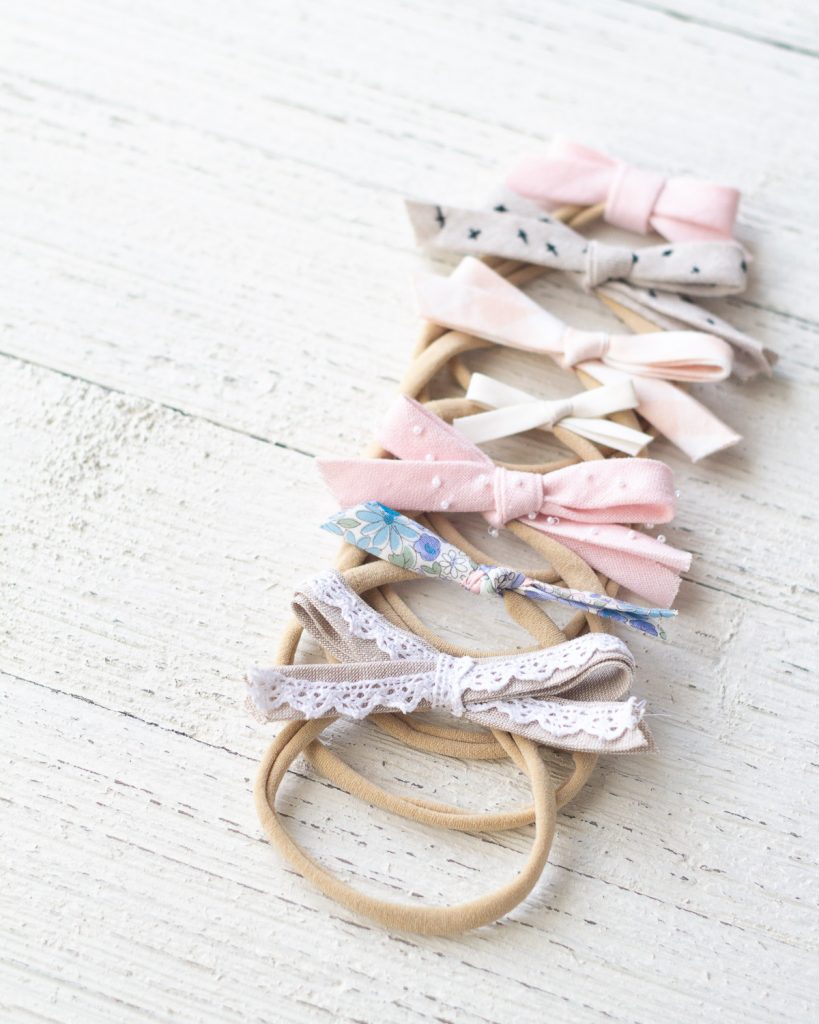
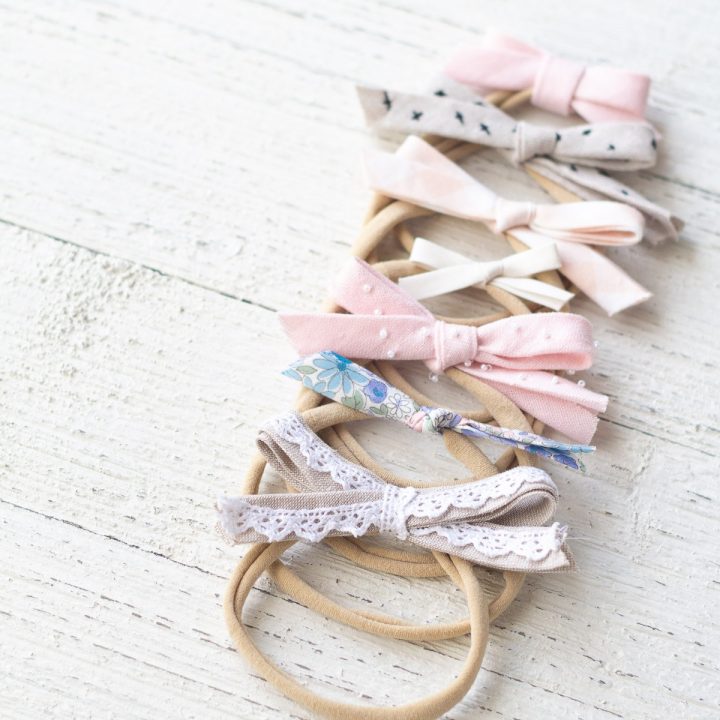
What Are the 7 Bias Tape Hair Bow Styles?
The 7 styles of bias tape hair bows I included in this tutorial are as follows. Watch the video to see each style being made!
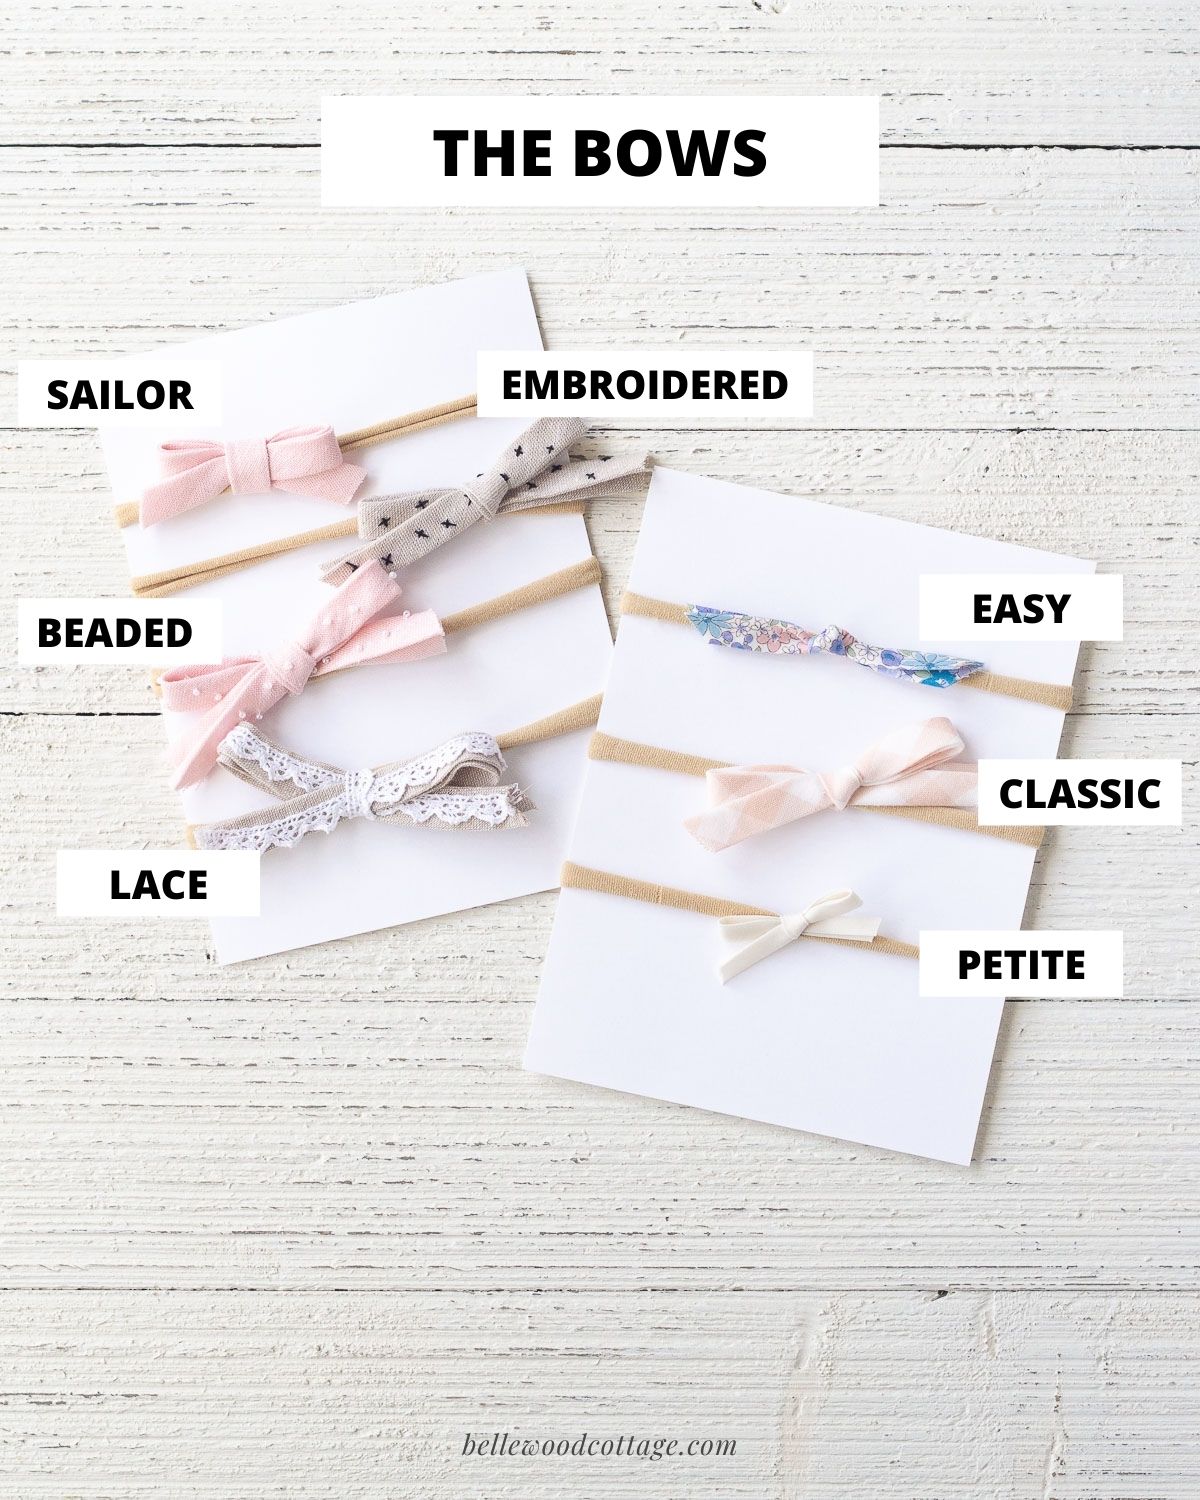
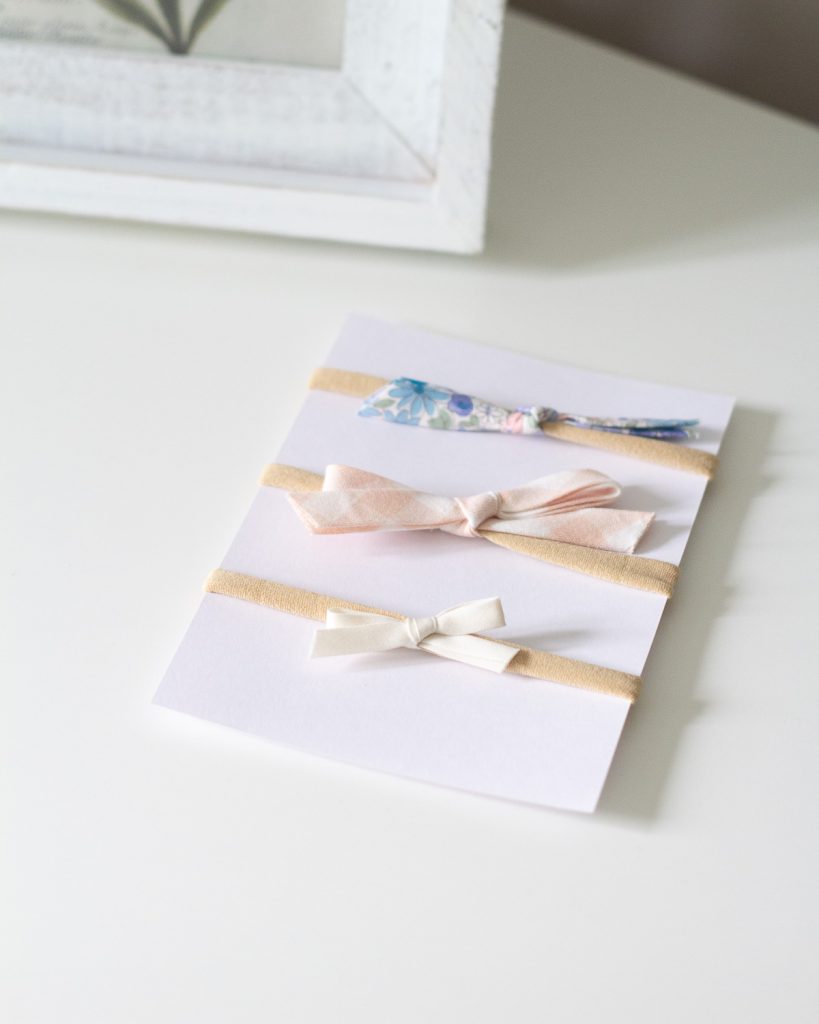
- The Easiest Bow – a short length of bias tape tied into a knot, that’s all!
- The Classic Bow – tie this bow the way you tie your shoes for the cutest little headband
- The Petite Bow – use 1/4″ double fold bias tape for a newborn bow
- The Sailor Bow – a loop of tape is secured in the middle and wrapped with more bias tape
- The Embroidered Bow – stitch tiny “x” shapes on the top layer of bias tape and tie into a classic bow
- The Beaded Bow – stitch pearl-colored seed beads onto the top layer of bias tape before tying into a classic bow
- The Lace Bow – stitch a lightweight piece of lace trim onto the bias tape before folding into a sailor bow
Supplies for Bias Tape Hairbows
If you are making the Easy, Classic, or Petite bows, this is all you will need:
- 5″-12″ of 1/2″ wide double fold bias tape per bow (see instructions)
- PETITE ONLY: 7″ of of 1/4″ wide double fold bias tape (per bow)
- Nylon Headbands (these come in a variety of colors, such as light tan, dark tan, and black)
- Hair clips (optional, only needed if you prefer clips to headbands)
Optional Supplies
Depending on which bows you will be making, you will need some of these additional supplies. You can check the parentheses below or read through the instructions at the end of the post for all the details.
- Hot glue gun (Sailor and Lace bows)
- Sewing thread (Sailor and Lace bows)
- Embroidery floss (Embroidered bow)
- Sewing or embroidery needle (Embroidered bow)
- Size 11/0 seed beads in pearl color (Beaded bow)
- Size 12 beading needle (Beaded bow)
- Fabric glue (Optional, use to secure any of the bows. I like Aleene’s Ok-to-Wash-It)
Watch the Tutorial Video
Go ahead and print the complete instruction card below, but also watch the video for a quick visual walk through of how each bias tape hair bow is made:
Are These Bias Tape Hair Bow Headbands No-Sew?
Most of these bows are no-sew. Stick to the first four bows in the tutorial if you want to avoid any sign of a sewing needle. It’s easy to create different looks just by tying the bows with a variety of patterned fabric bias tape.
On the other hand, if you are up for a bit of (super simple) embroidery or adding beads or lace to your bias tape bows then try tackling the other bows too. If you’re comfortable with a needle and thread you’ll be just fine.
Can I Use Clips Instead?
Absolutely! I love using simple nylon headbands, but before you know it, that tiny newborn will be a toddler and you’ll be setting aside headbands for clips and hair binders.
Clips are an adorable style for little girls and it’s easy to make these bias tape hair bows and attach them to clips (find packs of blank clips from Amazon like these or crafts stores).
Alright, let’s get crafting!
Bias Tape Hair Bows - 7 Ways
Learn how to make cute headbands for your baby girl with bias tape and nylon headbands. I’ll show you 7 different bias tape hair bow styles to make, plus give you the sources for my favorite headband-making supplies!
Materials
- If you are making the Easy, Classic, or Petite bows, this is all you will need!
- 5"-12" of 1/2" wide double fold bias tape per bow (see instructions)
- PETITE ONLY: 7" of of 1/4" wide double fold bias tape (per bow)
- Nylon Headbands (these come in a variety of colors, such as light tan, dark tan, and black)
- Hair clips (optional, only if you don't want to use headbands)
Tools
- Depending on which bows you will be making, you may need some of these additional supplies. You can check the parentheses below for all the details.
- Hot glue gun (Sailor and Lace bows)
- Sewing thread (Sailor and Lace bows)
- Embroidery floss (Embroidered bow)
- Sewing or embroidery needle (Embroidered bow)
- Size 11/0 seed beads in pearl color (Beaded bow)
- Size 12 beading needle (Beaded bow)
- Fabric glue (Optional, use to secure any of the bows. I like Aleene’s Ok-to-Wash-It)
Instructions
Tip: Check out my video for quick and easy video tutorial for these bows!
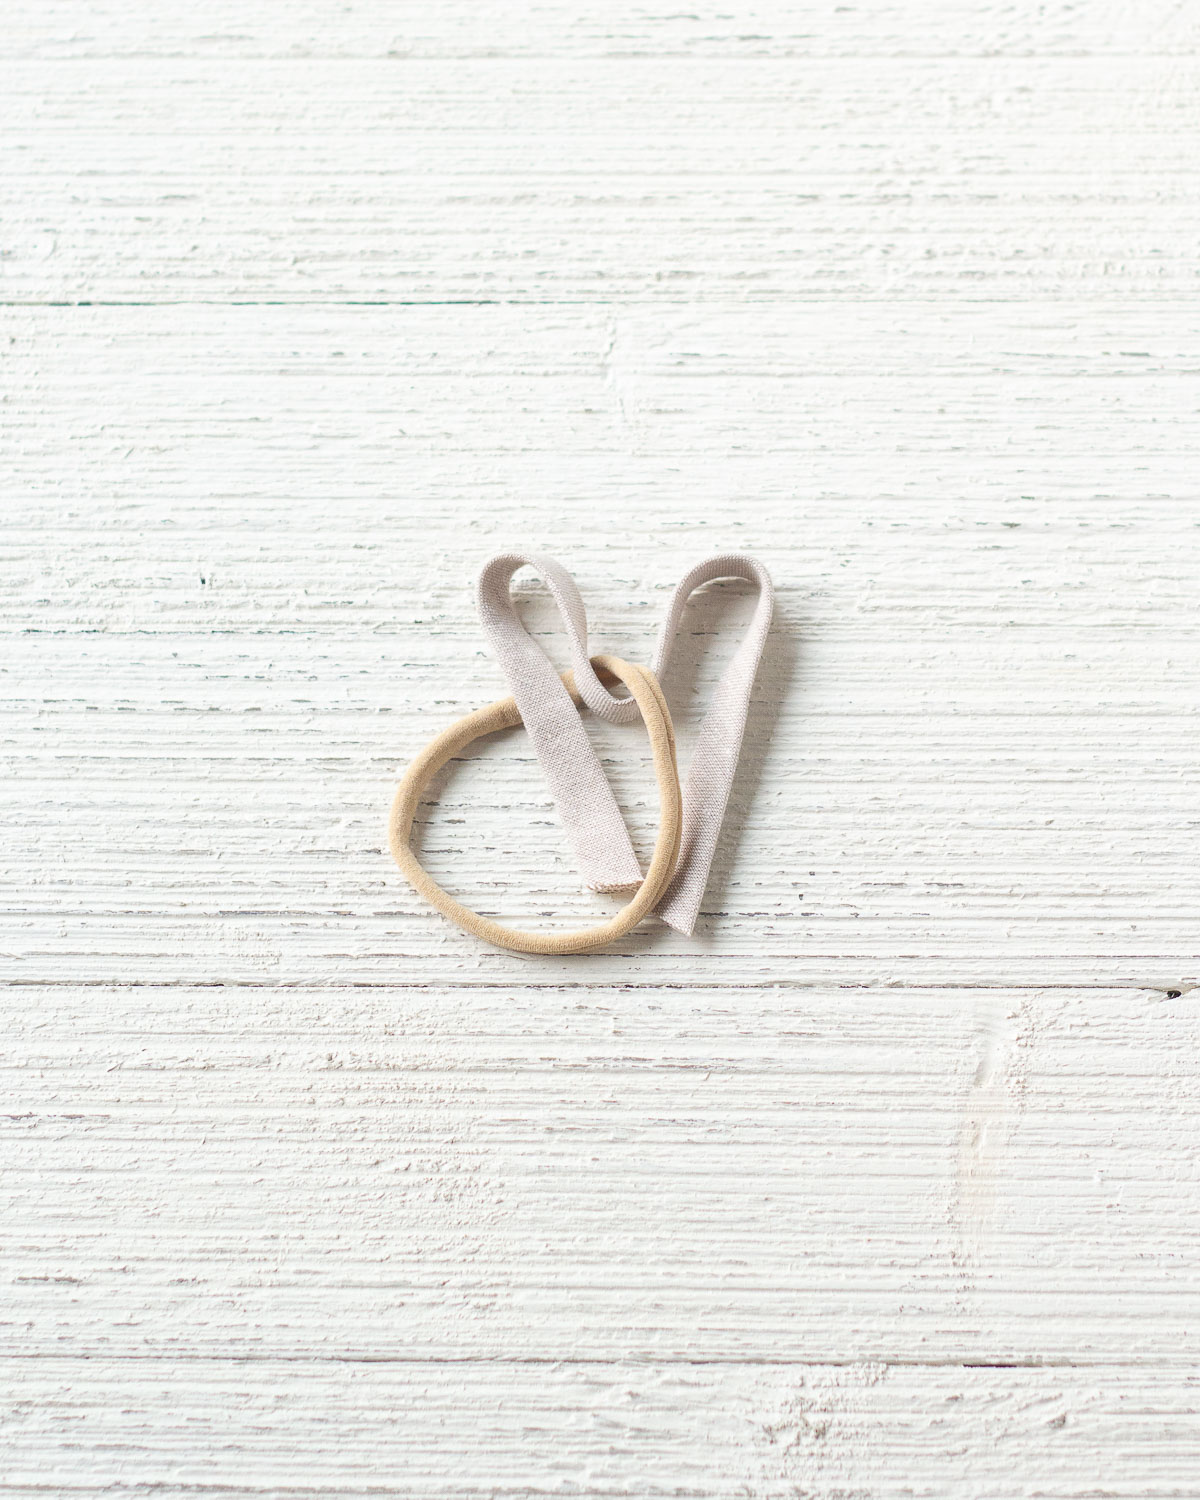
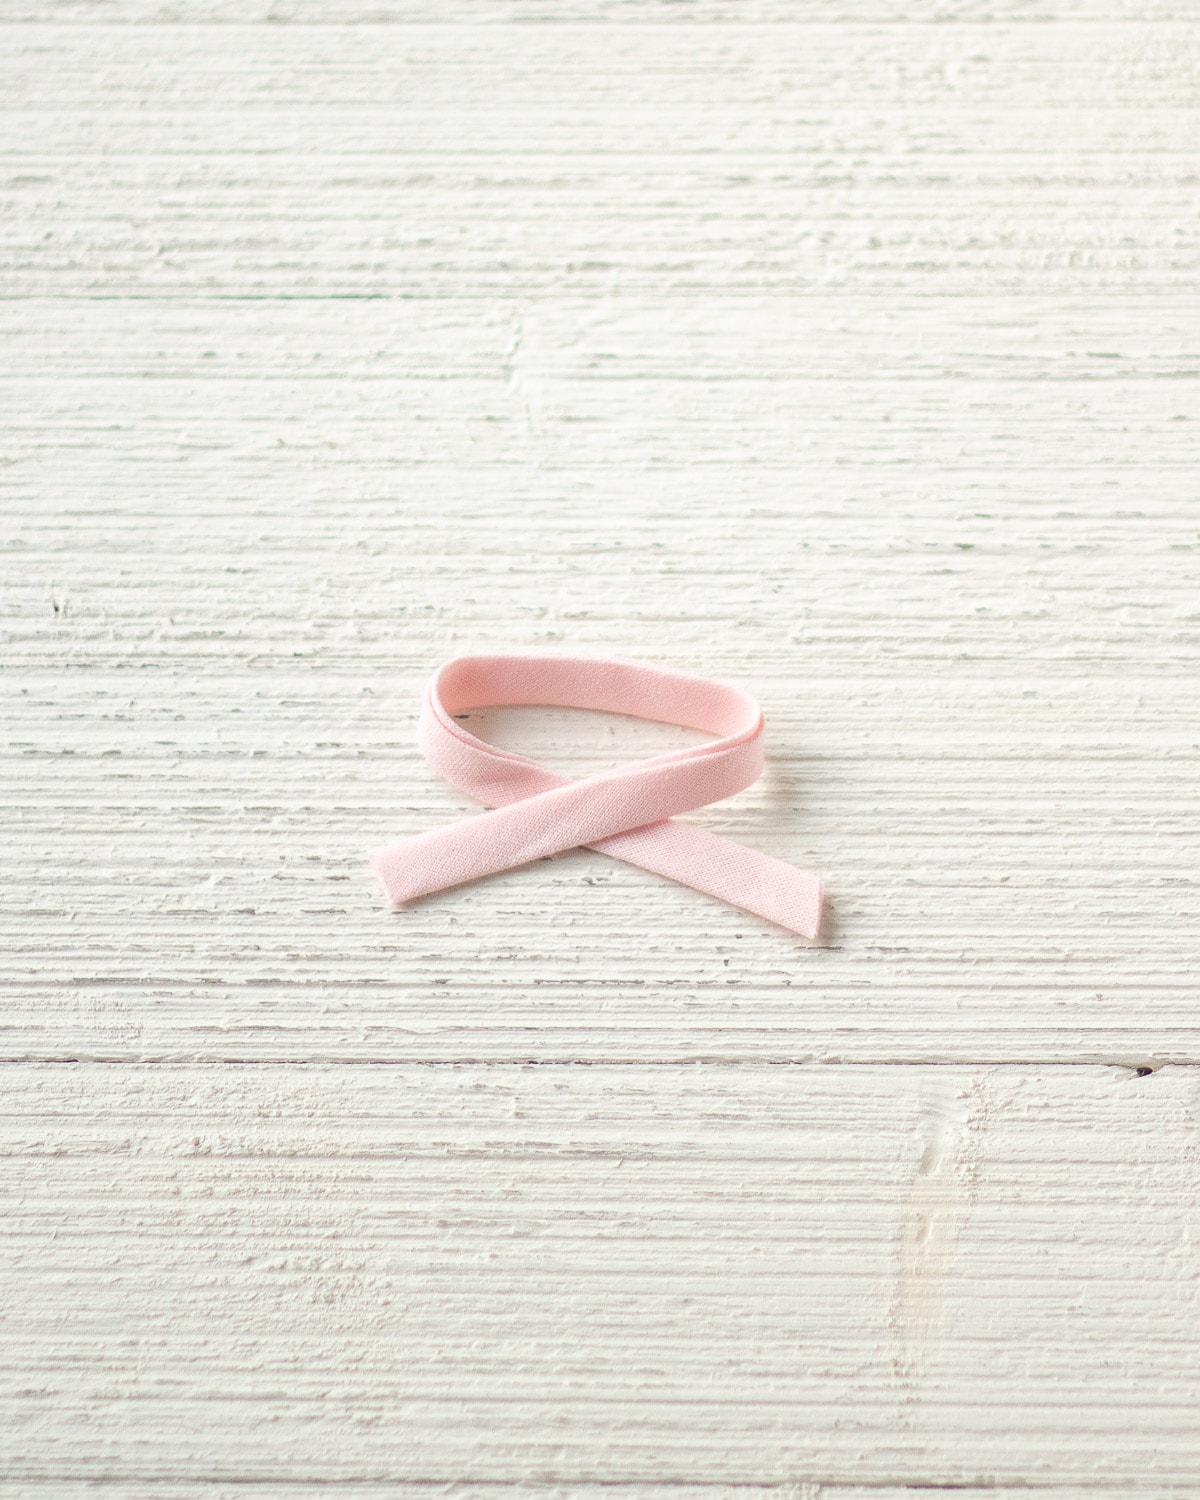
#1 The Easiest Bow
- Cut a 5" strip of 1/2" double fold bias tape. Tie around a nylon headband and trim edges as desired.
#2 The Classic Bow
- Cut a 12" strip of 1/2" double fold bias tape. Make two bunny ears/loops (just like tying a shoe!) and insert a nylon headband in between. Tie the bias tape into a bow with the headband in the middle. Tighten and adjust the bow as needed and trim edges.

#3 The Petite Bow
- Perfect for newborns, this bow is just like the classic, but you will start with 1/4" double fold bias tape instead of 1/2". Cut a 7" strip and form two bunny ears/loops, slipping a nylon headband in between. Tie the bow, adjust the knot as needed and trim edges.
#4 The Sailor Bow
- Plug in a glue gun. Cut 7.5" of 1/2" double fold bias tape. Make a loop and cross the tails over each other. Cut a 12" length of sturdy sewing thread and wrap it around the center of your bow. Tie it on each side a couple of times and then tie a double knot and trim the threads. Wrap a 3" segment of bias tape around the bow to hide the center. Fold edges under and hot glue (or use fabric glue and craft clips) to secure. Careful of your fingers! You can also sew it closed instead of gluing.
 Cut a 12" length of sturdy sewing thread and wrap it around the center of your bow. Tie it on each side a couple of times and then tie a double knot and trim the threads.
 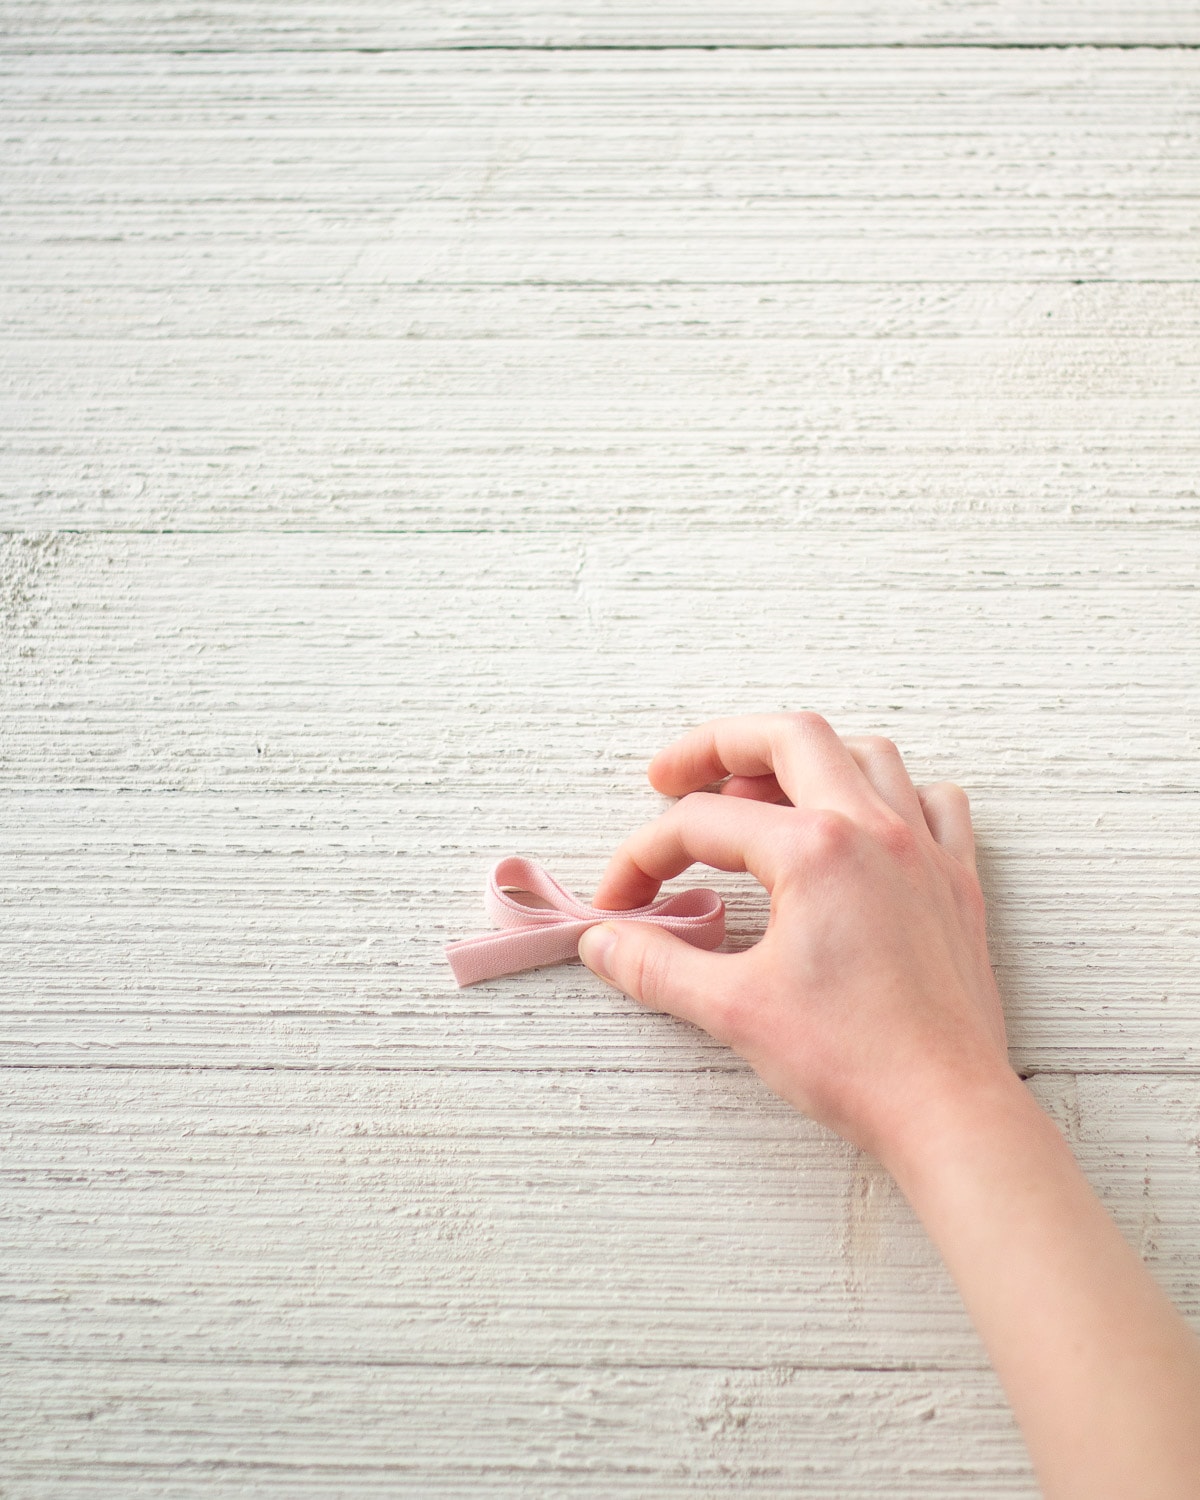 Wrap a 3" segment of bias tape around the bow to hide the center. Fold edges under and hot glue (or use fabric glue and craft clips) to secure. Careful of your fingers! You can also sew it closed instead of gluing.
#5 The Embroidered Bow
- Cut a 12" section of 1/2" double fold bias tape. Grab about 20" or so of embroidery floss and separate out 2 strands. Thread a needle with these and stitch small "x" shapes up the middle sections (one layer only) of the bias tape. Start 1/2" in from the edge of the tape to allow for some excess to trim later on. replace floss as needed. Knot thread, weave in ends, and trim once finished embroidering.
- Tie the bias tape into a classic bow: Make two bunny ears/loops and insert a nylon headband in between. Tie the bias tape into a bow with the headband in the middle. Tighten and adjust the bow as needed and trim edges.
#6 The Beaded Bow
- Cut a 12" section of 1/2" double fold bias tape. Grab about 30-40" or so of sewing thread, and thread through a small beading needle. Double it up and knot. Start 1/2" in from the edge of the tape to allow for some excess to trim later on. Pick up size 11/0 seed beads with your needle and stitch them in randomly (or however you like) across the middle sections (one layer only) of the bias tape. Knot thread, weave in ends, and trim once finished embroidering.
#7 The Layered Bow
- Plug in a hot glue gun (or use fabric glue). This bow can get a little thick, so use a lightweight lace. Cut a 12" piece of both lightweight lace trim and 1/2" double fold bias tape. Layer the lace trim onto one side of the bias tape and tack down with a needle and thread (use a sewing machine if you like, just unfold the bias tape before running it through the machine).
- Make a loop and cross the tails over each other. Cut a 12" length of sturdy sewing thread and wrap it around the center of your bow. Tie it on each side a couple of times and then tie a double knot and trim the threads.
- Wrap a 2" segment of the same lace you used to layer the bow around the bow to hide the center. Fold edges under and hot glue (or use fabric glue) to secure. Careful of your fingers! You can also sew it closed instead of gluing.
All Bows
If you want to really secure your bows to the headbands (or clips), feel free to use some small dots of fabric glue. I like Aleene's Ok-to-Wash-It Fabric Glue. I suggest spot clean only (or very gently handwash) for these bows, but I like the added security of the strong glue! 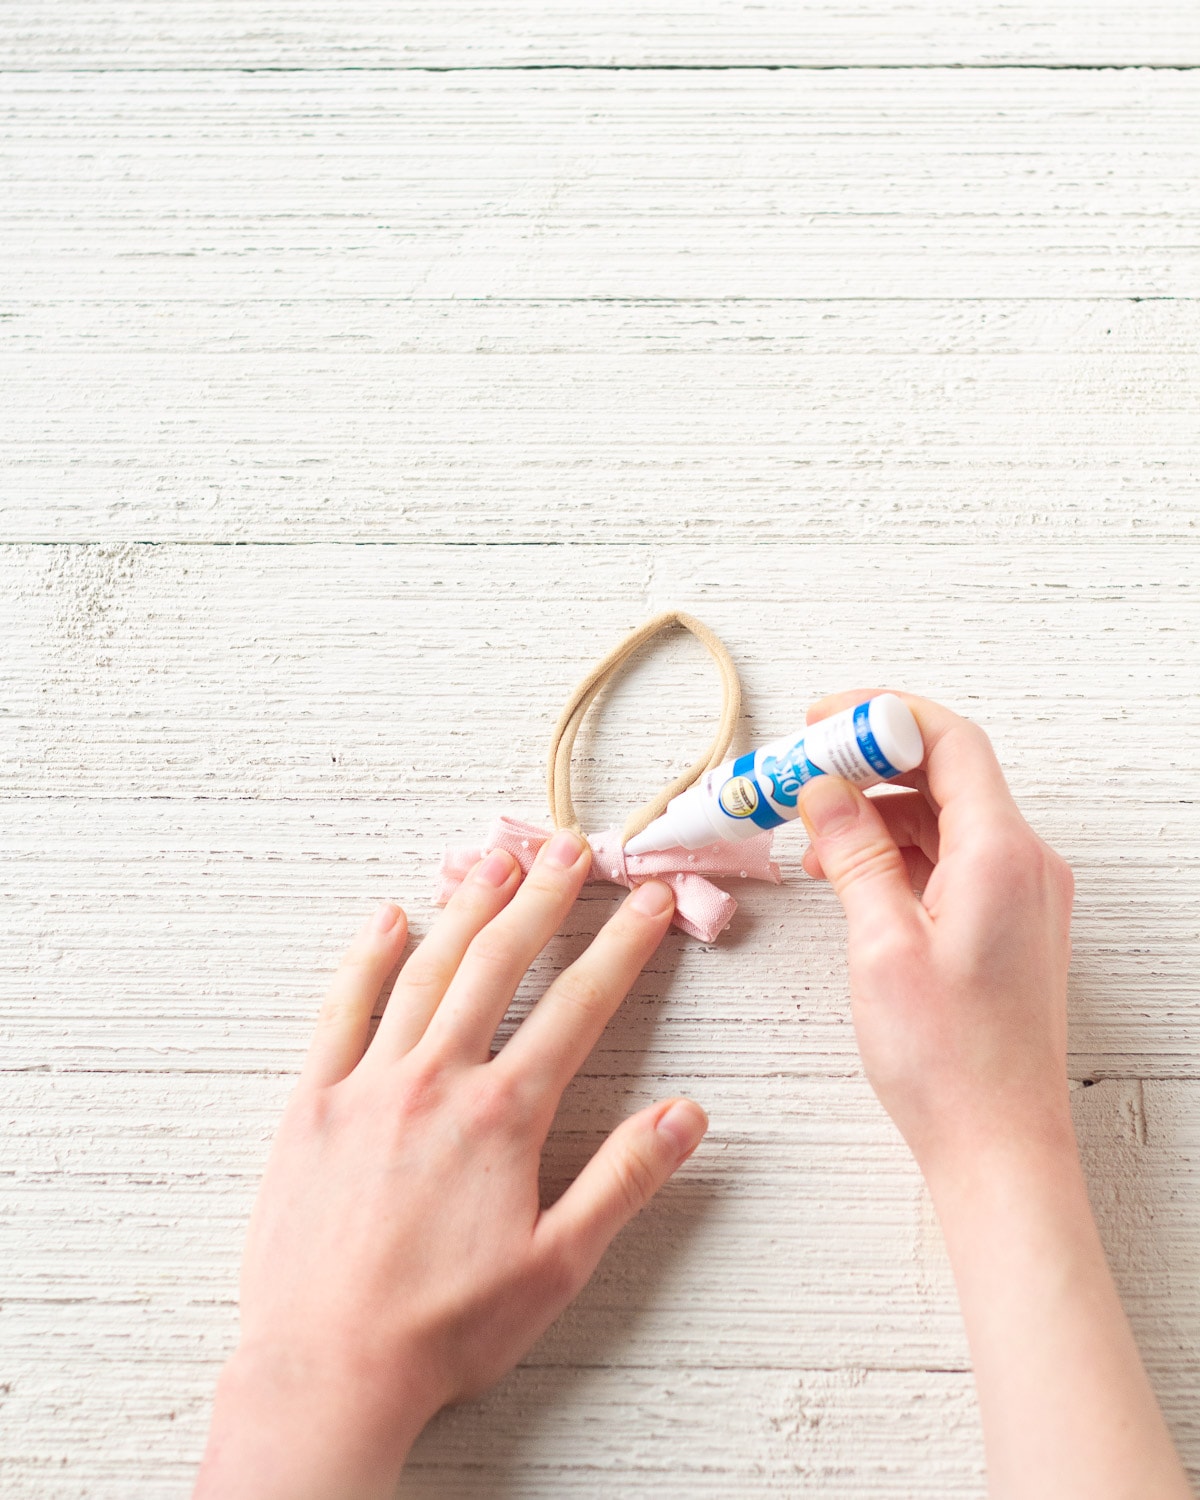
Notes
When cutting the bias tape, use angled cuts for the prettiest bows!
Don't forget to watch the video! These bias tape hair bows are so easy to create, and it will make a lot more sense watching the quick video segment for each design.
Securing the bows: If you want to keep your bows super secured to the headbands, feel free to add a small dab of hot glue or fabric glue on the back of the bow between the bow and headband.
Have to say it: please don't allow children or babies to wear bows/headbands unsupervised!

More From Bellewood Cottage
- Do I REALLY Need a Solly Baby Wrap? Solly Baby Wrap Review
- Newborn Baby Essentials Checklist for Months 0-3
- 10-Minute No-Sew Paper Garland
- How to Sew Baby Bibs from Kitchen Towels
- How To Bleach Drop Cloths Successfully
Weekly Crafting Fun!
Join my list and get a weekly email with relaxing craft ideas, freebies, sewing tutorials, and more!