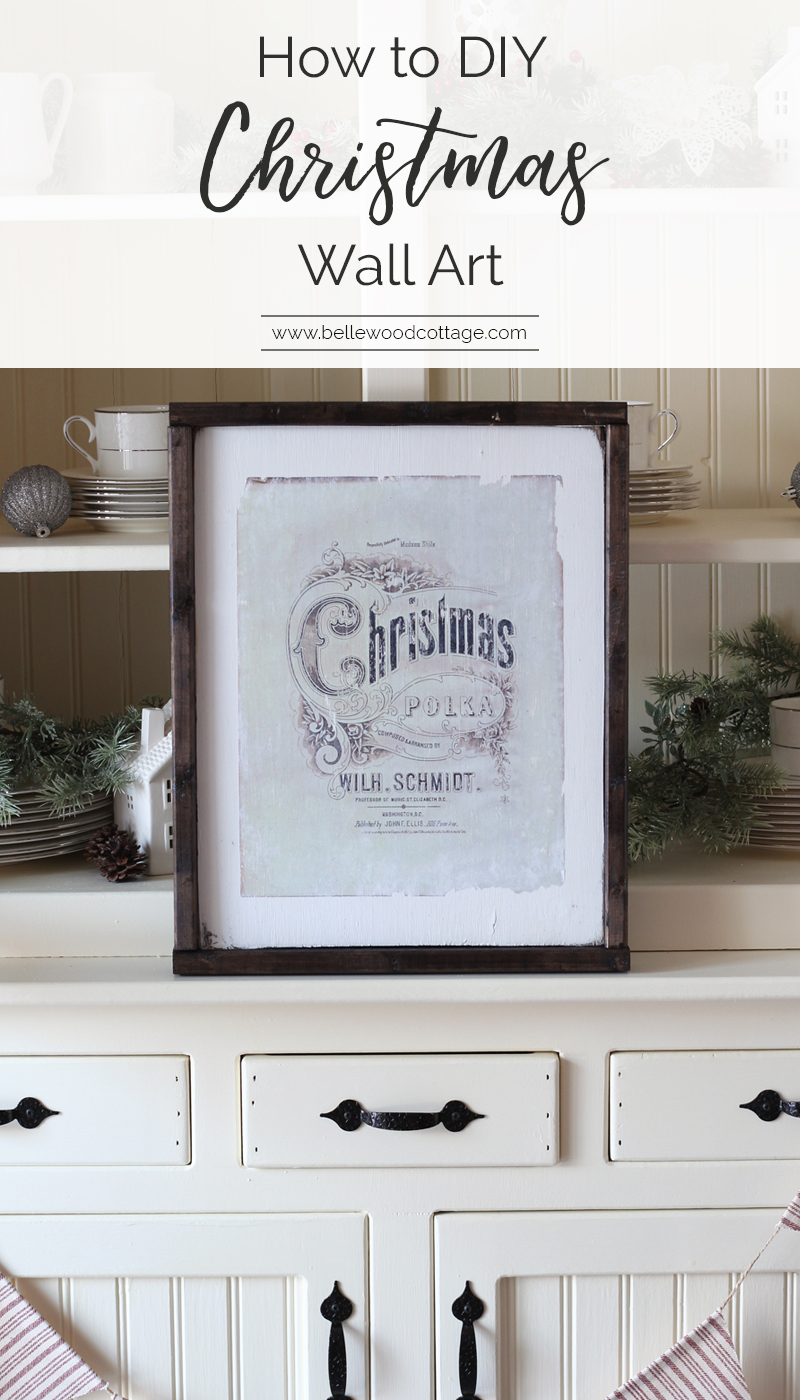
How to DIY Christmas Wall Art
This year, I finally felt like I had my Christmas decor act together. I mean, it was nothing that Martha Stewart would exclaim over, but it was relatively cohesive and pretty. And guess what? We did it all within our (tiny) budget. A combination of being patient and waiting for stellar sales + buying during prior years’ post-Christmas decor clearance + DIYing my own decor was a winning solution.
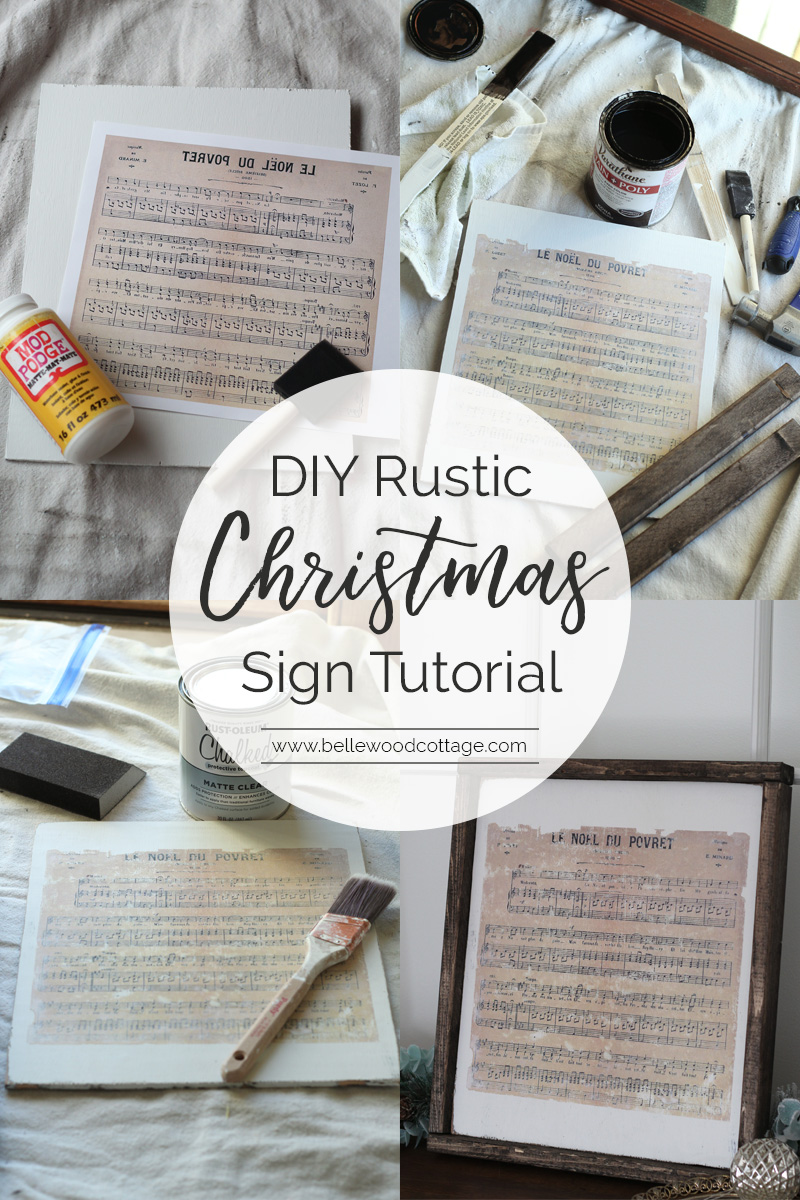
There is something so satisfying about a good DIY project. This year, one of my favorites turned out to be the Christmas wall art I made. If you follow the blog, you probably caught this earlier tutorial I posted on how to use Modge Podge and some basic supplies to make a rustic Christmas sign. Well, I couldn’t stop at one, so I didn’t!
Weekly Crafting Fun!
Join my list and get a weekly email with relaxing craft ideas, freebies, sewing tutorials, and more!
I’ll give some details below if you would like to make your own DIY Christmas wall art, but for the full tutorial head over to this post for step-by-step instructions and photos.
How to make DIY Christmas Wall Art
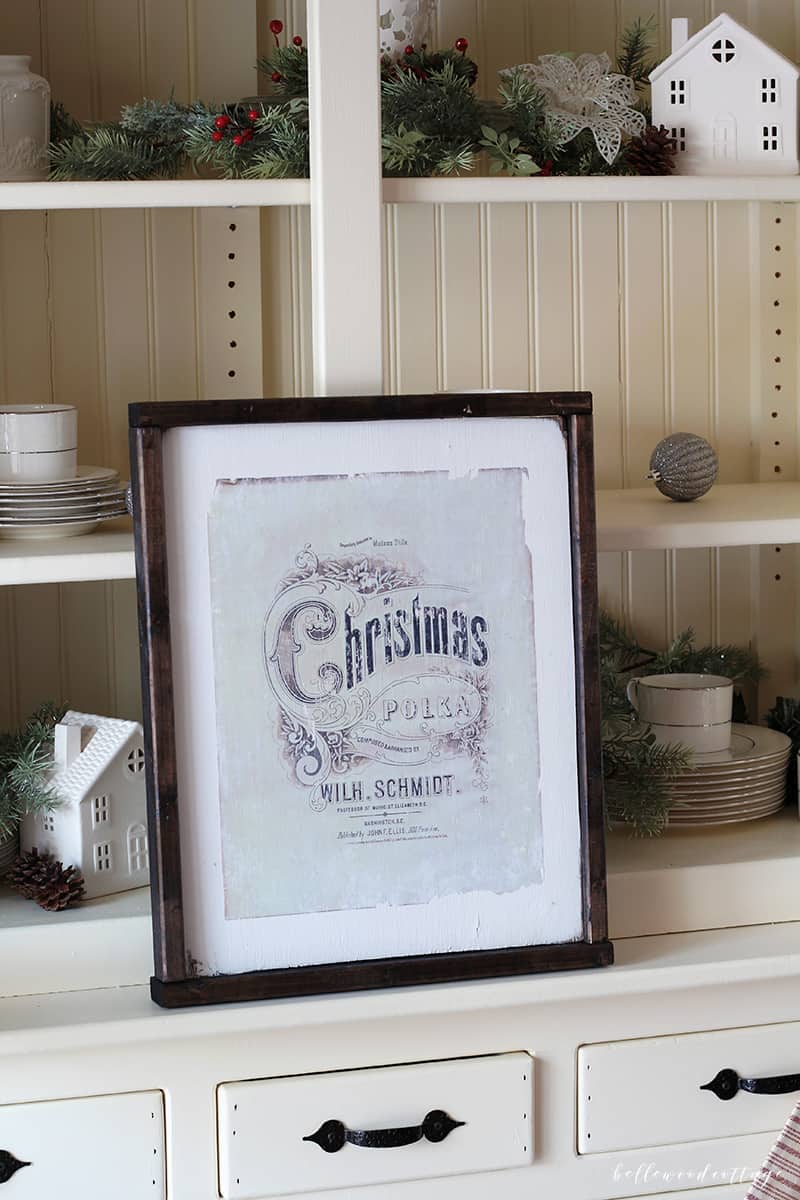
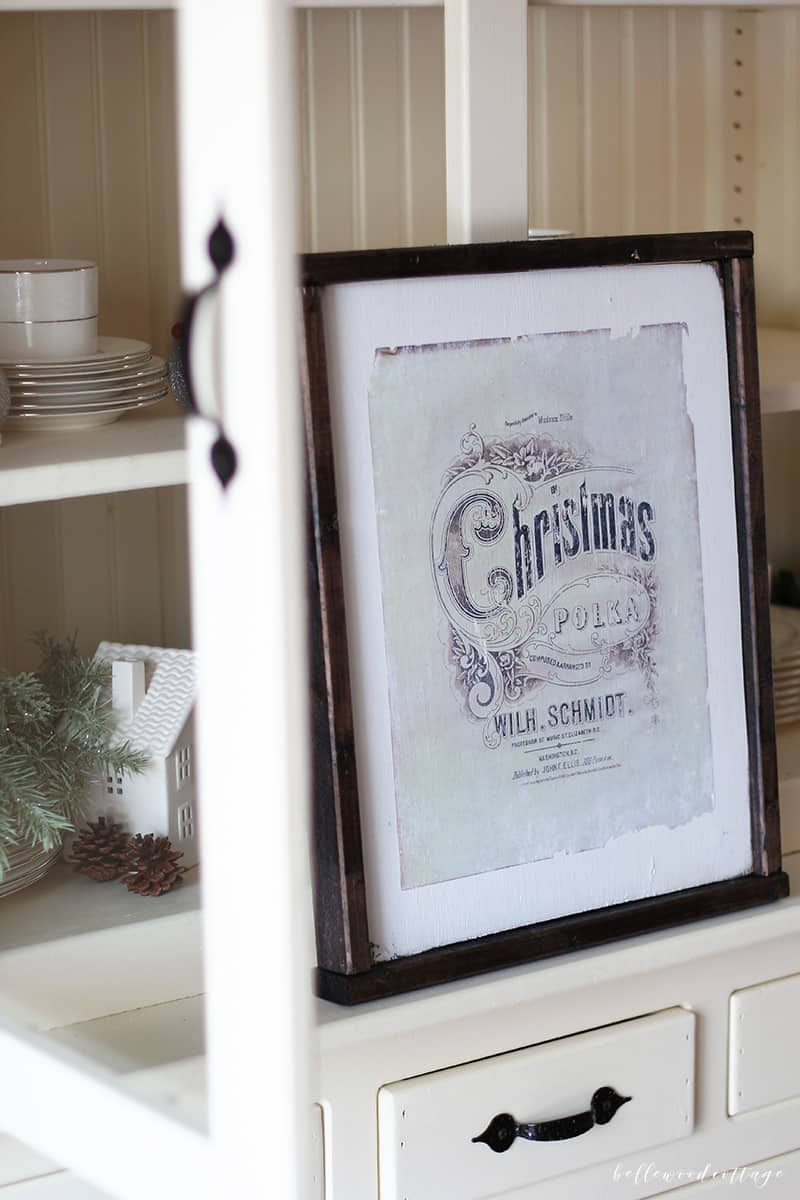
To start, you’ll need a reversed photocopy of your desired image. I used this gorgeous image from The Graphics Fairy.
Then it’s a simple process from there. Essentially, you will “paint” the printed side of your photocopy with Modge Podge and then apply that to a piece of plywood or similar. After it dries, the top layers of paper are gently rubbed off with a sponge revealing the image underneath. A little sanding, some polycrylic to seal, and it’s basically done. To frame my Christmas wall art, I just used furring strips cut to size and stained.
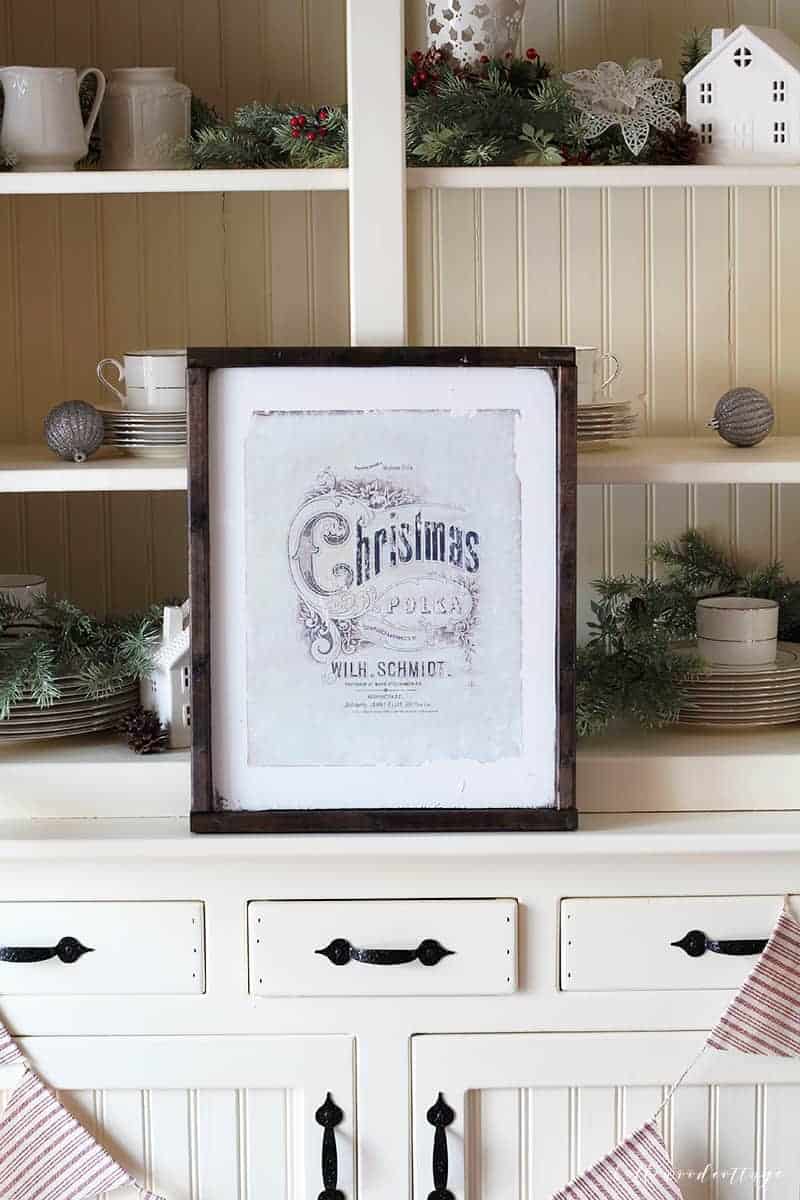
To make the furring strips easier to attach, I glued supports to the back of the sign, as shown. Then I just added wood glue around all the edges and secured the furring strips. And done!

Since I already had most of the supplies on hand, I was able to make these signs without spending really anything. Just the money for copies, a couple furring strips, and Modge Podge. That’s what I call budget-friendly.

I’d love to hear how you decorate for Christmas on a budget! Any favorite DIYs you have made? Share with me in the comments!
More Christmas Inspiration from Bellewood Cottage
Weekly Crafting Fun!
Join my list and get a weekly email with relaxing craft ideas, freebies, sewing tutorials, and more!


It is suggested to get a crisp transfer of the image using a laser printed copy. The quality of the transferred image will be sharper with fewer gaps. It will also help if the sponge is slightly wet. The water will help soften the sponge material. Rub a dry sponge and then a moistened one on the back of your hand to feel the difference. Rub lightly. Too hard, and the image may get removed as well. You can always repeat the process to remove more bits of paper, but you can’t add image back if the process removes a portion. When you THINK you are finished let it dry completely. Then repeat until there are no pieces of paper visible on the dried finished product. A clean rag from an old T-shirt can also be used instead of the sponge. Making this with an ink-jet printer would help with the aged look to give it the vintage feel to it