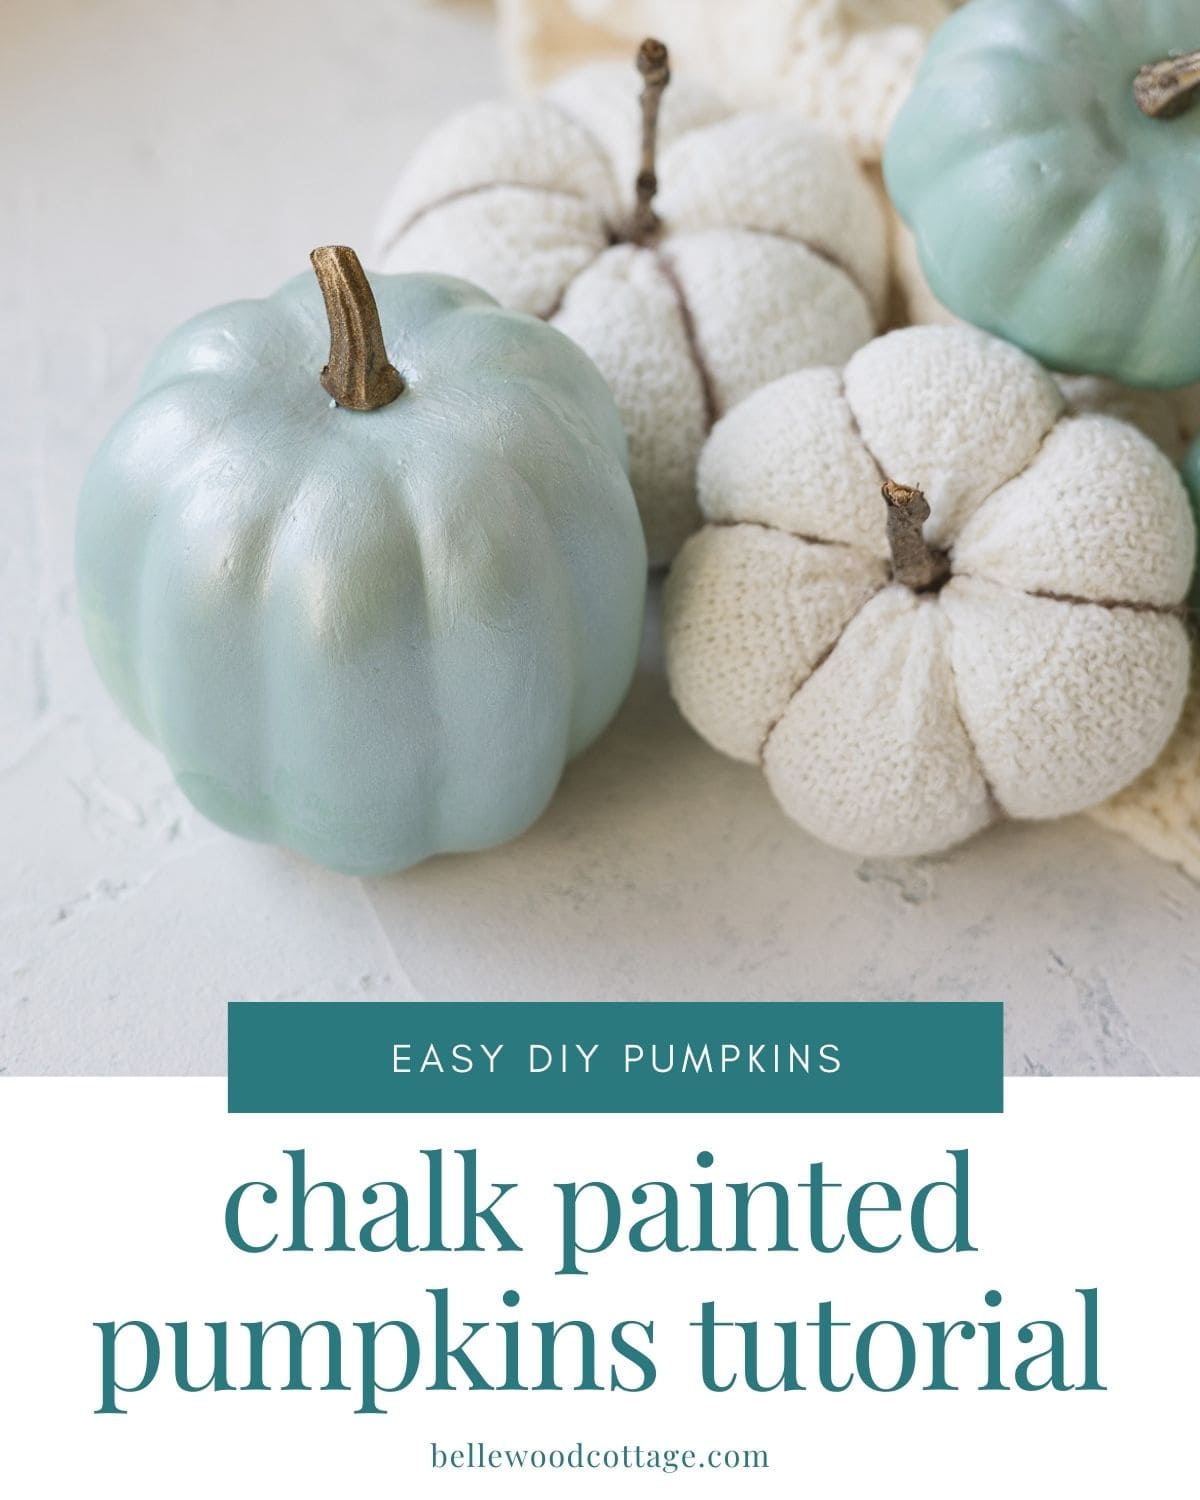
Chalk Painted Pumpkins Tutorial + VIDEO
Spruce up faux pumpkins with this chalk painted pumpkins tutorial. I’ll share tips for working with the pumpkins and paint, plus how to achieve a shimmery finish if desired. Fill your fall home décor with these festive DIY pumpkins!
Please note that this post contains affiliate links which allow me to earn a small commission when a purchase is made at no additional cost to you. As an Amazon Associate I earn from qualifying purchases. Read more here.
Fall and winter are definitely my favorite times of year for crafting projects. There’s just something about settling down with a hot beverage (mm, chai lattes) and a relaxing craft. Glamming up these faux pumpkins is the perfect craft for a fall afternoon.
First, head to the craft store and find their faux pumpkin selection. OR, snag some pumpkins from your décor stash–color doesn’t matter since we will be painting these pumpkins with opaque chalk paint. A great time to refresh old fall décor that you’ll fallen out of love with!
Weekly Crafting Fun!
Join my list and get a weekly email with relaxing craft ideas, freebies, sewing tutorials, and more!
Don’t miss the video & step-by-step printable instructions at the end of this post!
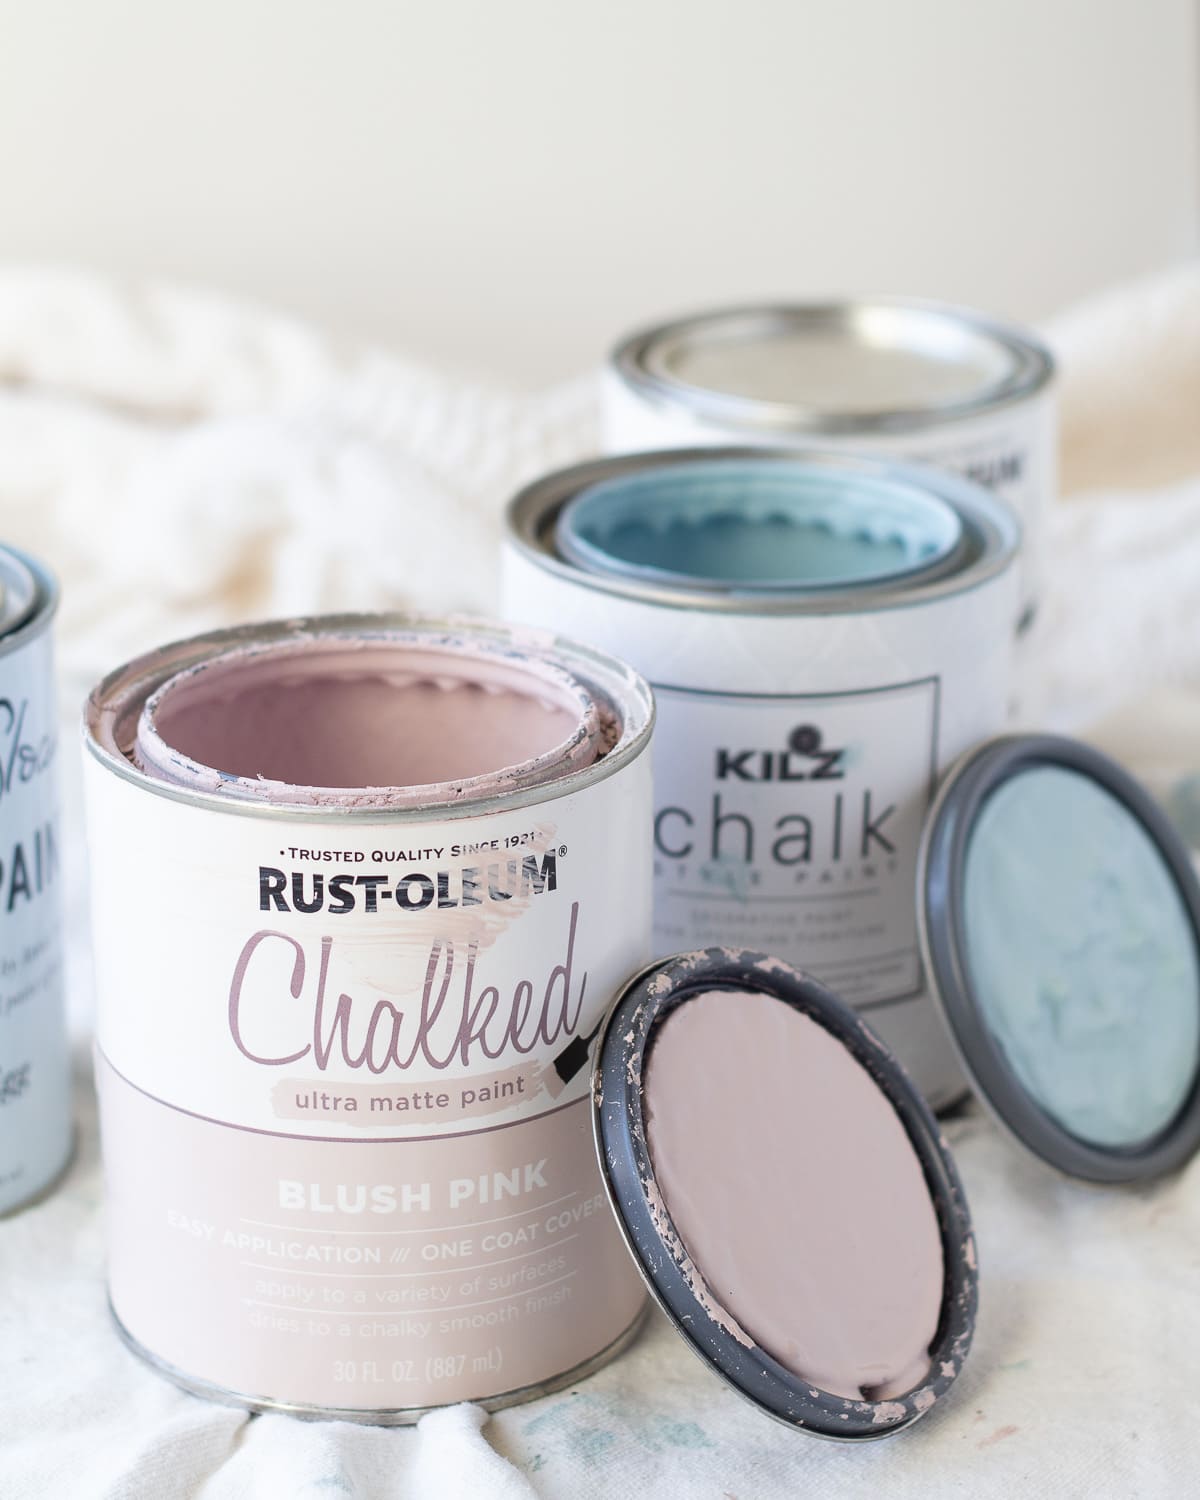
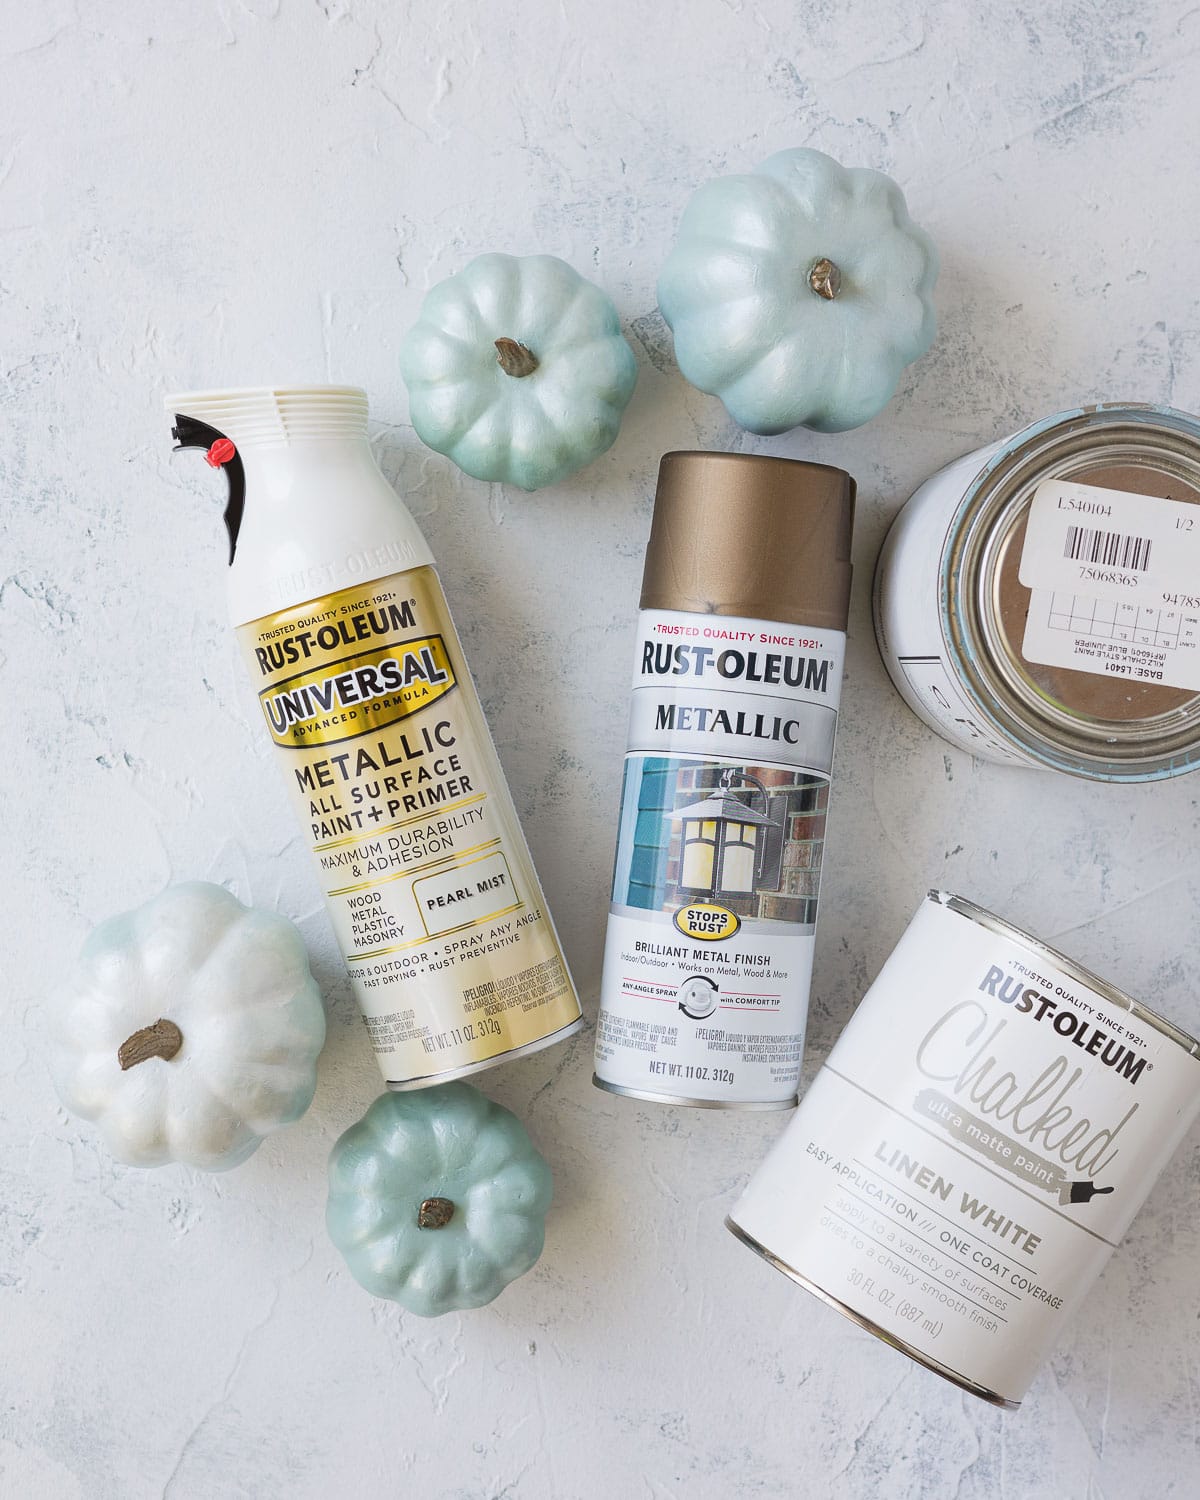
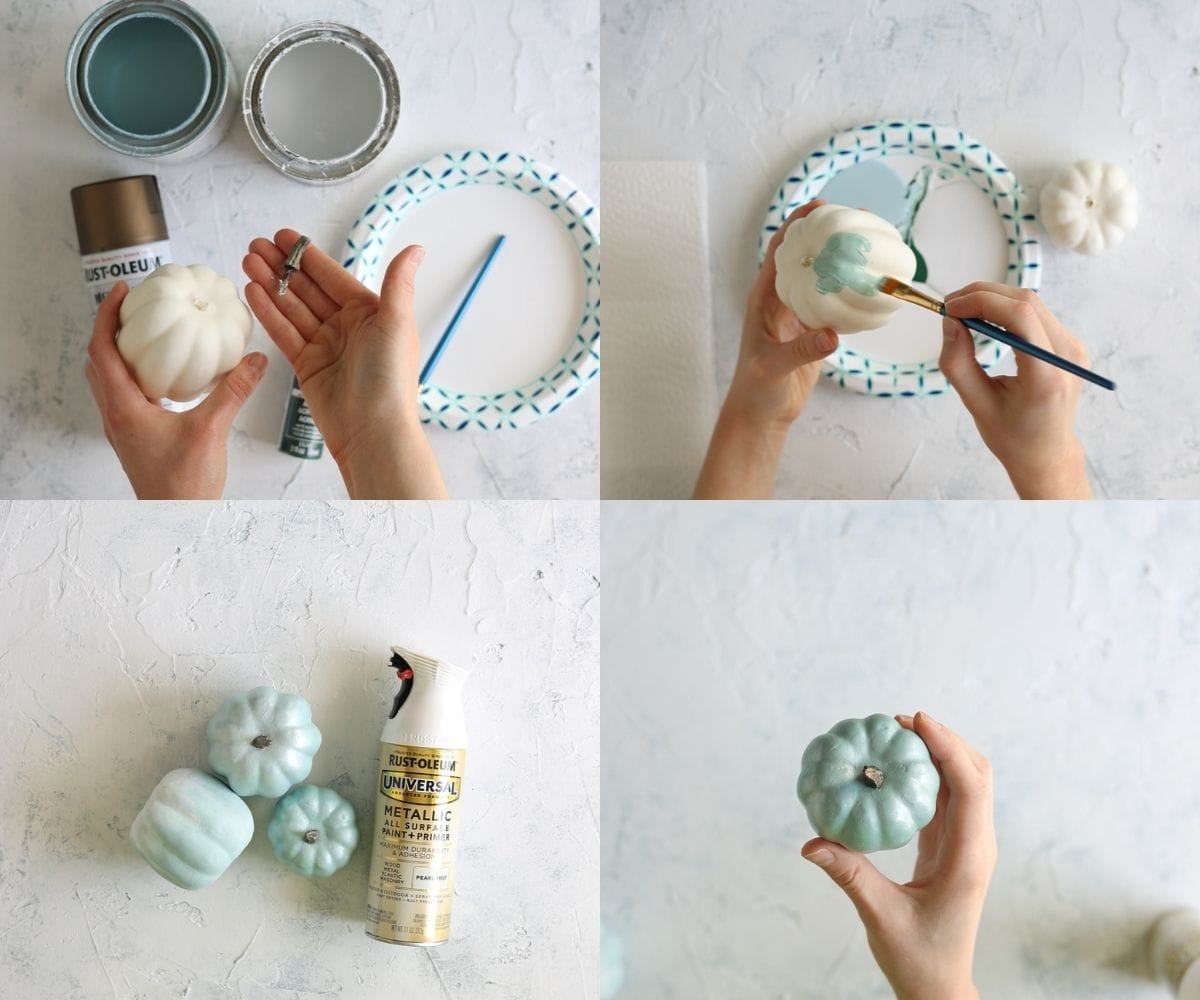
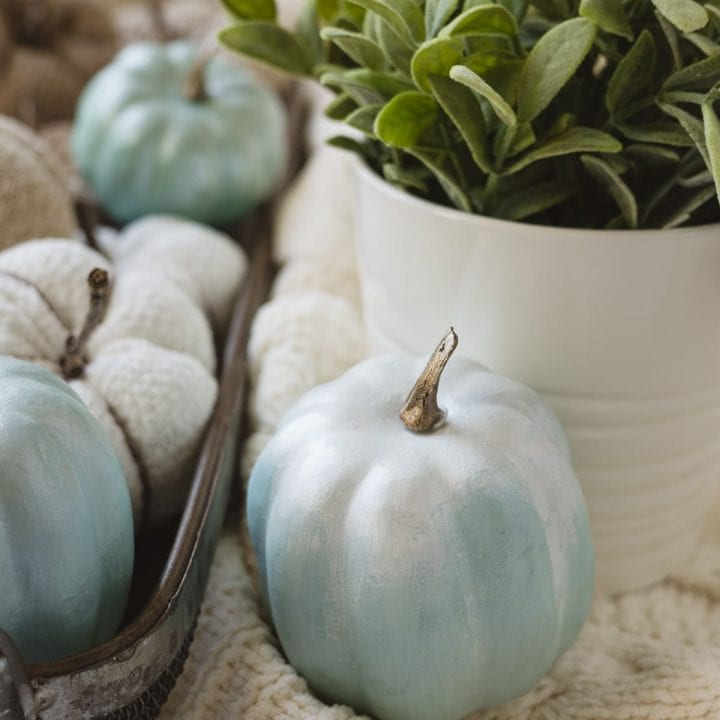
To totally transform these pumpkins, I started with a set of basic white foam faux pumpkins from Hobby Lobby. I spray painted the stems with metallic paint and then rounded up my collection of chalk paints.
I wanted the pumpkins to have more character/dimension, so I poured a plate of blue, white, and green paints and mixed as I painted. After I finished, they just needed a little something extra. I ended up using a shimmery spray paint to provide a little sparkle.
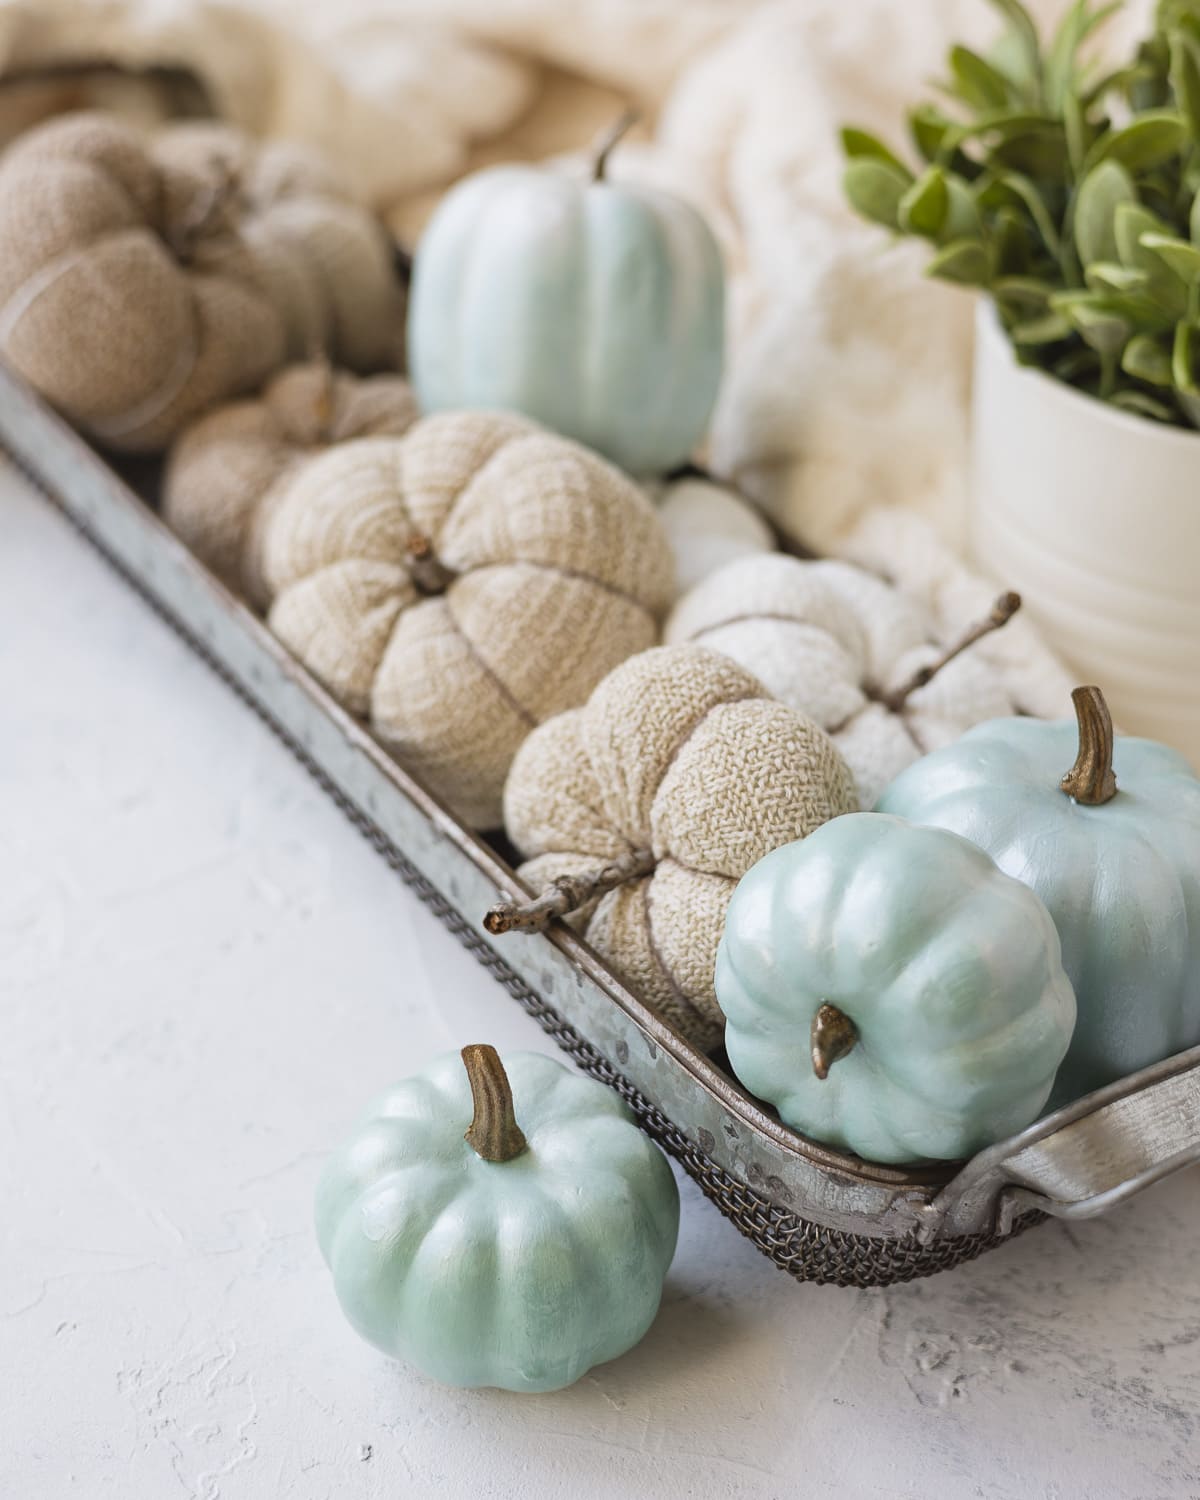
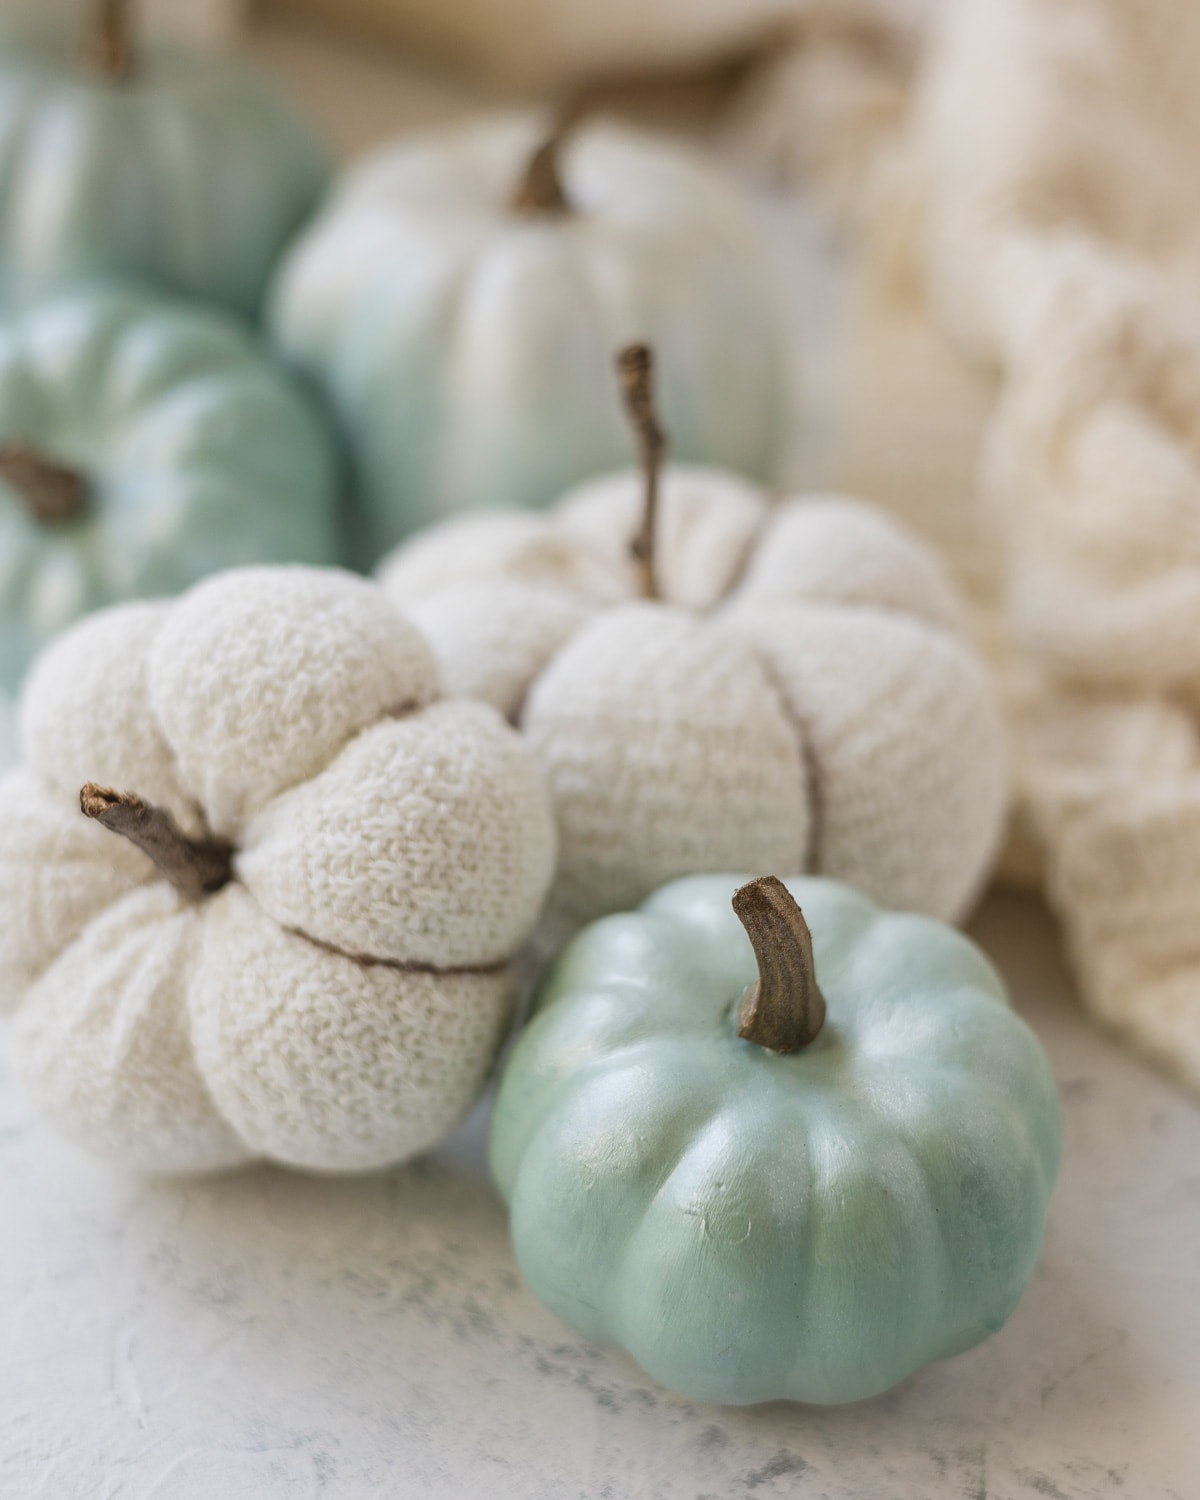
If you want another easy way to glam up faux pumpkins, also try my Washi Tape Pumpkins Tutorial. The other pumpkins pictured in these photos are DIY Sock Pumpkins which require a little sewing, but are SO easy and quick to make.
What You Need to Make Chalk Painted Pumpkins
The best thing about chalk paint pumpkins is that you can work with what you already have on hand. These pumpkins use very little paint so they are a fantastic small project for finishing off leftovers.
Faux Foam Pumpkins – You can use any color of pumpkins, but if you start with really dark or colorful pumpkins you might want to spray paint them with a good primer first (or a first coat of white chalk paint) before adding your colors.
I bought my white faux foam pumpkins at Hobby Lobby and you can also find white pumpkins on Amazon as well.
Chalk Paint – I suggest using chalk paint/chalk style paint (here’s more info on what chalk paint is). Chalk style paints adhere well to a variety of surfaces and don’t require a primer to stick to these faux pumpkins.
I used Rust-Oleum Chalked in Linen White, KILZ Chalk Style Paint in Blue Juniper, and a few squirts of a dark green acrylic craft paint.
The matte finish of chalk paint works with a variety of home décor styles and allows you to leave the pumpkins unsealed/rustic or finish with a top coat of your choice. I also used a little acrylic paint mixed in with my chalk paint to change the color and that worked fine.
If you don’t already have chalk paint on hand from other projects, you can purchase smaller containers of it at the craft store.
Metallic Spray Paint – Choose your favorite color for the stems. I just used a random can I already had: Rust-Oleum Metallic in a bronze color.
Shimmery Spray Paint – My secret ingredient for these chalk painted pumpkins! I bought this Rust-Oleum Metallic Pearl Mist spray paint not realizing it gives a transparent finish (unless you spray several coats). It’s perfect for these pumpkins though! A light coat sprayed over the faux painted pumpkins allows the colors to show through, but gives some sparkle and shine.
Paintbrush – Any small paintbrush will do.
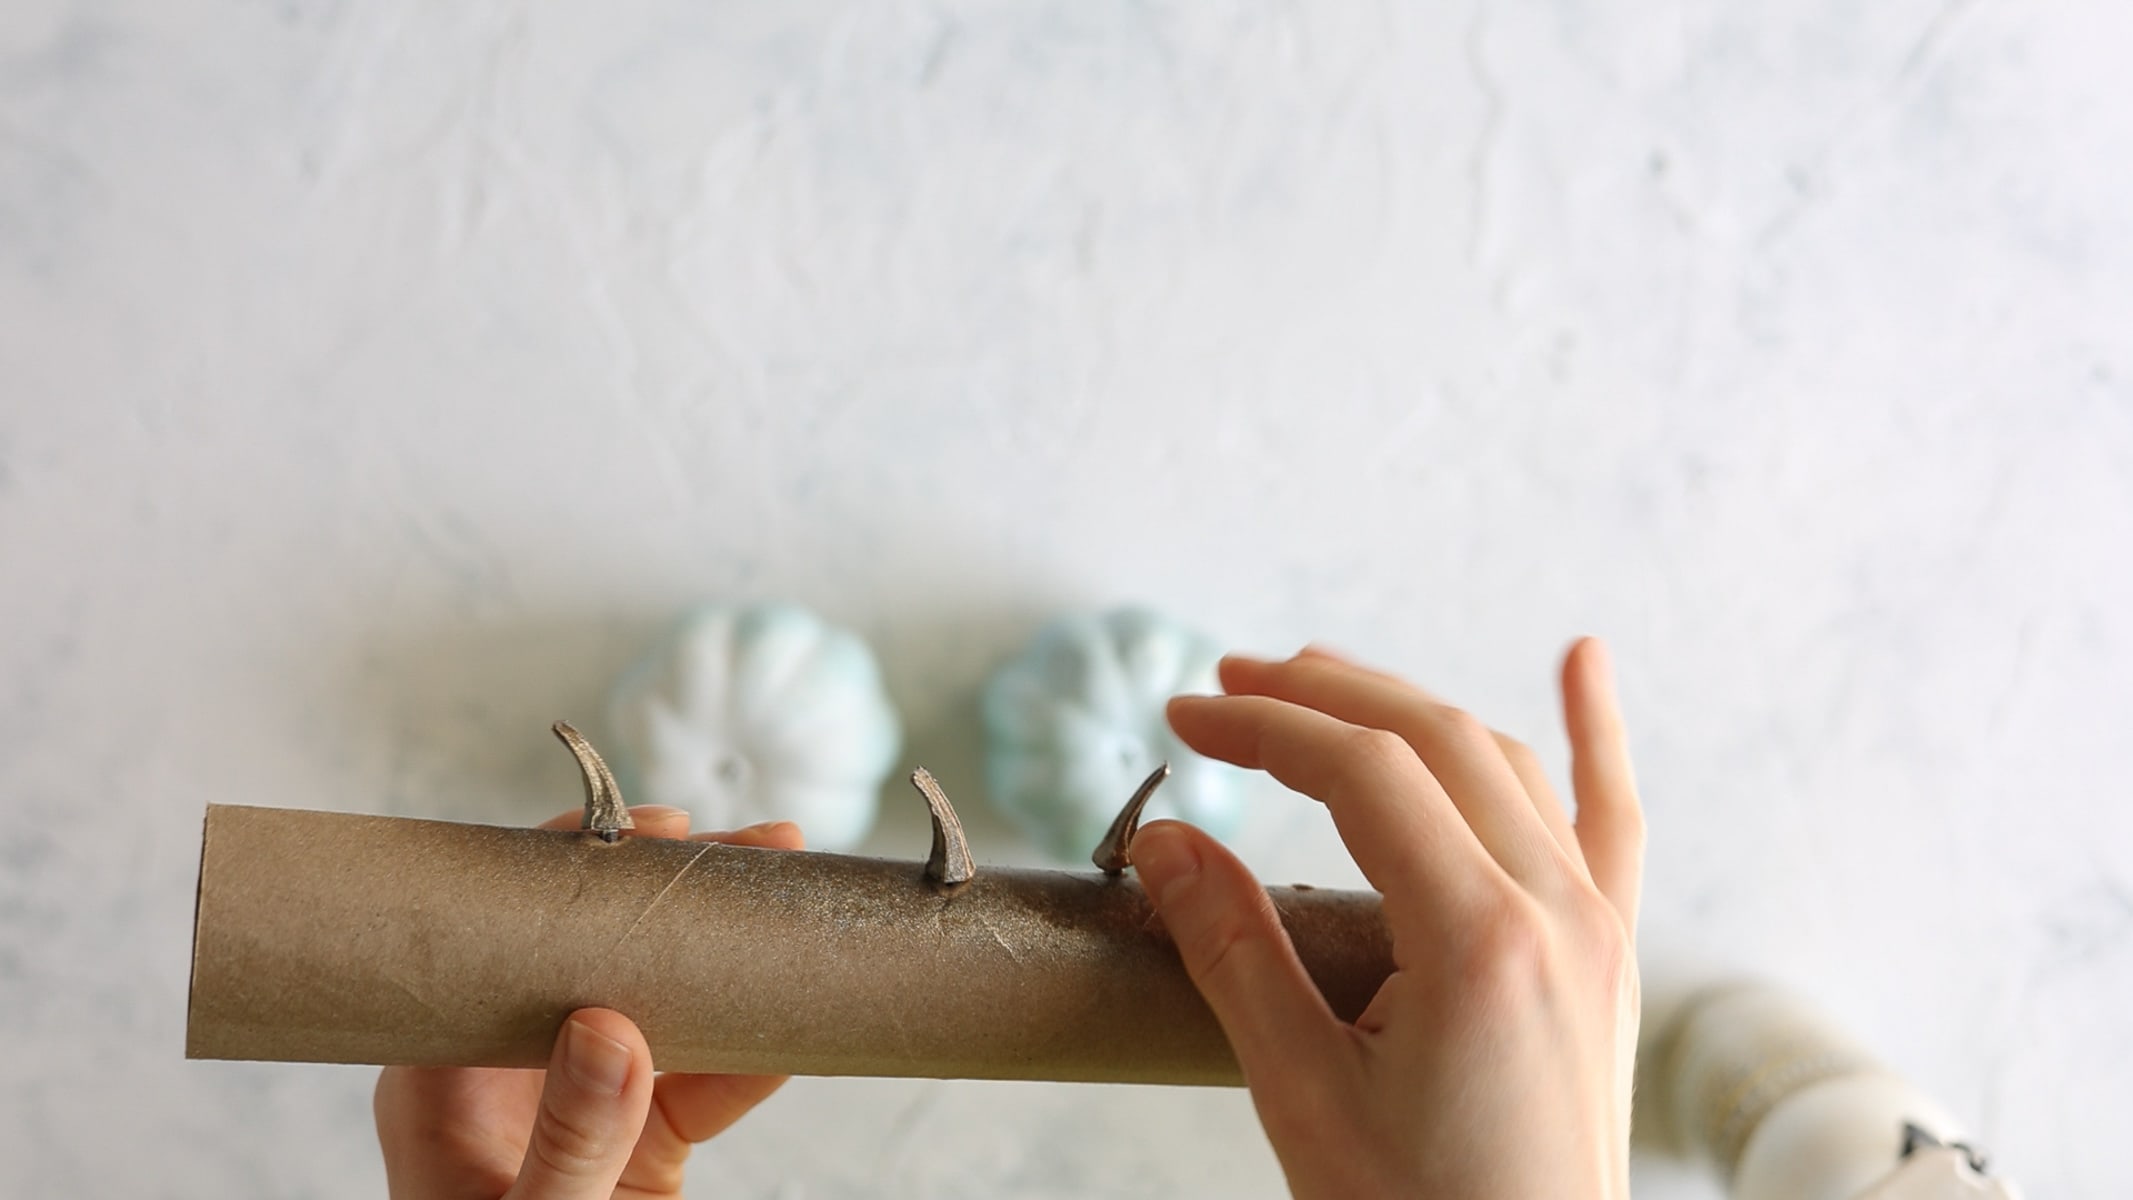
Paper Towel Tube – Totally optional, but I realized that using a paper towel tube for spray painting the stems (I’ll show you a pic in just a bit here) works like a charm.

How to Make Chalk Paint Pumpkins
Once you have your paint ready to go, these DIY pumpkins are super straightforward.
Prep the Faux Pumpkins
Remove the stem from a foam faux pumpkin. Alternatively, leave it on for now if you want to use it for a handle as you paint.
Paint
Add a few colors of chalk paint to a small paper plate. Load your brush with a mix of them as you paint. I used Rust-Oleum Chalked in Linen White , KILZ Chalk Style Paint in Blue Juniper, and a few squirts of a dark green acrylic craft paint.
Paint around the pumpkin, leaving a dry spot to rest the pumpkin. The paint dries really quickly, so I just work on multiple pumpkins at once and rotate through them as they dry to touch up the unpainted spots.
Plan on two coats of paint. Let dry between coats. For more of an ombre effect, I painted the pumpkin with a mixture of white with just a tiny bit of blue and then carefully feathered in some darker mixes on the bottom of the pumpkin after the first coat was dry.
Add a Shimmery Effect
When the pumpkins are dry, spray with a coat of Rust-Oleum Metallic Spray Paint in Pearl Mist. This is a transparent shimmery spray paint. Gives some beautiful shimmer and sparkle!
I just used one light coat to give my pumpkins a little shine. I placed the pumpkins upside down, sprayed the ends first, let dry, and then flipped over and sprayed the tops.
Glam up the Pumpkin Stems
Poke some small holes into an empty paper towel tube and insert the faux pumpkin stems you removed earlier from the pumpkins. Spray with a coat or two of metallic spray paint. Let dry.
Tip: I propped up my paper towel tube with a pencil stuck into the other side of the tube. Then I could spray every angle of the stems all at once. Much faster!
Put the stems back into the pumpkins and the pumpkins are ready to join your fall home décor!
Frequently Asked Questions
Probably the top questions I see whenever I write about chalk paint are about prepping the surface and sealing the surface.
Do I Need a Primer First?
If you are using a good chalk paint you won’t have any problems with the paint sticking directly to these DIY fall pumpkins, so no need for a primer.
The exception is if you are painting dark/colorful pumpkins, then you might wish to start with a coat of plain white chalk paint or spray them with a spray paint primer.
Do I Need to Seal the Chalk Paint on The Pumpkins?
I personally think chalk paint looks best when sealed! If the pumpkins could be exposed to water and you want them to be super durable you’ll want to seal them with a product that can stand up to that.
For most of us though, any top coat whether wax, a water-based polycrylic, or clear spray paint is perfect. Here as I mentioned earlier, I used Pearl Mist spray paint to give these a little sparkle.
Wax would also be great since you can finish the whole pumpkin at once without the process of spraying one side and then waiting for it to dry before spraying the other side.
Looking for more pumpkin crafts?
Check out my list of 15+ DIY Pumpkin Craft Ideas.
I hope you enjoyed chalk painting your own pumpkins today! I loved making this project and getting to customize the color and style of my fall décor this year.
More Crafts Like This
- How to Make DIY Sock Pumpkins + Video Tutorial!
- DIY Drop Cloth Pumpkins
- 12 Captivating Blue Chalk Paint Colors
- Where to Buy Chalk Paint + Money Saving Tips
Craft with me! If you try this tutorial, tag me on Instagram or use the hashtag #BellewoodCottageCrafts. Watch my videos on YouTube and follow along on Pinterest for more ideas like this one!
Chalk Painted Pumpkins Tutorial
Spruce up faux pumpkins with this chalk painted pumpkins tutorial! I'll share tips for working with the pumpkins and paint, plus how to achieve a shimmery finish if desired. Fill your fall home décor with these festive DIY pumpkins!
Materials
- Faux Foam Pumpkins
- Chalk Paint
- Metallic Spray Paint
- Rust-Oleum Metallic Pearl Mist Spray Paint
- Small Paintbrush
- Paper Towel Tube
Instructions
 Prep the Faux Pumpkins
Remove the stem from a foam faux pumpkin (or leave it on for now if you want to use it for a handle as you paint).
Paint
- Add a few colors of chalk paint to a small paper plate and load your brush with a mix of them as you paint. I used Rust-Oleum Chalked in Linen White, KILZ Chalk Style Paint in Blue Juniper, and a few squirts of a dark green acrylic craft paint.
- Paint around the pumpkin, leaving a dry spot to rest the pumpkin. The paint dries really quickly, so I just work on multiple pumpkins at once and rotate through them as they dry to touch up the unpainted spots.
- Plan on two coats of paint. Let dry between coats. For more of an ombre effect, I painted the pumpkin with a mixture of white with just a tiny bit of blue and then carefully feathered in some darker mixes on the bottom of the pumpkin after the first coat was dry.
Add a Shimmery Effect
- When the pumpkins are dry, spray with a coat of Rust-Oleum Metallic Spray Paint in Peal Mist. This is a transparent shimmery spray paint. Gives some beautiful shimmer and sparkle!
- I just used one light coat to give my pumpkins a little shine. I placed the pumpkins upside down, sprayed the ends first, let dry, and then flipped over and sprayed the tops.
Glam up the Pumpkin Stems
- Poke some small holes into an empty paper towel tube and insert the faux pumpkin stems you removed earlier from the pumpkins. Spray with a coat or two of metallic spray paint. Let dry.
- Tip: I propped up my paper towel tube with a pencil so I could coat the entire stems at once without having to flip them. Much faster!

- Put the stems back into the pumpkins and you are done!
Weekly Crafting Fun!
Join my list and get a weekly email with relaxing craft ideas, freebies, sewing tutorials, and more!