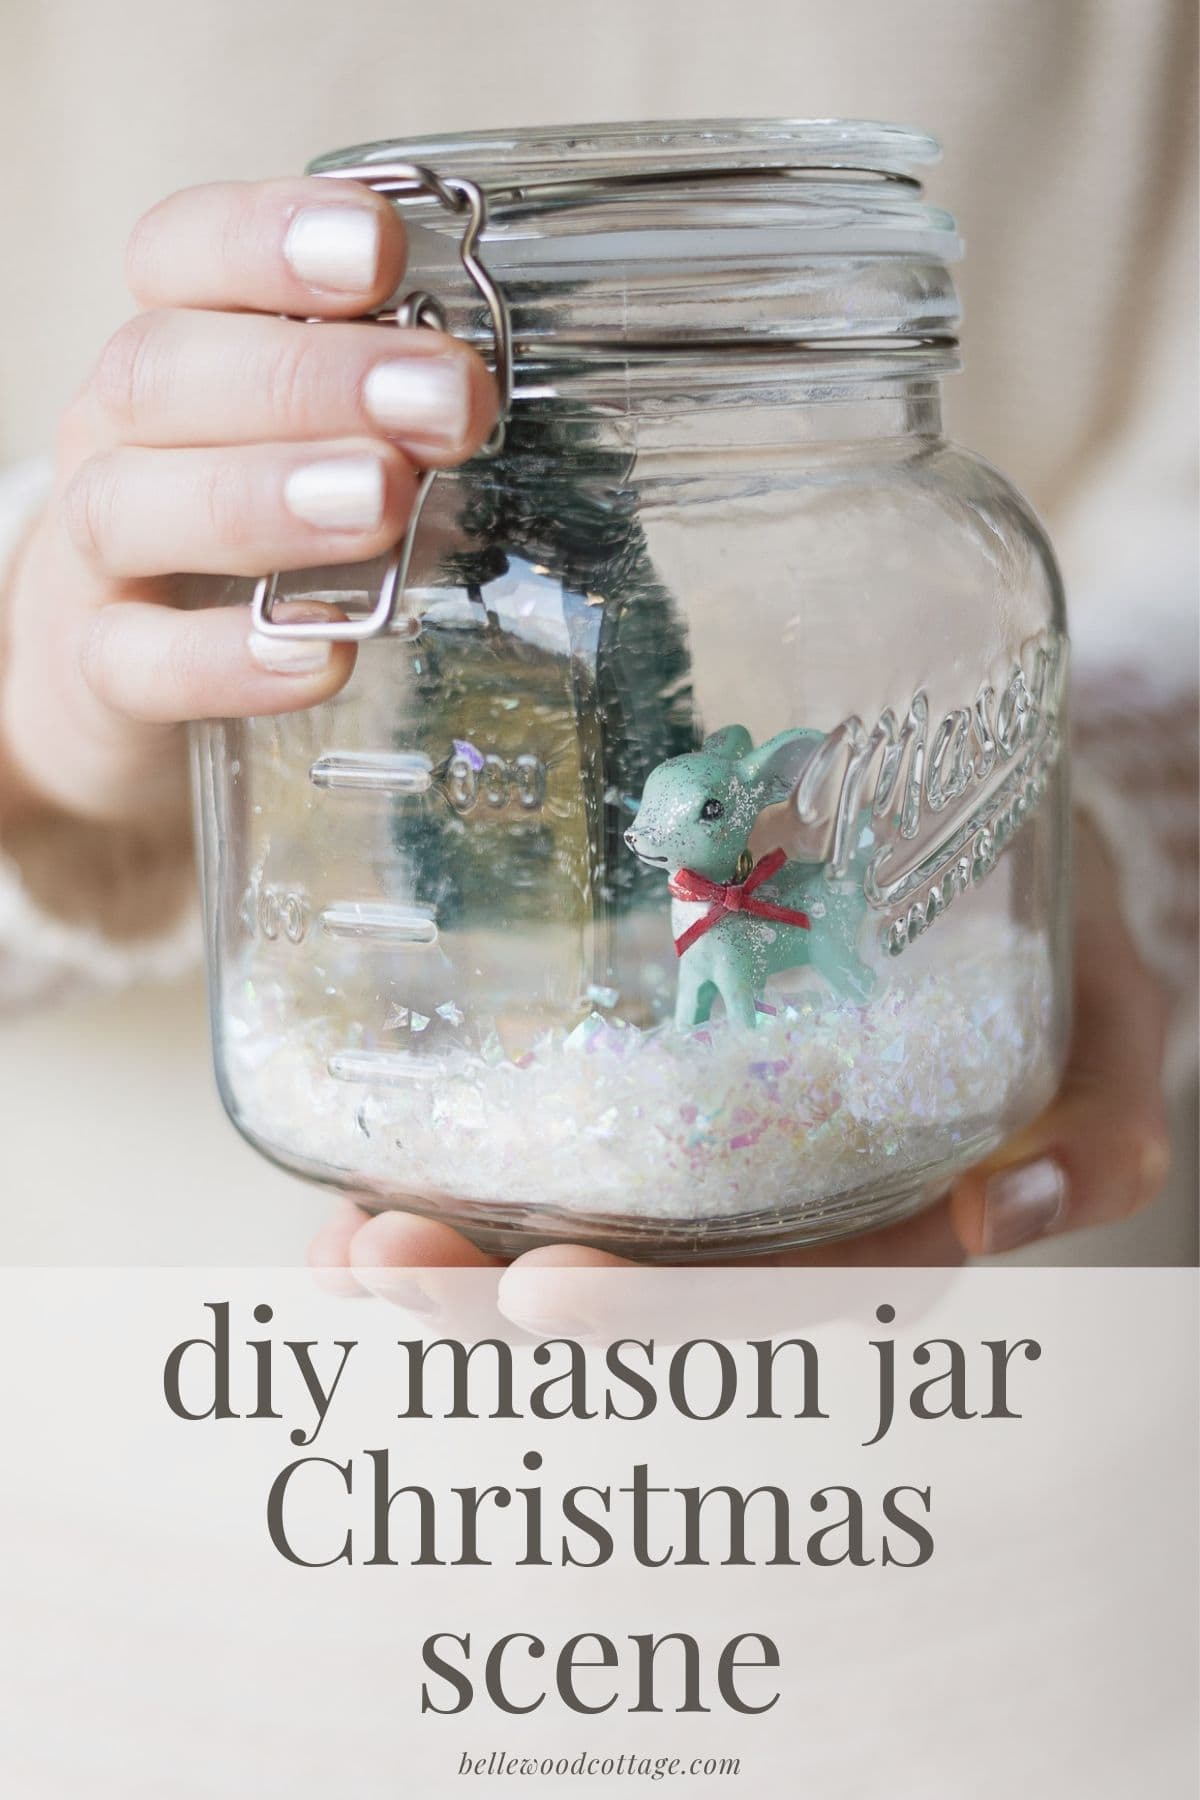
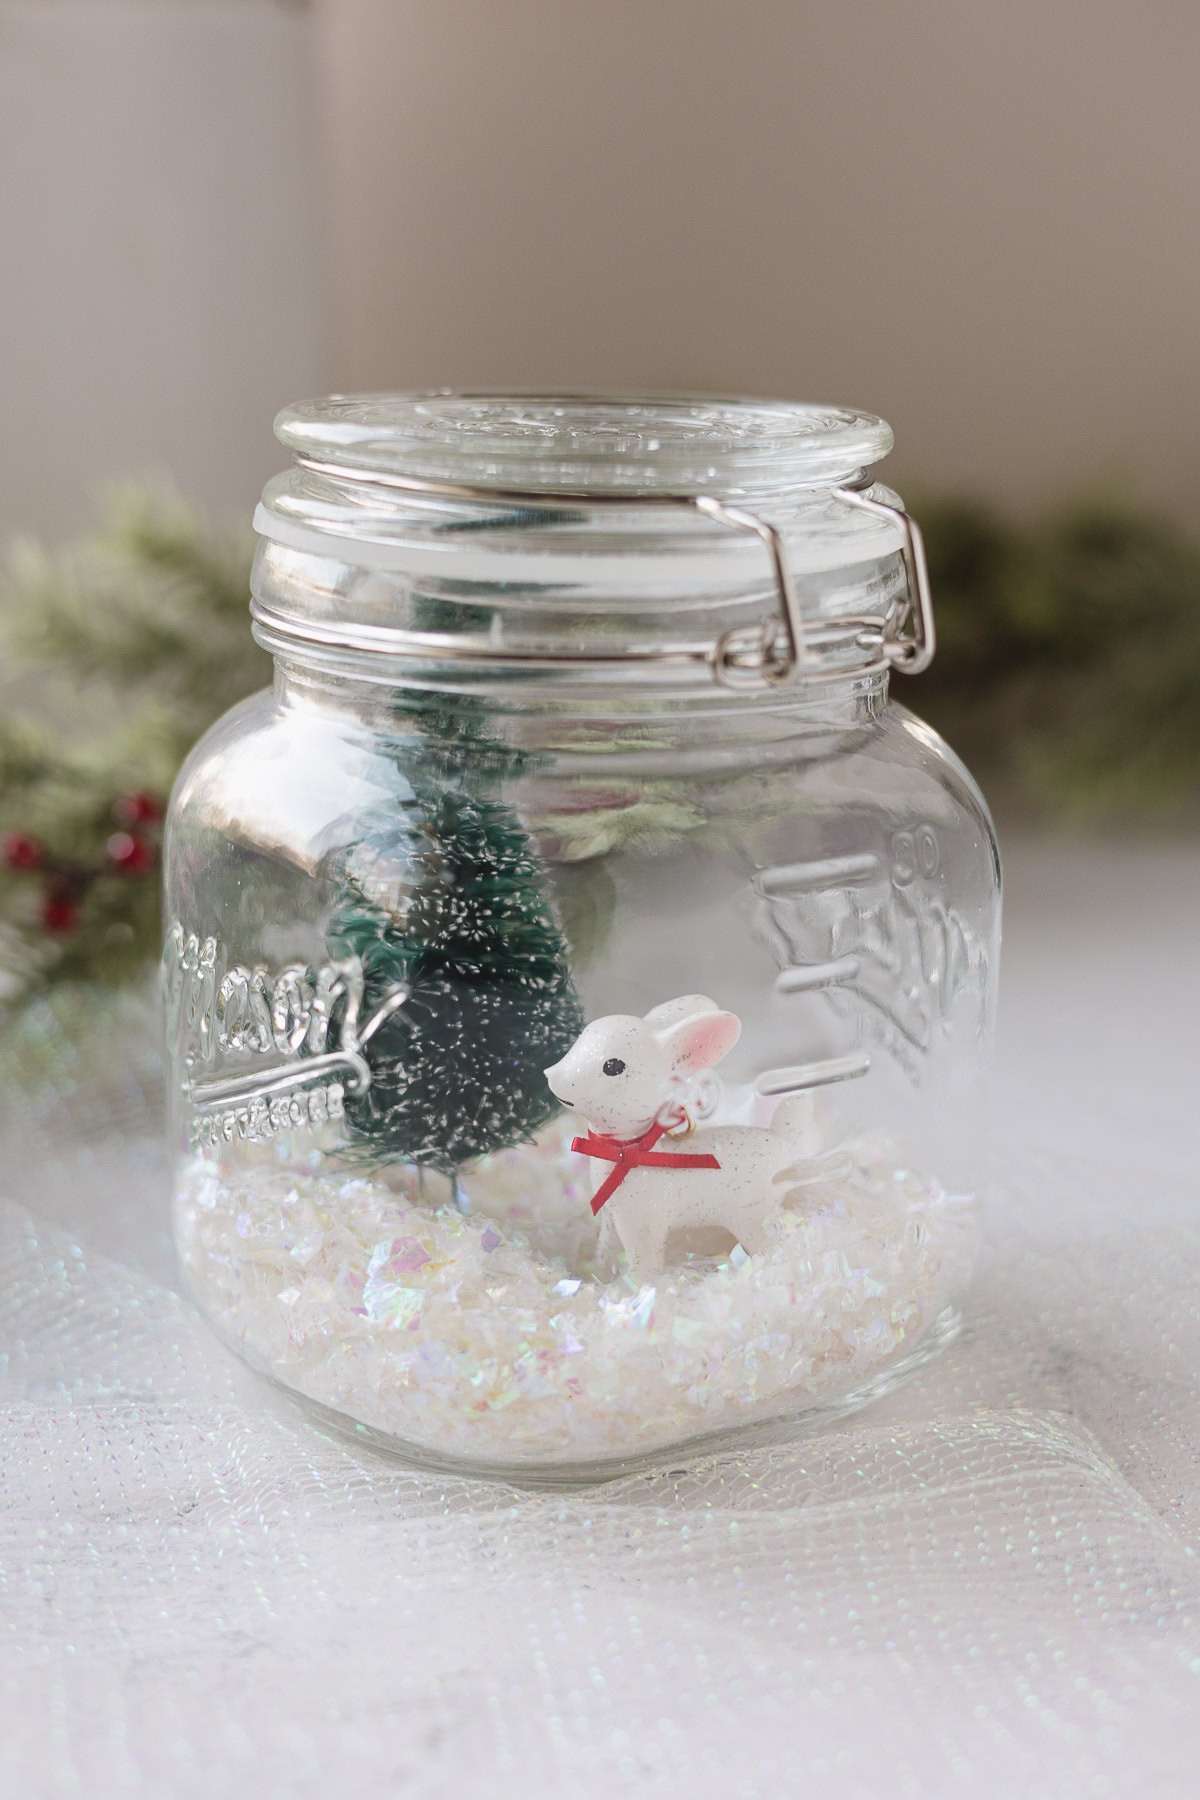
Mason Jar Christmas Scene DIY
Add whimsical charm to your holiday décor with this Mason Jar Christmas Scene. The hand crafted miniature scene is perfect on a tabletop or even for gifting. Choose your favorite miniatures to place inside for a custom Christmas-in-a-jar scene.
Please note that this post contains affiliate links which allow me to earn a small commission when a purchase is made at no additional cost to you. As an Amazon Associate I earn from qualifying purchases. Read more here.
This simple DIY Christmas jar is budget-friendly and quick to make. Plan an afternoon of crafting with your kids or whip up a few on your own to add to your Christmas décor.
Also consider this idea: grab a few friends and host a holiday craft party. Choose a few projects to create (like this one!), serve snacks and beverages, and craft away!
Weekly Crafting Fun!
Join my list and get a weekly email with relaxing craft ideas, freebies, sewing tutorials, and more!
Here’s all the supplies you will need for this holiday mason jar craft:
Supplies Needed
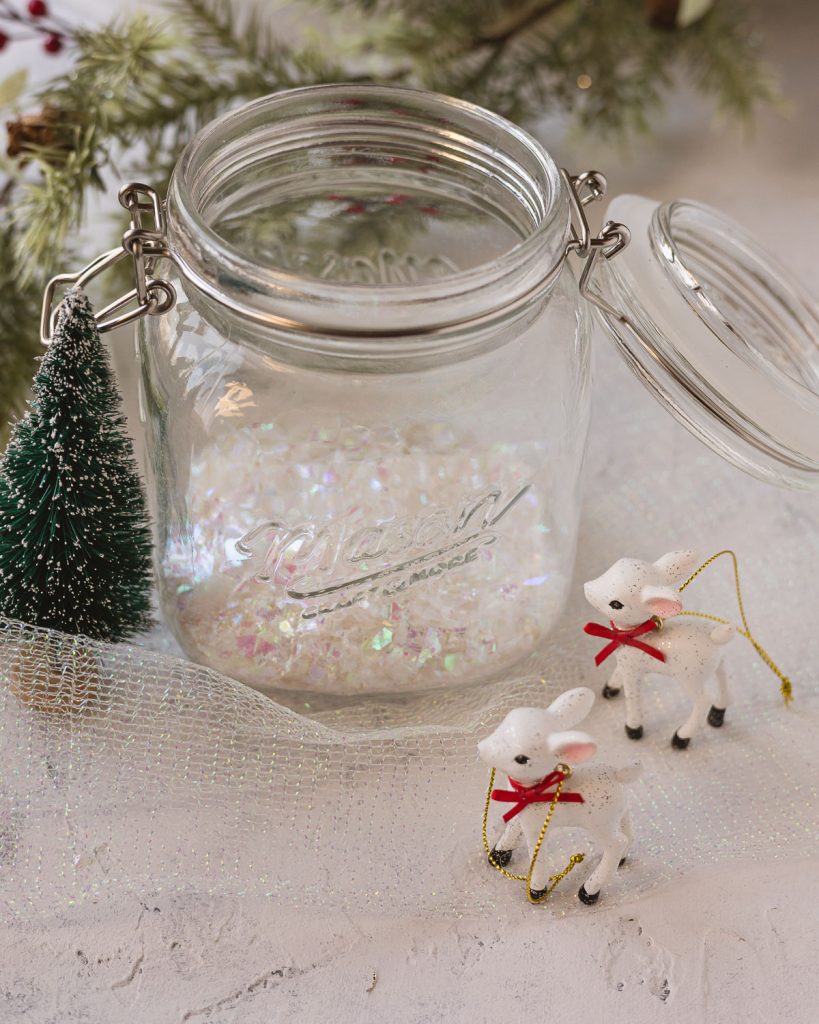
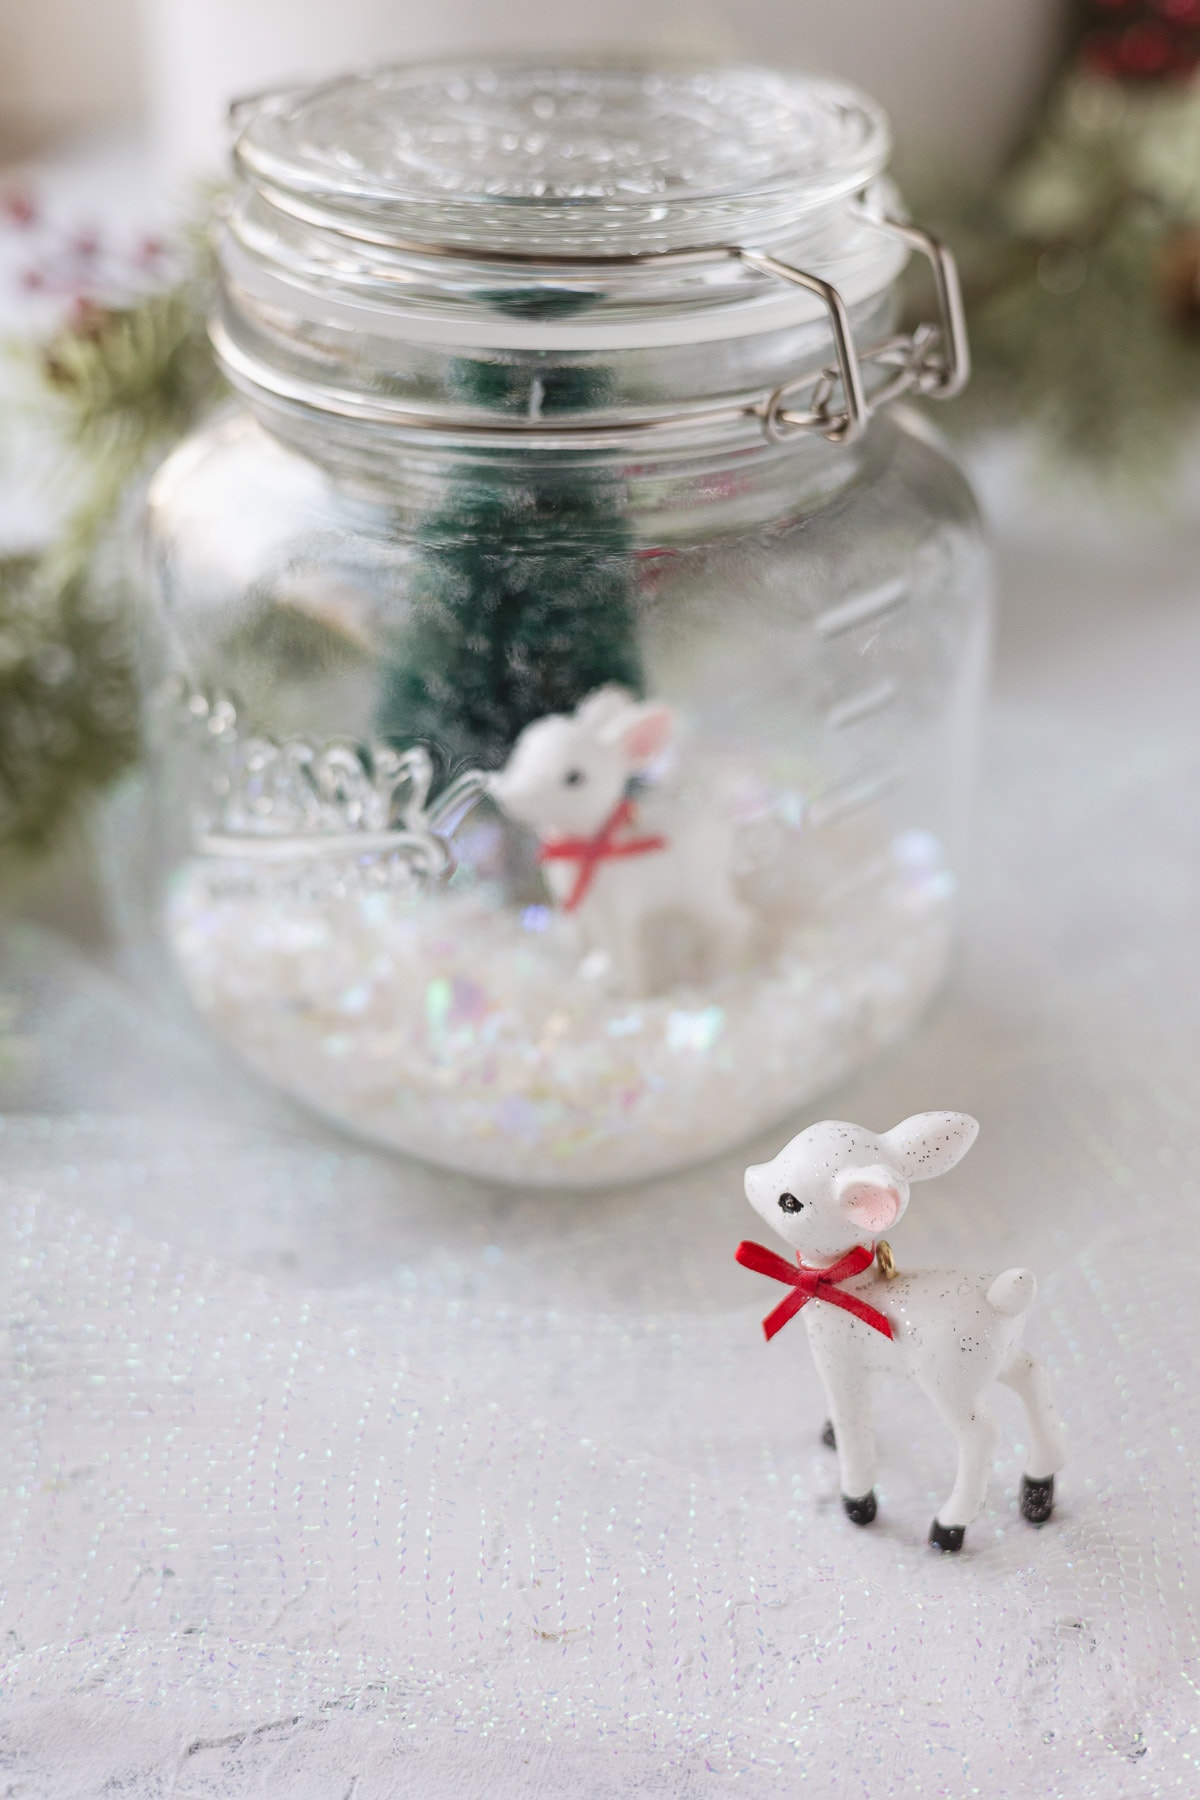
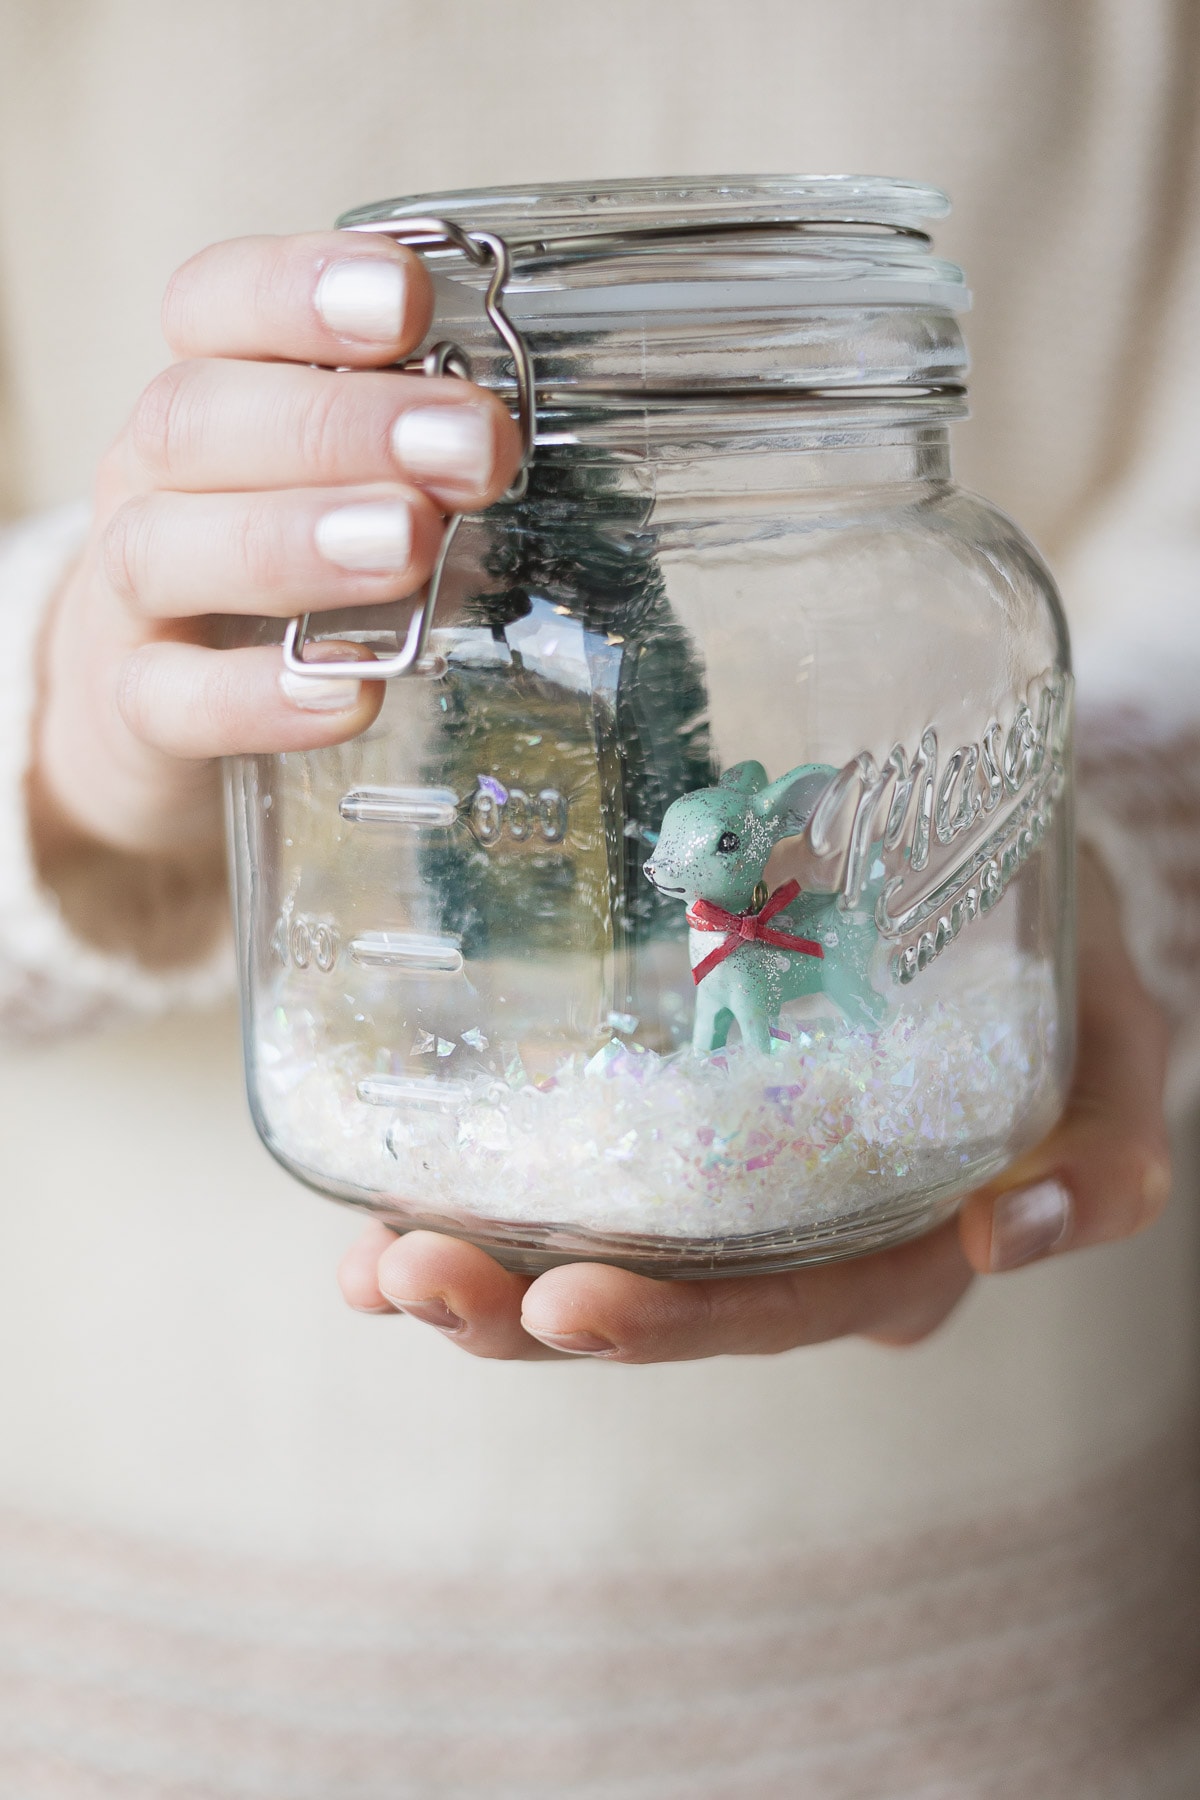
A glass jar – You’ll need a short glass jar with a wide opening. Within those parameters, just about any kind of jar should work. Avoid jars that are tall (the height makes it hard to arrange your scene) or have a narrow opening.
Here’s a few ideas:

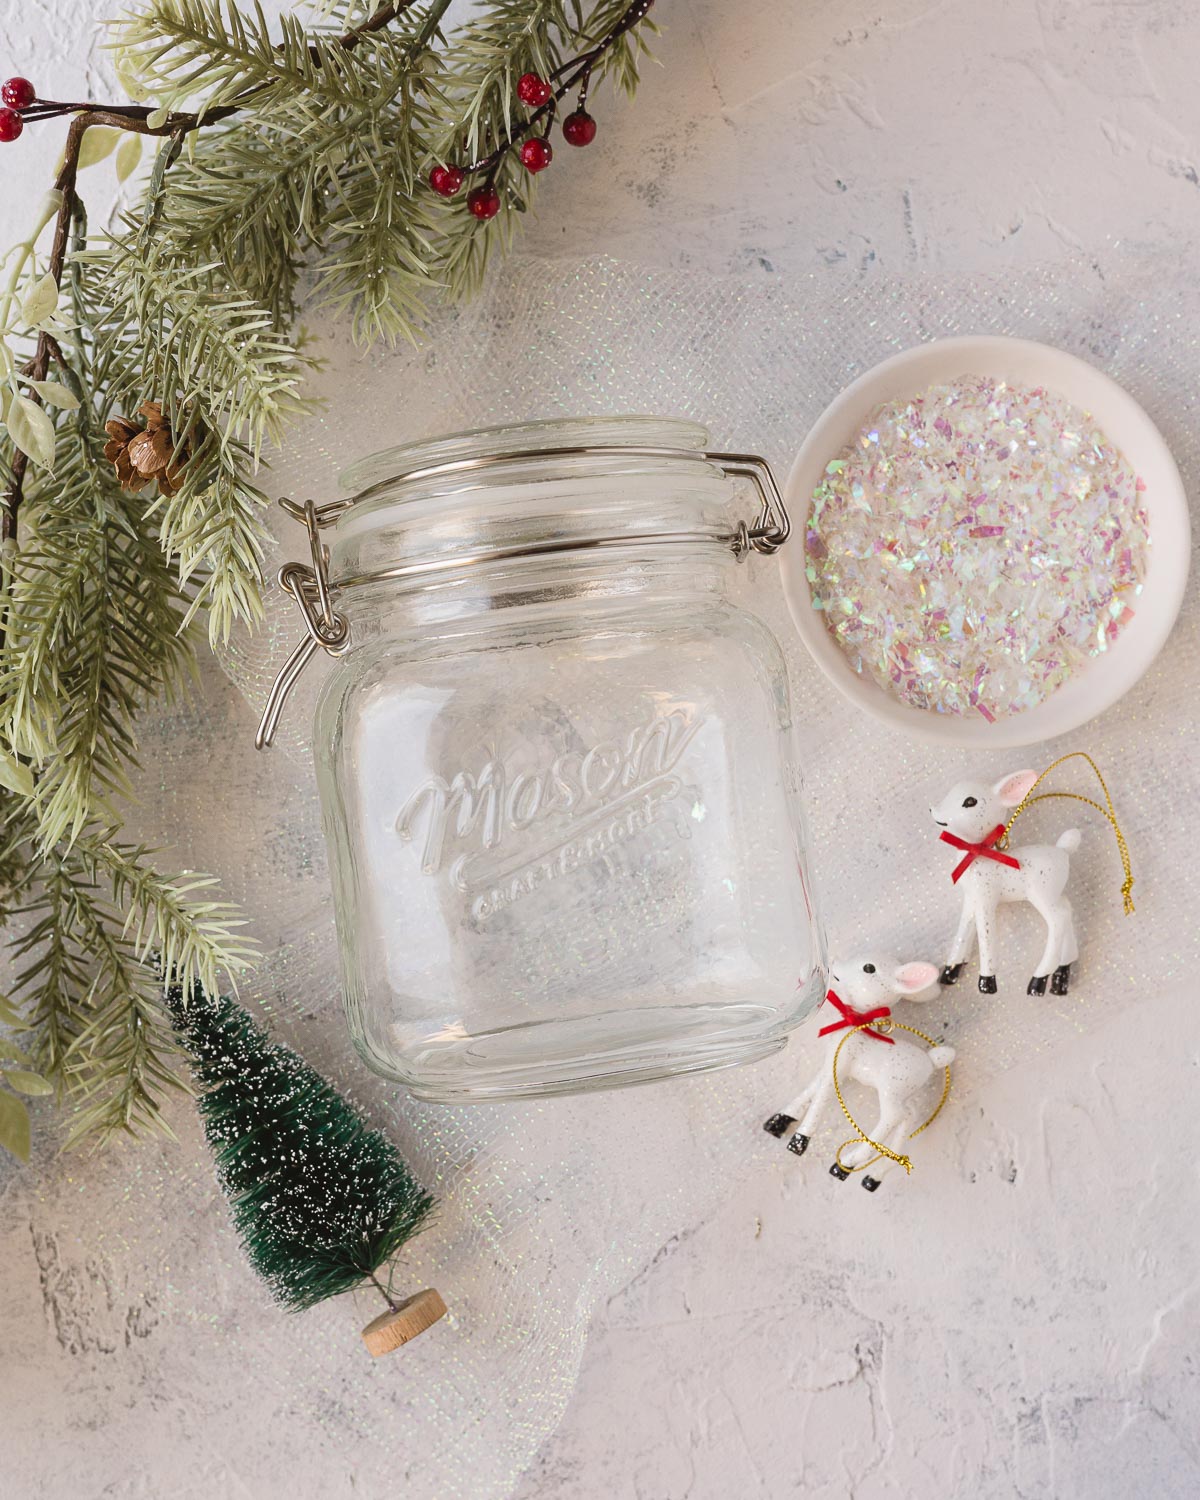
I used about a 32 oz flip top mason jar that I found at a local TJMaxx.
Faux snow – You’ll want enough faux snow to fill your jar about 1/2″-1″. This stuff is messy, so be careful.
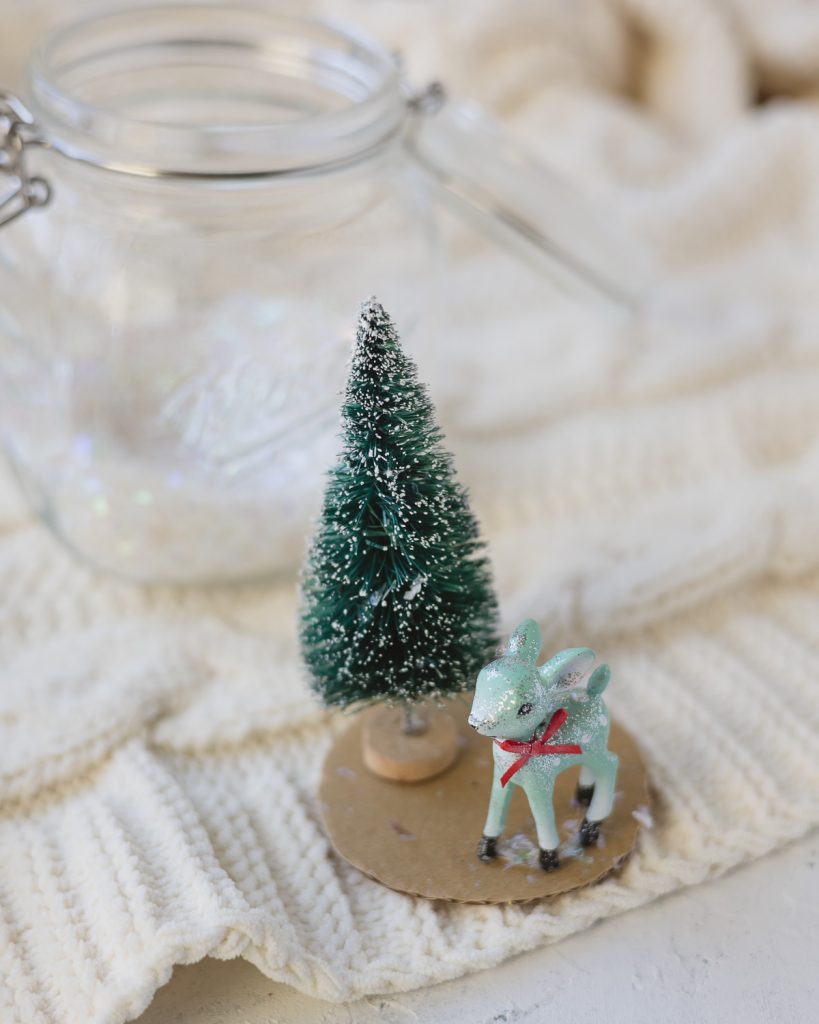
Mini Bottle Brush Trees – Check your craft store or even the dollar section at Target during the holidays. Make sure your tree is short enough to fit inside your jar.
Mini Ornaments – The fun part! Peruse your favorite stores for their holiday offerings to see what you find. These tiny deer are from Target and came in two-packs for just $3.
Other mini figures certainly work as well–the only requirement is that they fit into your jar.
You could get more creative and use Lego Mini Figures or even Princesses. Great for kids!
Cardboard – If you want to secure your scene (which I recommend as it’s quite annoying if everything falls over when moved) you’ll need a small piece of thick cardboard (from a shipping box for instance).
Hot glue gun – To secure your winter mason jar scene, use a hot glue gun or another preferred way of sticking the pieces to the cardboard.
How to Make Mason Jar Christmas Scenes
First, cut a circle from your cardboard that is just smaller than the opening of your jar. Once the figures are attached, it’ll be easy to move the scene in and out of the jar.
Optional: Paint the cardboard white if you are worried about the edges peeking through.
Heat up a hot glue gun. Once hot, use the glue to carefully attach your figures to the cardboard. You can “trial” the figures in the jar without the cardboard before gluing if you like.
Note: You do not *have* to glue your figures down as the faux snow will help them stay put. However, depending on the figures, it’s easy for them to fall over if the jar gets bumped or moved, so I prefer to glue things down.
Once the glue has dried, shake a little faux snow into your jar.
Add the cardboard scene (trim a little more from the cardboard piece if it’s hard to fit).
Shake a little more snow on top to cover, close the lid, and the Christmas jar is complete!
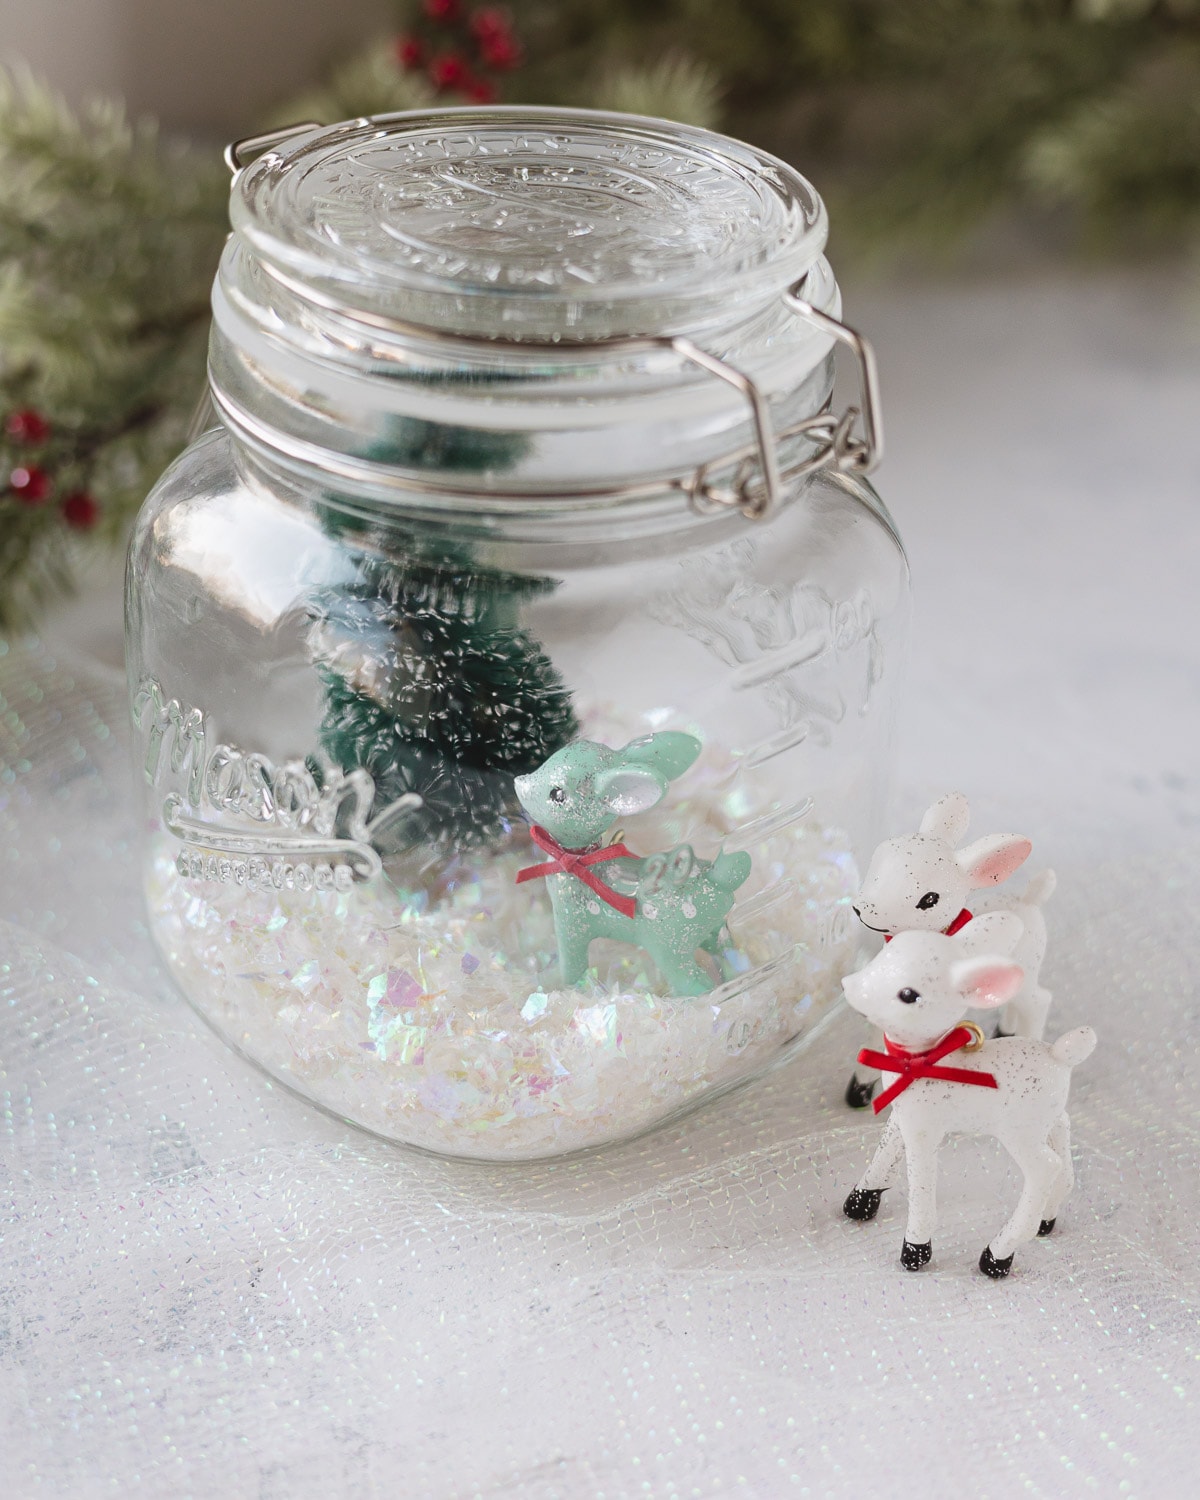
You can make this Christmas mason jar craft more “Christmas-y” or holiday-centered by choosing bright holiday colors and accents. Make it more wintery by sticking with neutrals like creams, whites, and browns and use it all winter long for a pretty décor piece!
Questions About the Jars
Is This a Good Craft for Kids?
A parent will need to be involved with the preparation steps (like cutting cardboard and gluing the figures to the cardboard), but the assembly steps are a lot of fun for kids. Involve kids in choosing their own jar, trees, and ornaments and inserting the scenes into the jars.
Keep a hand-vac nearby to clean up any snow spillage!
How Long Do These Jars Take to Make?
This would be a great holiday party craft if you are looking for something relatively quick. These jars only take about 10-15 minutes per jar to create.
To prep this craft for a holiday party:
Purchase jars, faux snow, bottle brush trees and plenty of tiny figures or ornaments in advance. Provide the tools to prepare the scenes (like a couple hot glue guns).
Guests can arrange scenes to their liking and assemble their final choice when ready.
To give a little more chance for creativity, also provide ribbons and embellishments (such as tags, very small branches, buttons, etc.) that can be attached to the outside of the jar.
Happy crafting! ~Ellen
Craft with me! If you try this tutorial, tag me on Instagram or use the hashtag #BellewoodCottageCrafts. Watch my videos on YouTube and follow along on Pinterest for more ideas like this one!
More Holiday Crafts
I LOVE Christmas and all things holiday décor! Enjoy more festive tutorials here:
- Christmas Window Ornament Using Chalk-Style Paint
- Christmas Ornaments with Vintage Cookie Cutters
- Holiday Garland with Scrapbook Paper
- Washi Tape Christmas Ornaments
- DIY Christmas Wall Art
Weekly Crafting Fun!
Join my list and get a weekly email with relaxing craft ideas, freebies, sewing tutorials, and more!