How to Layer Wall Art to Get More Mileage From Your Favorite Pieces
I have had this sign from Hobby Lobby for several months now making the rounds in various rooms of our home. Somehow I never found juuust the right spot for it. Instead, It’s primarily been leaning up against walls (SUCH a cool look) or hanging out in a dresser.
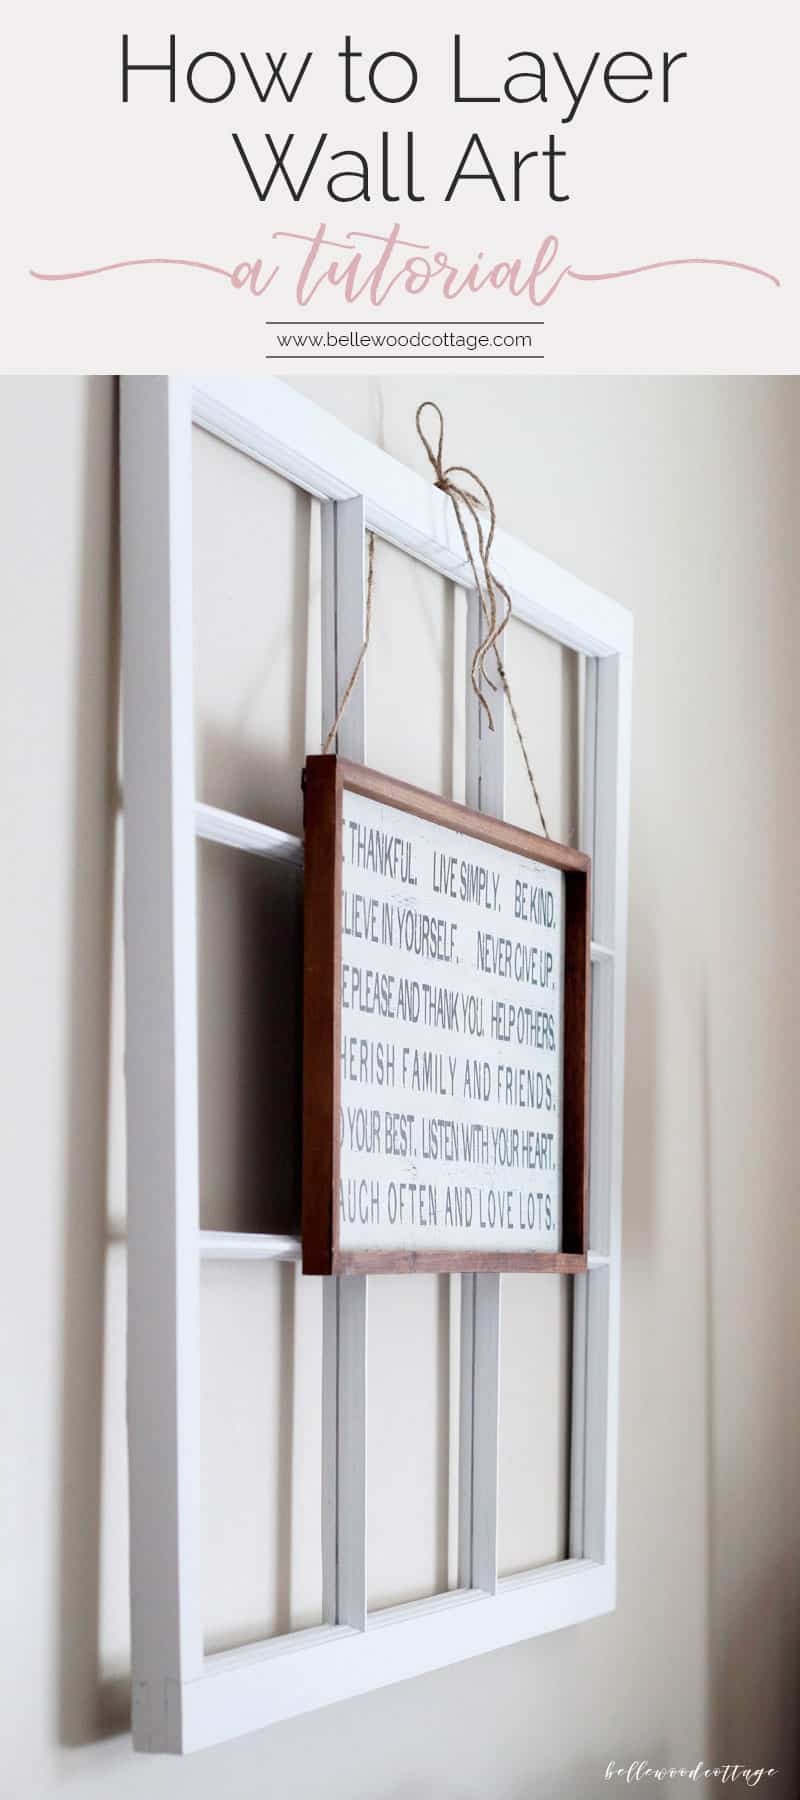
The problem is that it’s a bit of an awkward shape. Small, but wide enough that it looked funny pretty much anywhere I tried to display it.
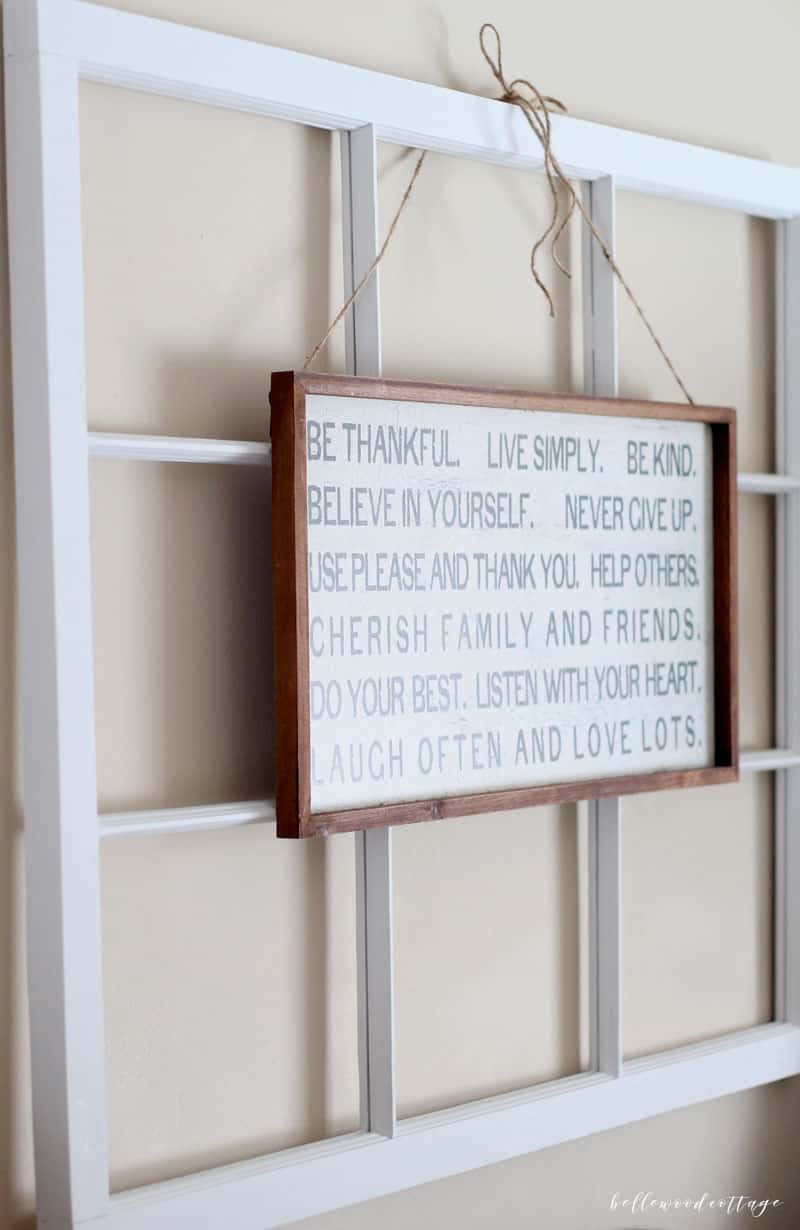
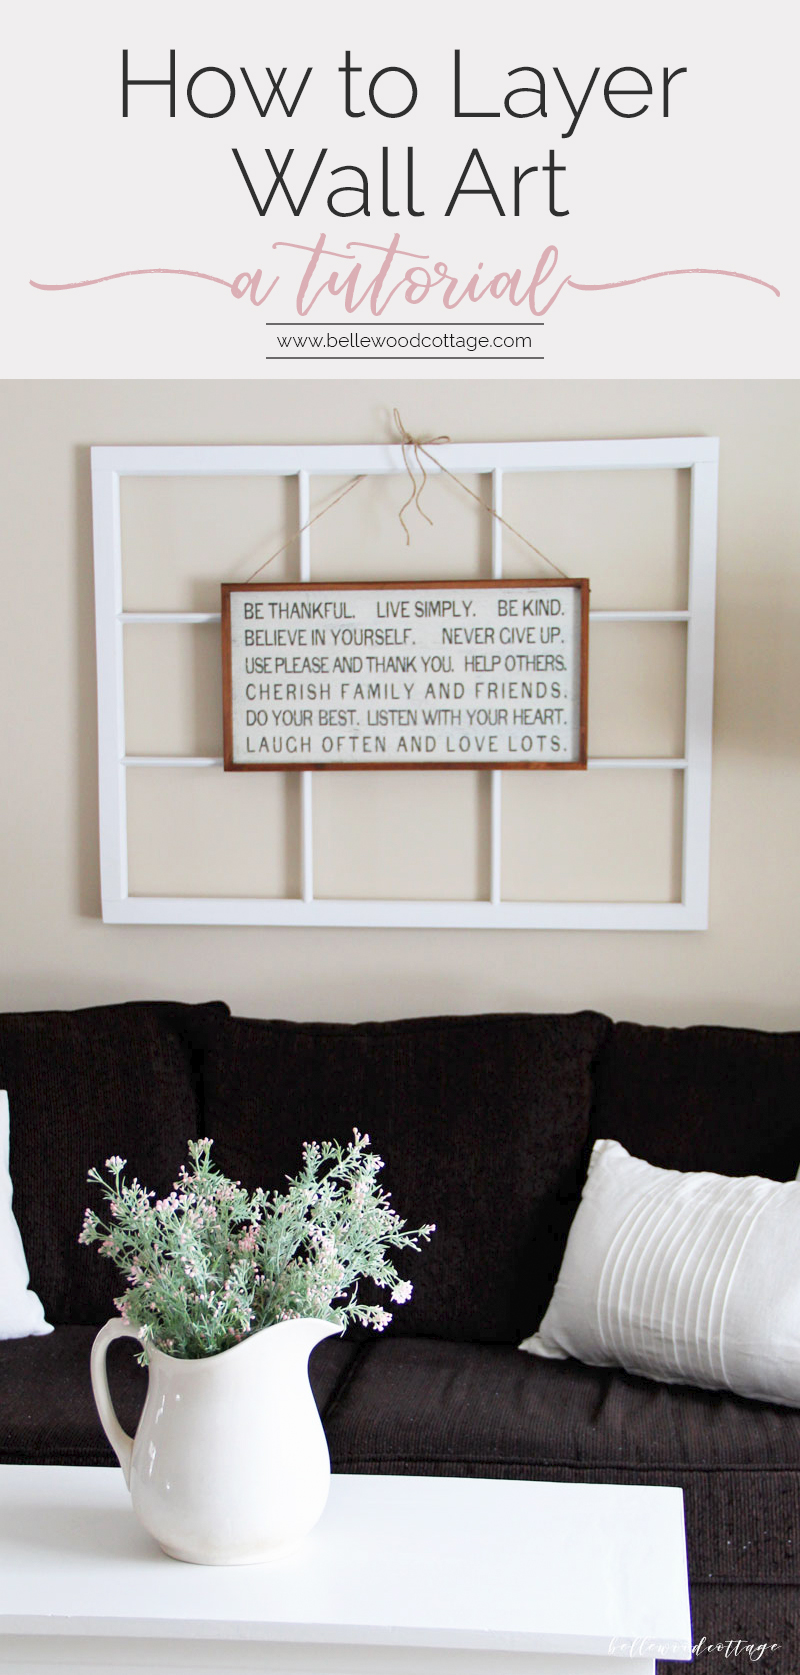
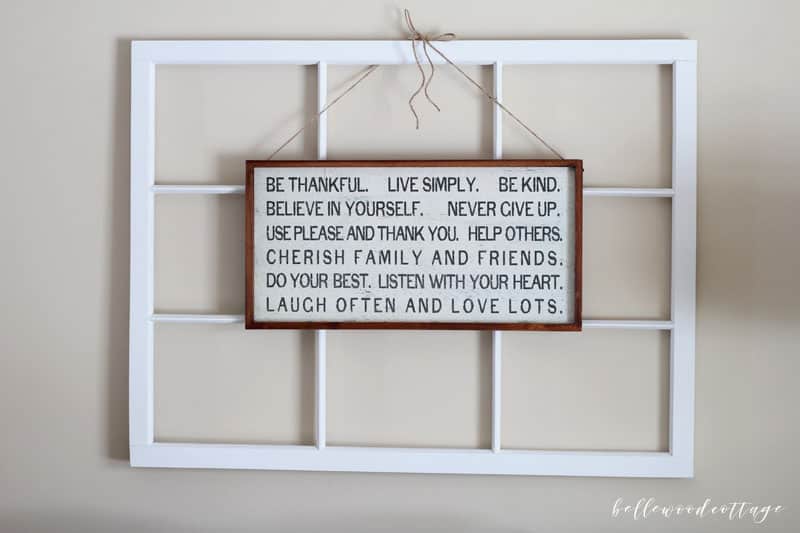
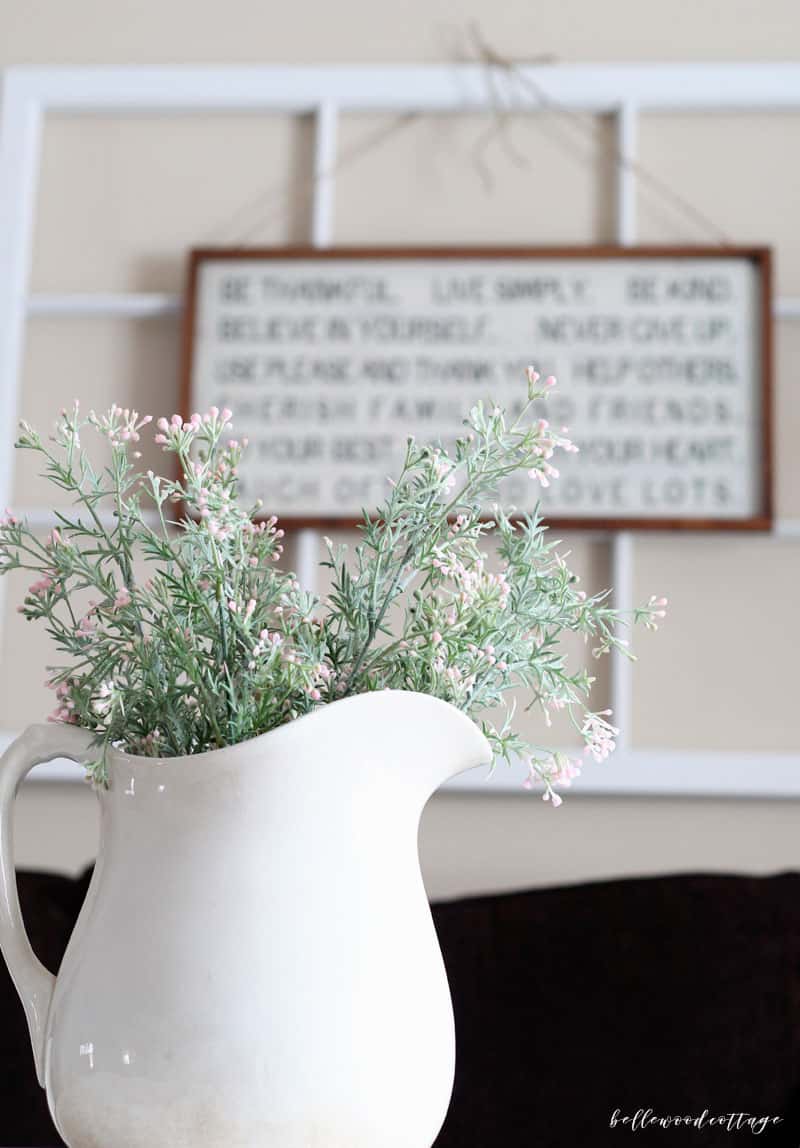
I finally settled on this “layered wall art” look, and I’m loving the way it turned out. It all started when I couldn’t find a good wreath to hang over this vintage window frame above our couch. A plain white window on the wall definitely required a something to jazz it up a bit. Enter, awkwardly sized sign.
Weekly Crafting Fun!
Join my list and get a weekly email with relaxing craft ideas, freebies, sewing tutorials, and more!
I thought about drilling the sign to the window to layer it, but a. impatient, and b. commitment issues.
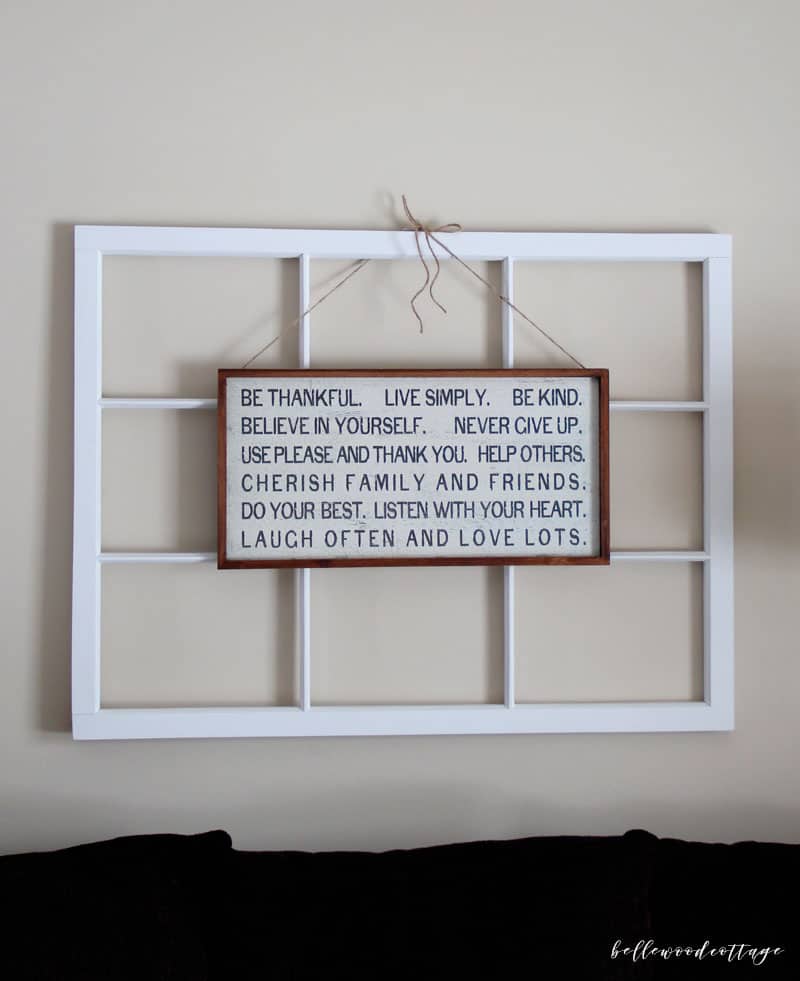
So instead, I opted to just simply tie the sign onto the window with a sturdy twine. The pros of this method are that I can easily switch out the sign (sans drill holes), and it took me less than five minutes. Plus, I think that the twine adds more character than if I had just attached it with screws.
But the best part is that I got some brand new wall art simply by creatively using what I already had. Win!
If you want to layer wall art in your own home, here’s a quick overview of how I did it.
Note: Attempt this tutorial at your own discretion! My lightweight sign has stayed securely attached no problem, but please use caution and understand that Bellewood Cottage accepts no responsibility for falling artwork etc. etc. Pick a lightweight piece of art and strong twine/string and you should be fine.
How to Layer Wall Art
First off, you need a large window frame to anchor the art. You could try using something else, but for the simplest variation I love using a window frame. It’s easy to tie the art around the window pane and it’s simple neutral backdrop. If you have a chippy antique window, that would be lovely. Otherwise there are plenty of “reproduction” windows out there that would work.
Next, you need a sign that is lightweight. The inexpensive “wood” signs from stores like Hobby Lobby or Michael’s are great because they are generally cute, but usually made from very light (read: sometimes fake) materials. But that isn’t a bad thing! Because the lighter the better if you are going to be hanging the wall art with string or twine.
You can find the sign I used here from Hobby Lobby.
Next, you need to make sure the d-rings on the back (that it hangs from) are in the correct spot. They need to be installed one on each side of the frame so the string can be threaded through. If your art just has a bracket in the middle, you can still use it, but you will need to drill in the d-rings yourself.
Finally, use a sturdy string/twine and thread it though the smaller piece of art and tie it around the window frame. It helps to have another pair of hands for this step. If you are in doubt about the strength of your string, either double or triple strand it or go out and buy something sturdy. Even if your sign is lightweight, you do not want it crashing down in the middle of the night. Or when a guest is sitting on your sofa. Because you KNOW that is when it would happen. Safety first!
Hope you enjoyed this quick little tip/tutorial on how to layer wall art! I am always a fan of decor tricks that use what I already have on hand, versus buying new stuff. I hope this idea inspires you to think creatively about new ways to use decor you already own. I’d love to hear other ways you are re-purposing home goods in your space!
Until next time,
<3 Ellen
More ideas to re-purpose home decor you already own:

Weekly Crafting Fun!
Join my list and get a weekly email with relaxing craft ideas, freebies, sewing tutorials, and more!