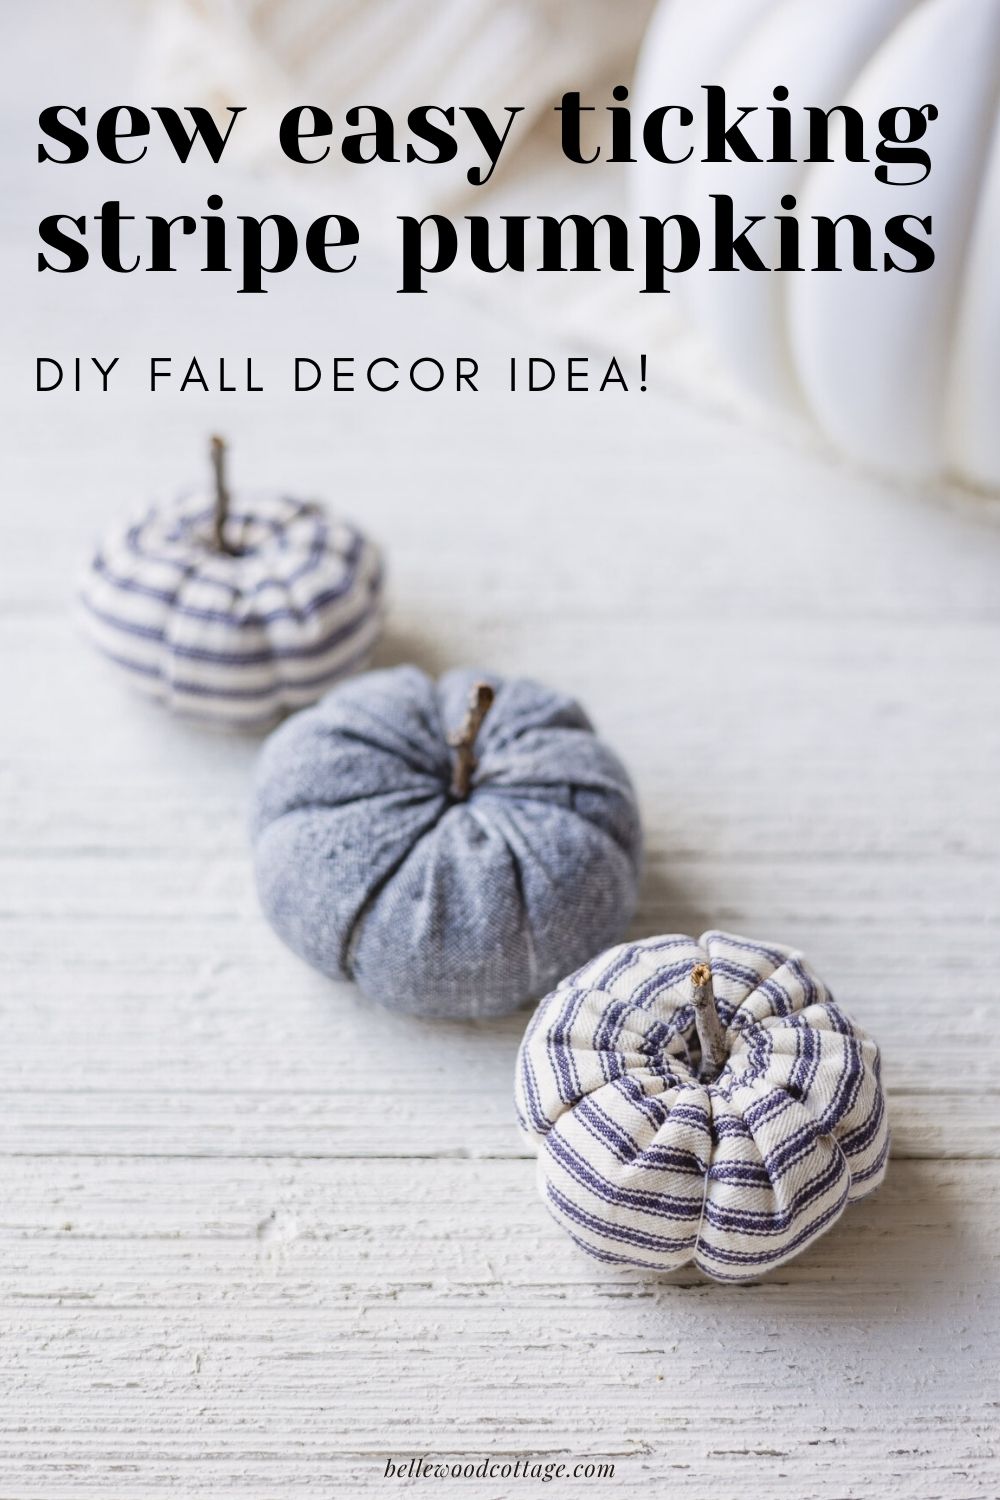
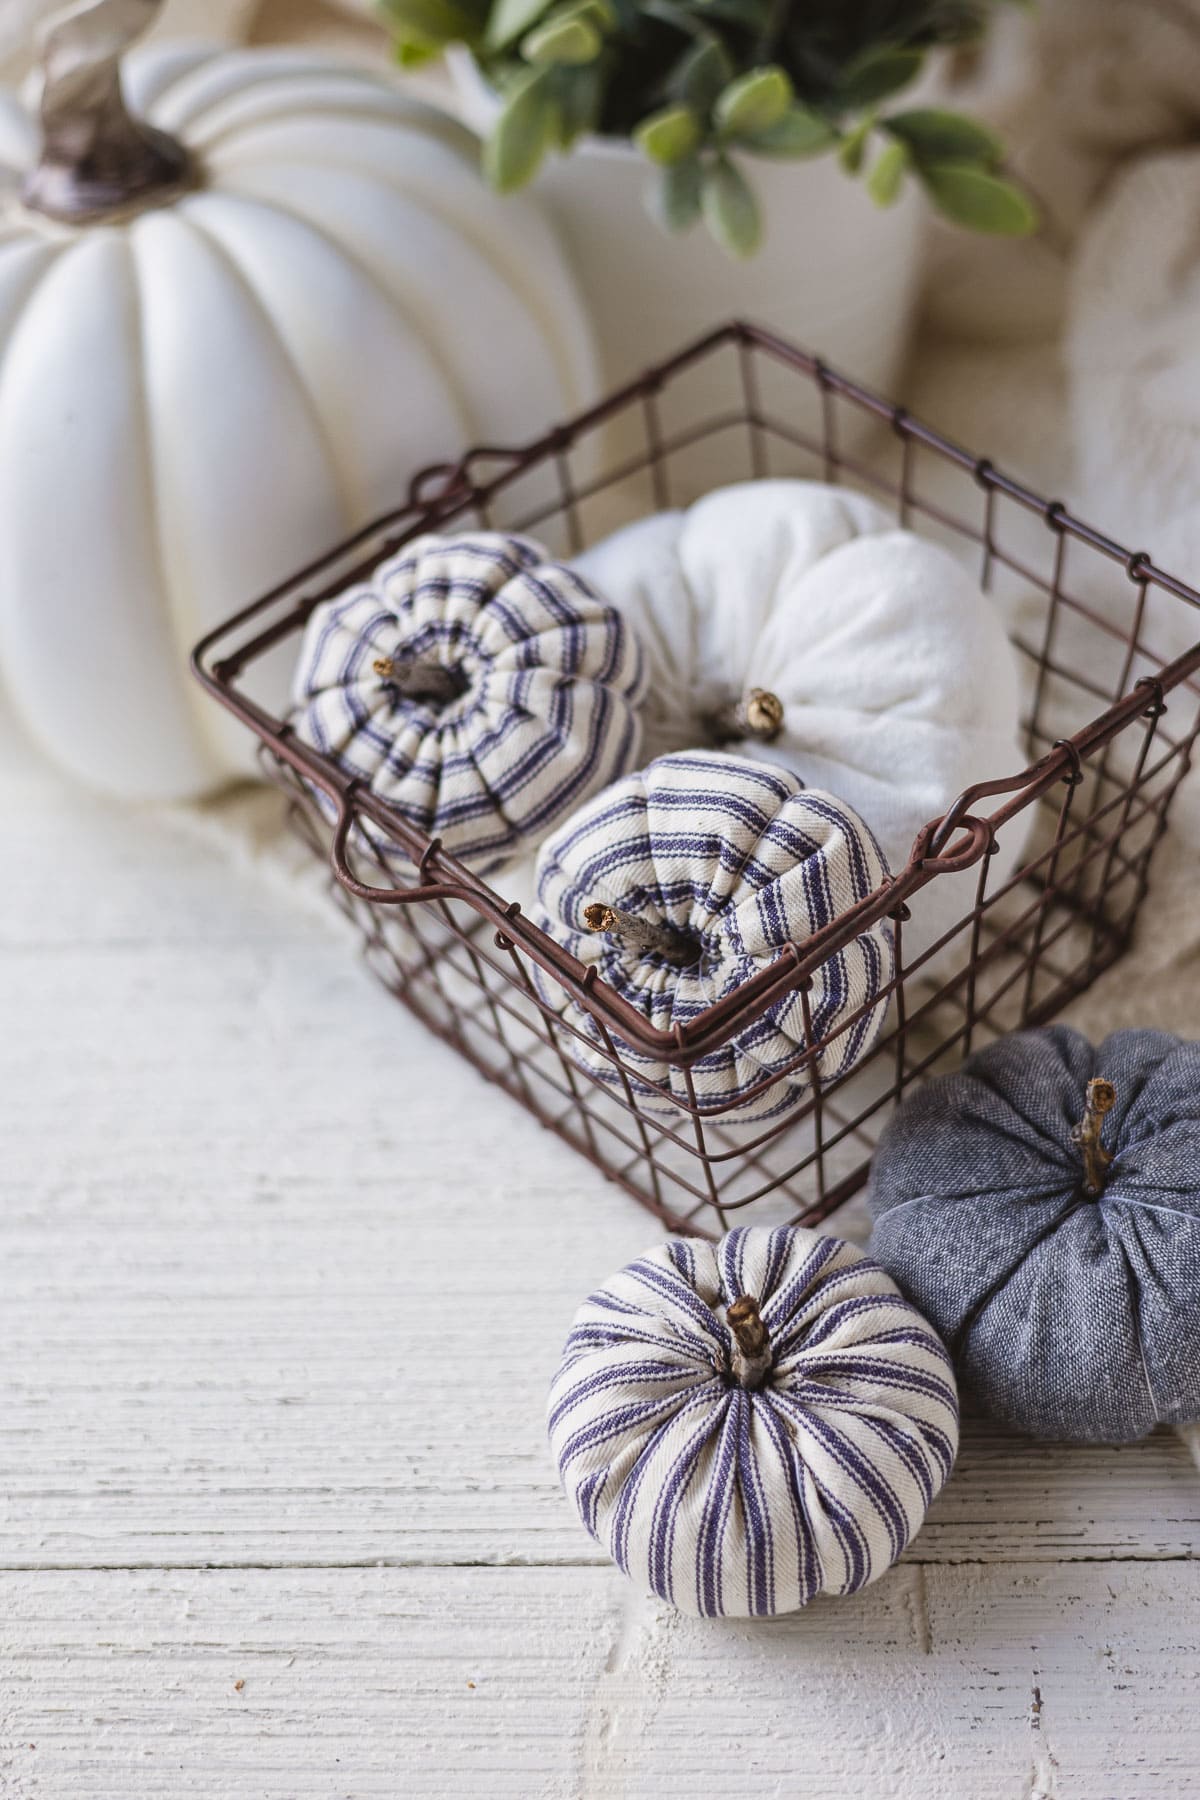
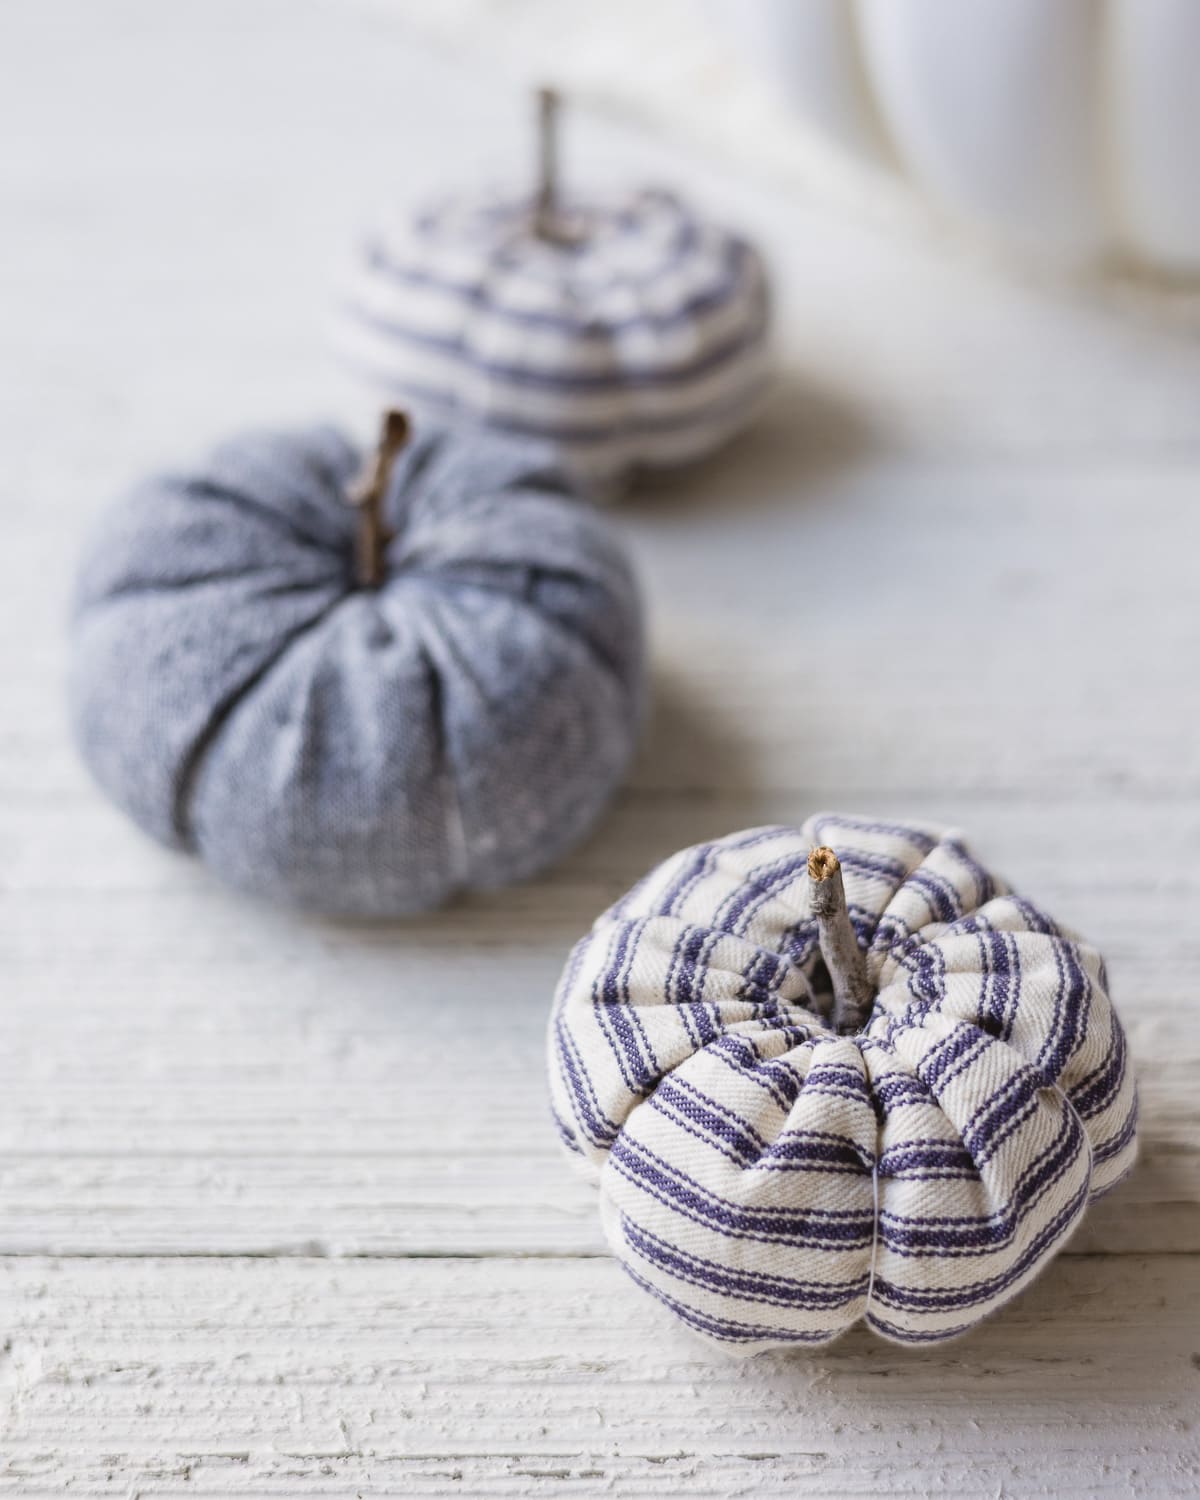
Mini DIY Ticking Stripe Pumpkins
If you love creating your own DIY fall home décor each year, I think you’ll love these easy mini DIY Ticking Stripe Pumpkins! They fit right into fall farmhouse décor and can easily be made with your favorite fabrics.
Please note that this post contains affiliate links which allow me to earn a small commission when a purchase is made at no additional cost to you. As an Amazon Associate I earn from qualifying purchases. Read more here.
I am all about the pumpkin tutorials this year. I’ve been creating many different tutorials and ideas behind the scenes and I can’t wait to share more.
I was excited to create both my DIY Drop Cloth Pumpkins and these Ticking Stripe Pumpkins (they use the same technique) because they fit so well into farmhouse style home décor. I know that if you enjoy farmhouse style décor, you’ll love these pumpkins!
Weekly Crafting Fun!
Join my list and get a weekly email with relaxing craft ideas, freebies, sewing tutorials, and more!
Looking for more pumpkin crafts?
Check out my list of 15+ DIY Pumpkin Craft Ideas.
What Fabric to Use?
To get the look, you’ll need to find some ticking stripe fabric. I usually like to buy my fabric in person. I purchase my ticking stripe fabric at Hobby Lobby, but you can also find ticking stripe fabric on Amazon. Check reviews to see real-life photos of the fabric you are considering.
I also used some pretty yarn-dyed blue linen I originally bought from Amazon to make the blue pumpkin shown the photos. Feel free to get creative with your fabric choices and or even add embellishments.
Other Supplies to Gather
Sewing Needle & Thread (Sewing Machine Optional)
The mini pumpkins require sewing one seam which can be done by hand or with a sewing machine. Then, you’ll use a needle and thread for gathering the pumpkin top and bottom.
Polyester Fiberfill
Use poly-fil to stuff your pumpkins. Polyester Fiberfill is what I use. If you are buying a new bag, a standard 12 oz bag will be more than enough. This the size I usually grab at the craft store, but if you only need it for your mini pumpkins, you could certainly grab a smaller size if you want.
3″ or 4″ Doll Needle and Crochet Thread
You’ll need a long and thin (about 3″) doll needle and crochet thread or a similar thread (like thin sturdy yarn) to make the segments of the pumpkin.
So long as you can get your yarn and needle through the center of the pumpkin to create the stitching for the grooves you can use any yarn/thick thread you want.
What Size Are the Pumpkins?
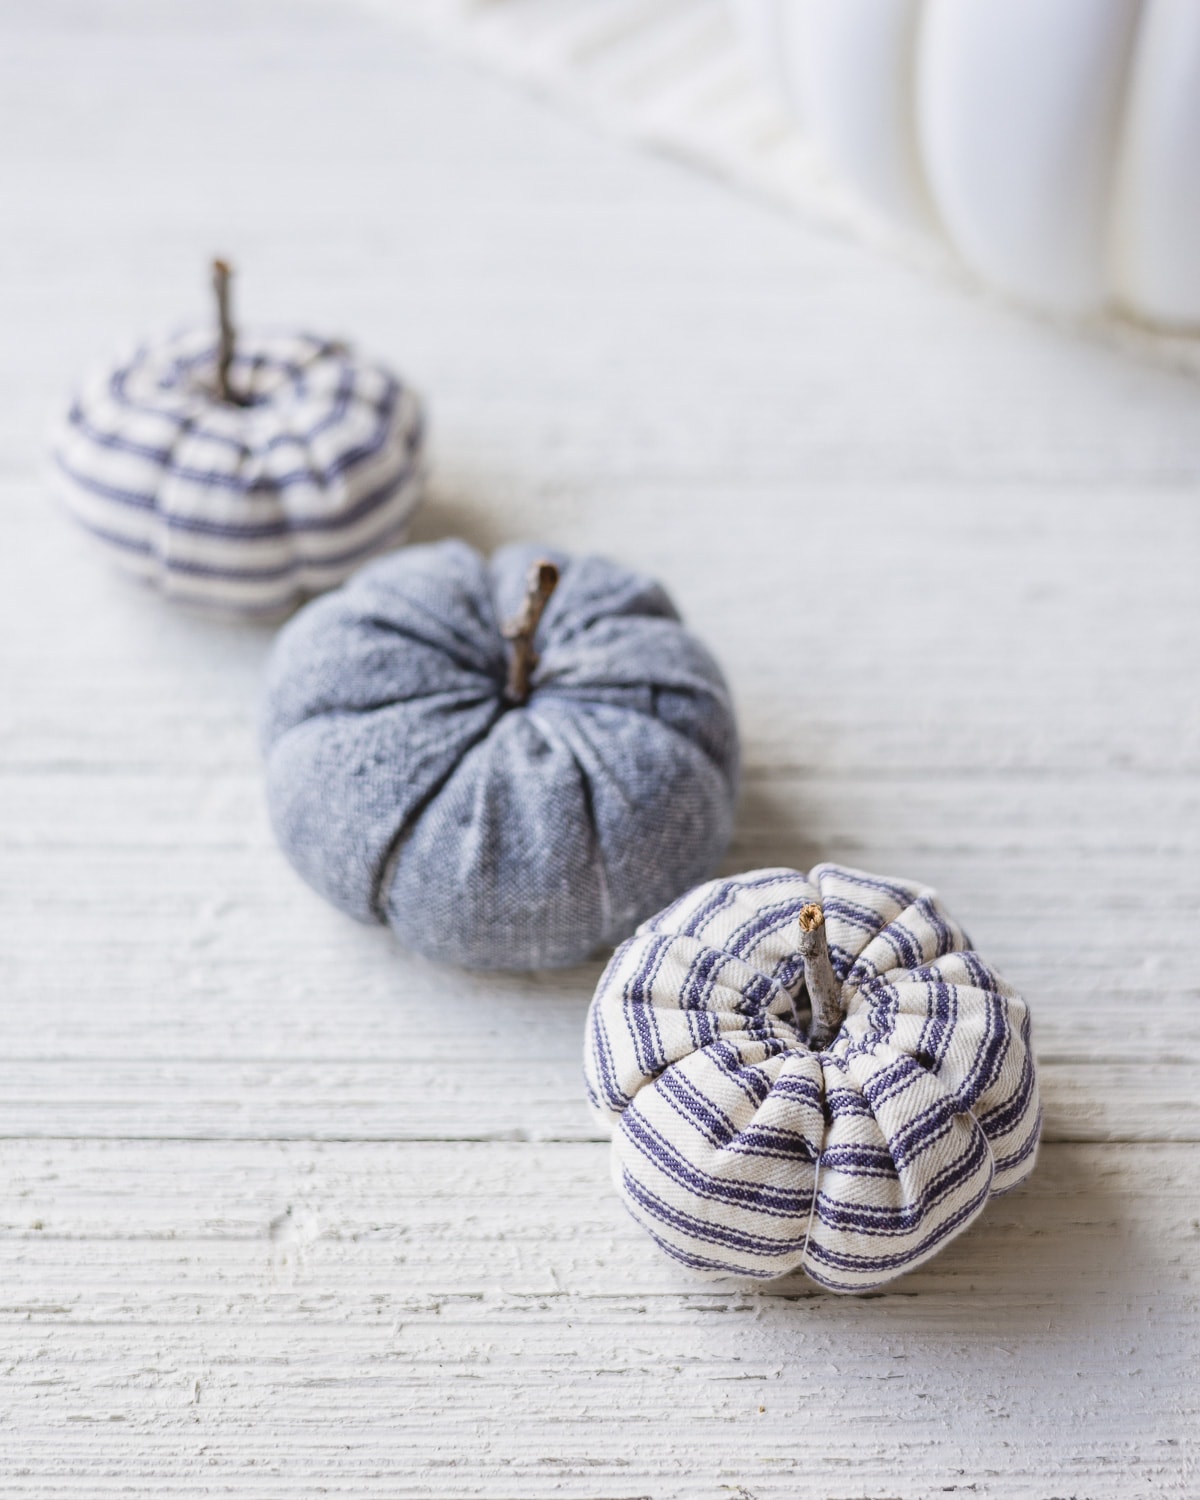
With the dimensions I give here (a 10″x5″ rectangle of fabric per pumpkin) you end up with a pumpkin that is about 3″ in diameter. You can absolutely make these pumpkins larger/smaller/taller/wider.
These mini pumpkins are great for using up fabric scraps!
How to Make Mini DIY Ticking Stripe Pumpkins
The technique for crafting these is nearly exactly the same as my Drop Cloth Pumpkin tutorial, but because I didn’t take photos of the step-by-step when I made these smaller ticking stripe versions, I’ve included duplicate photos below.
The only real difference in the technique is that for these mini pumpkins I start with a smaller rectangle of fabric and the resulting seam allowances for the top and the bottom is a bit smaller. All of these changes are noted clearly in the instructions.
1 – Cut a Rectangle and Sew Closed
First, cut a 10″x5″ rectangle from ticking stripe fabric for each pumpkin you want to make. You’ll see in the image below I made some pumpkins with the stripes running horizontal and one with vertical stripes. Choose whichever you prefer.
Fold the fabric in half wrong sides together and stitch a 3/8″” seam down the open end. Use your sewing machine or a needle and thread if you don’t have a sewing machine.
2 – Create the Base
Now we need to gather the bottom of the pumpkin together. On the bottom edge, measure about 1″ from the opening all the way around the tube we created. You can mark this line or just eyeball it.
Thread a needle with a doubled & knotted thread and sew a gathering stitch (just a medium-long length running stitch) all the way around the opening at the 1″ line. Note that you are just sewing through one layer of fabric all the way around the tube.
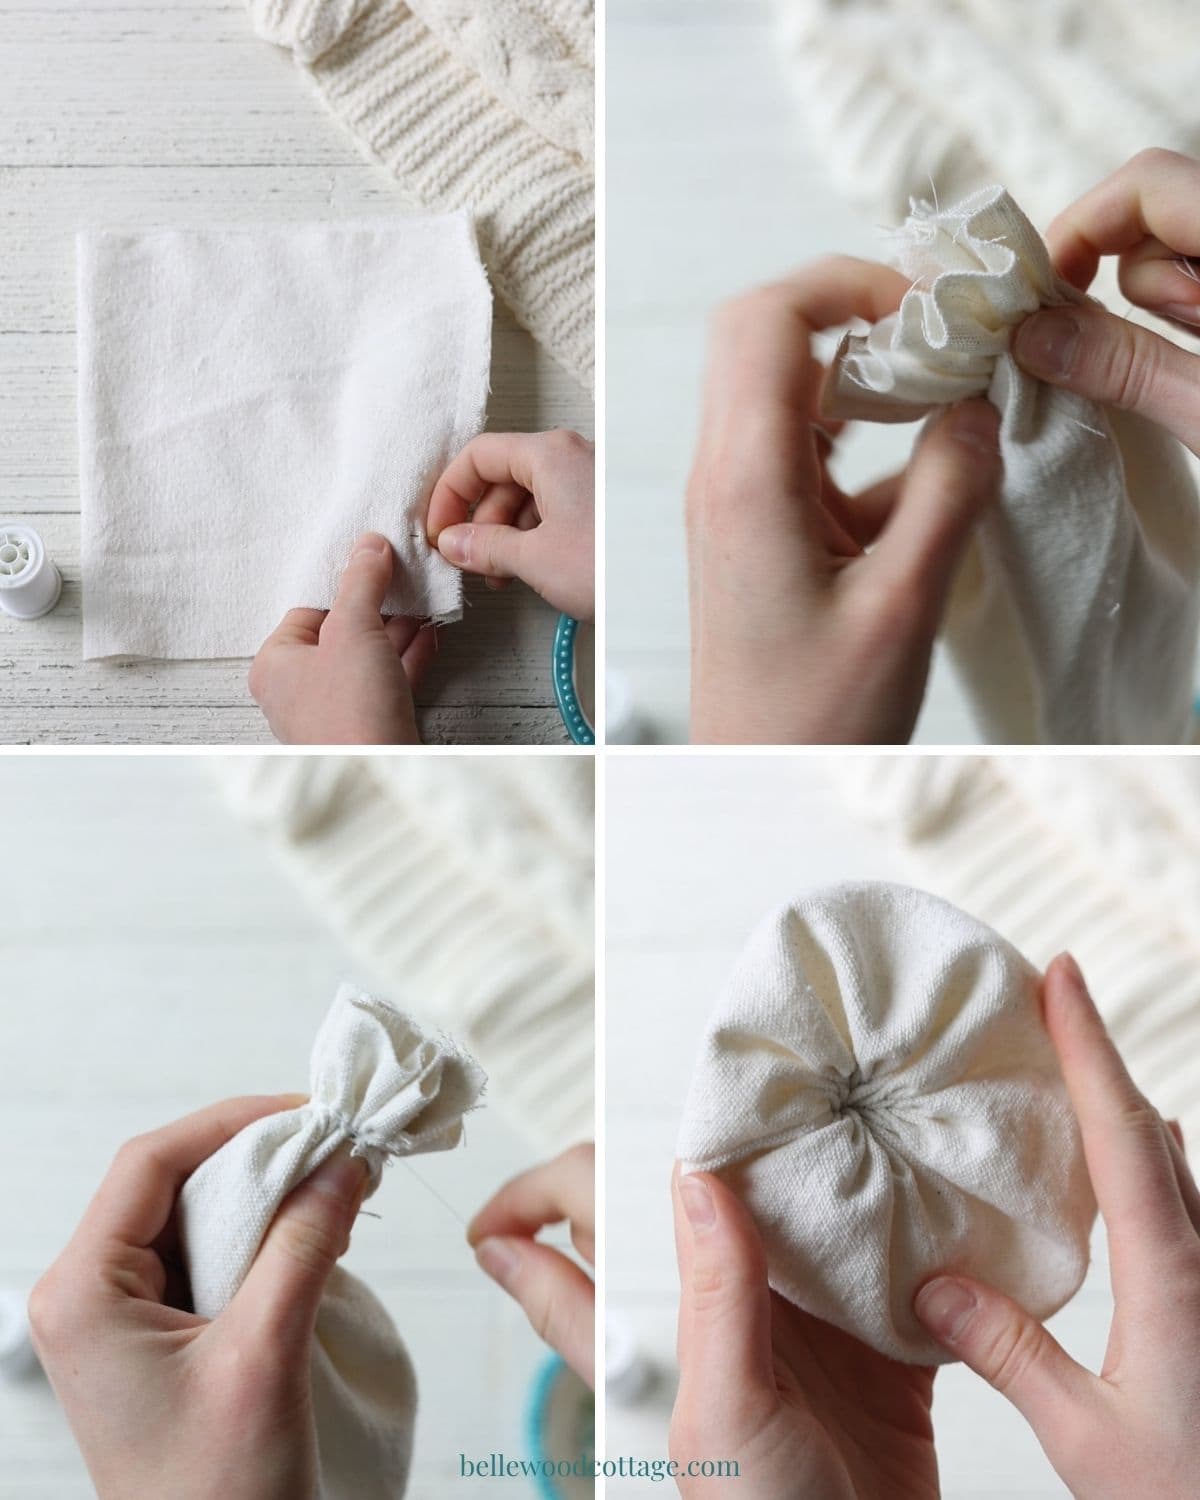
After you sew all the way around gently push the fabric and pull your thread to gather the pumpkin. Be careful not to pull too hard on your thread and snap it.
You won’t be able to completely tighten the gathers, instead, just gently gather the fabric as snug as you can (the generous seam allowance means the edges won’t peek through).
Once the gathers are done it helps before the next step to take a couple “catch stitches”. These are just tiny whip stitches to secure your gathers for a moment. You can place these in the excess fabric of the gathered area.
Once you can’t get the gathers any tighter and you’ve added a few catch stitches, take your thread and wrap it snugly around the whole gathered section three times. Then, knot your thread securely, pass the end of the thread out of the pumpkin, and trim.
Turn right side out.
3 – Stuff the Pumpkin
Using polyester fiberfill, stuff and pack the pumpkin until it feels full (use more or less filling depending on the final look you want). Leave about 1″ of fabric all the way around the opening so you have enough fabric for the gathers on top.
4 – Close the Top
Thread your needle with another doubled & knotted length of thread. On the right side, stitch a gathering stitch all the way around that 1″ line. Gently push the fabric and pull your thread to gather the top of the pumpkin together.
Before the fabric is completely gathered, use your fingers to push the seam allowance into the center of the pumpkin, hiding all the raw edges. Gently pull the gathering as snug as you can.
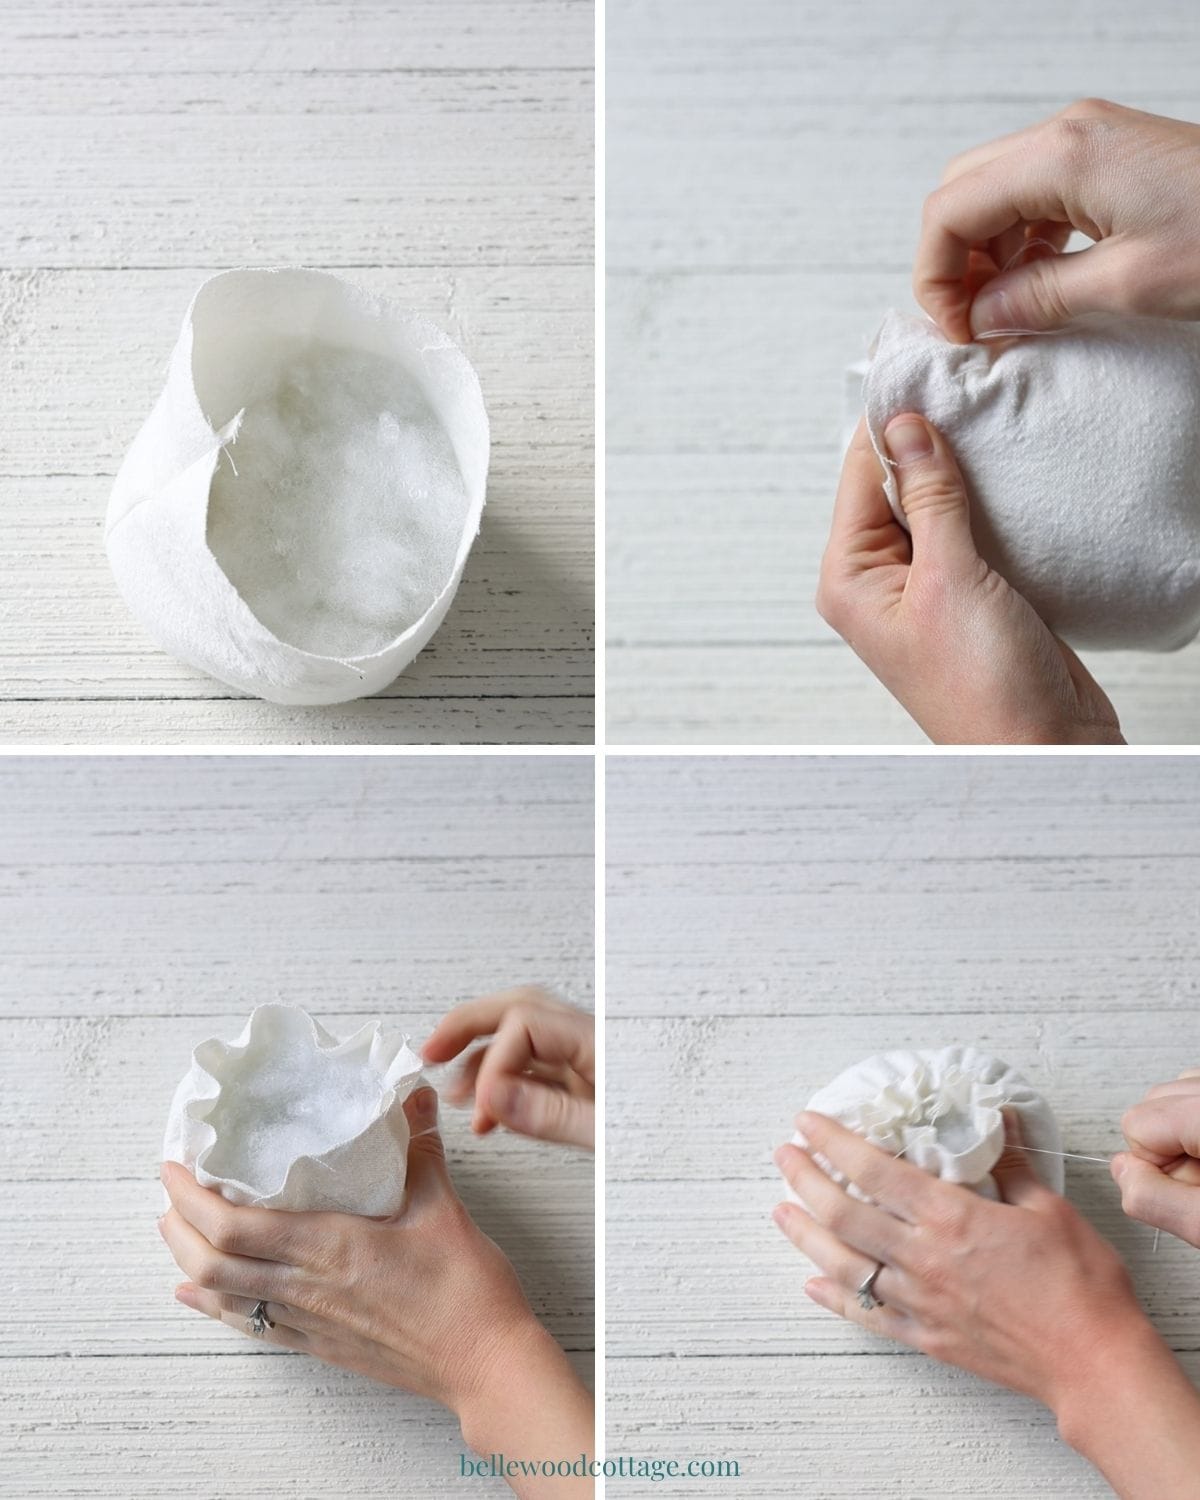
As before, take a few catch stitches to secure your gathers and then knot off the thread securely. Pass the end of the thread out of the pumpkin, and trim.
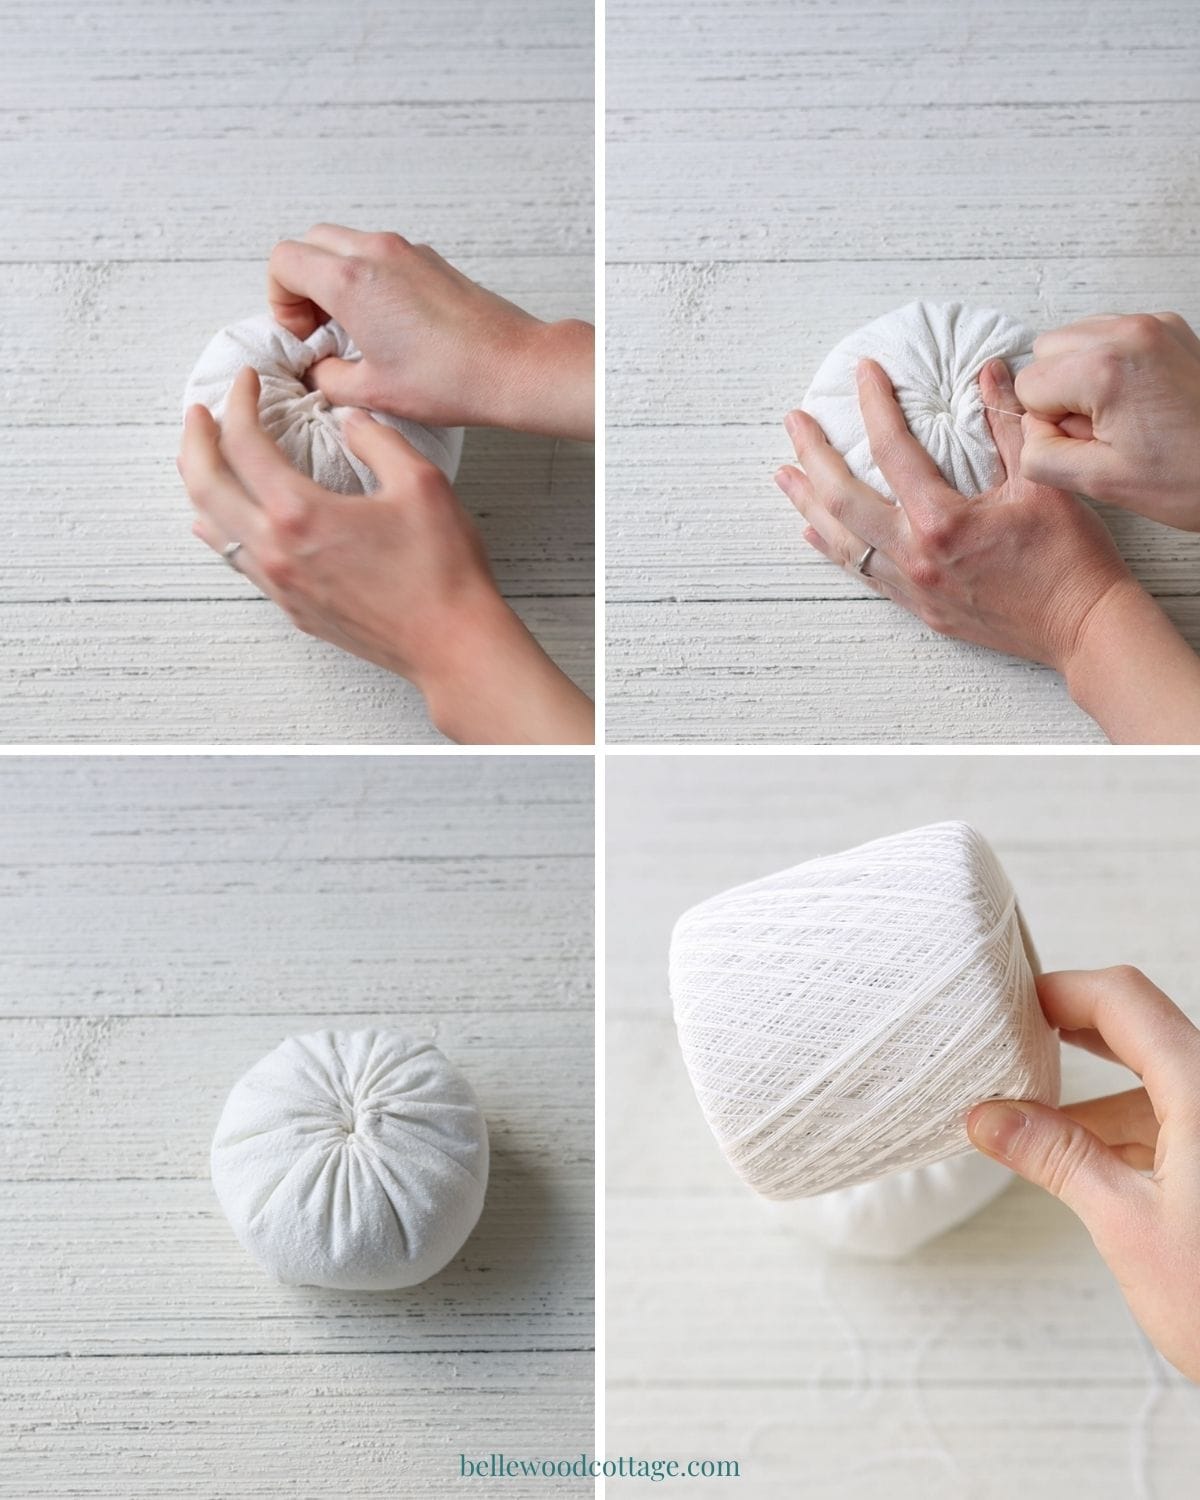
5 – Pumpkin Grooves
Use about 3 feet (single length) of crochet thread (or thin strong yarn) threaded through a 3″ doll needle. Knot the thread securely and pass through the bottom of the pumpkin to hide the knot.
You’ll have to catch the knot in the gathers that are tucked inside the pumpkin so that it doesn’t pull out as you continue to sew.
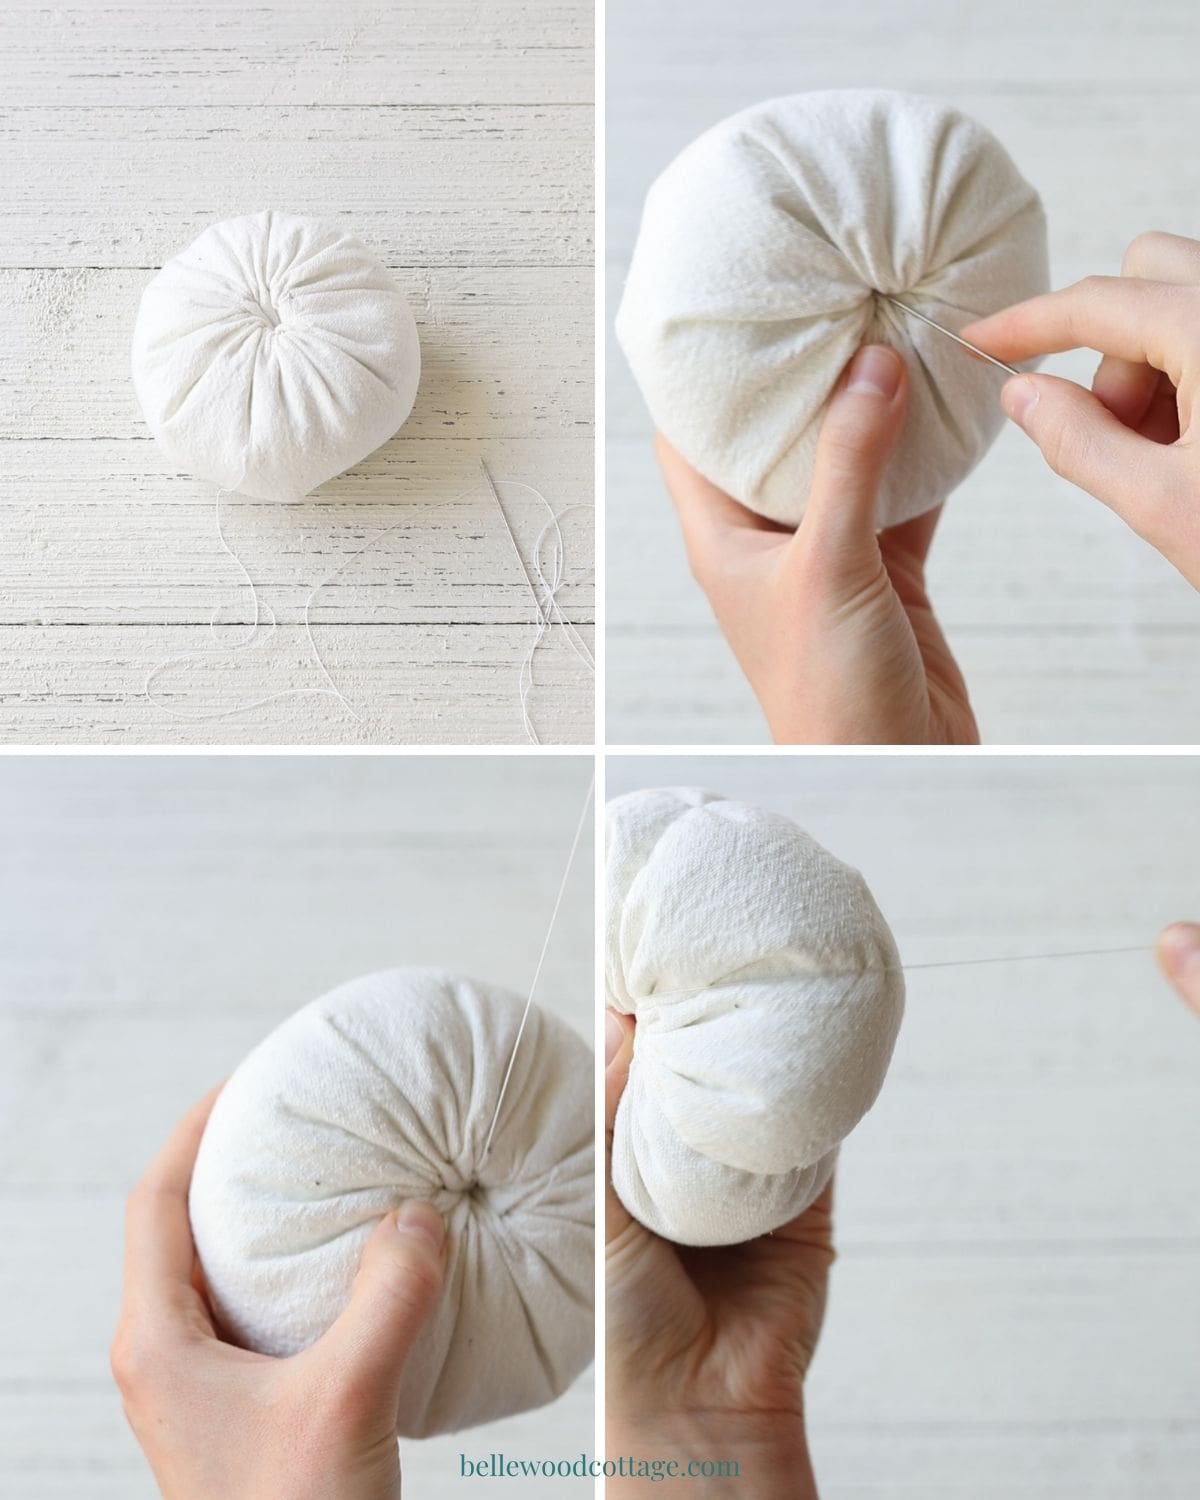
Bring your doll needle up the center of the pumpkin to the where the seam of the pumpkin is (where we originally sewed the fabric to make a tube). Now wrap the thread down over that seam and bring the needle back up again through the base of the pumpkin.
Note: I have you sew your first “groove” into the seam of the pumpkin to hide it in the finished pumpkin.
We’re essentially just doing a giant whipstitch around the pumpkin to make the grooves. Continue moving your needle up through the center of the pumpkin, down over and around the side of pumpkin, and up again, until you’ve made as many “grooves” as you like. Pull the thread a bit tighter than you want after each groove since it will loosen a bit as you go.
To keep the thread from loosening you can take some hidden catch stitches tucked in the base of the pumpkin or the top to secure your thread after each groove. Also be careful not to pull too tightly and break the thread.
Once you’ve made all of your grooves, knot your thread in an inconspicuous spot (deep in the gathers is great) and pass the needle (with the thread still in it) through the pumpkin to tuck in the knot. Trim thread.
Make the Stem
For the stem, we’re just going to use some twigs from the yard. Choose dry twigs that snap easily.
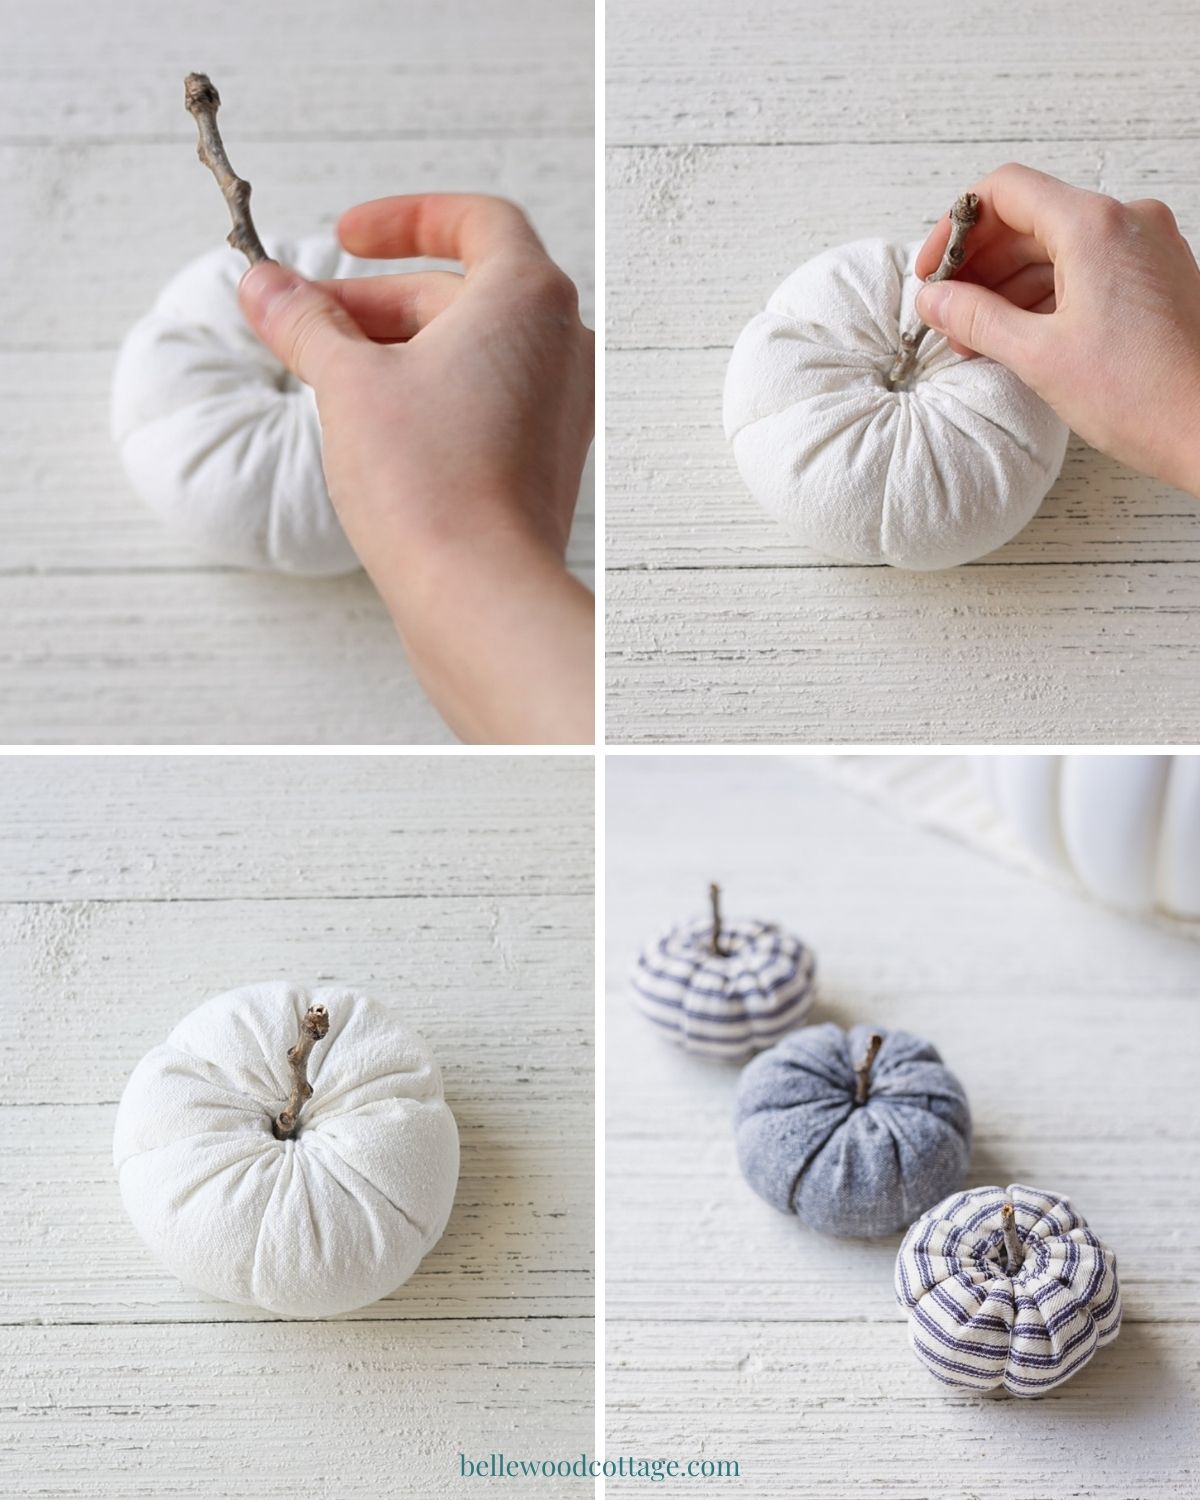
Snap a few inches off a larger stick or twig and stick it right into the center of the pumpkin. You can add some hot glue to keep it securely in the pumpkin if you like.
And that’s all there is to it!
More Easy Crafts to Try
- Washi Tape Pumpkins for DIY Fall Décor
- How to Sew a Drawstring Bag with French Seams Tutorial
- How to Paint Mason Jars
- 30+ Washi Tape Ideas to Make Today!
Weekly Crafting Fun!
Join my list and get a weekly email with relaxing craft ideas, freebies, sewing tutorials, and more!