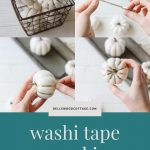
Washi Tape Pumpkins for DIY Fall Décor
If you love easy and relaxing crafts, you’ll love these washi tape pumpkins. DIY fall décor couldn’t be easier with craft store pumpkins, beautiful washi tape, and a pair of scissors.
Please note that this post contains affiliate links which allow me to earn a small commission when a purchase is made at no additional cost to you. As an Amazon Associate I earn from qualifying purchases. Read more here.
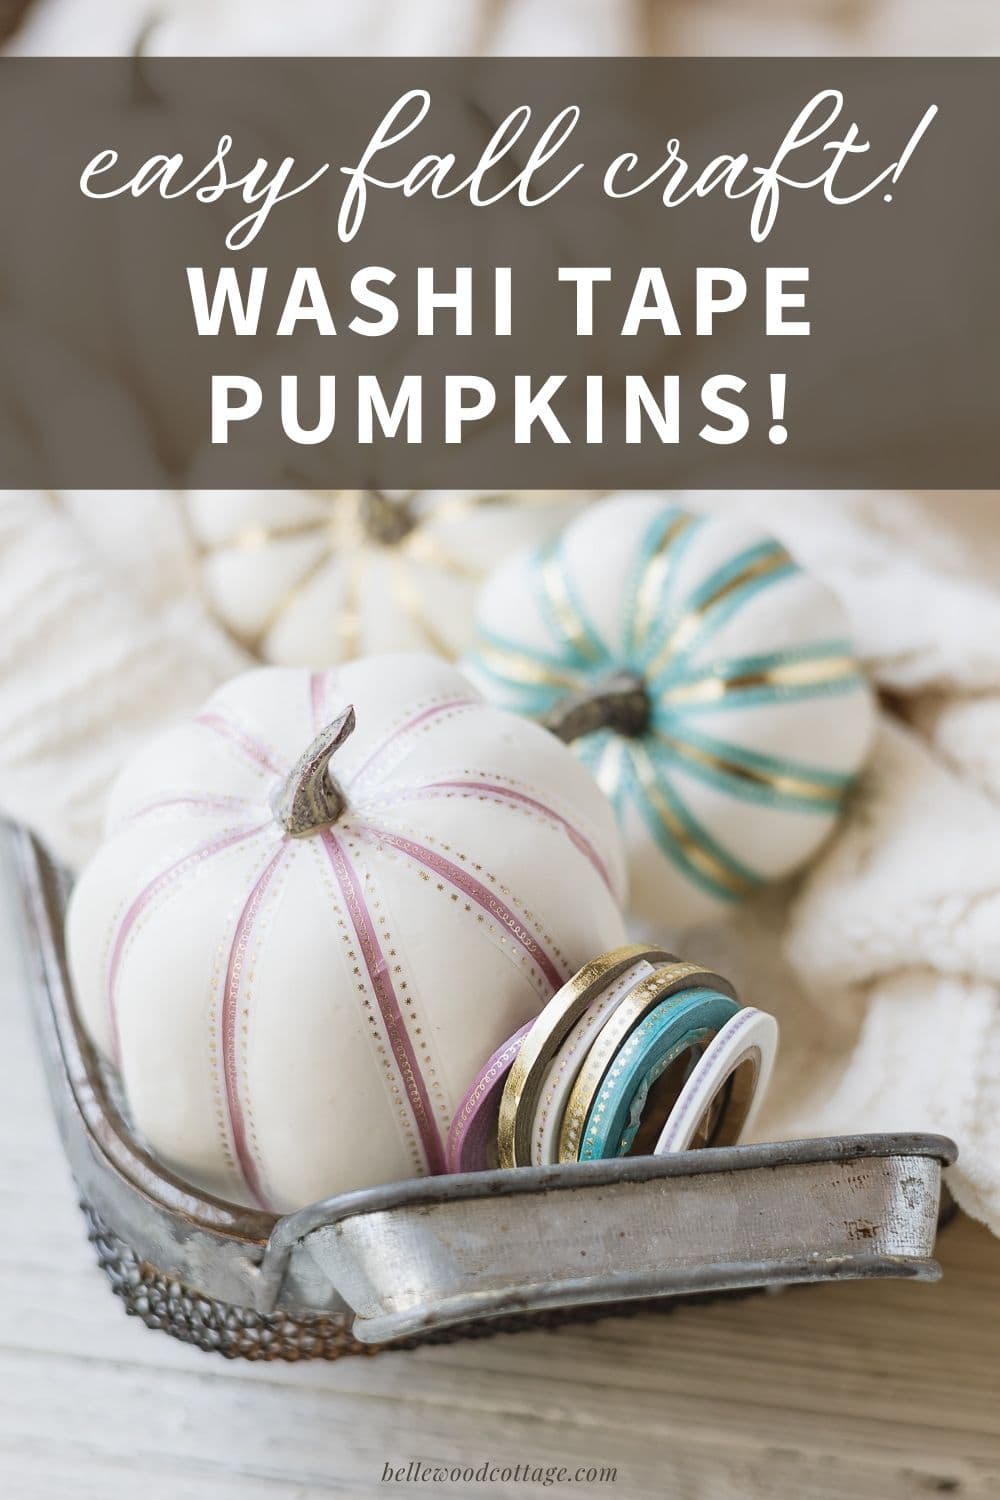
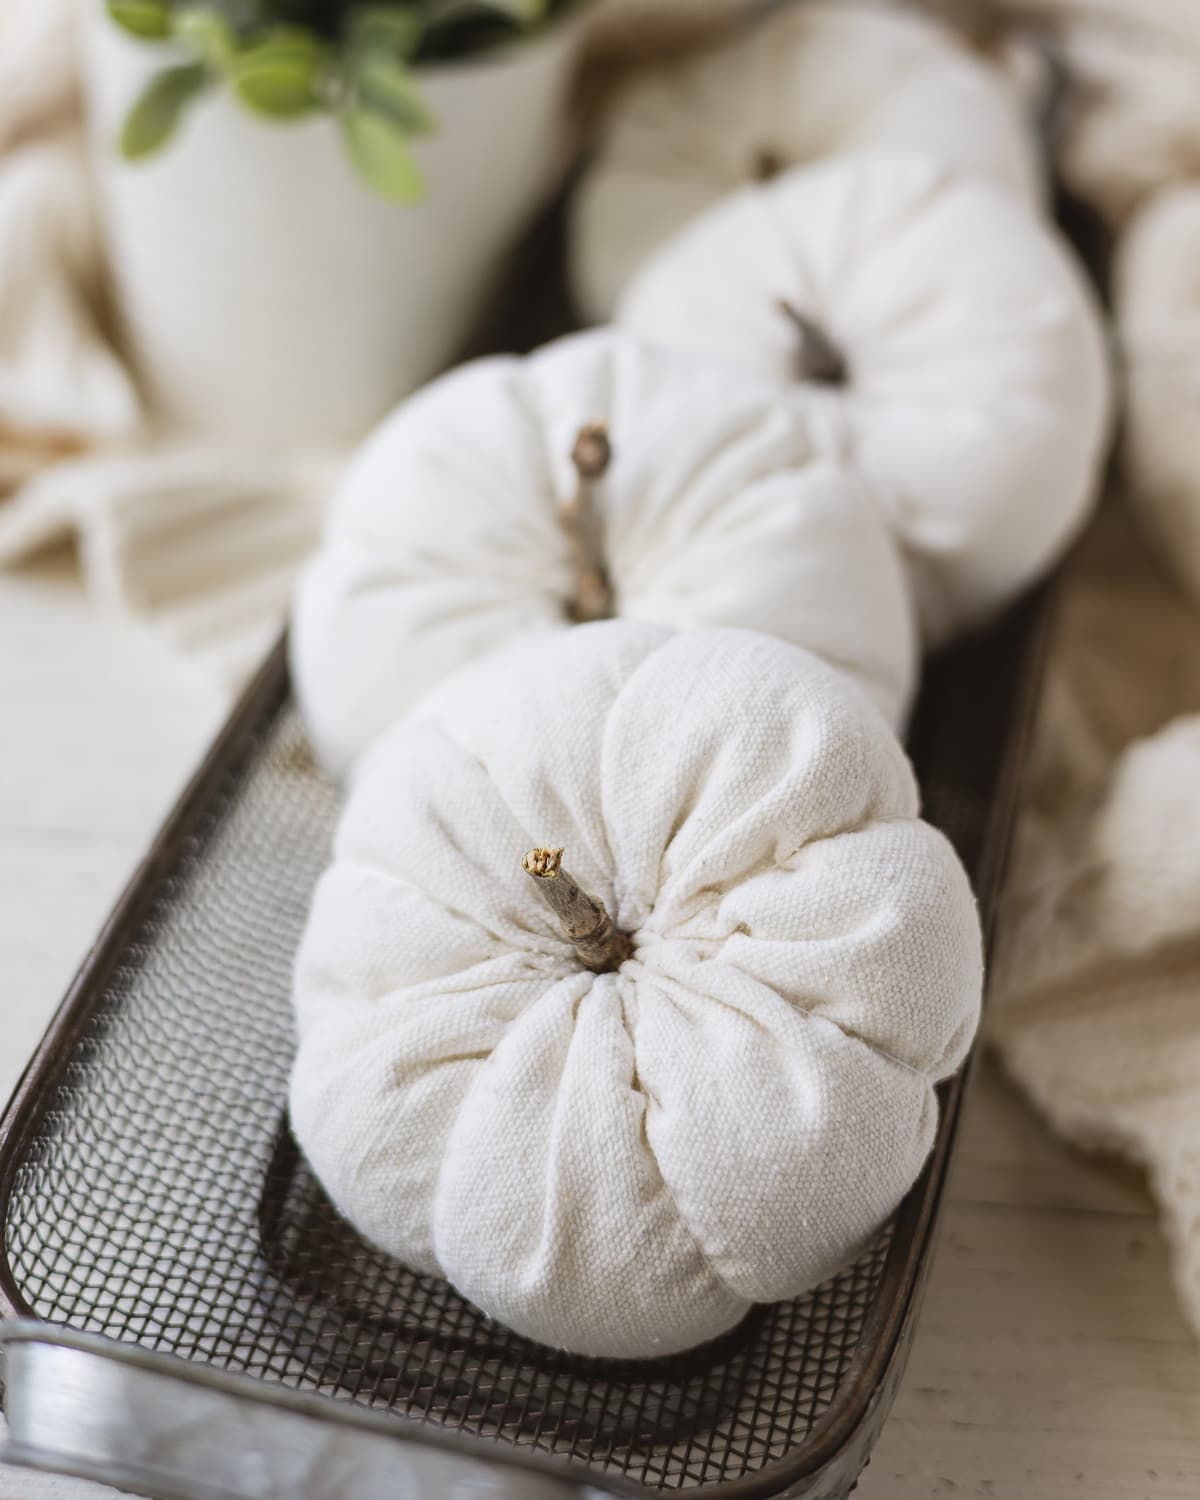
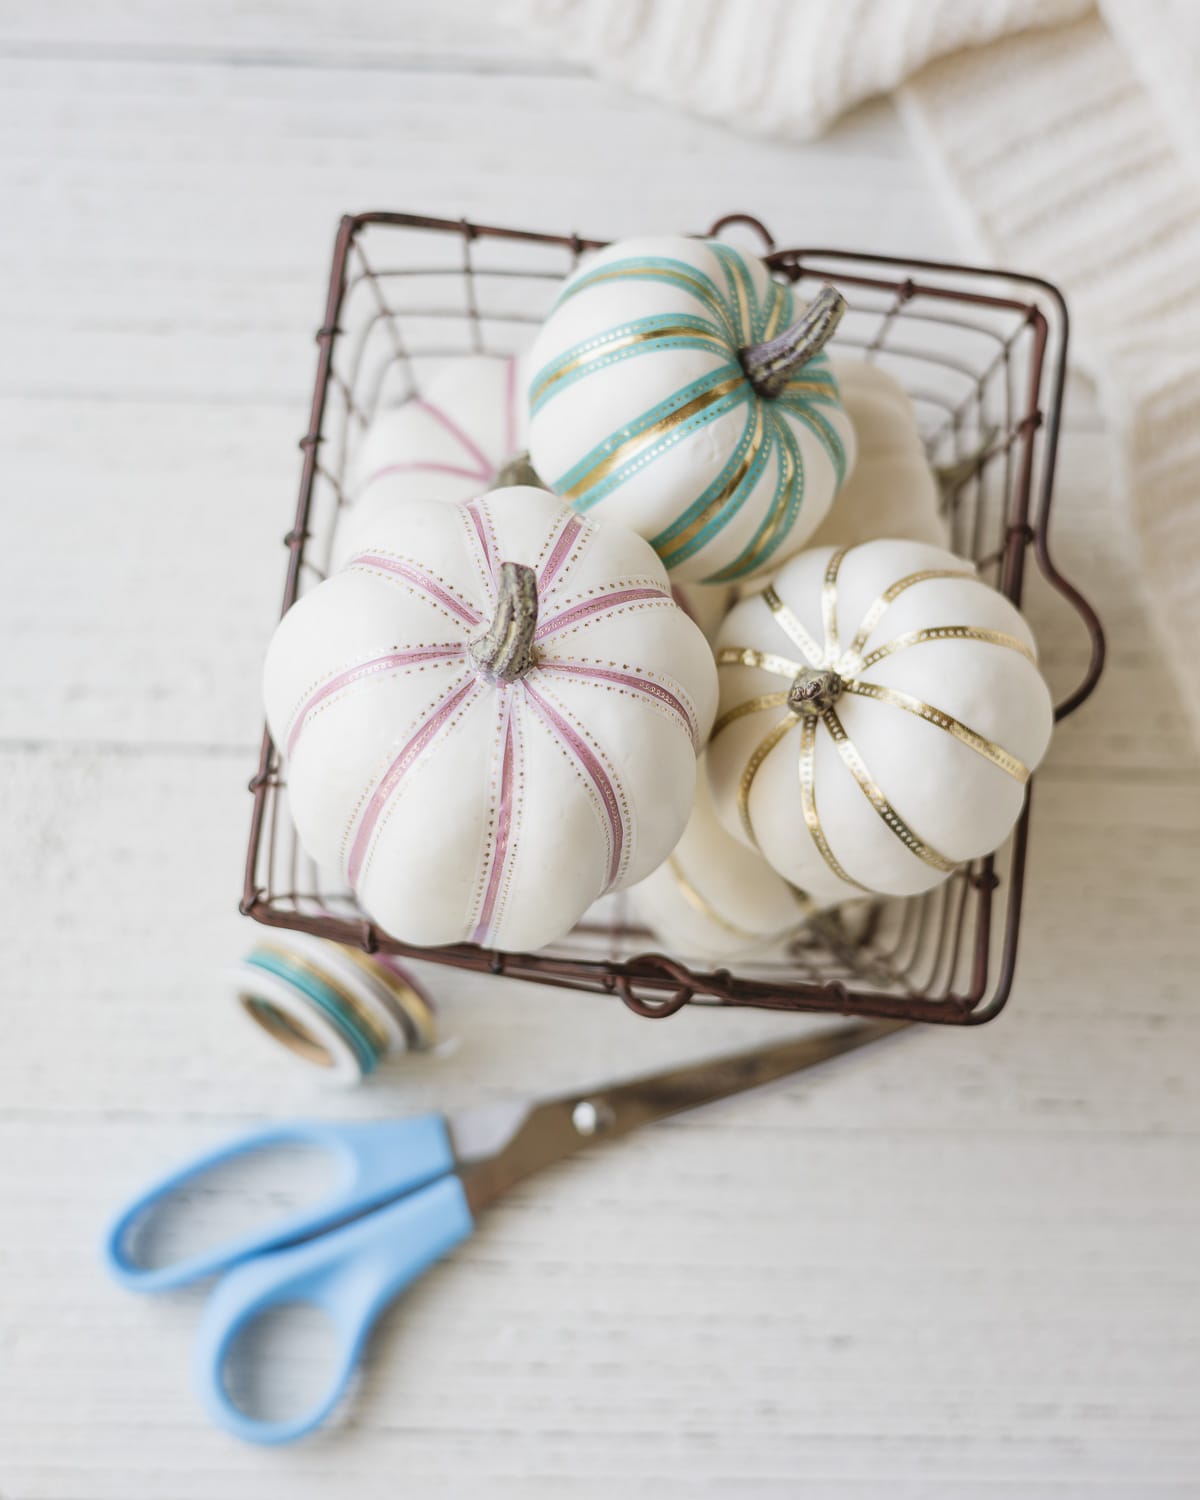
Retailers have realized that home decorators love white pumpkins and now it’s much easier to find bags of these neutral pumpkins available at craft stores. In addition to being pretty on their own, they are a lot of fun to add embellishment to as well.
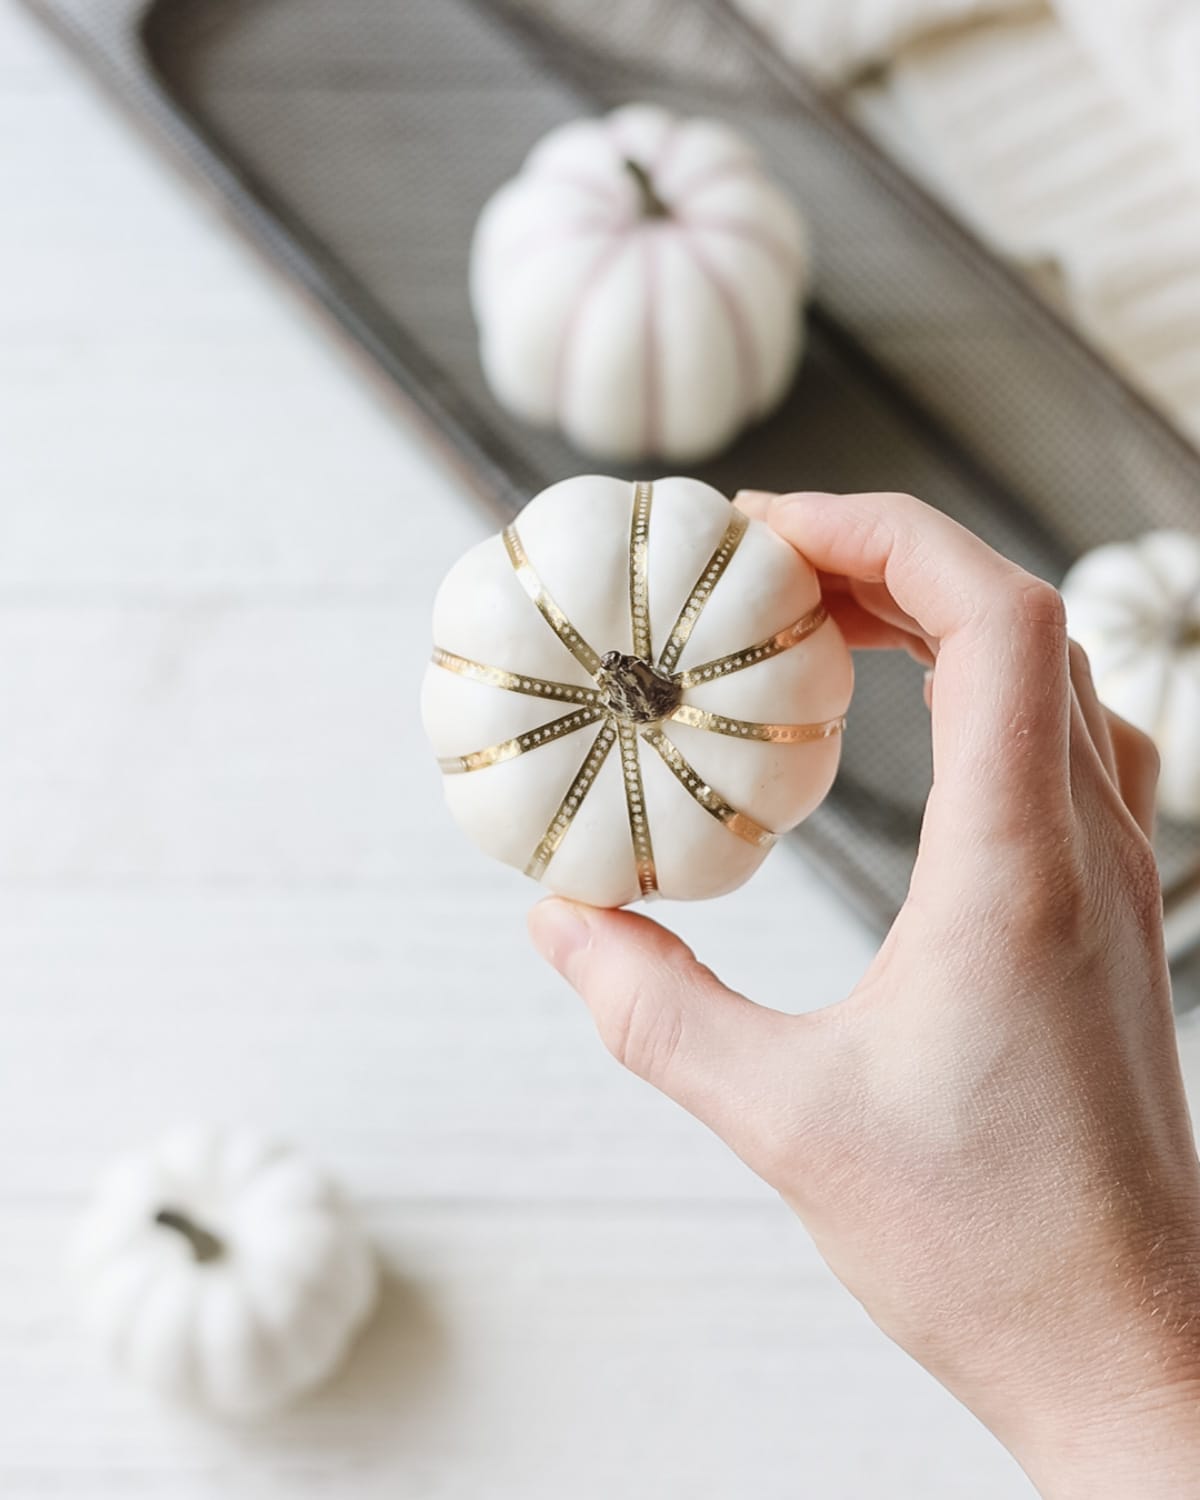
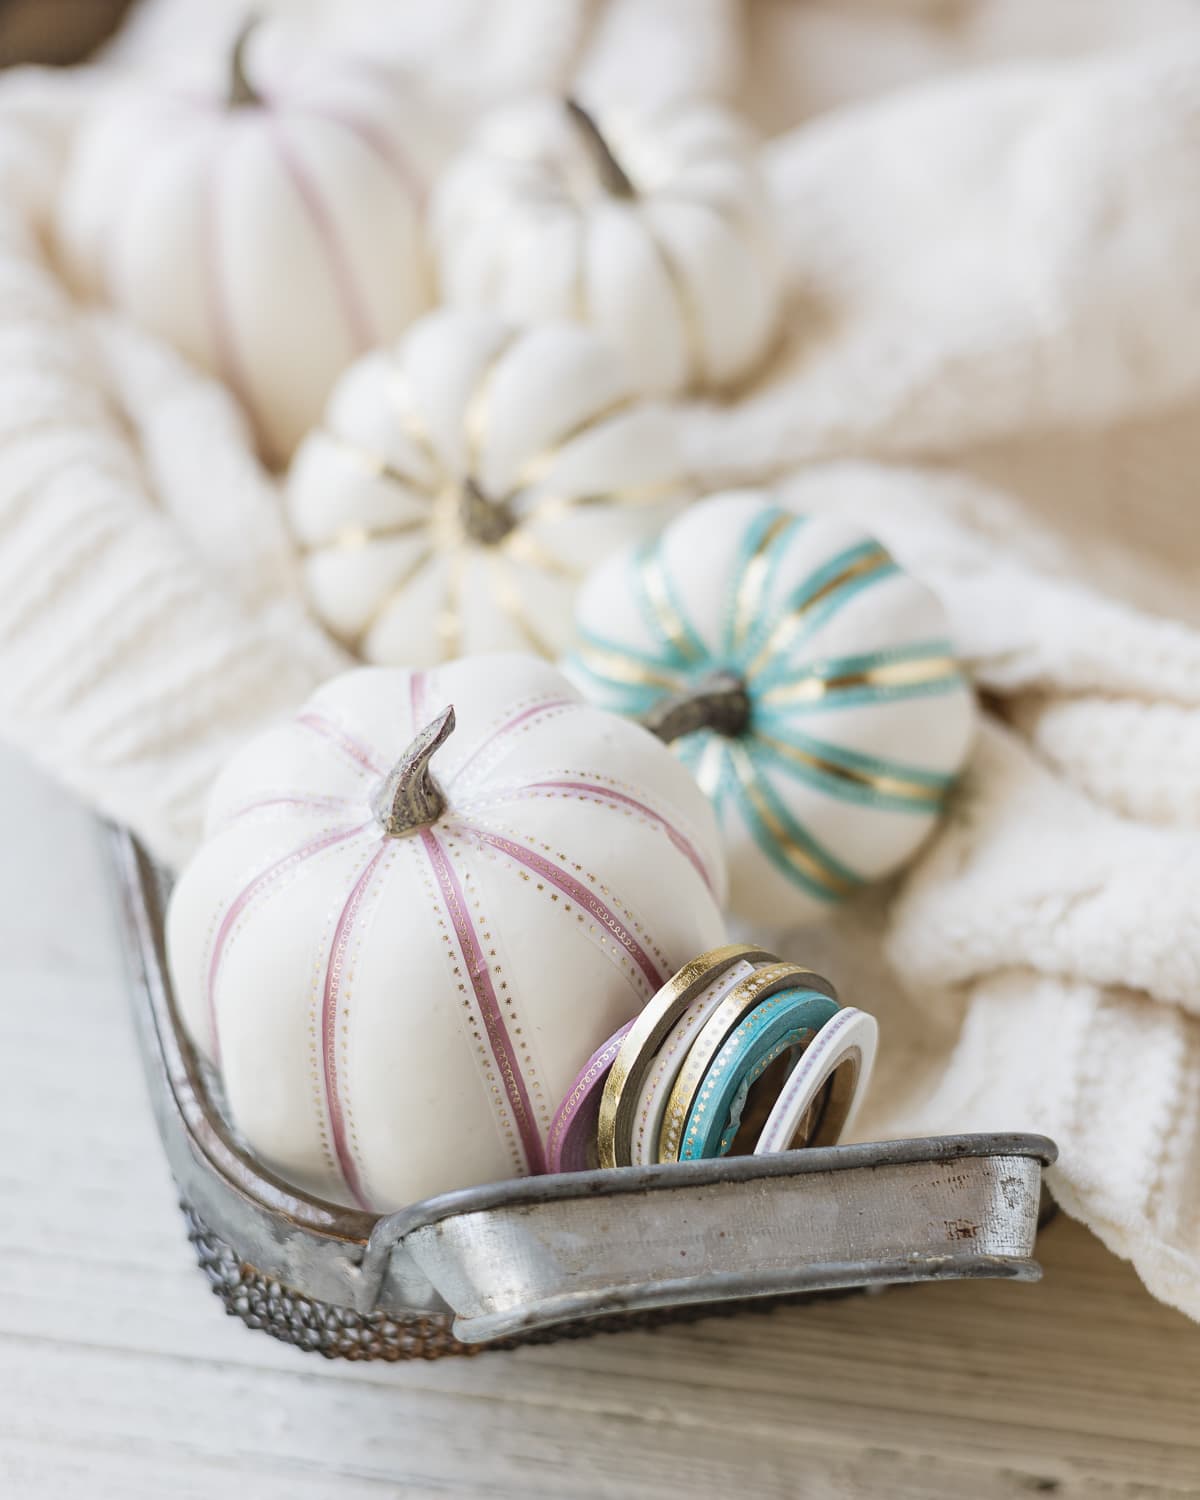
Here I’ve decorated my white pumpkins with thin washi tape in metallic colors. I layered a few different tapes onto the pumpkins to create different looks.
Weekly Crafting Fun!
Join my list and get a weekly email with relaxing craft ideas, freebies, sewing tutorials, and more!
Easier Than Paint!
Now, you could of course paint your foam pumpkins before getting started, but if you’d rather avoid painting, washi tape makes things so easy. If you are planning a craft activity for kids or scheduling a craft night for adults and don’t want to worry about dry time, adding this easy project to the plan could be just the ticket.
Washi tape is easy to use, no mess, sticks easily, and doesn’t require dry time. It’s also available in a huge array of colors and patterns so you can get creative with your projects.
Looking for more washi tape crafts? Try my favorite washi tape ideas right here.
Want more pumpkin crafts? Check out my list of 15+ DIY Pumpkin Craft Ideas.
Supplies You’ll Need
Foam/Plastic Pumpkins
You can use any color of pumpkin you’d like of course, but I like white or cream. I found white foam pumpkins at Hobby Lobby. Buy white pumpkins on Amazon or at dollar stores during the fall season as well.
Thin Washi Tape
While you can use any style of washi tape, I chose these thin metallic tapes (about 1/8″ wide). The tape is thin enough that it didn’t scrunch up as I attached it. You can also use multiple strands to create thicker designs.
I used this set of thin tape from Hobby Lobby. The rolls are a generous length and if you can snag it on sale it’s a great deal. This set of thin washi tape from Amazon would also work well.
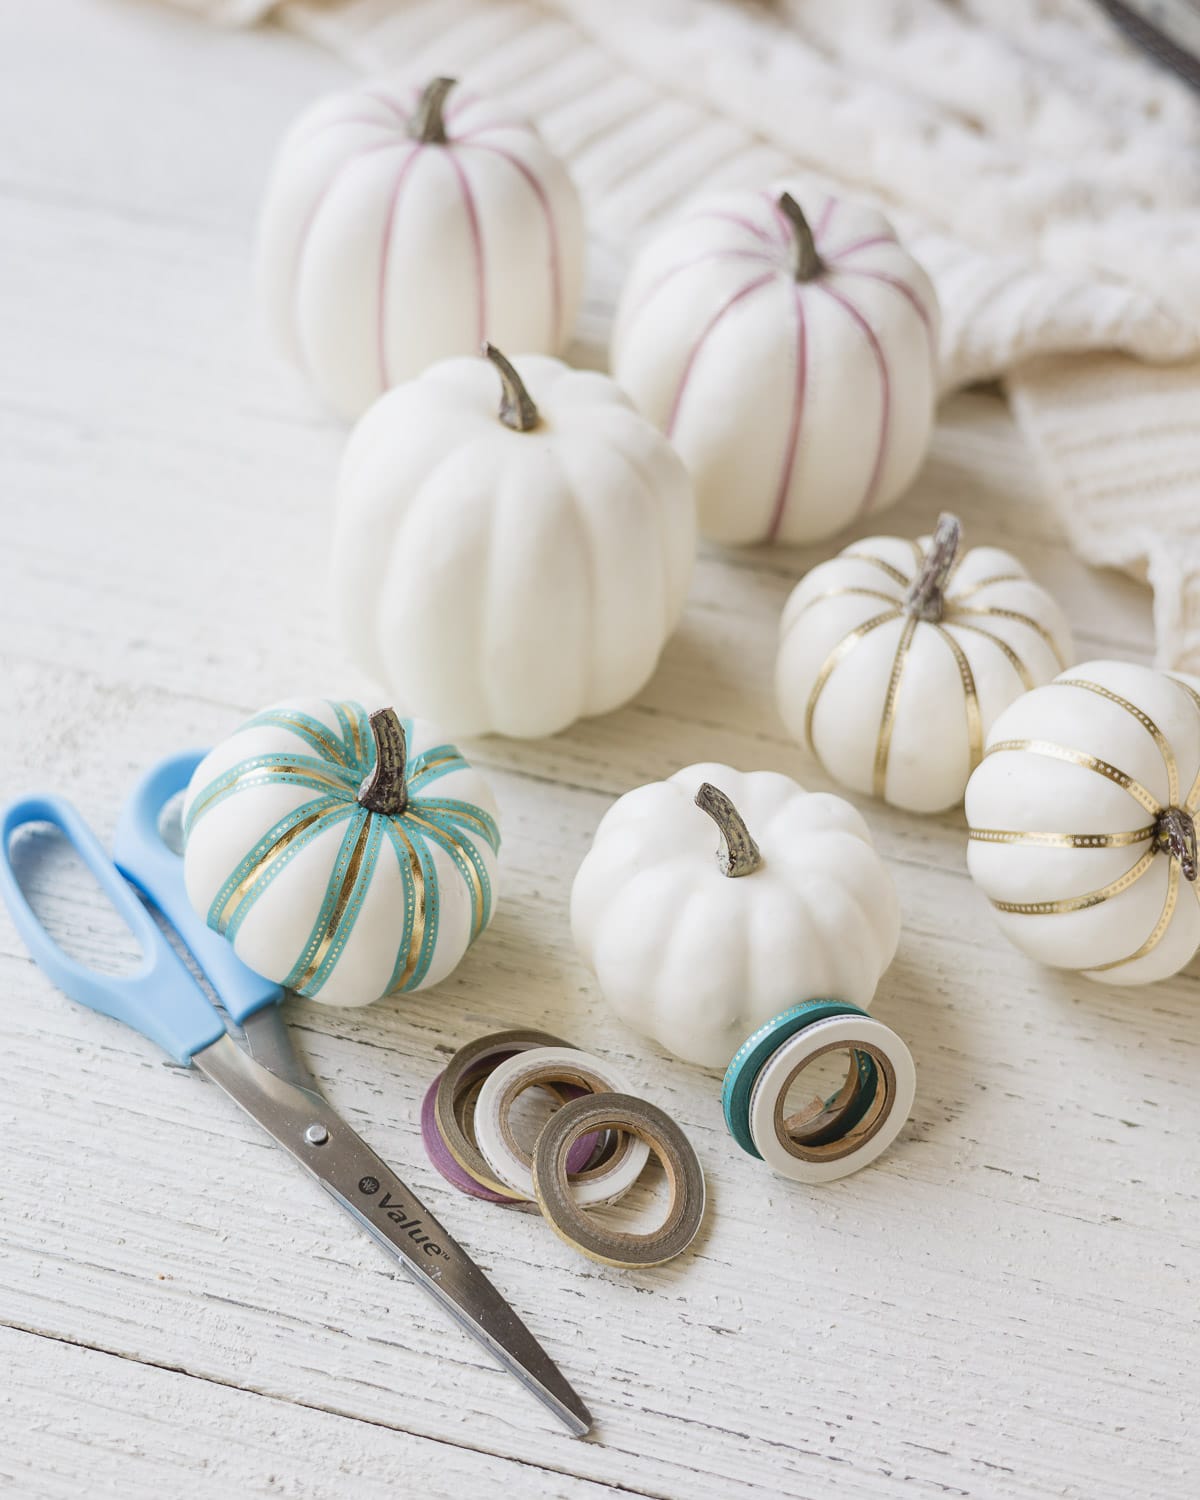
Scissors
While you can cut washi tape just by tearing it, for this project I like to keep a pair of scissors handy for neatly trimming each section of tape.
How to Make Washi Tape Pumpkins
You can probably get a pretty good idea how I made these easy pumpkins just by looking at the photo! Regardless, here’s a few tips to get you started.
Working with thin washi tapes can be a little tricky since it’s so delicate. Take your time and feel free to tear off pieces a bit larger than you know you will need and then trim the excess after attaching the tape.
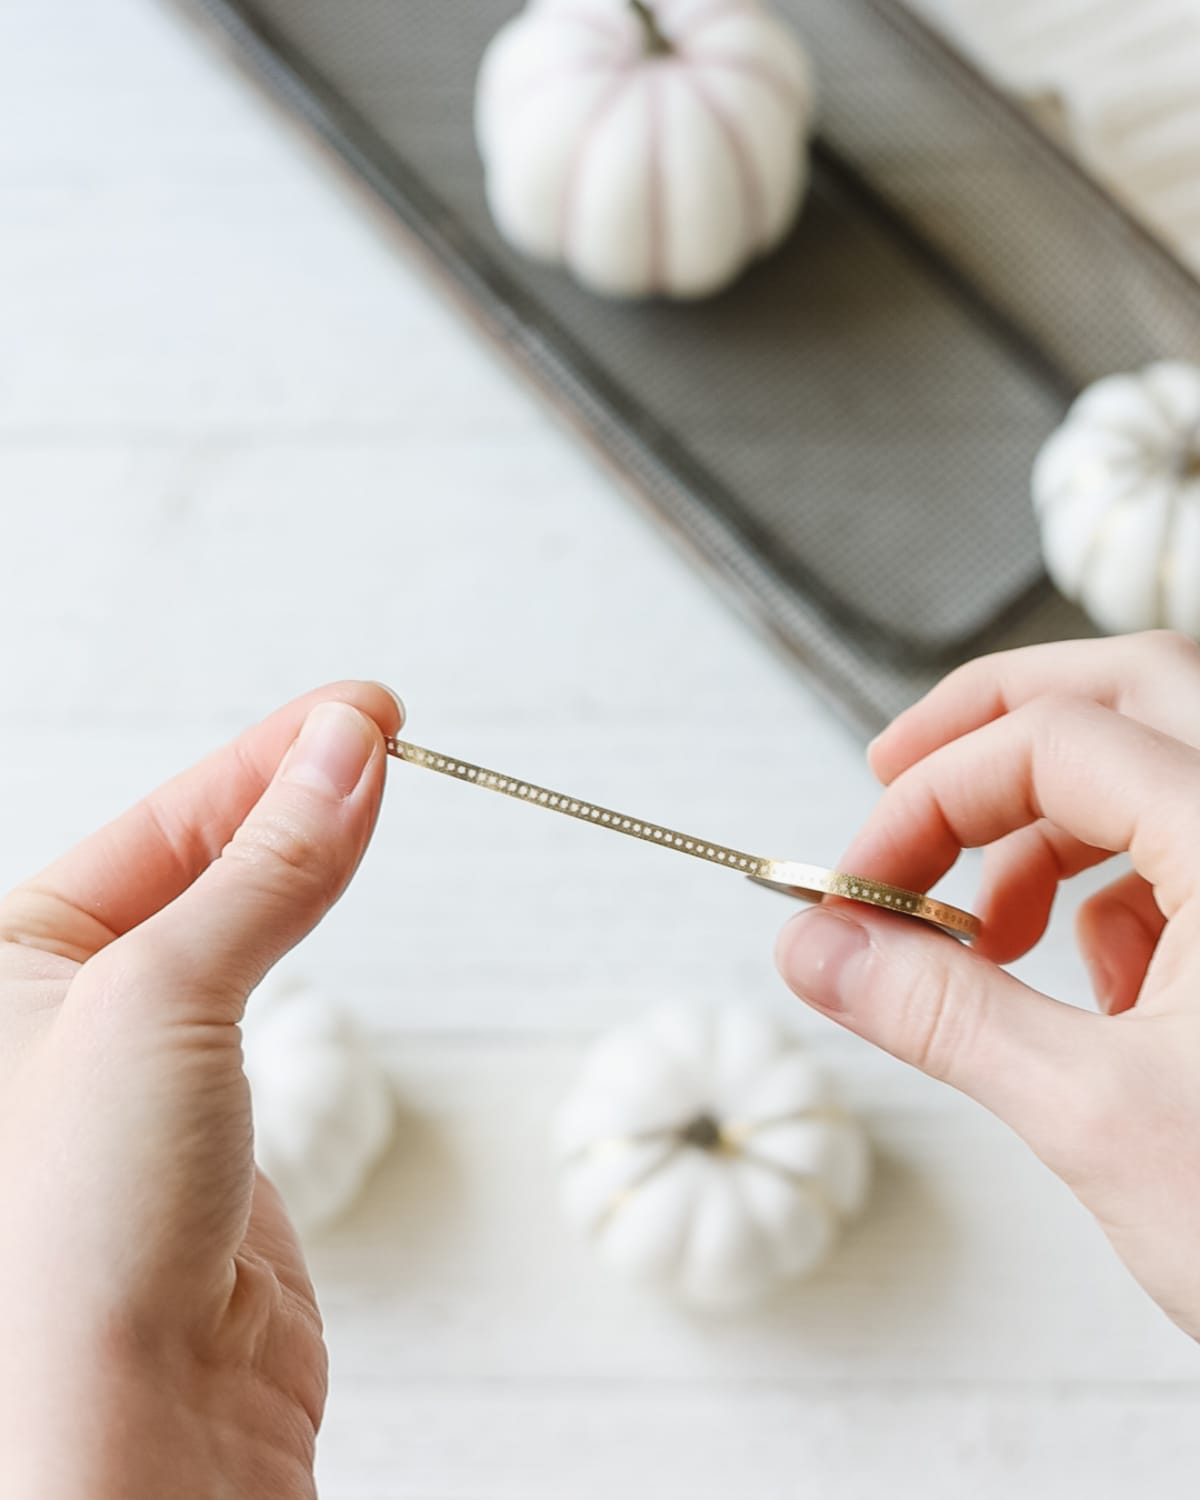
Start by applying washi tape from top to bottom (tuck the end a bit under the stem on top if your pumpkin allows for that) and gently press it down one of the grooves of the pumpkin all the way until you reach the underside of the pumpkin.
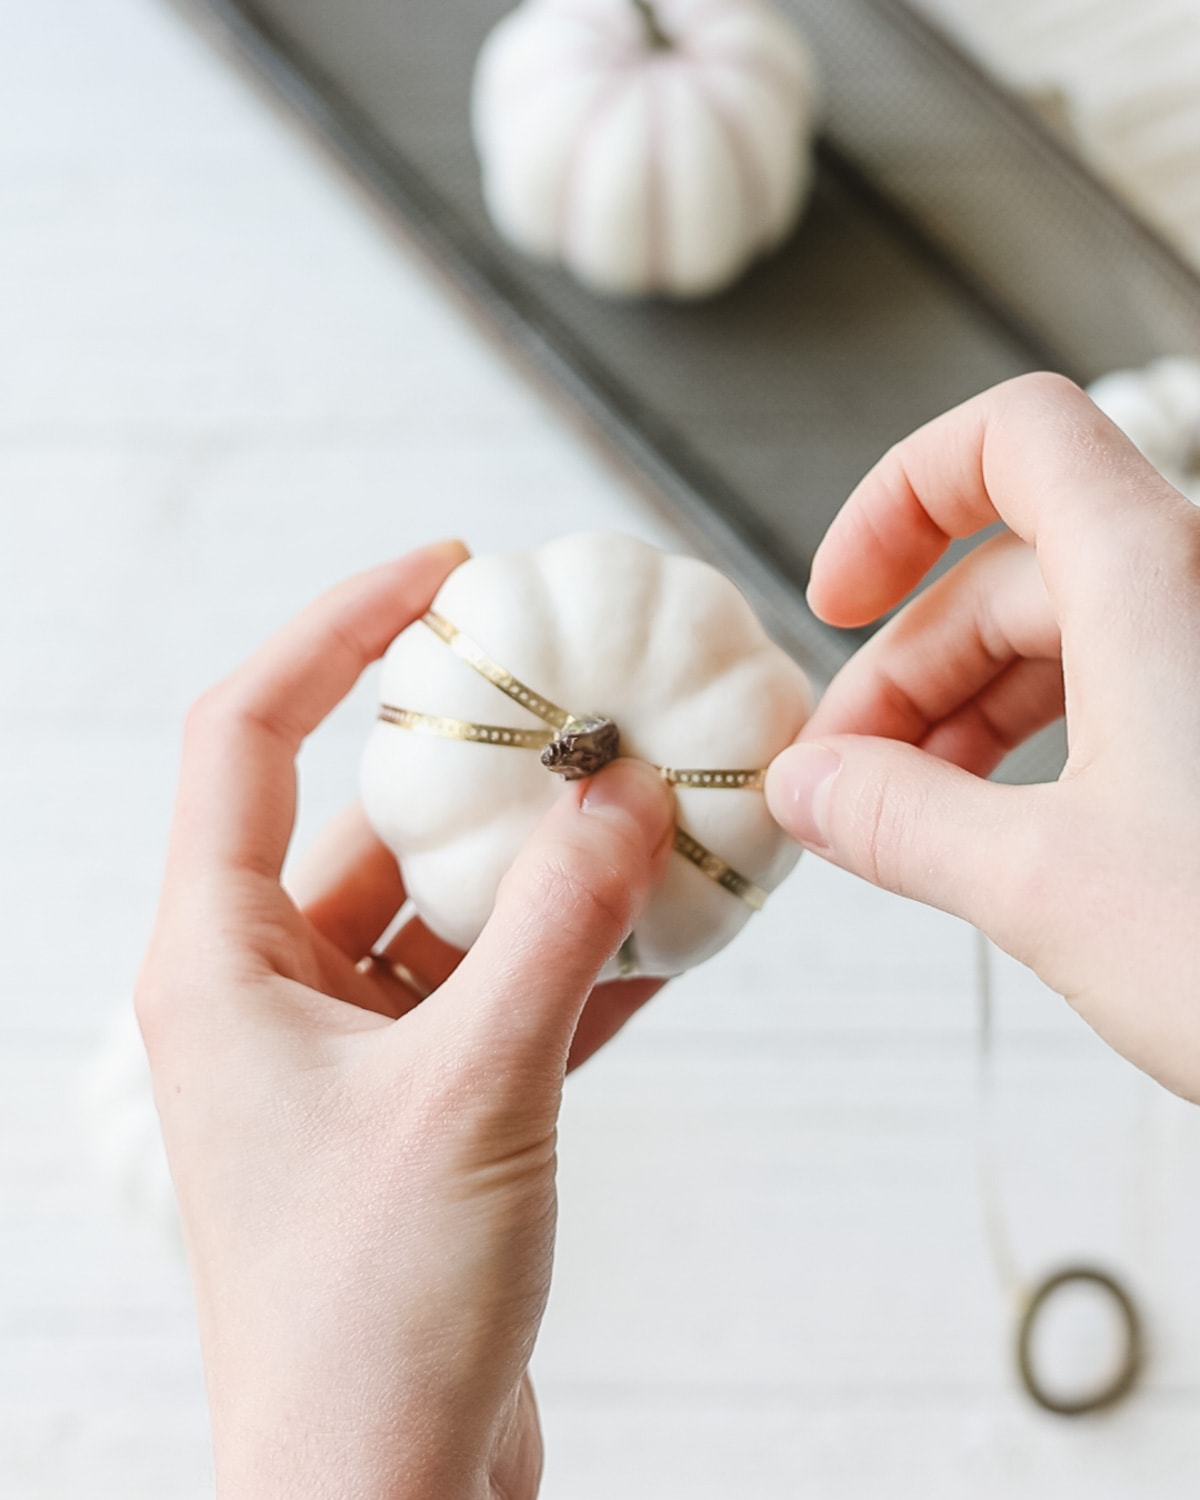
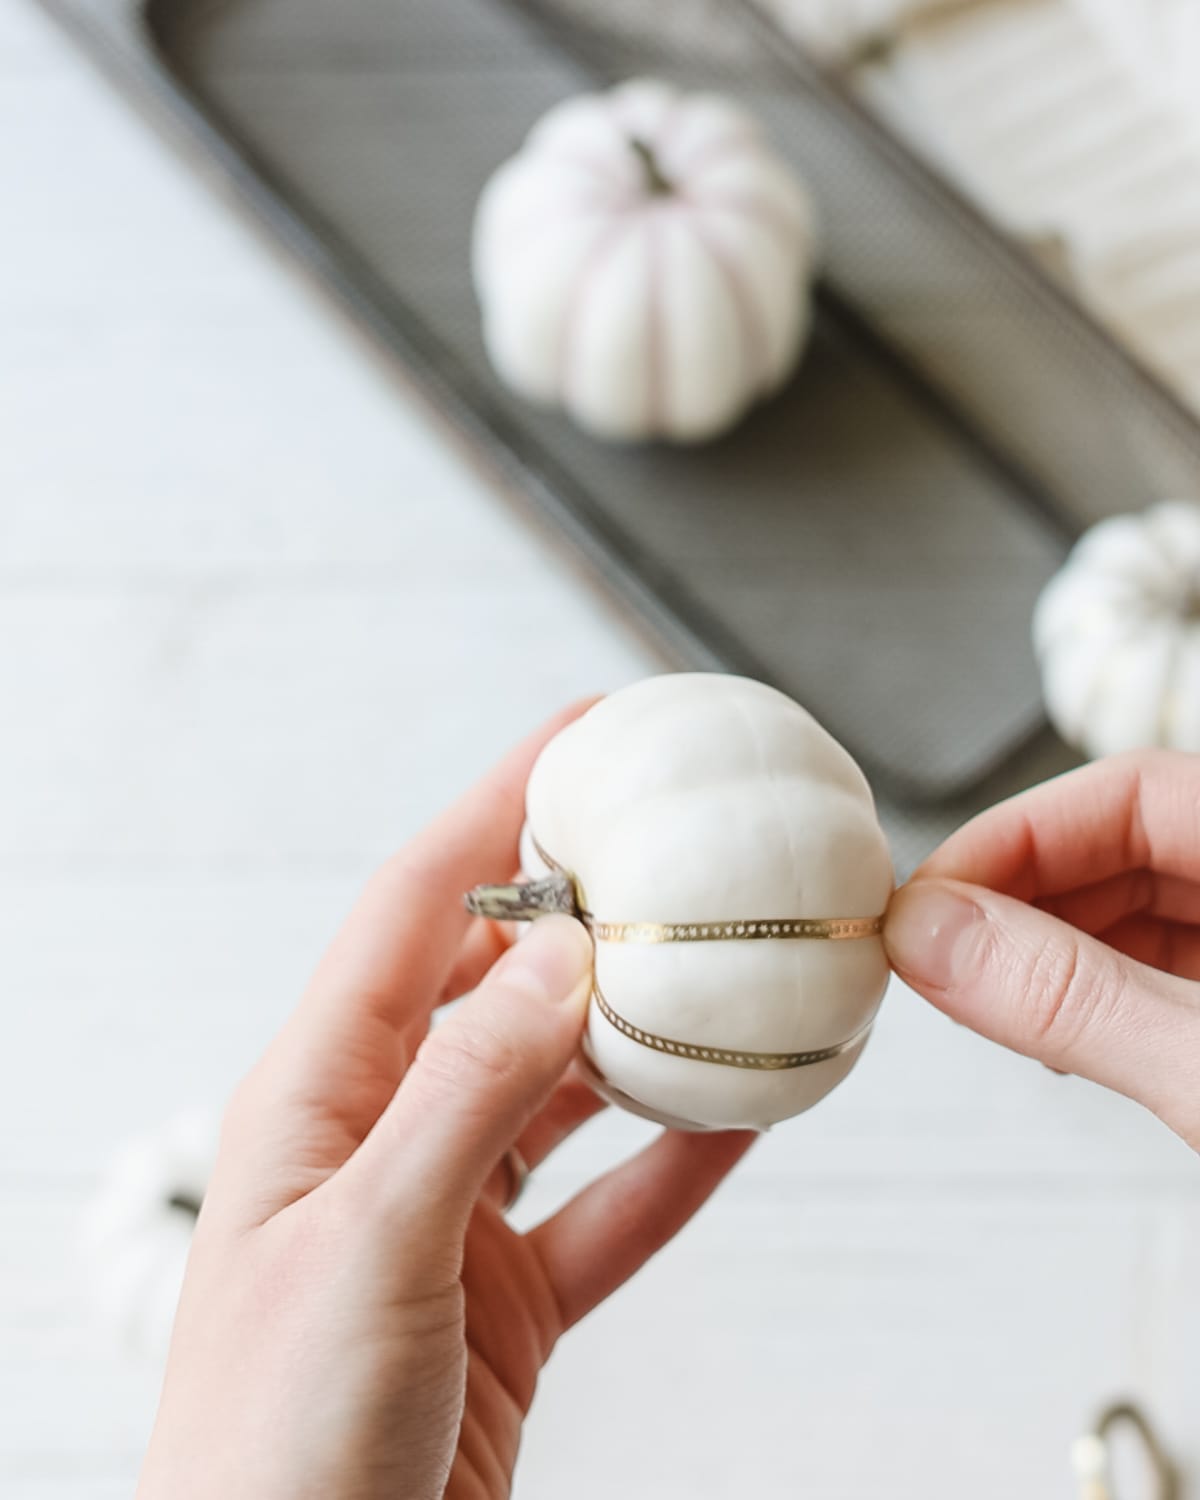
At this point, you can choose a new groove to travel your tape up, or you can cut the tape and repeat the process.
Repeat all the way around, adding additional colors of tape if you’d like thicker stripes for your pumpkin.
You can get creative by cutting washi tape different ways and applying the pieces (grab some inspiration from my Washi Tape Christmas Ornaments) around the pumpkin or even punching circles from washi tape and creating polka dot pumpkins.
And that’s about it!
If you’d like, you could enhance the sticking power of the washi tape by gently heating with a hair dryer for about 15-30 seconds. Just be careful and don’t overheat your pumpkins!
You can also seal the pumpkins with a matte clear coat spray. I usually suggest testing this on the bottom of a pumpkin first (where it won’t be seen) to make sure the pumpkins and the clear coat you’ve selected are compatible and the top coat doesn’t cause yellowing.
More Craft Ideas from Bellewood Cottage
- Home State Washi Tape Wall Art
- How to Cover Mason Jar Lids with Washi Tape
- How to Make Washi Tape Flags
- DIY Washi Tape Bud Vases from the Target Dollar Spot
Want More Washi Tape Ideas?
Visit my roundup post of 30+ of the best washi tape crafts and DIYs around the web for tutorials and inspiration!
Weekly Crafting Fun!
Join my list and get a weekly email with relaxing craft ideas, freebies, sewing tutorials, and more!