No Bake French Silk Pie Mason Jar Desserts
Looking for a cute dessert for a party, shower, or other event? Try these easy No Bake French Silk Pie Mason Jar Desserts. Made in 4-oz mason jars with a fluffy chocolate filling and topped with sweet whipped cream, these desserts are adorable and delicious!
Please note that this post contains affiliate links which allow me to earn a small commission when a purchase is made at no additional cost to you. As an Amazon Associate I earn from qualifying purchases. Read more here.
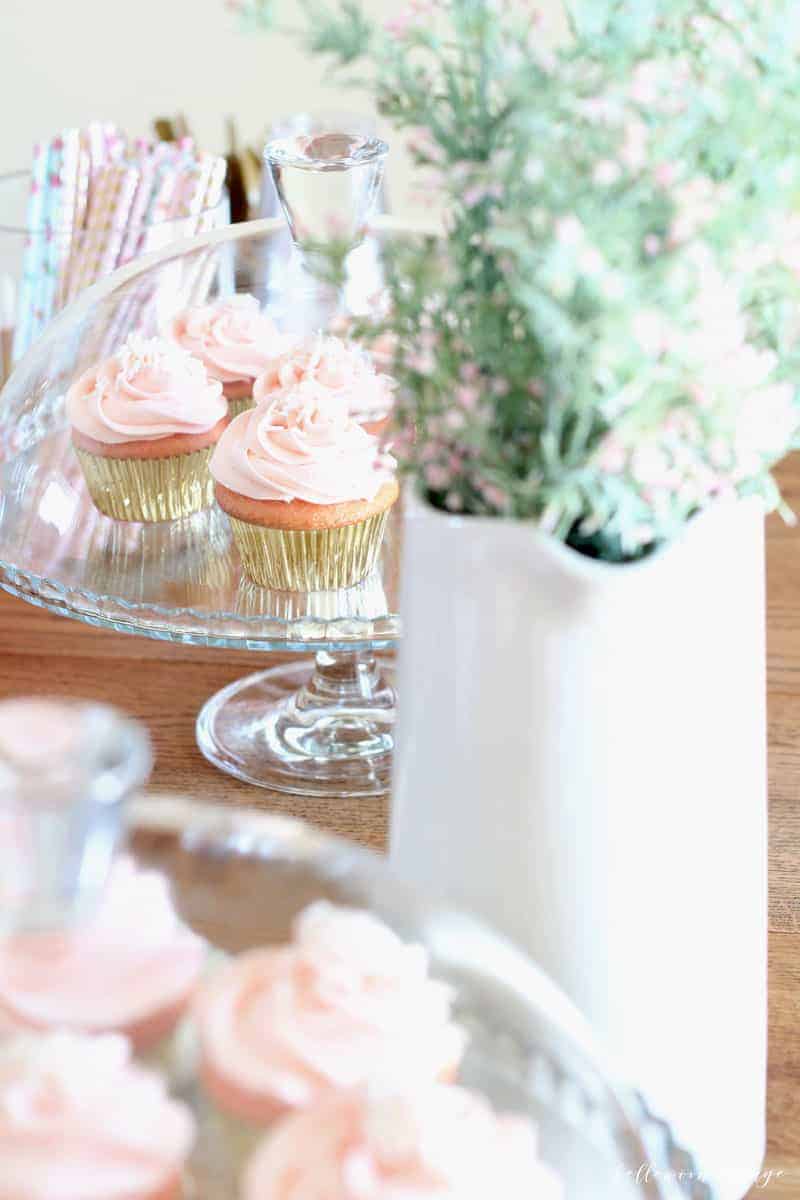
Desserts-in-a-jar definitely had a moment a few years back. It seems every food blogger was crafting these tiny treats in all manner of flavors. No surprise, since single-serving desserts are both easy to serve and totally adorable.
Fellow Crumbl Fans!
Join my list and get a weekly email with fresh Crumbl news, delicious copycat recipes, and more!
Besides, have you ever tried to serve slices of cake or pie at an event? One person gets stuck cutting and serving dessert and it’s inevitably a messy, time-consuming, and crumb-filled endeavor.
Weekly Crafting Fun!
Join my list and get a weekly email with relaxing craft ideas, freebies, sewing tutorials, and more!
So, single-serving desserts like these mason jar desserts are an excellent choice if you want to be ready to go before the party even starts. Individual desserts work great for parties and baby showers/bridal showers since there is always plenty to do beforehand…these will take one thing off your list!
More recipes to try: Oreo Cheesecakes in a Jar, Strawberry Cheesecake Jars, and No Bake Key Lime Pie Jars are a few more favorites!
About the Recipe
These French Silk Pie Mason Jar Desserts are completely egg-free (consider them a bit of a French Silk Pie imitation) so they are a nice option for an easy dessert or for kids parties.
The chocolate filling is fluffy and decadent and paired with the fresh whipped cream it is just irresistible!
Another benefit of preparing dessert in individual jars is not only are they easier to serve, but with pre-prepared single servings like these you can keep germs at bay.
How to Make These Desserts Ahead
Leave these desserts in the fridge up until party time. Pipe the whipped cream on directly before serving. The whipped cream for the topping is best prepared the same day as serving.
If you’d rather make the dessert a day or two ahead try this: whip 1/2 cup of the heavy cream to fold into the chocolate mixture and then wait to whip the remaining 1 cup of heavy cream until a few hours before the party.
Since the whipped cream will fill the desserts above the edge of the jar I find that storing them neatly after the whipped cream has been piped is a bit tricky. Thus, it works best to pipe it on directly before serving.
If you do want to store the jars: You can also spoon the whipped cream on and only fill the jars to just below the top. Then screw on the lids and you have a perfectly packable dessert. Not as fancy, but still delicious! Note this option will leave you with leftover whipped cream.
You can also check out this article on how to stabilize whipped cream for more tips if you need the whipped topping to be super stable.
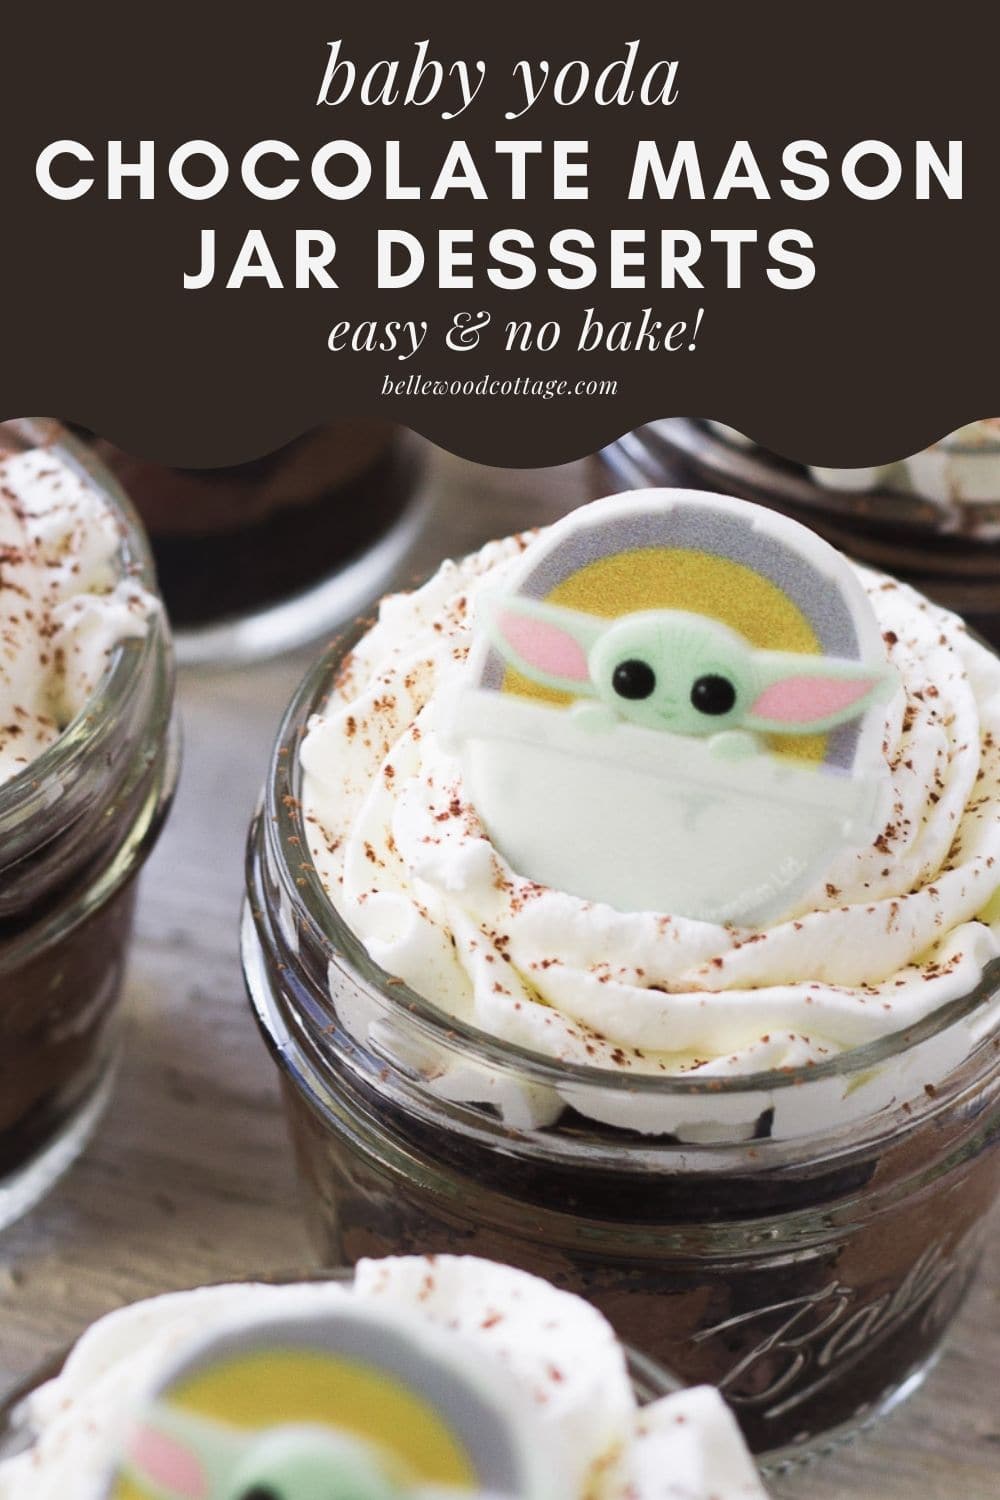
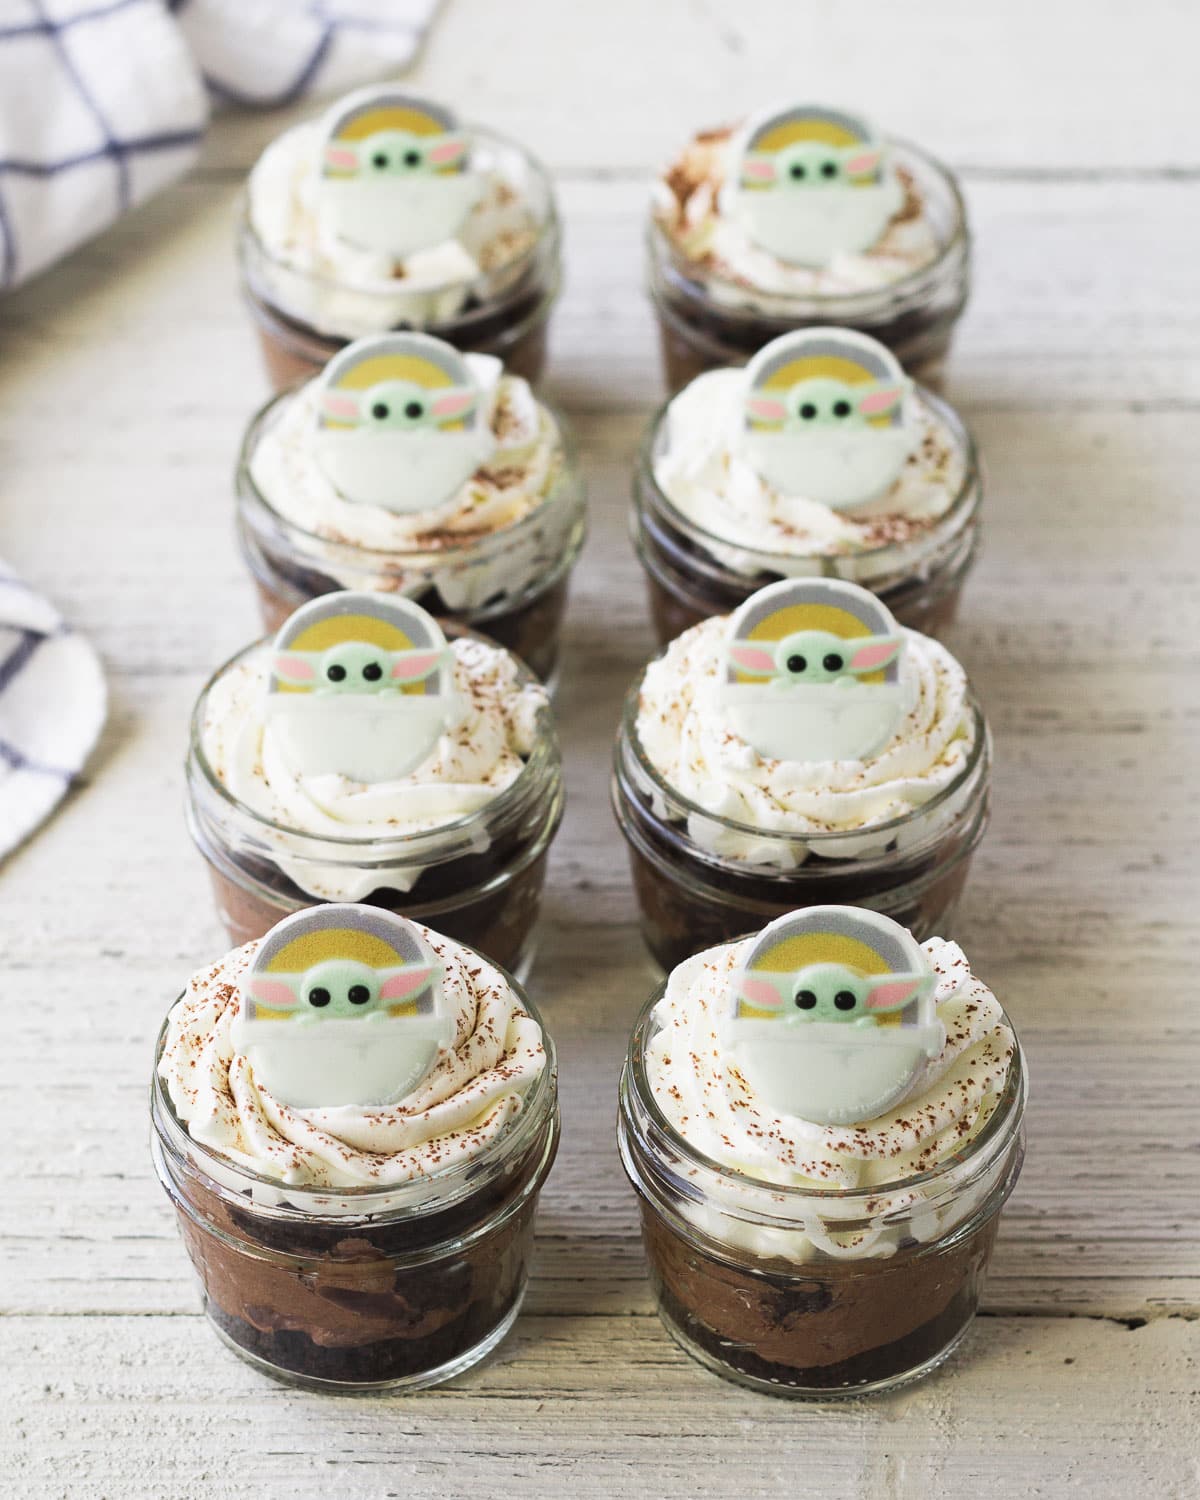
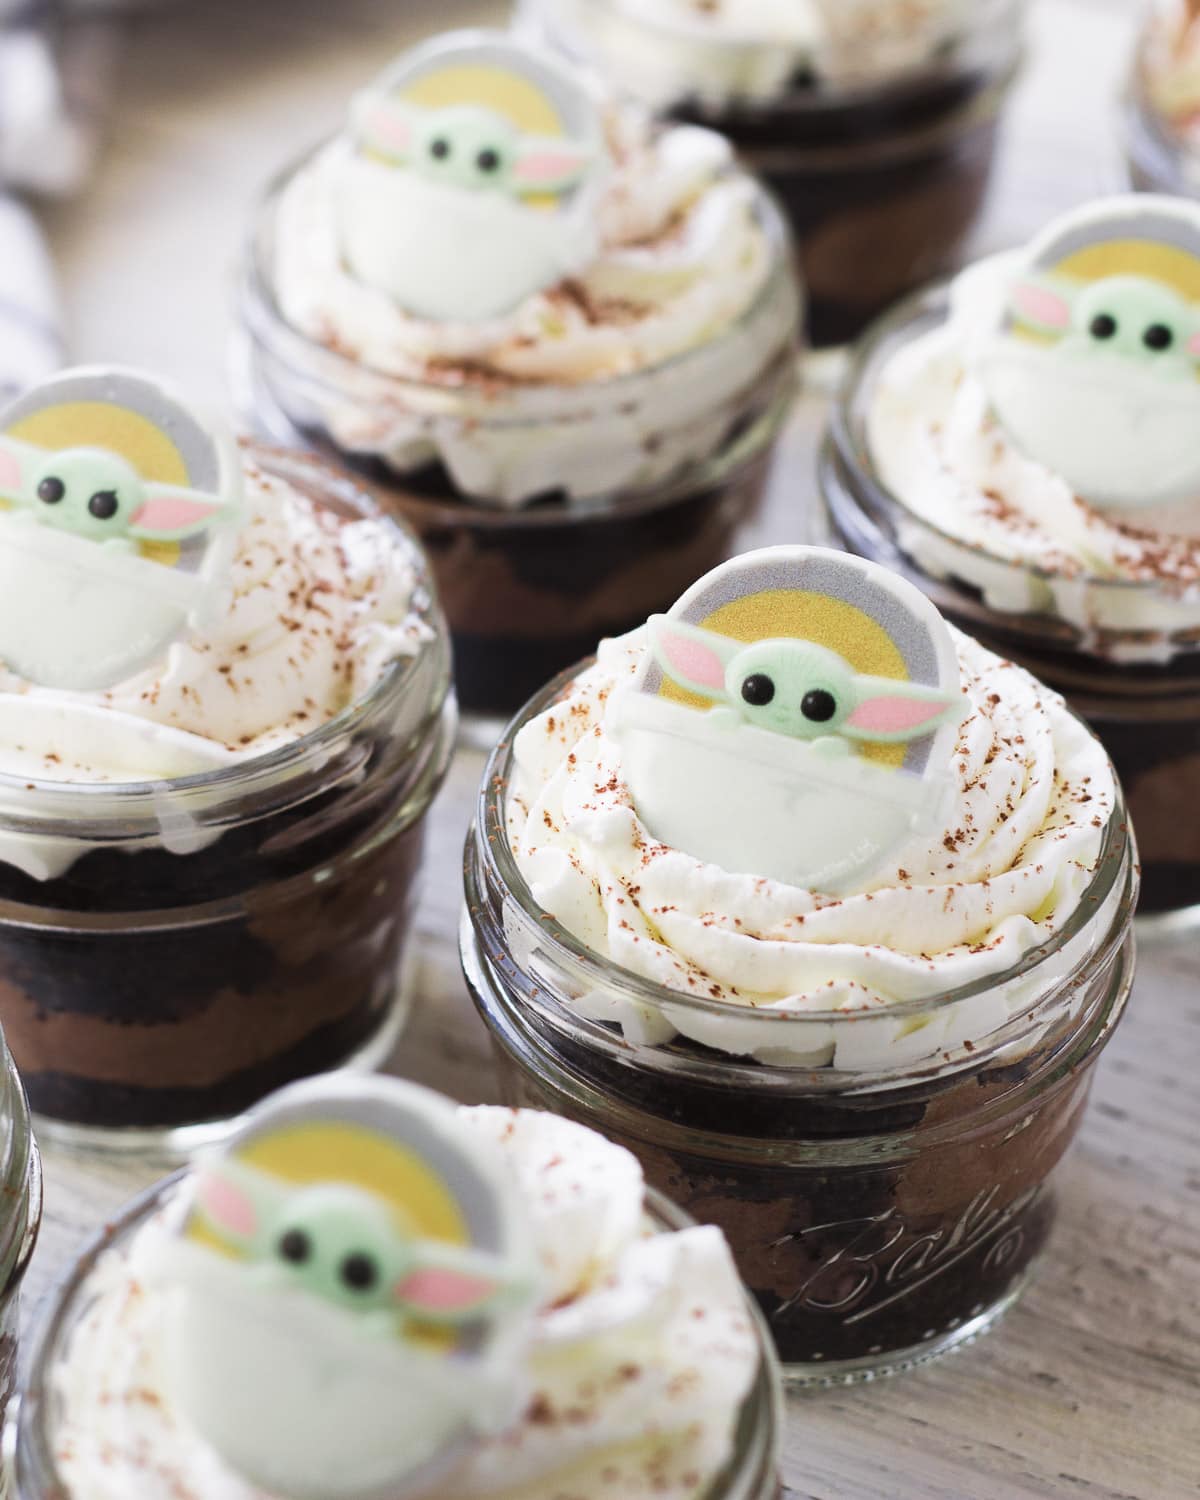
Let’s Talk About Baby Yoda
While these aren’t “Baby Yoda” specific desserts, I did have these cute little Baby Yoda cupcake rings on hand and couldn’t resist adding them in.
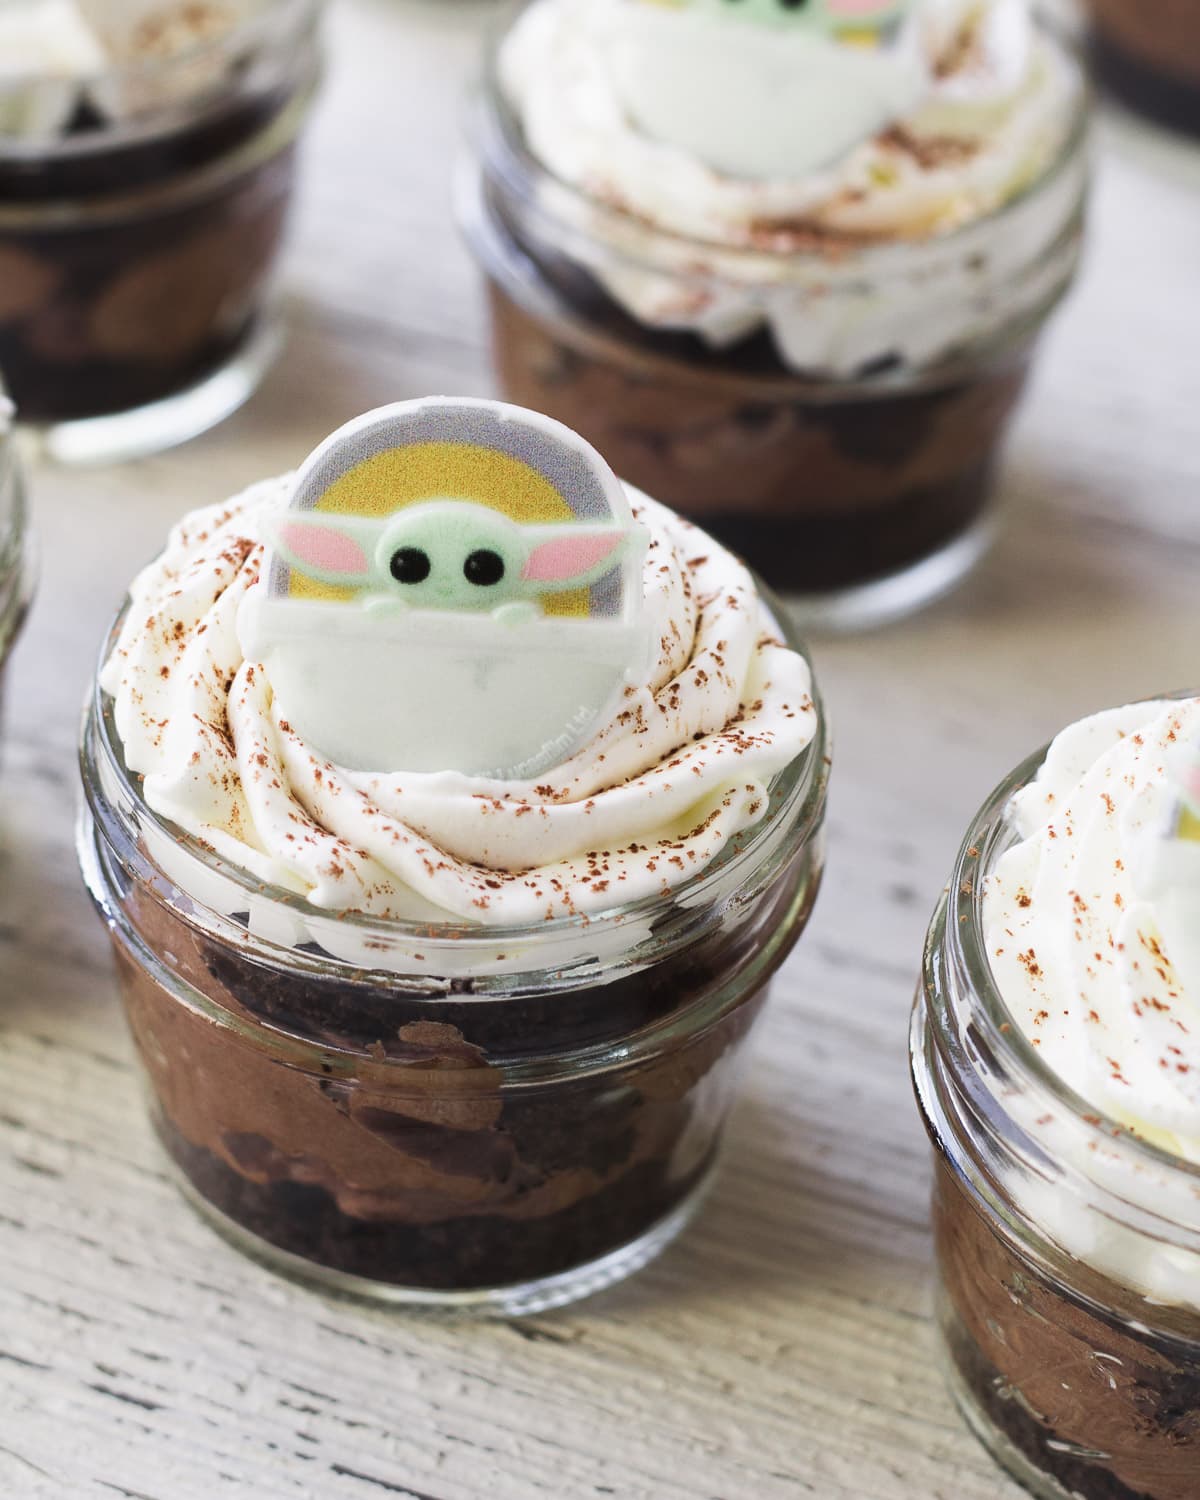
You can use cupcake rings like I did, or add another decoration that suits the theme of your event.
How to Make French Silk Pie Mason Jar Desserts
You’ll need some simple ingredients including: chocolate sandwich cookies, butter, chocolate chips (semi-sweet), cream cheese, powdered sugar, cocoa powder, heavy whipping cream, and vanilla extract.
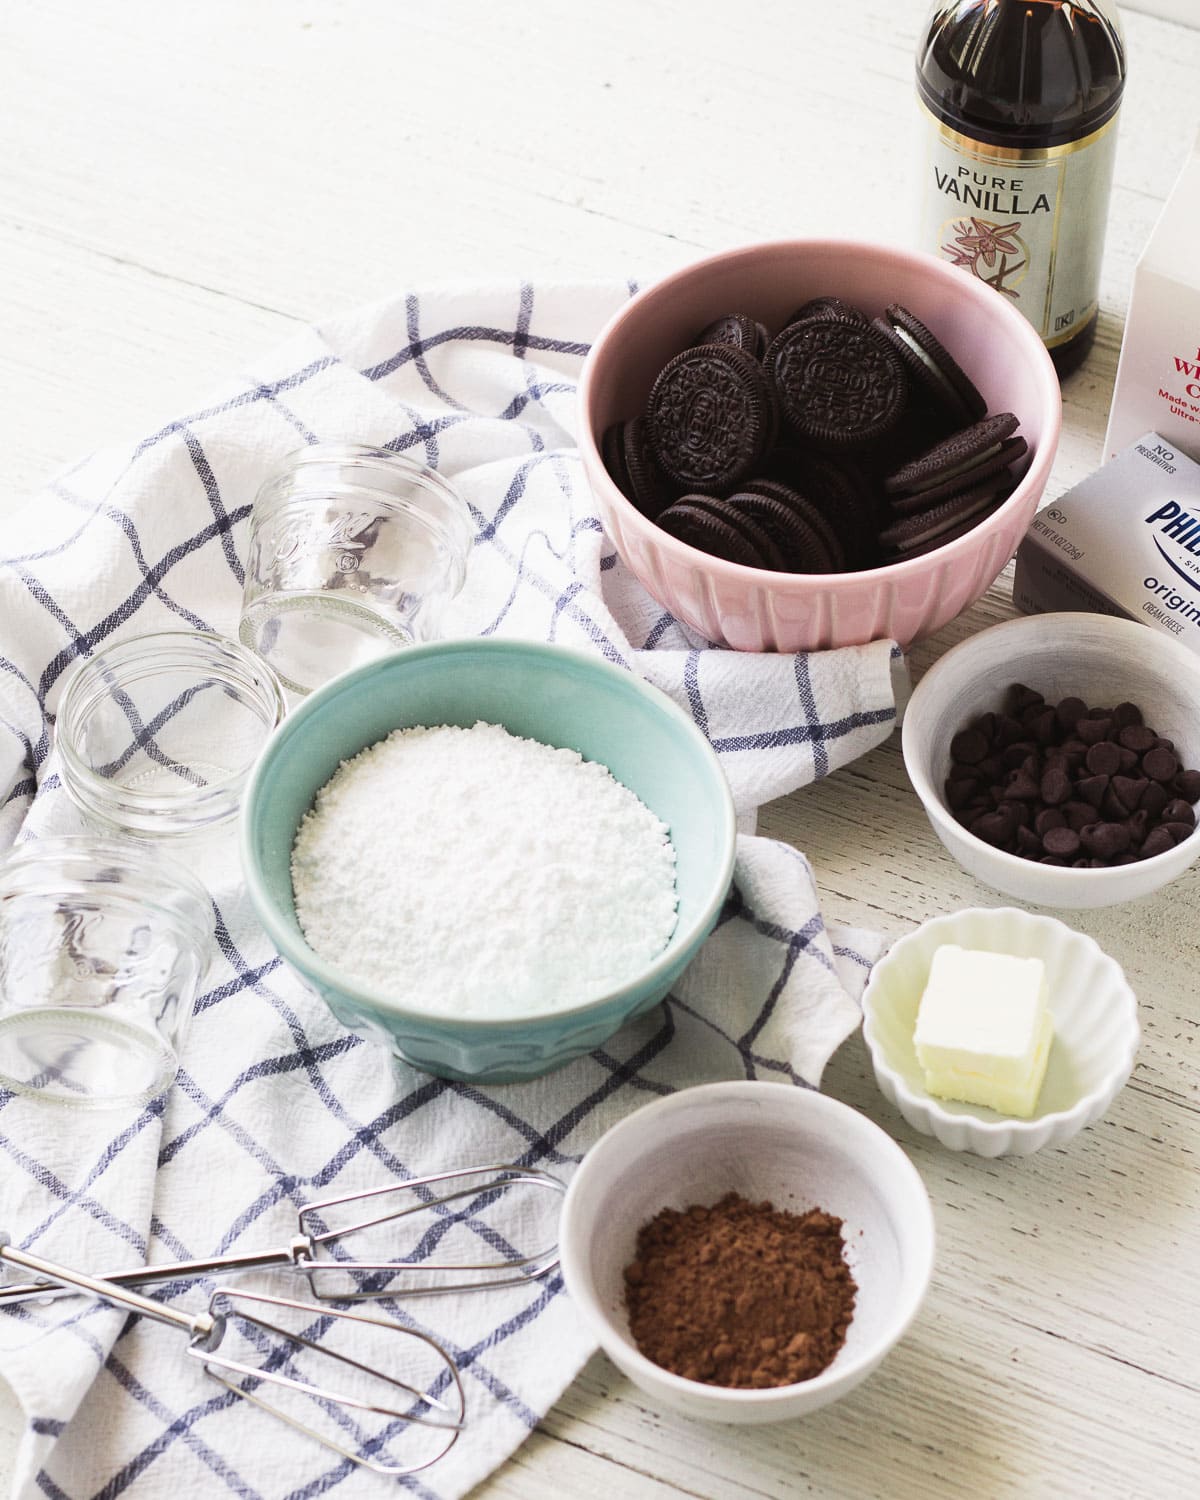
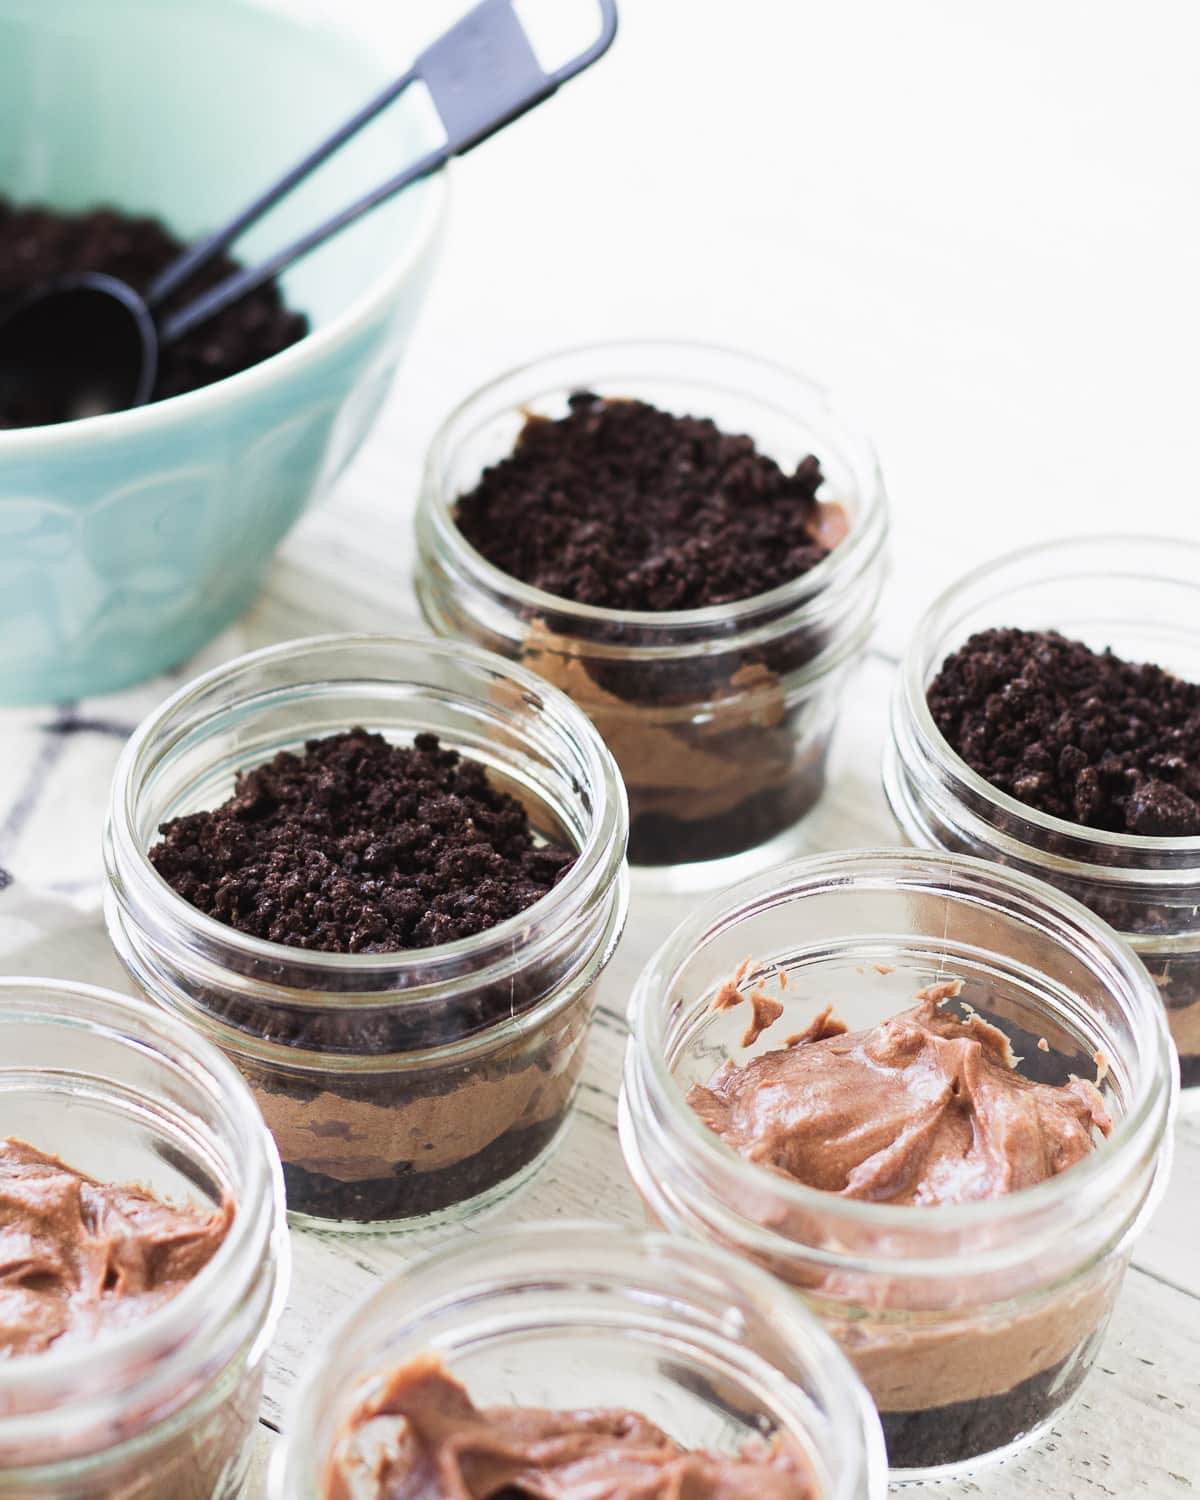
First, crush chocolate sandwich cookies and then set aside.
Then, make the chocolate layer. Melt chocolate chips and butter in the microwave and let cool. Beat softened cream cheese until smooth (no lumps!) and add in 3/4 cup powdered sugar. Beat until combined.
Pour in the cooled chocolate/butter mixture and 2 tbsp cocoa powder. Beat until combined and set aside.
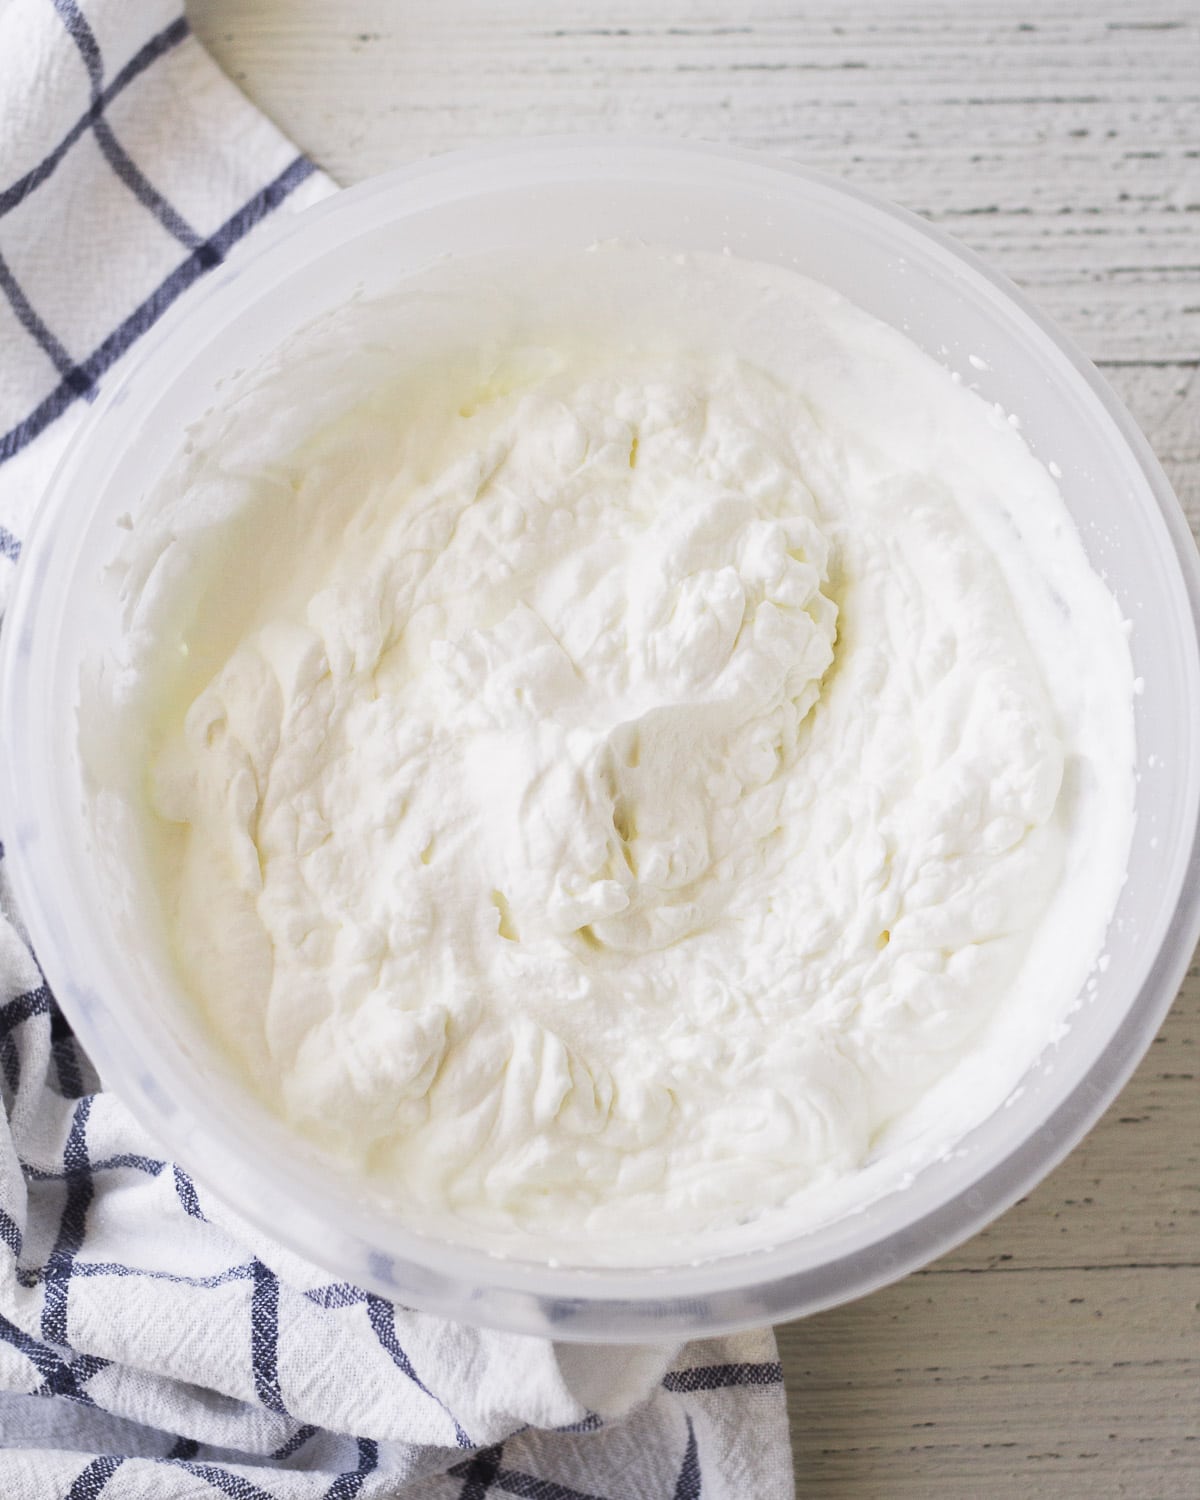
Make the whipped cream layer: whip heavy cream with powdered sugar and vanilla extract. Continue beating until the whipped cream is just beginning to form stiff peaks.
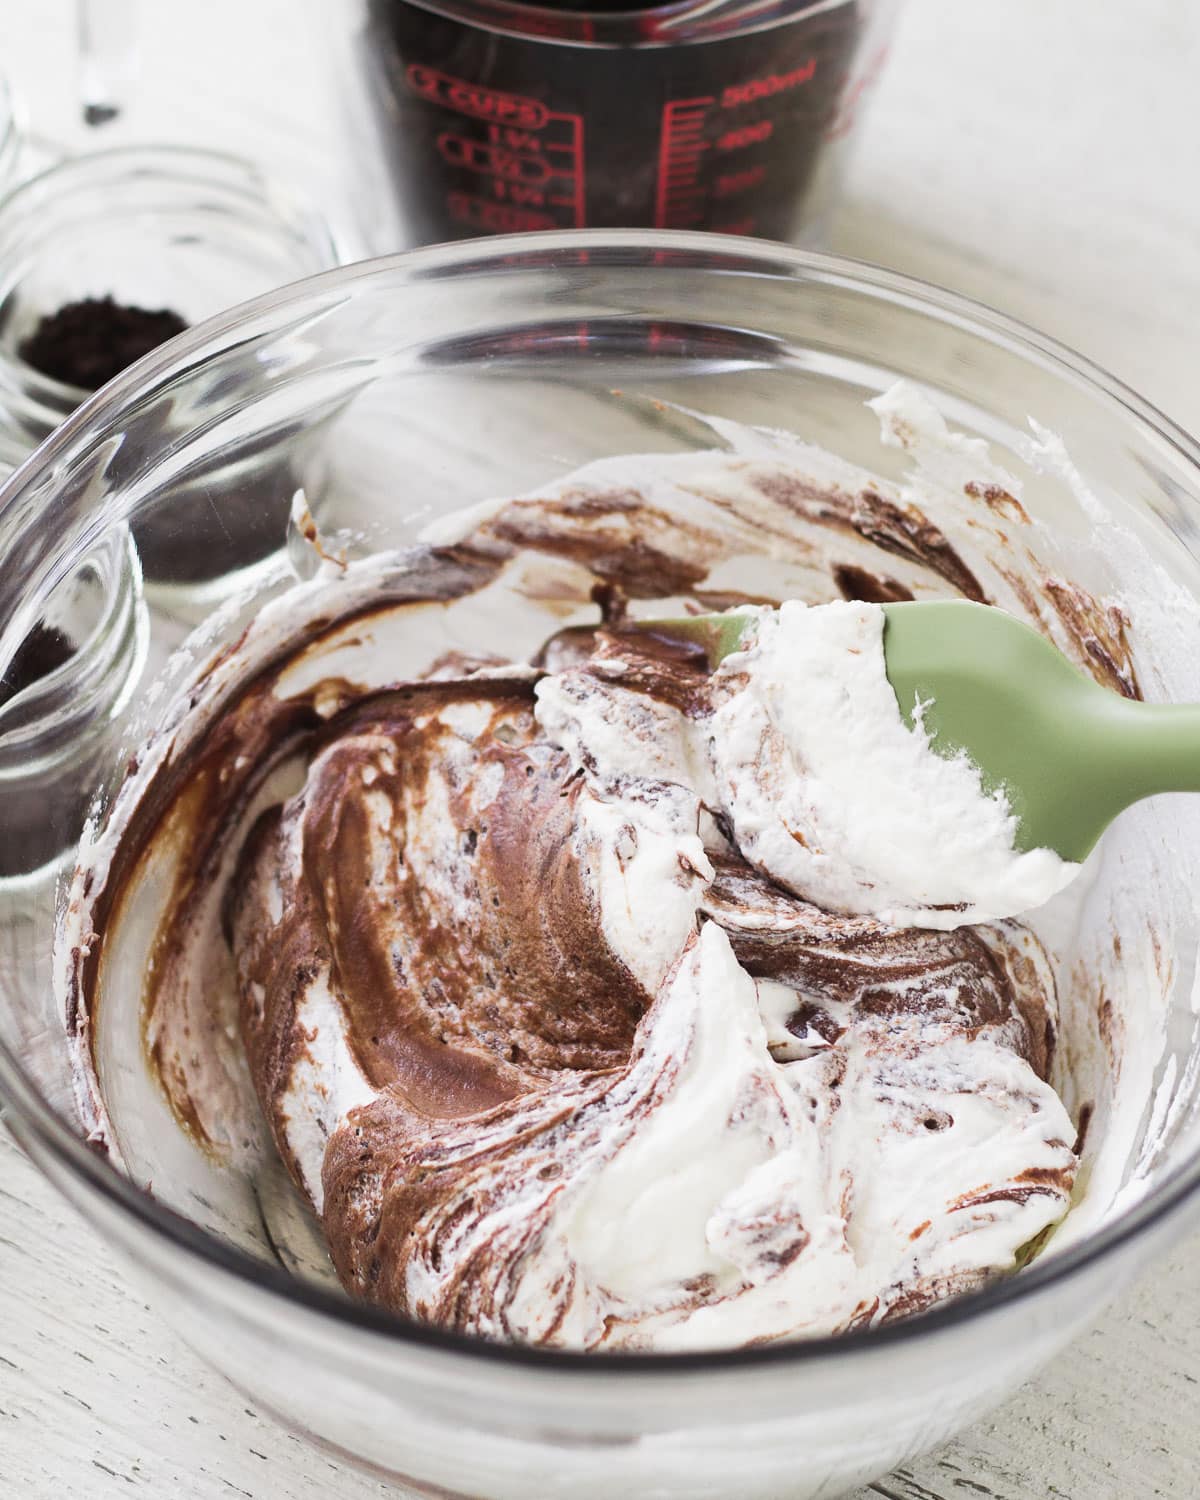
Divide the whipped cream, adding roughly 1/3 of the cream to the chocolate layer mixture and folding it in very gently. Place the remaining whipped cream in the fridge for now.
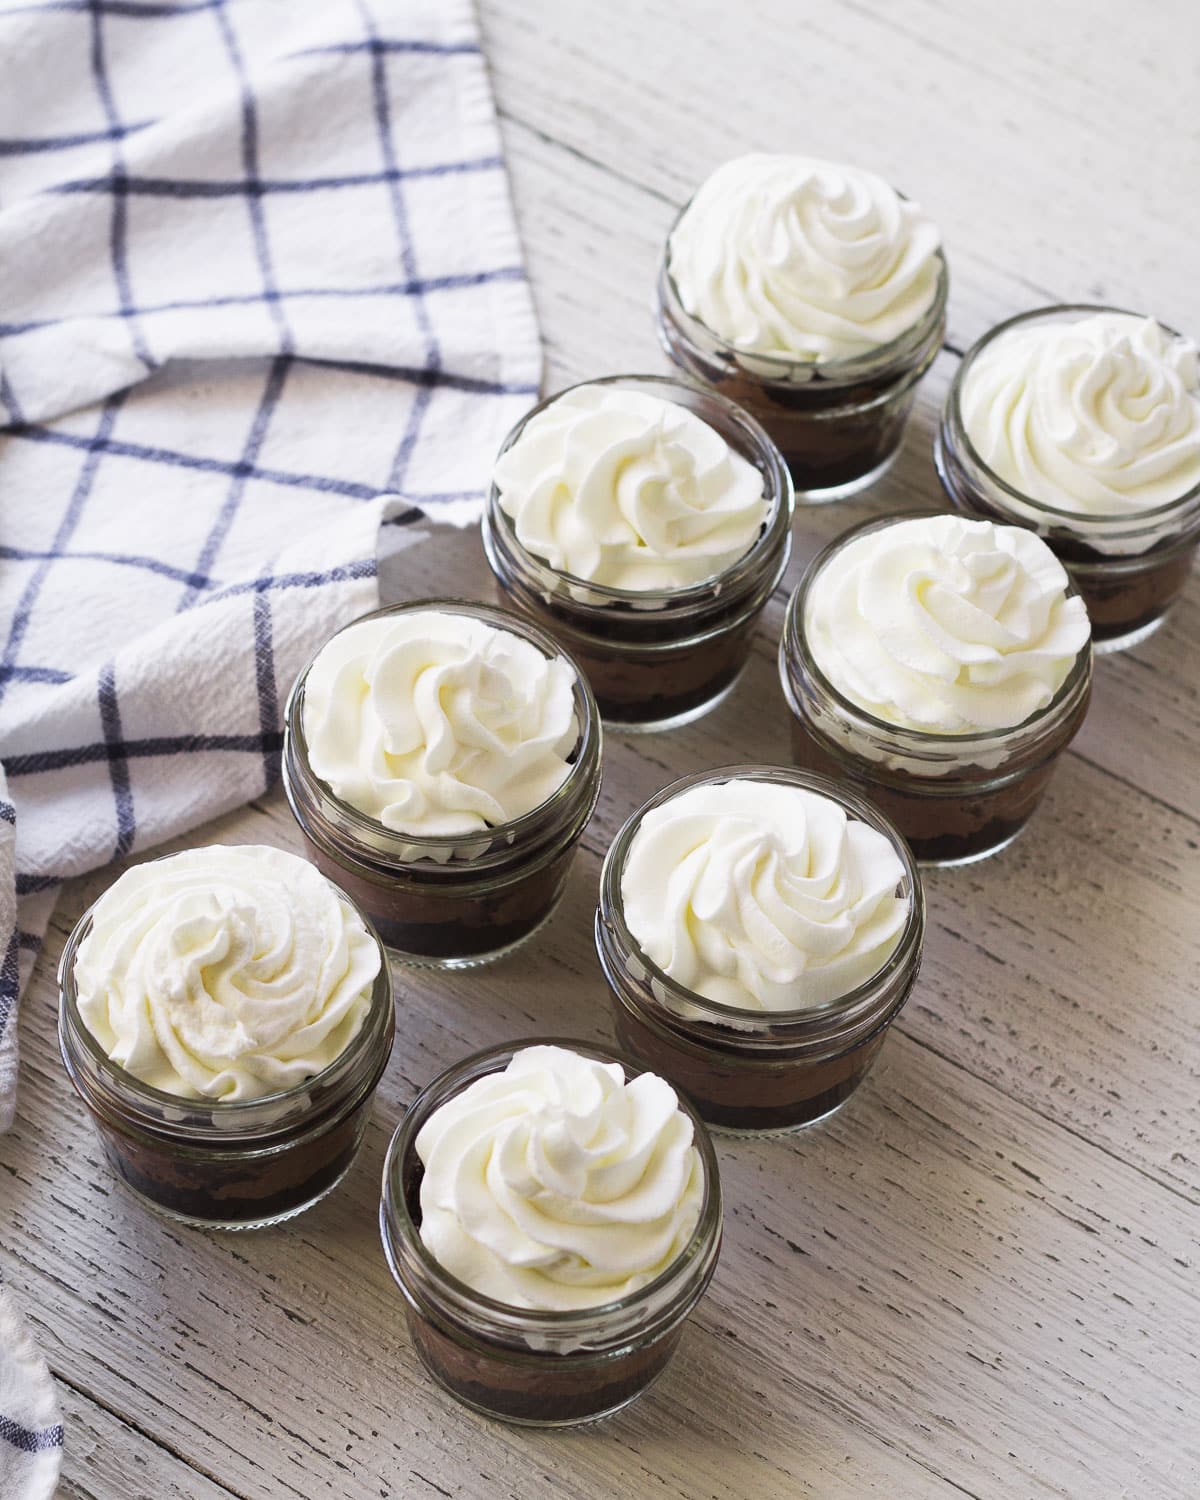
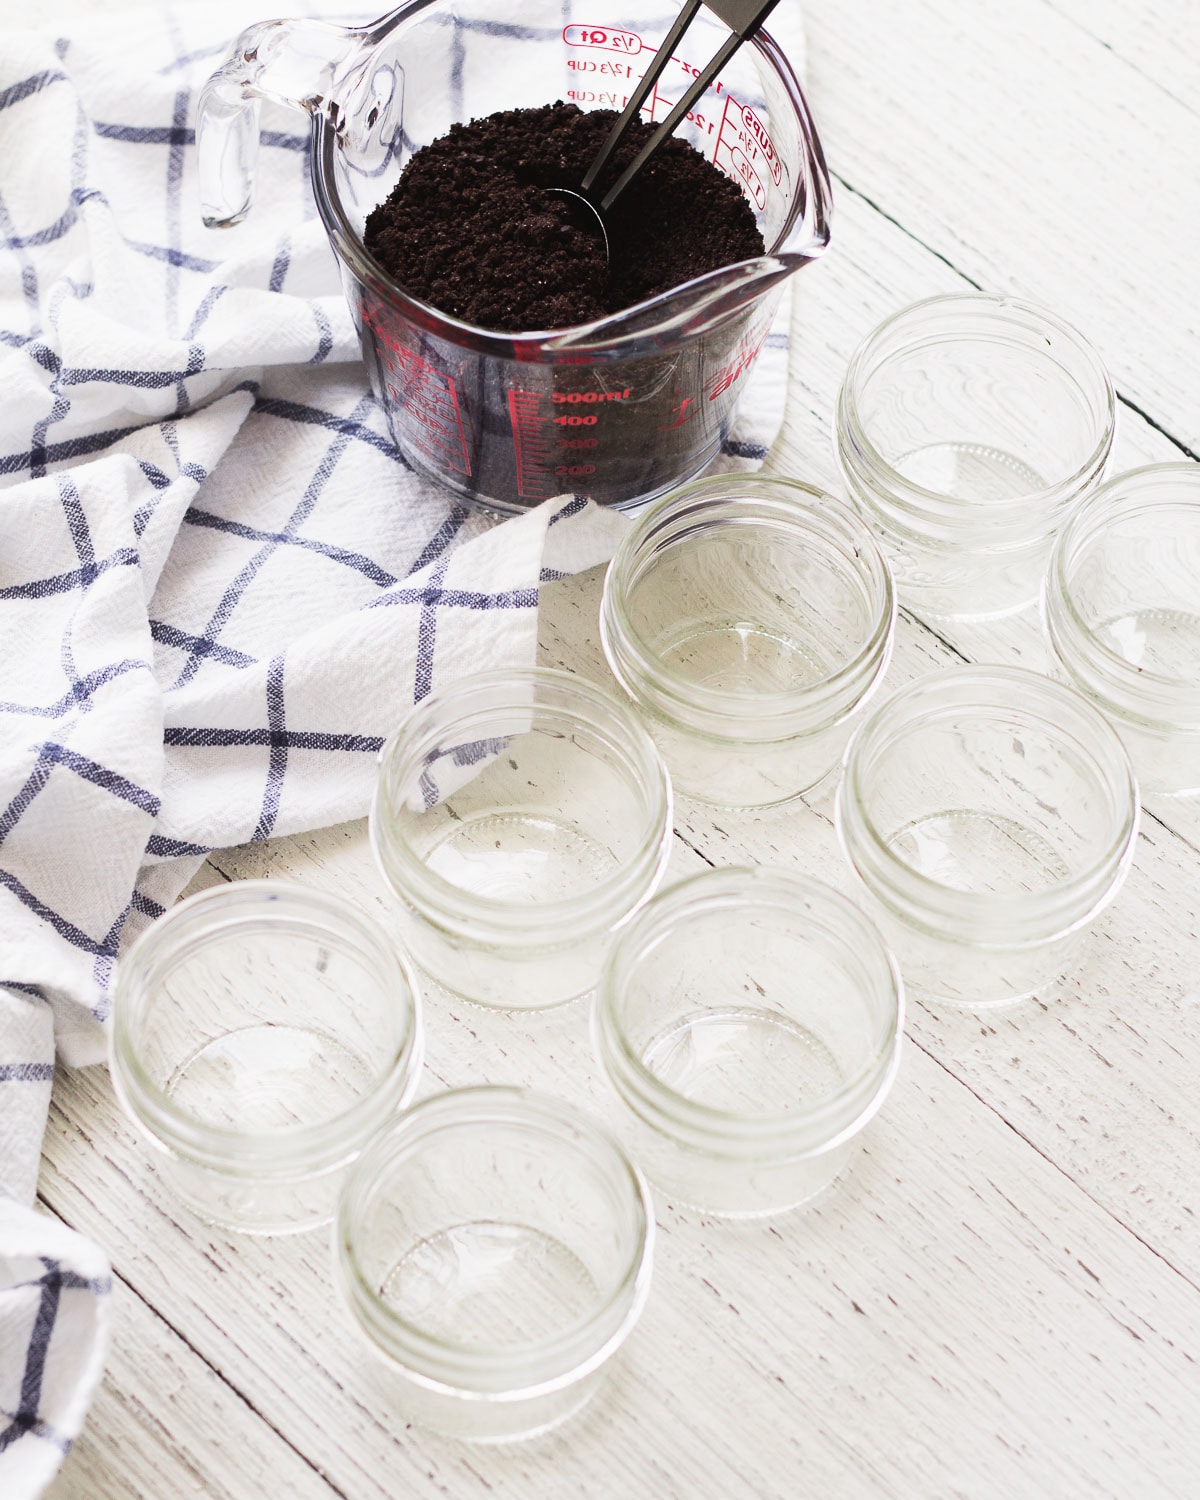
Fill the jars: line up eight 4-oz jars and fill with about 1 tbsp of cookie crumbs per jar.
Spoon the fluffy chocolate mixture gently into each jar, dividing it evenly.
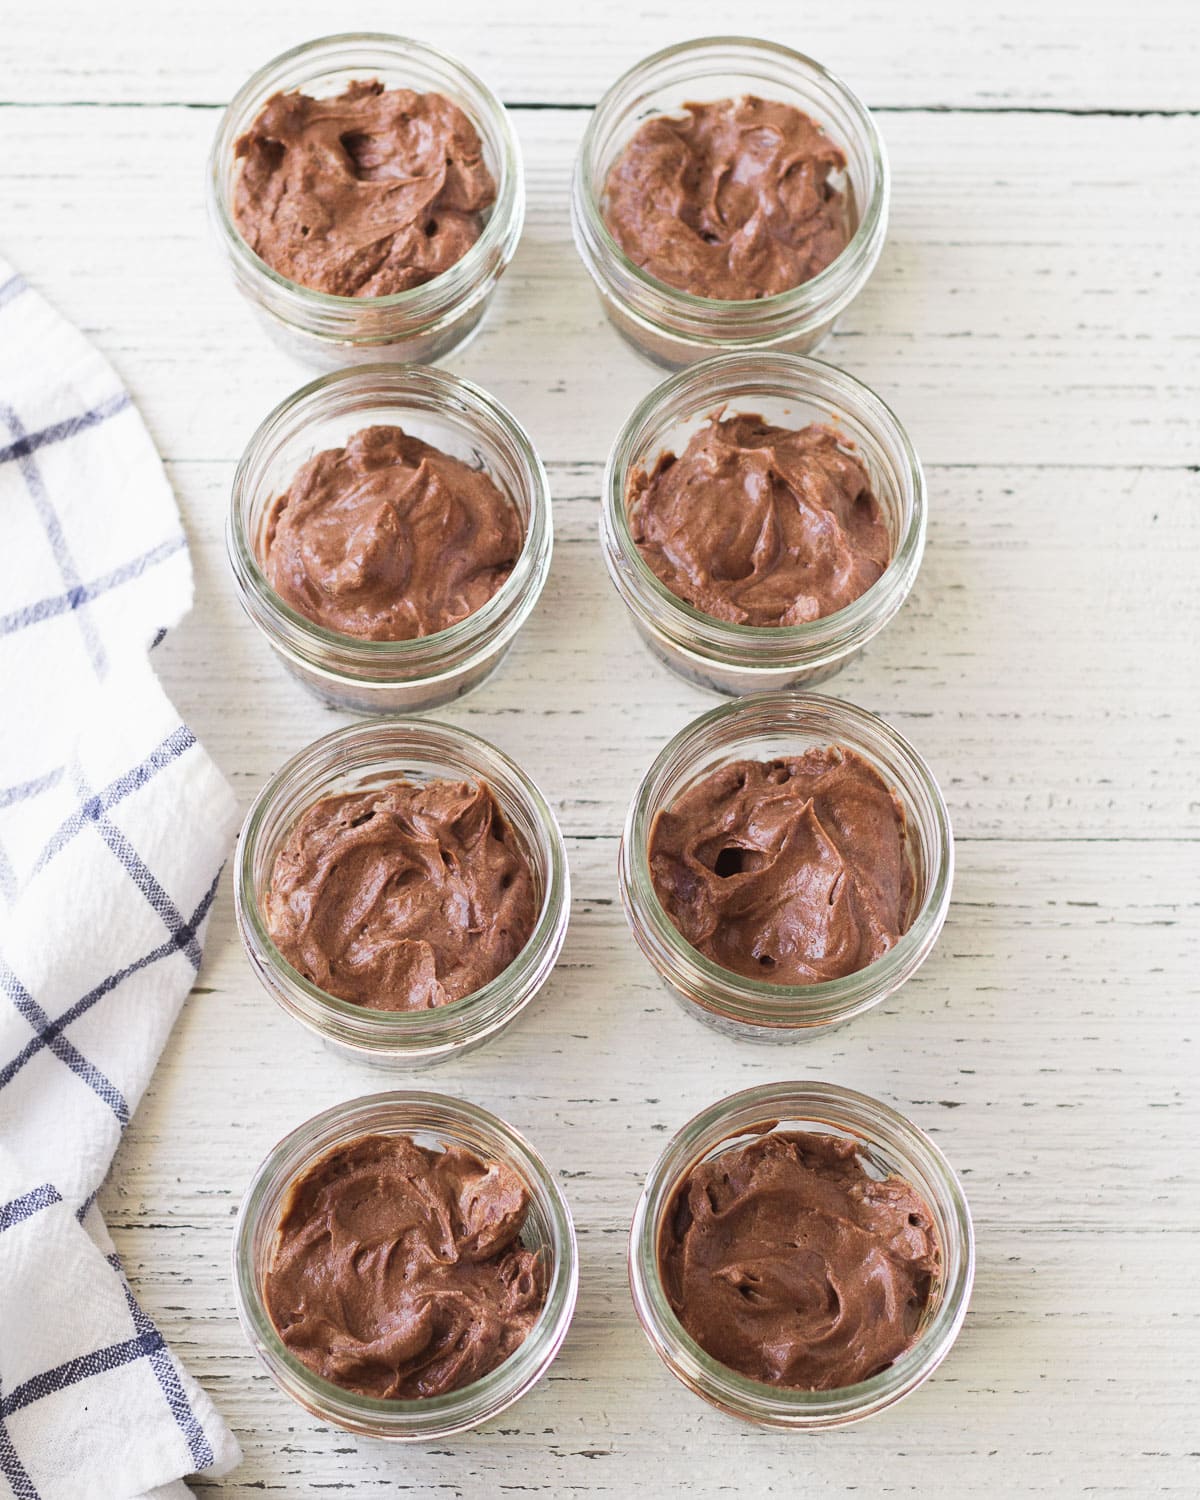
Use the remaining cookie crumbs to add another layer of chocolate crumbs in each jar (1 tbsp per jar). Let chill two hours or until ready to serve. Can also be eaten right away, but I like the crumbs to soften!
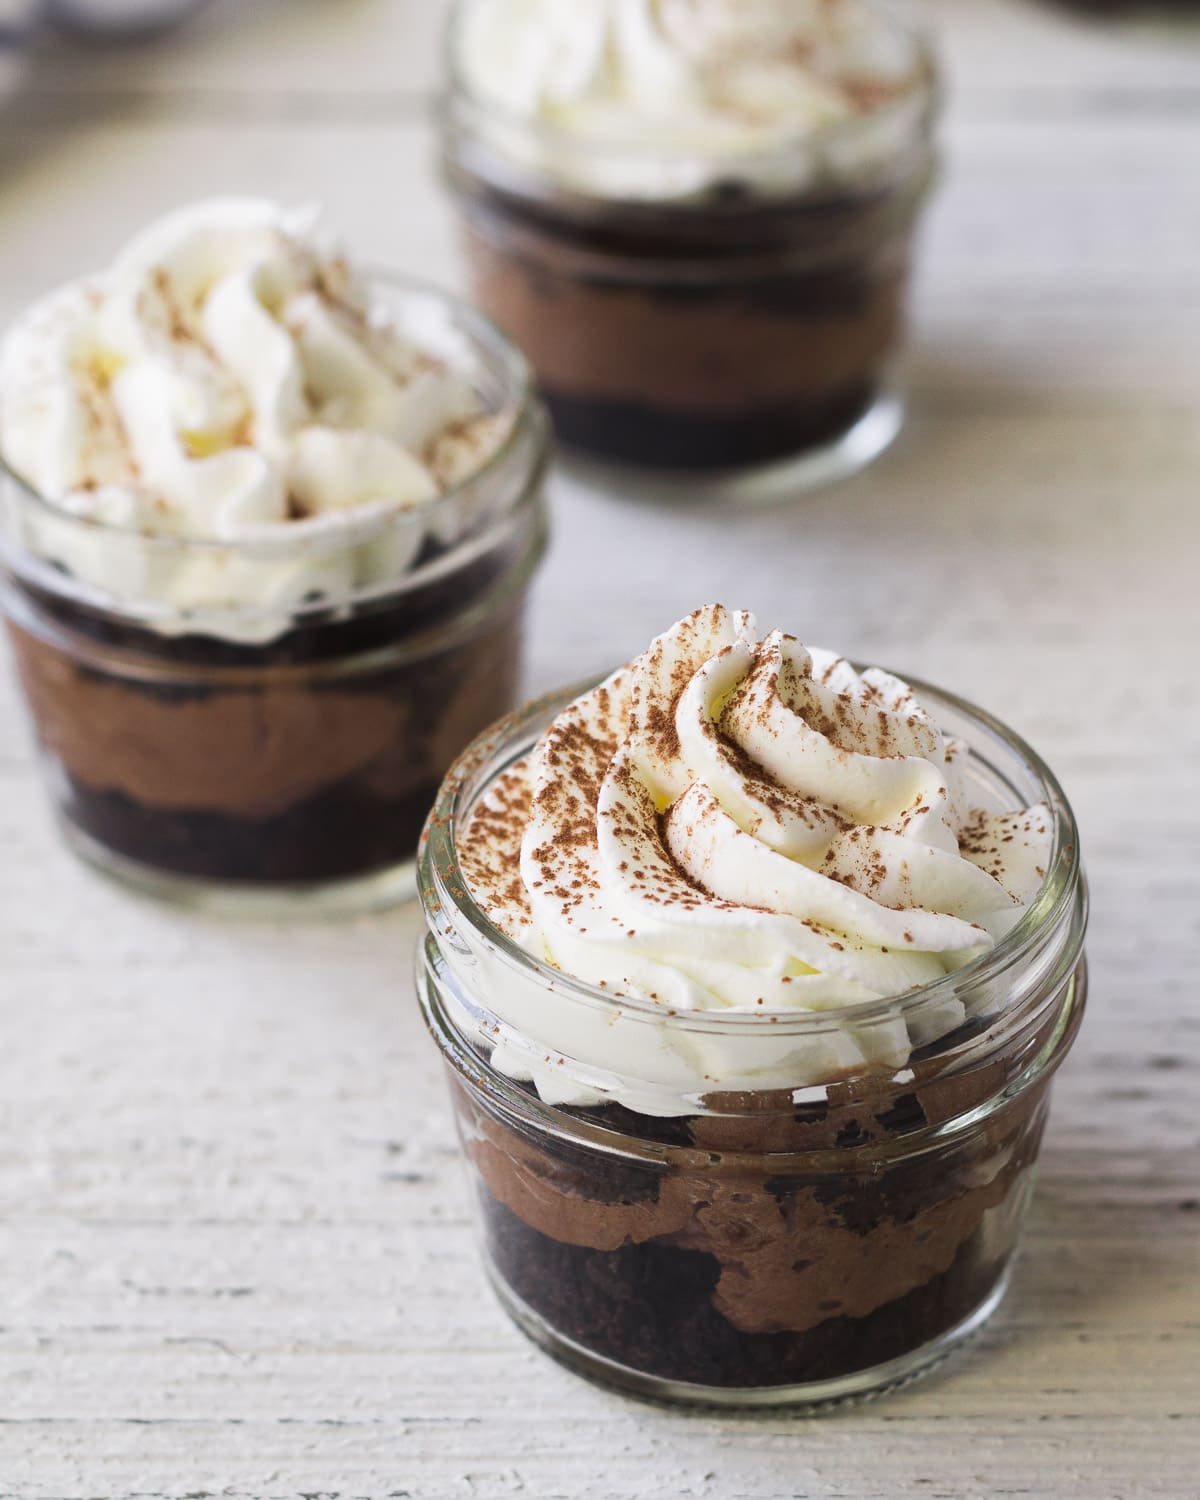
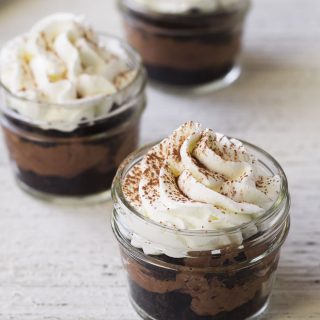
When ready to serve, fit a piping bag with a large star tip and fill jars with the whipped cream. Pipe a large swirl on top of each mason jar.
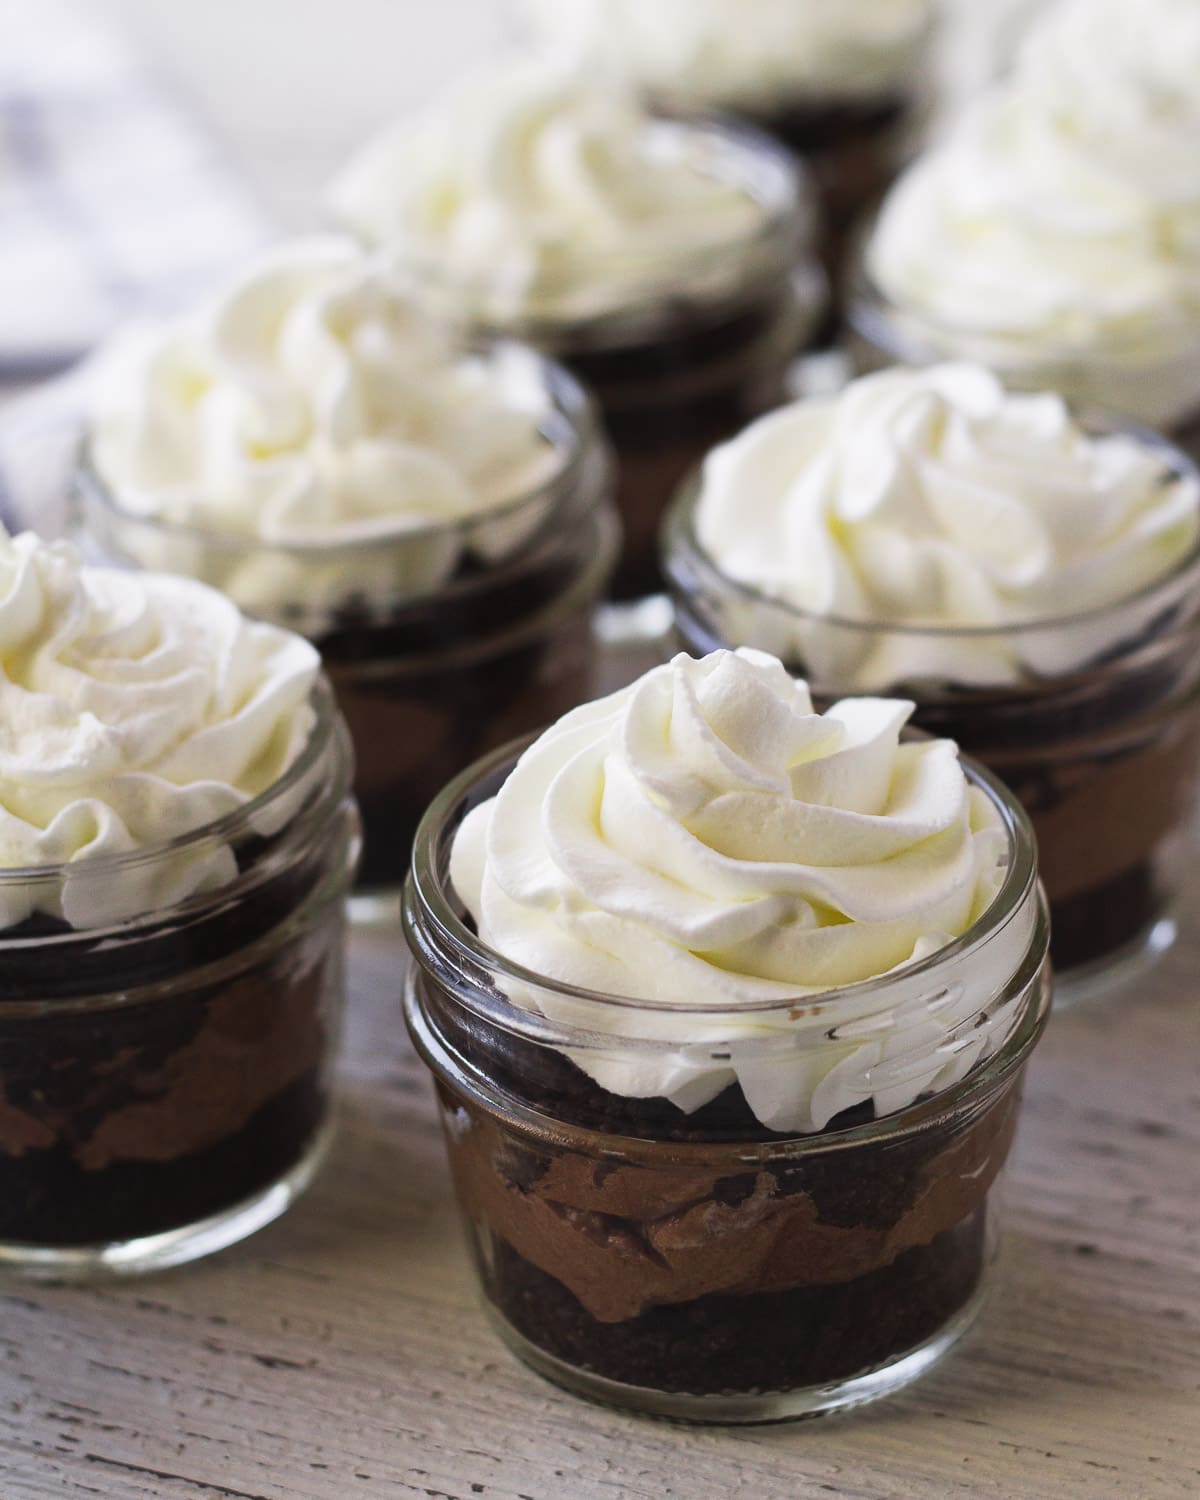
Dust with cocoa powder if desired.
Cupcake rings or even washi tape flags work great for a simple decoration!
Enjoy!

More Recipes from Bellewood Cottage
- Egg-Free French Silk Pie Recipe
- Nutella Whipped Cream Recipe
- No Bake Pumpkin Cheesecake Mason Jars
- Honey Whipped Cream
- No Bake Banana Pudding without Cool Whip
If you loved this recipe, leave a 5-star rating! I would so appreciate it!
No Bake French Silk Pie Mason Jar Desserts
Ingredients
- 12 chocolate sandwich cookies
Chocolate Layer:
- 2 oz semi-sweet chocolate chips (about a scant 1/3 cup)
- 2 tbsp butter unsalted
- 4 oz cream cheese
- 3/4 cup powdered sugar
- 2 tbsp cocoa powder
Whipped Cream:
- 1.5 cups heavy whipping cream
- 3 tbsp powdered sugar
- 1/4 tsp vanilla extract
Instructions
- Use eight 4-oz mason jars (or similar size jars) for this recipe. Crush 12 chocolate sandwich cookies in a gallon-size zip top bag (closed) with a rolling pin until they are crushed to fine crumbs. Set aside.
Chocolate Layer:
- In a small bowl, melt 2 oz of semi-sweet chocolate chips with 2 tbsp unsalted butter in the microwave at 15 second intervals, stirring between each interval, until fully melted and combined. Let cool. In a medium bowl, microwave 4 oz cream cheese at 10 second intervals, stirring between each interval, until very soft.
- With a hand mixer, stand mixer, or fork, beat the cream cheese until smooth (no lumps!), about 1 minute. Add in 3/4 cup powdered sugar. Beat until combined. Pour in the cooled chocolate/butter mixture and 2 tbsp cocoa powder. Beat until combined and set aside.
Whipped Cream Layer:
- With a hand mixer or stand mixer (using the wire whisk attachment) and a large bowl, whip 1.5 cups of heavy cream until frothy and beginning to thicken. Add in 3 tbsp of powdered sugar and 1/4 tsp of vanilla extract. Continue beating until soft peaks form and then beat a bit more until the whipped cream is just beginning to form stiff peaks. Don’t overbeat.
Assembly:
- Divide the whipped cream, adding roughly 1/3 of the cream to the chocolate layer mixture we set aside earlier and placing the remaining whipped cream to the fridge until you are ready to serve the desserts. Fold the whipped cream into the chocolate mixture gently to avoid deflating it.
- Line up eight 4-oz jars and fill with about 1 tbsp of cookie crumbs per jar. I like to lightly wiggle each jar back and forth to settle the crumbs. Don't push them down with a spoon because it'll create a stronger crust that will be harder to eat.
- Spoon the fluffy chocolate mixture gently into each jar, dividing it evenly. Each jar will have about a scant 1/4 cup of filling.
- Use the remaining cookie crumbs to add another layer of chocolate crumbs in each jar (1 tbsp per jar). Let chill two hours or until ready to serve. You can eat these right away, I just prefer it if the cookie crumbs soften a bit first.
To Serve:
- Fit a piping bag with a large star tip and fill with the whipped cream. Pipe a large swirl on top of each mason jar. The cream will start to deflate after a while of sitting out, so I would avoid doing this more than 30 minutes in advance of eating.
Notes
Weekly Crafting Fun!
Join my list and get a weekly email with relaxing craft ideas, freebies, sewing tutorials, and more!
Fellow Crumbl Fans!
Join my list and get a weekly email with fresh Crumbl news, delicious copycat recipes, and more!


Rich and delicious and so easy to make!
Thanks so much Cheryl! =)
Made this or a party and everyone went nuts over it! Even took some to go!