How to Paint a Pantry Door with Chalk Paint
Learn how to paint a pantry door with chalk paint. This quick kitchen update is inexpensive, transformative, and quick. If you are looking for pantry door ideas you can DIY in a weekend (that are budget-friendly too!), try this step-by-step.
Please note that this post contains affiliate links which allow me to earn a small commission when a purchase is made at no additional cost to you. As an Amazon Associate I earn from qualifying purchases. Read more here.
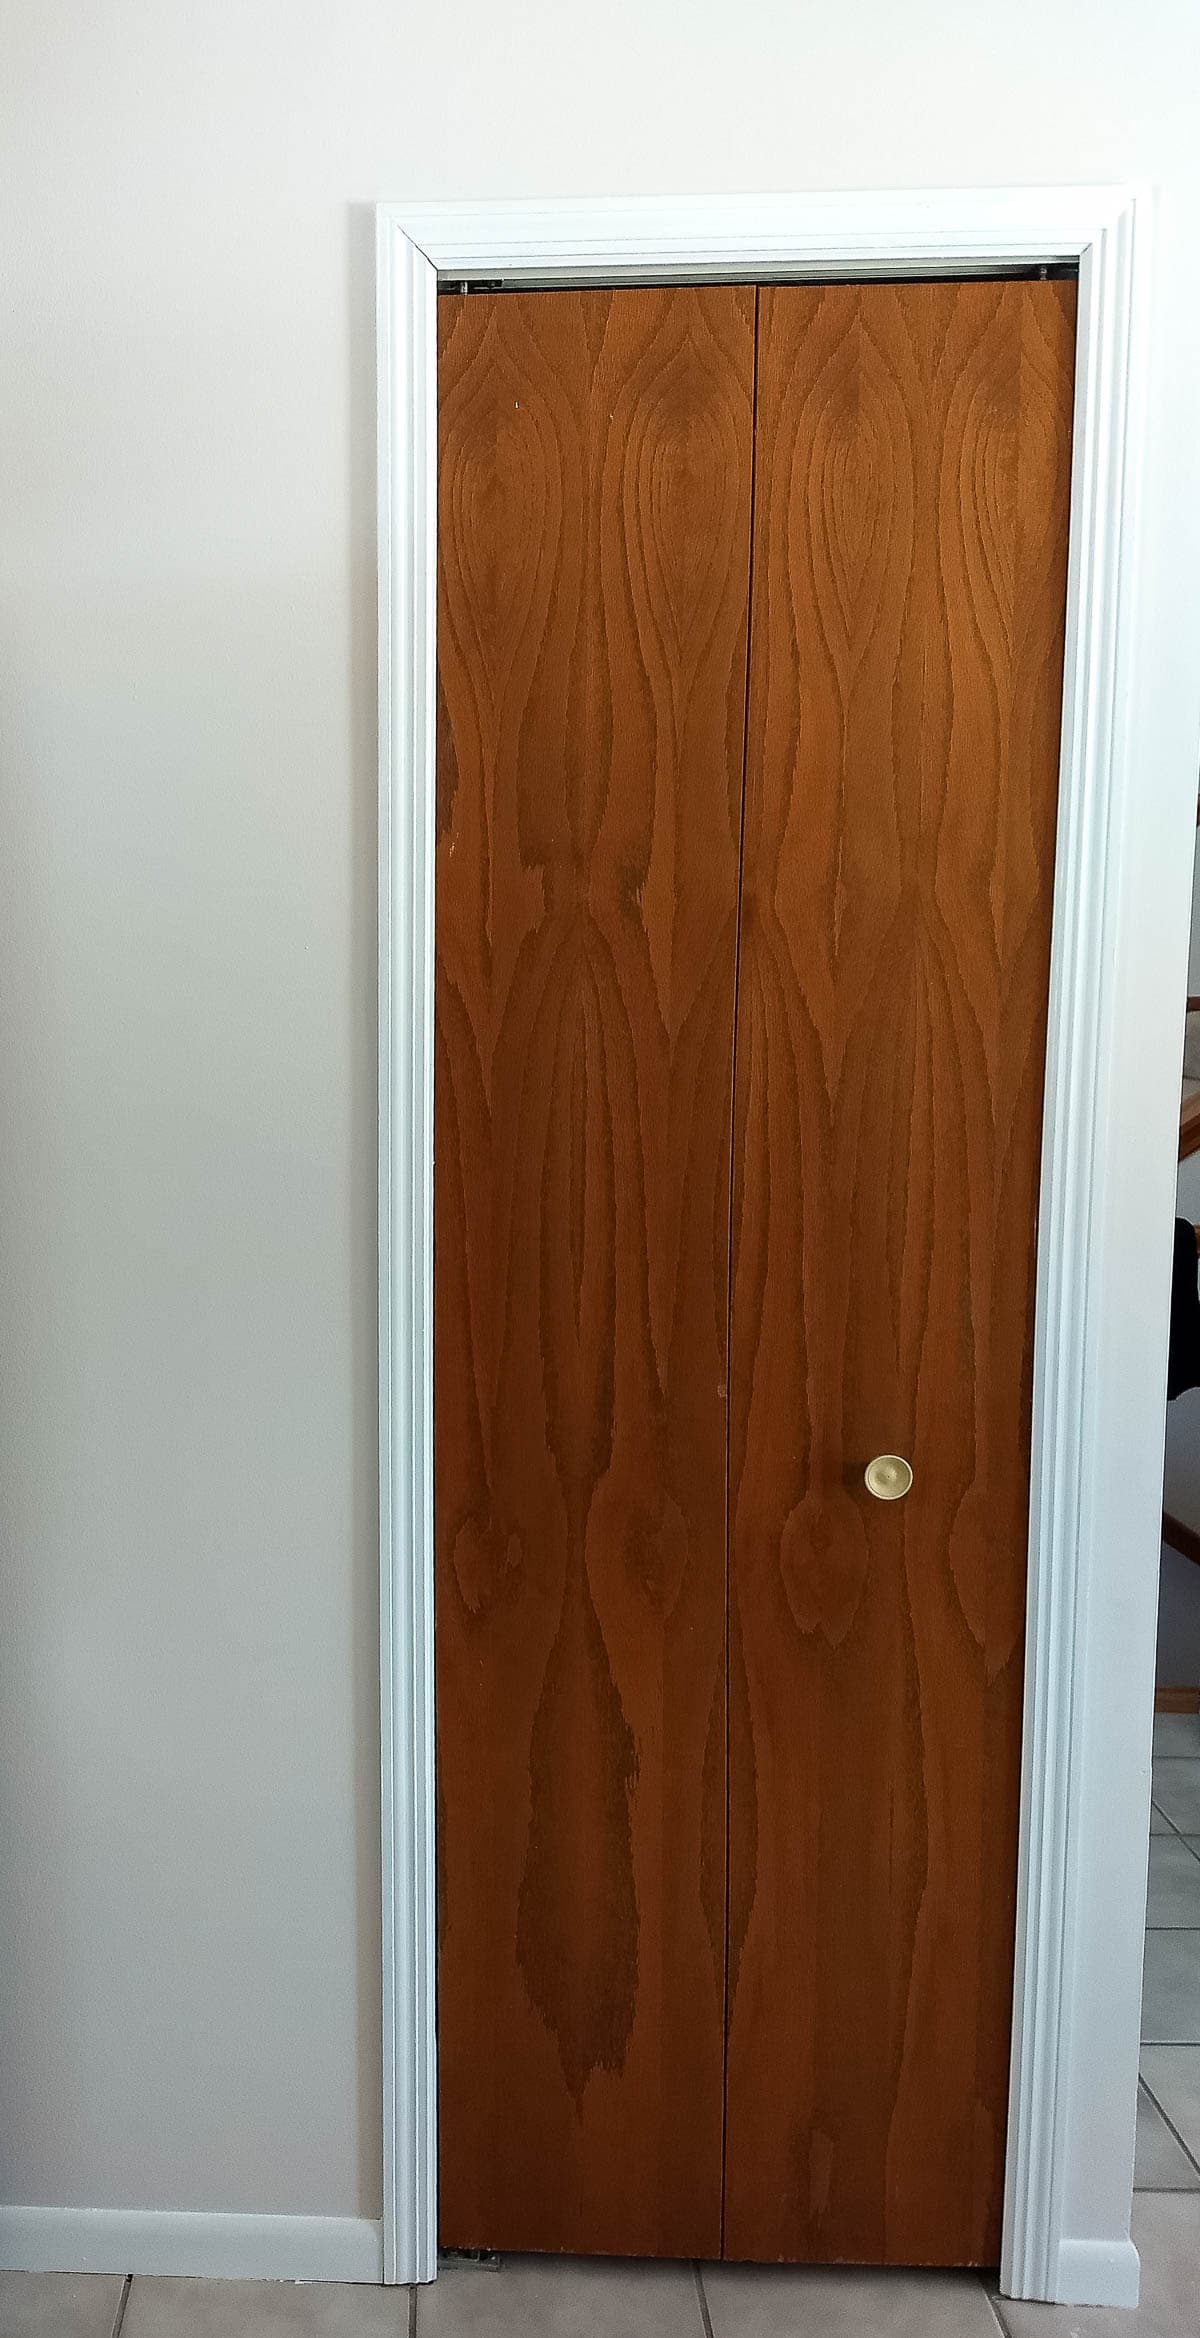
We live in an older home. And by “older” I do not mean, “quaint”, “character-filled”, or “charming”. No, our house is a classic 1980’s split-level with no inherent charm to speak of. So, finally I’ve decided to be a little more risky with my updates.
Paint is relatively cheap, and if eyesores in a home can be addressed with paint, it’s a wonderful solution to take advantage of. Let’s take a look at the “before” shall we?
Weekly Crafting Fun!
Join my list and get a weekly email with relaxing craft ideas, freebies, sewing tutorials, and more!
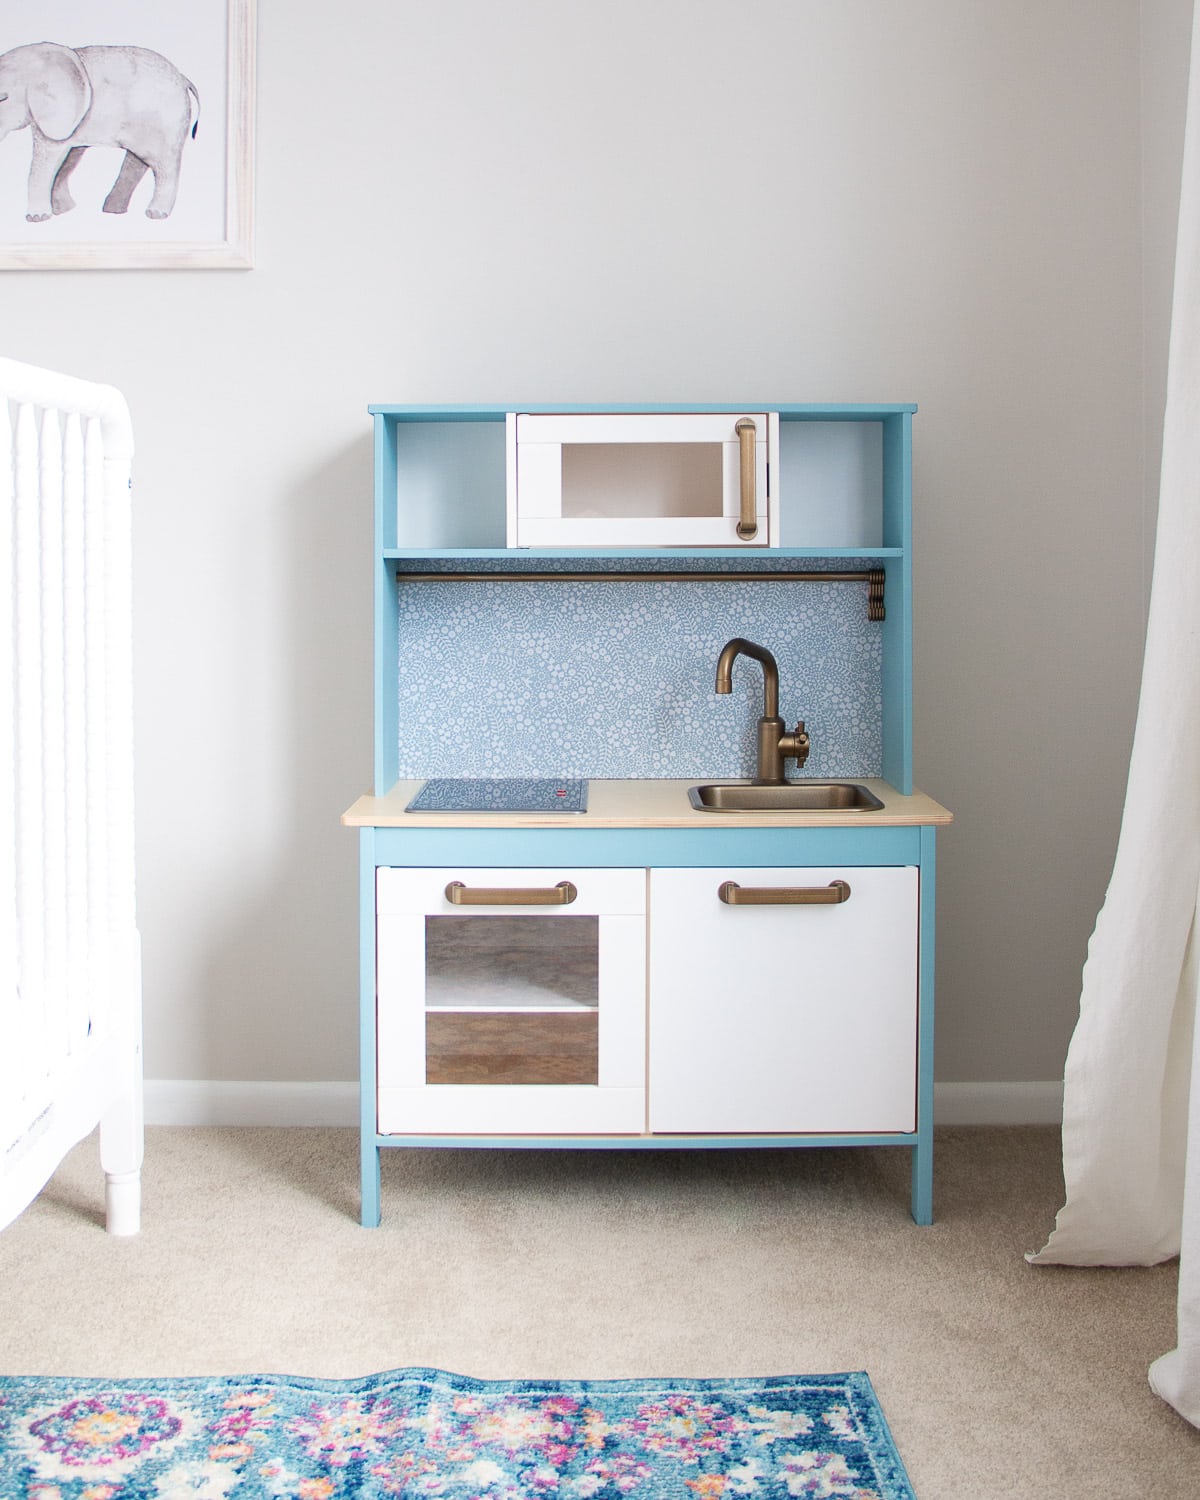
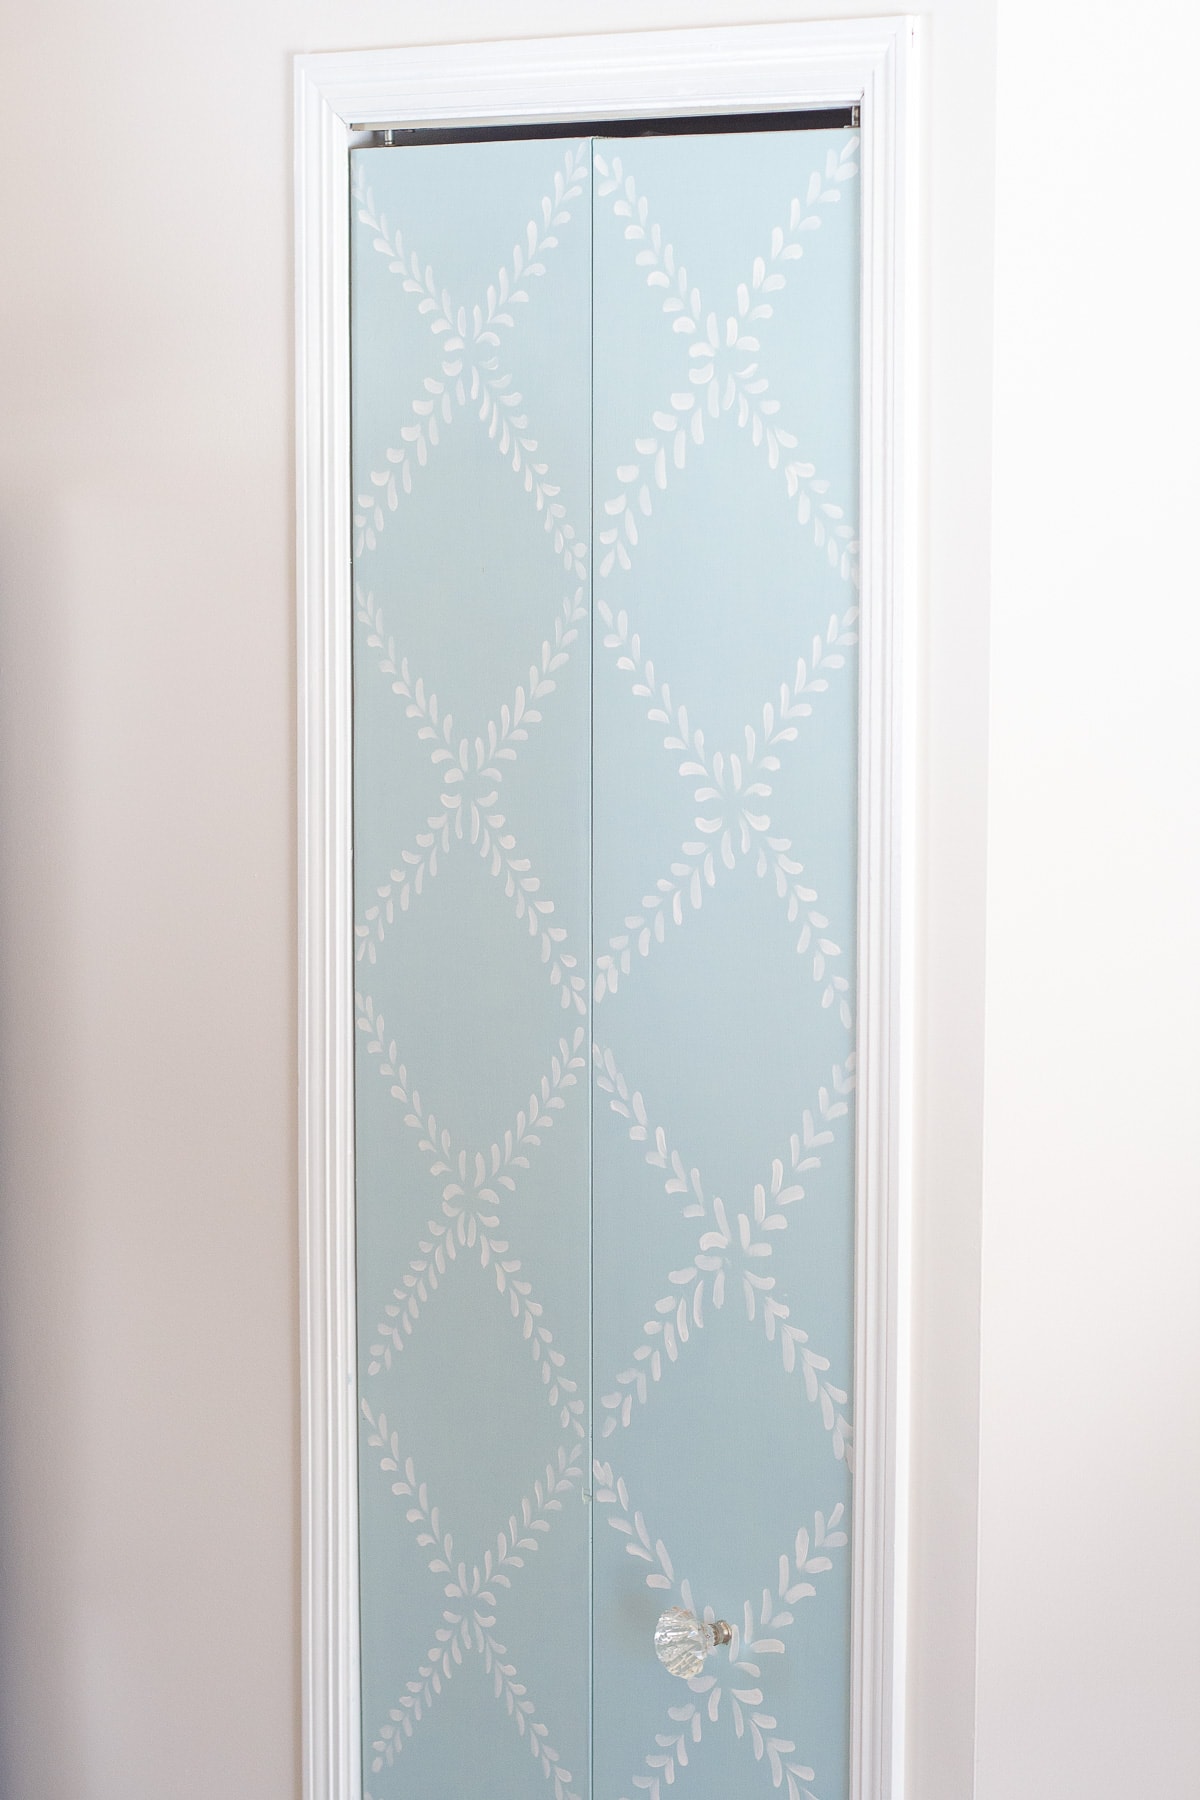
I originally planned to remove this bi-fold pantry door in our kitchen and replace it. But before I did so, I thought, well, why not chalk paint it?! I had some pretty blue chalk style paint leftover from my IKEA Play Kitchen Hack and decided to mix up a lighter variation of it and give it a try.
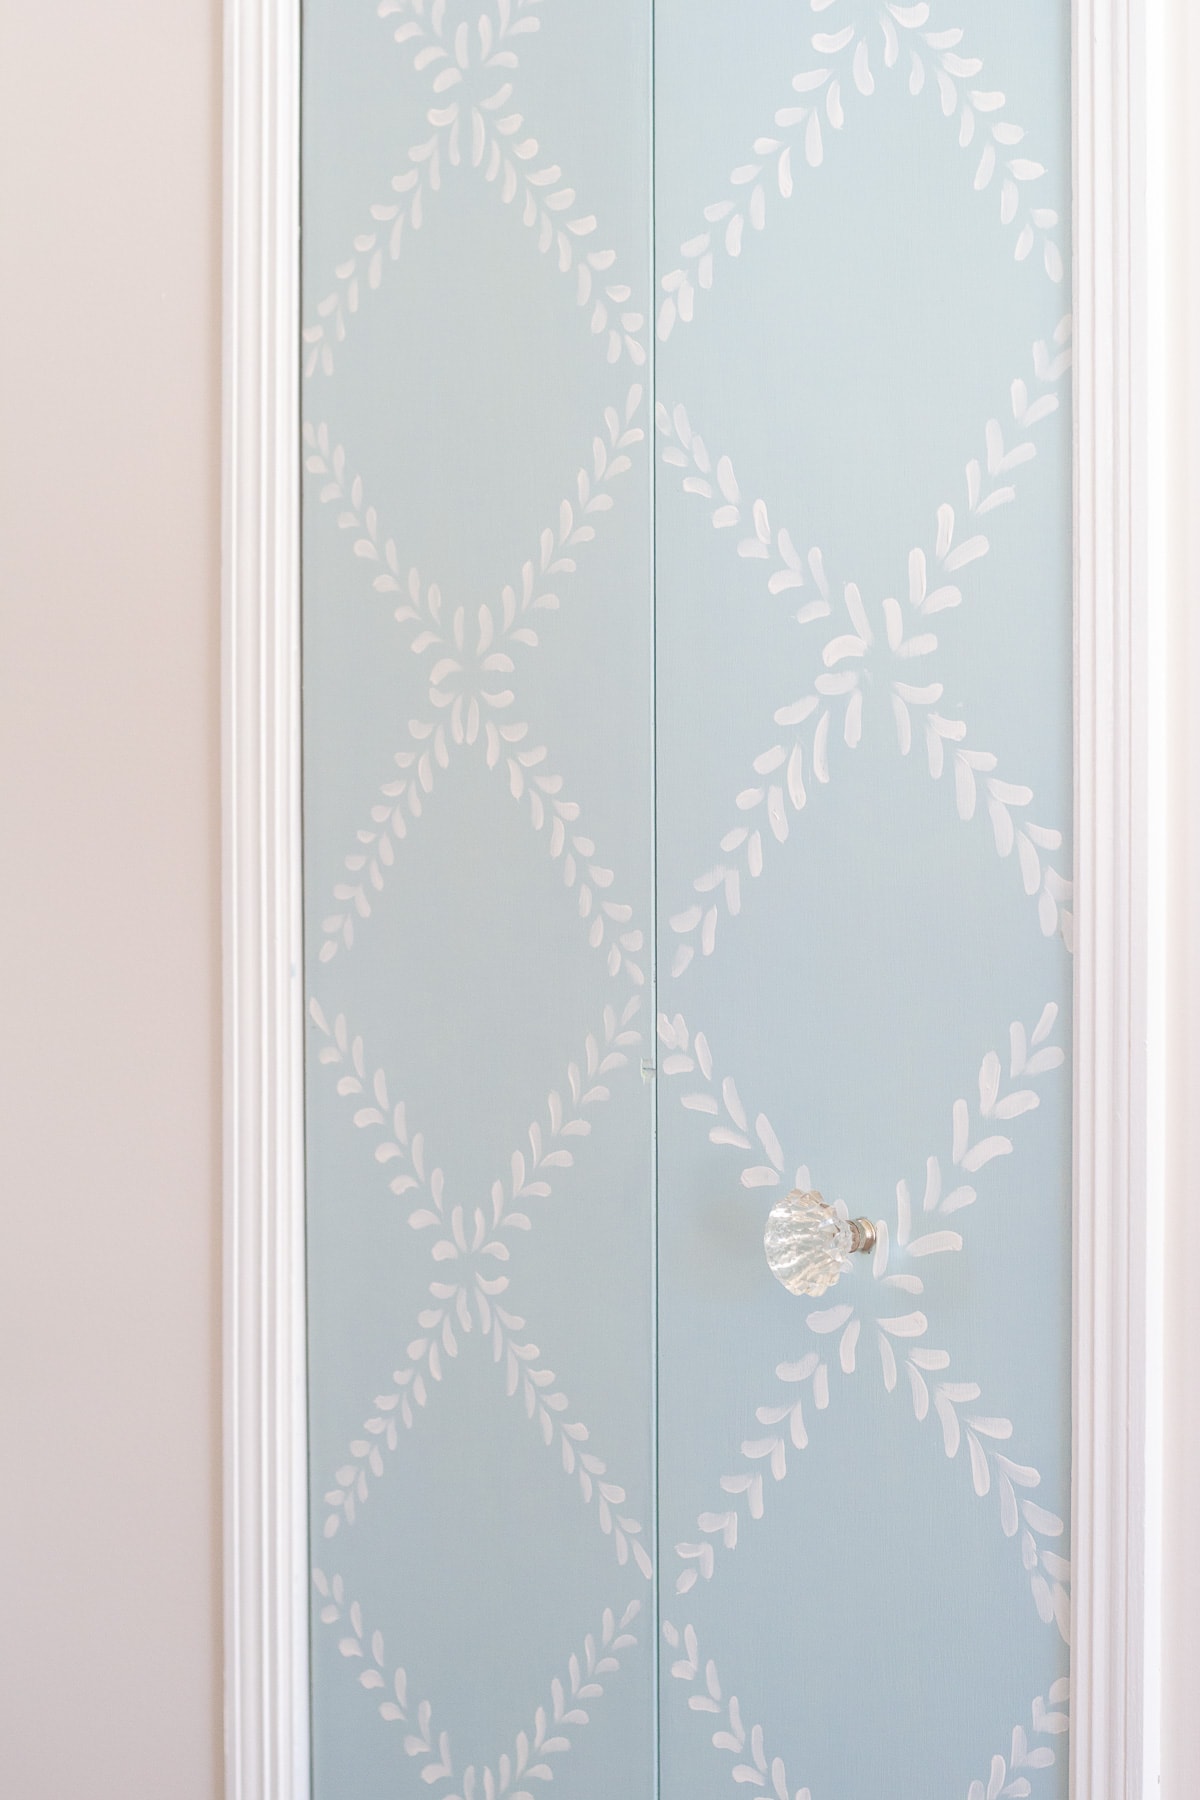
And, the after:
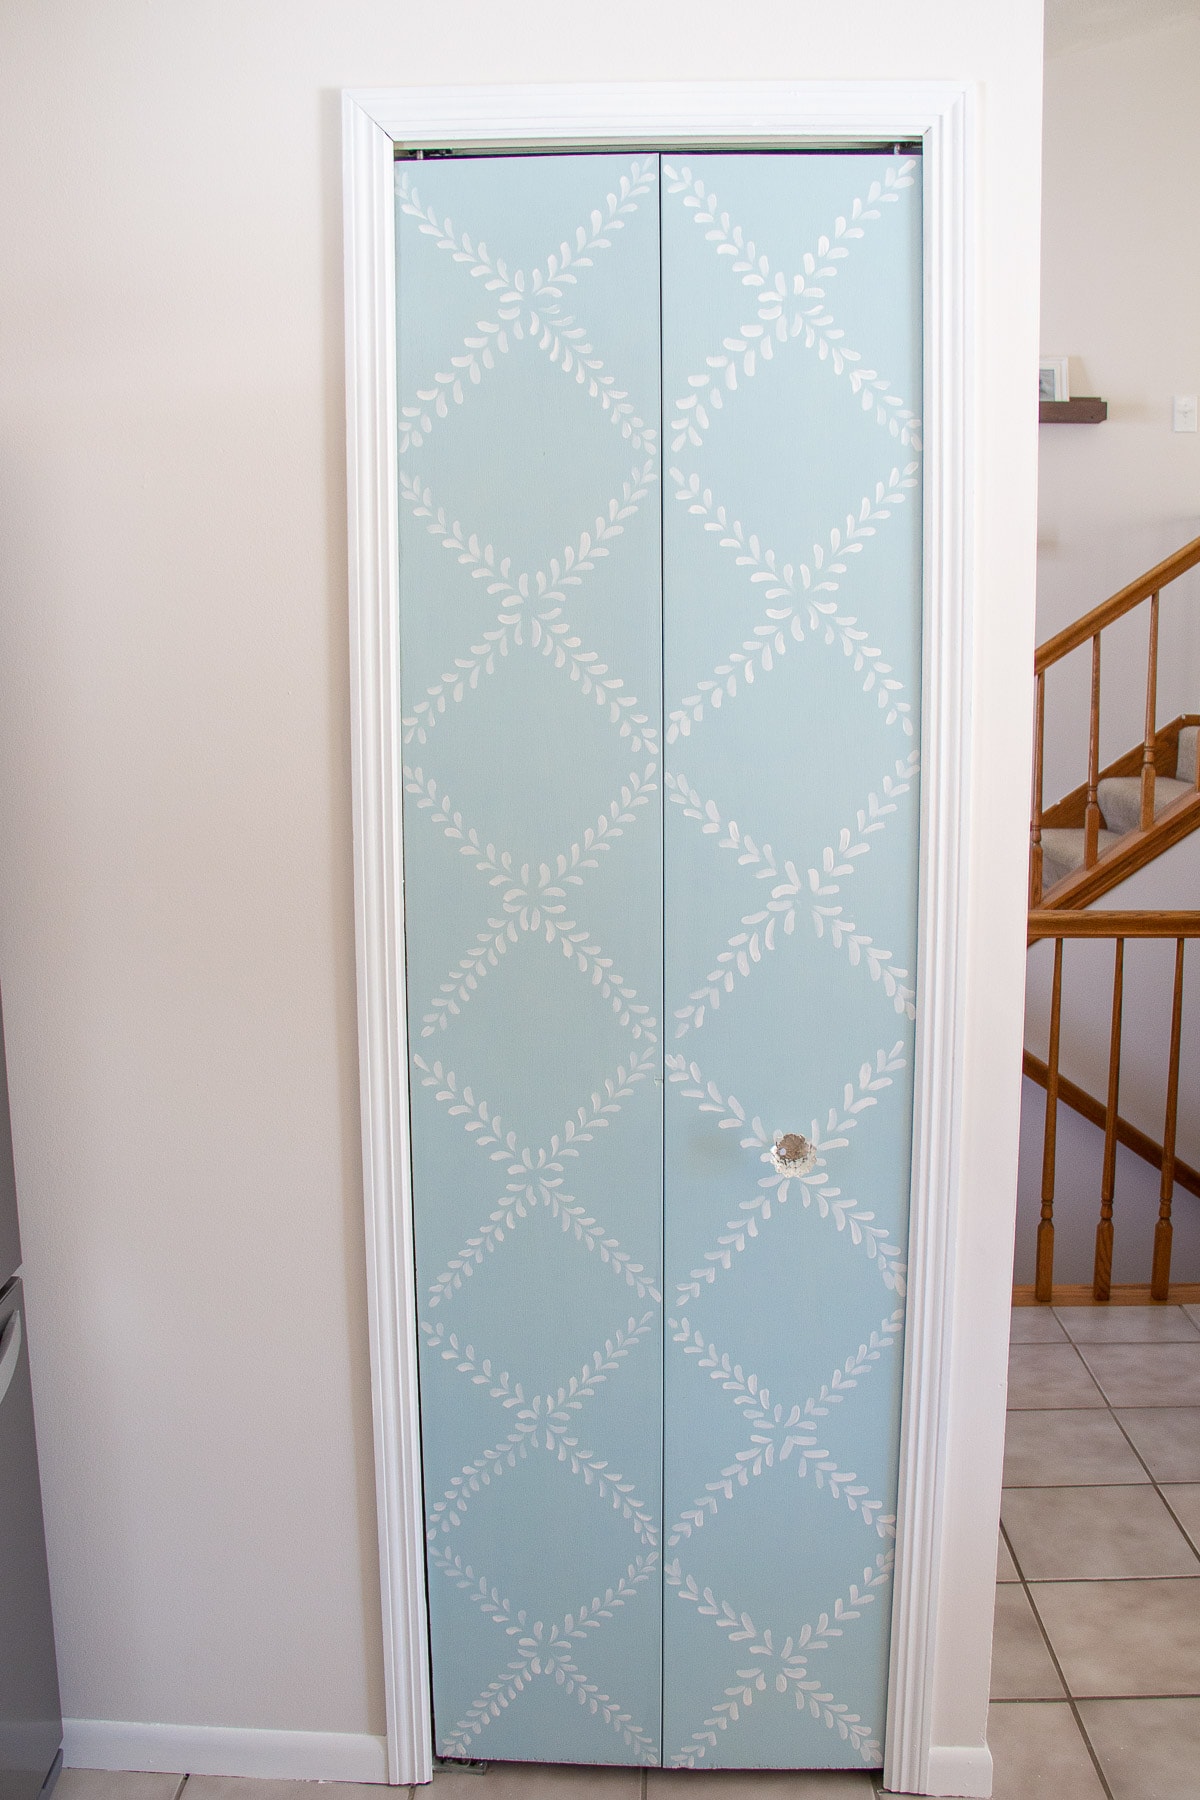
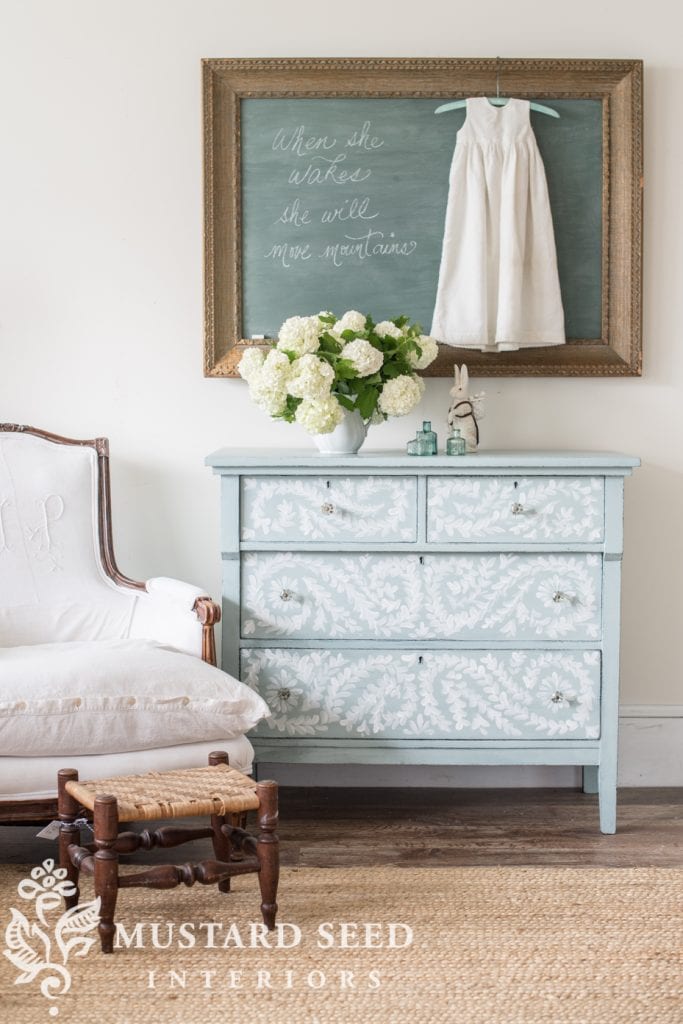
The floral designs were inspired this dresser that I’ve admired for years, painted by Marian at Miss Mustard Seed. I ended up doing a different look than the dresser, but I think it came out alright.
If you would like to make some bold moves in your own home, painting a pantry door is the perfect place to make a statement. Paint is cheap and this is a project that accommodates any budget.
You could opt to do any number of designs–stripes, florals, freehand, stenciled. Keep reading if you’d like the details of how I painted my farmhouse pantry door.
Supplies
Here’s the scoop on the supplies I used:
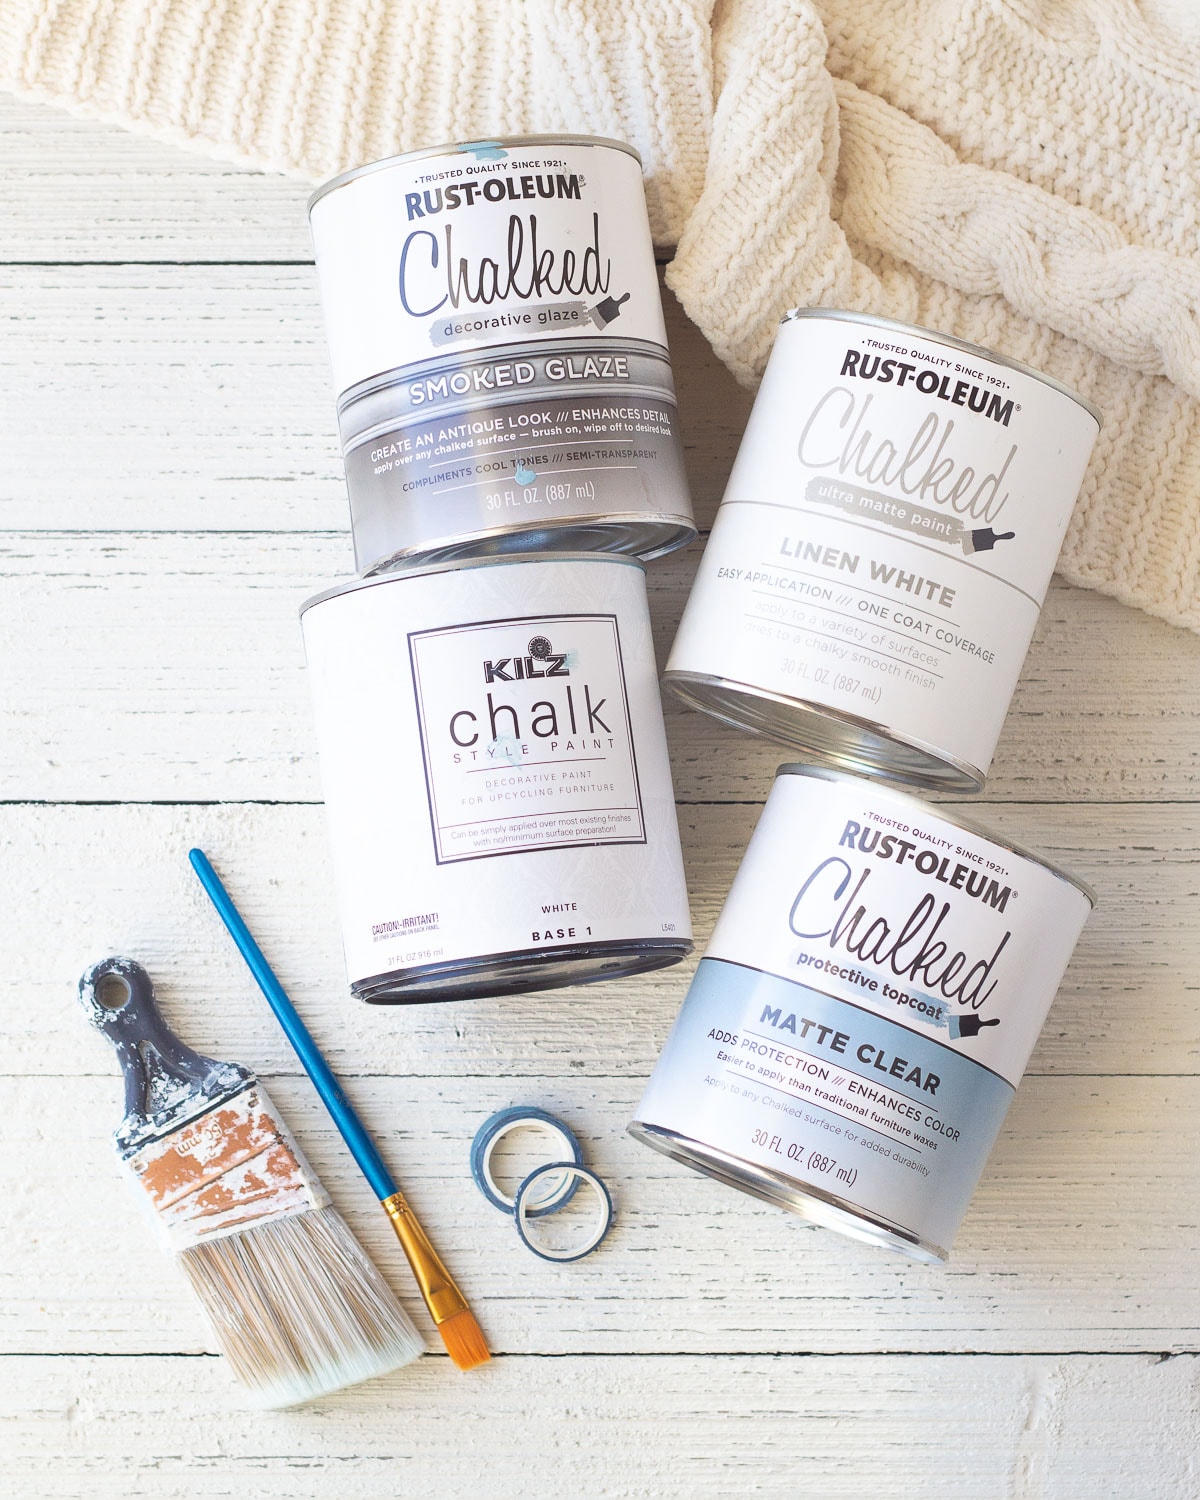
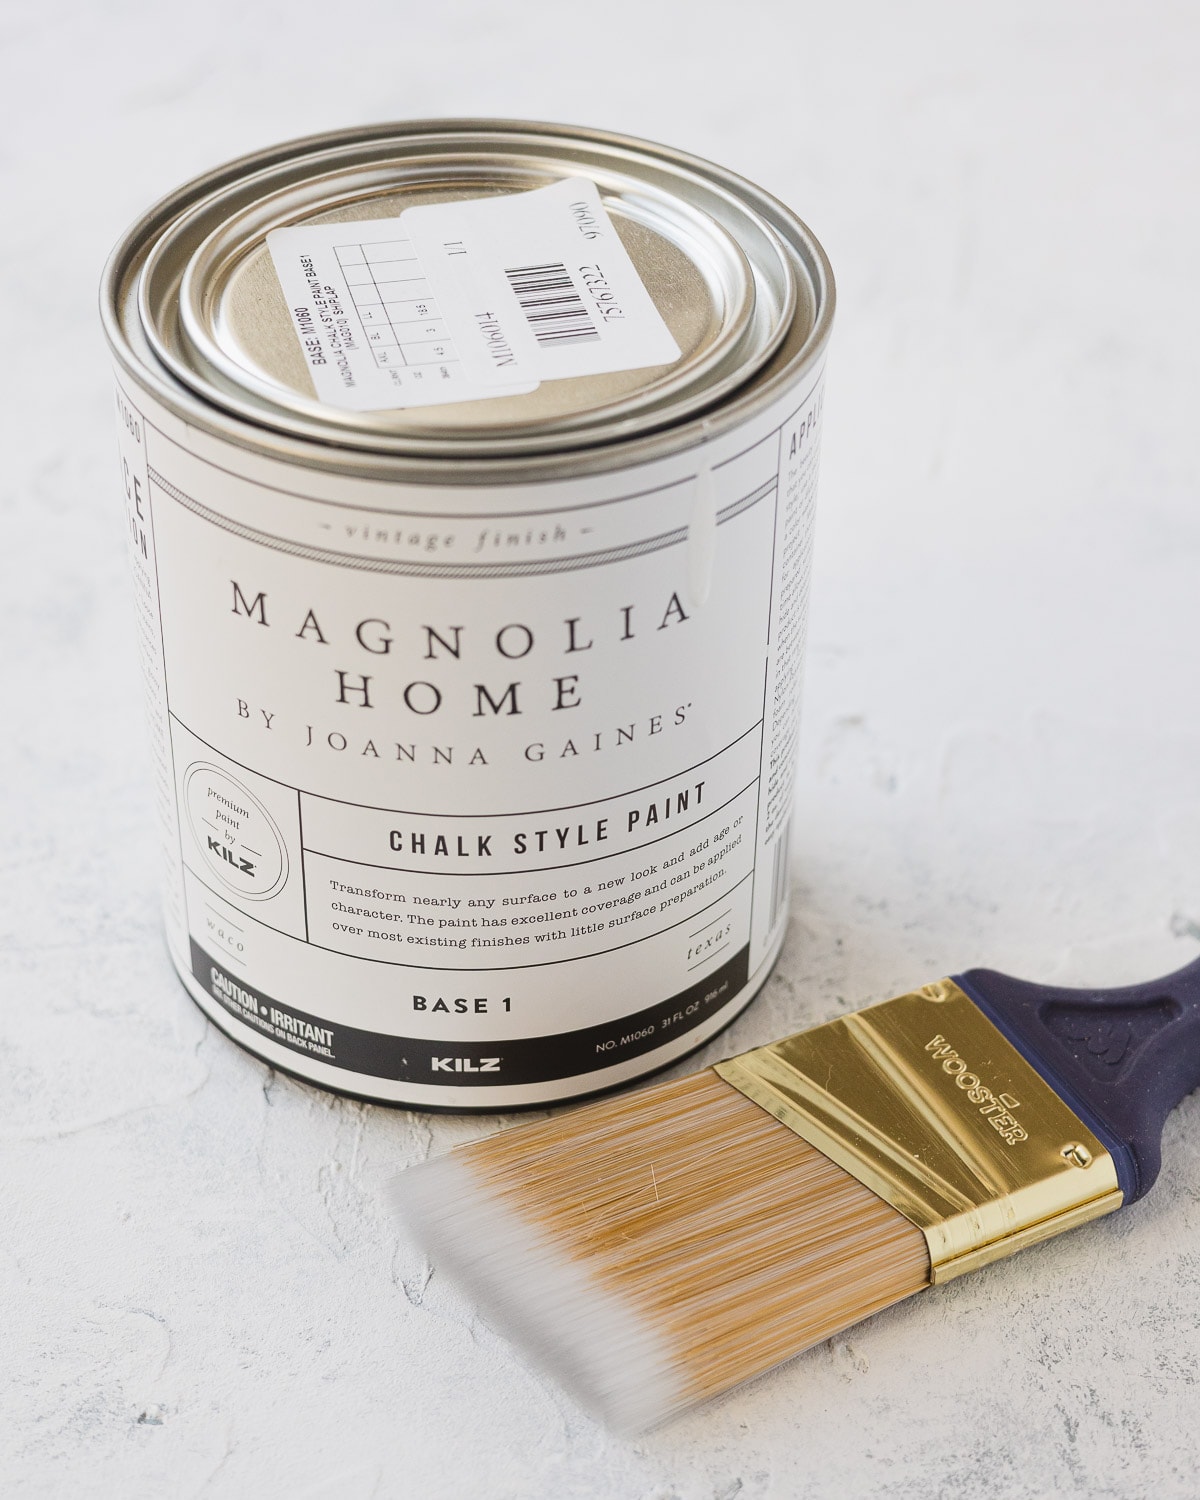
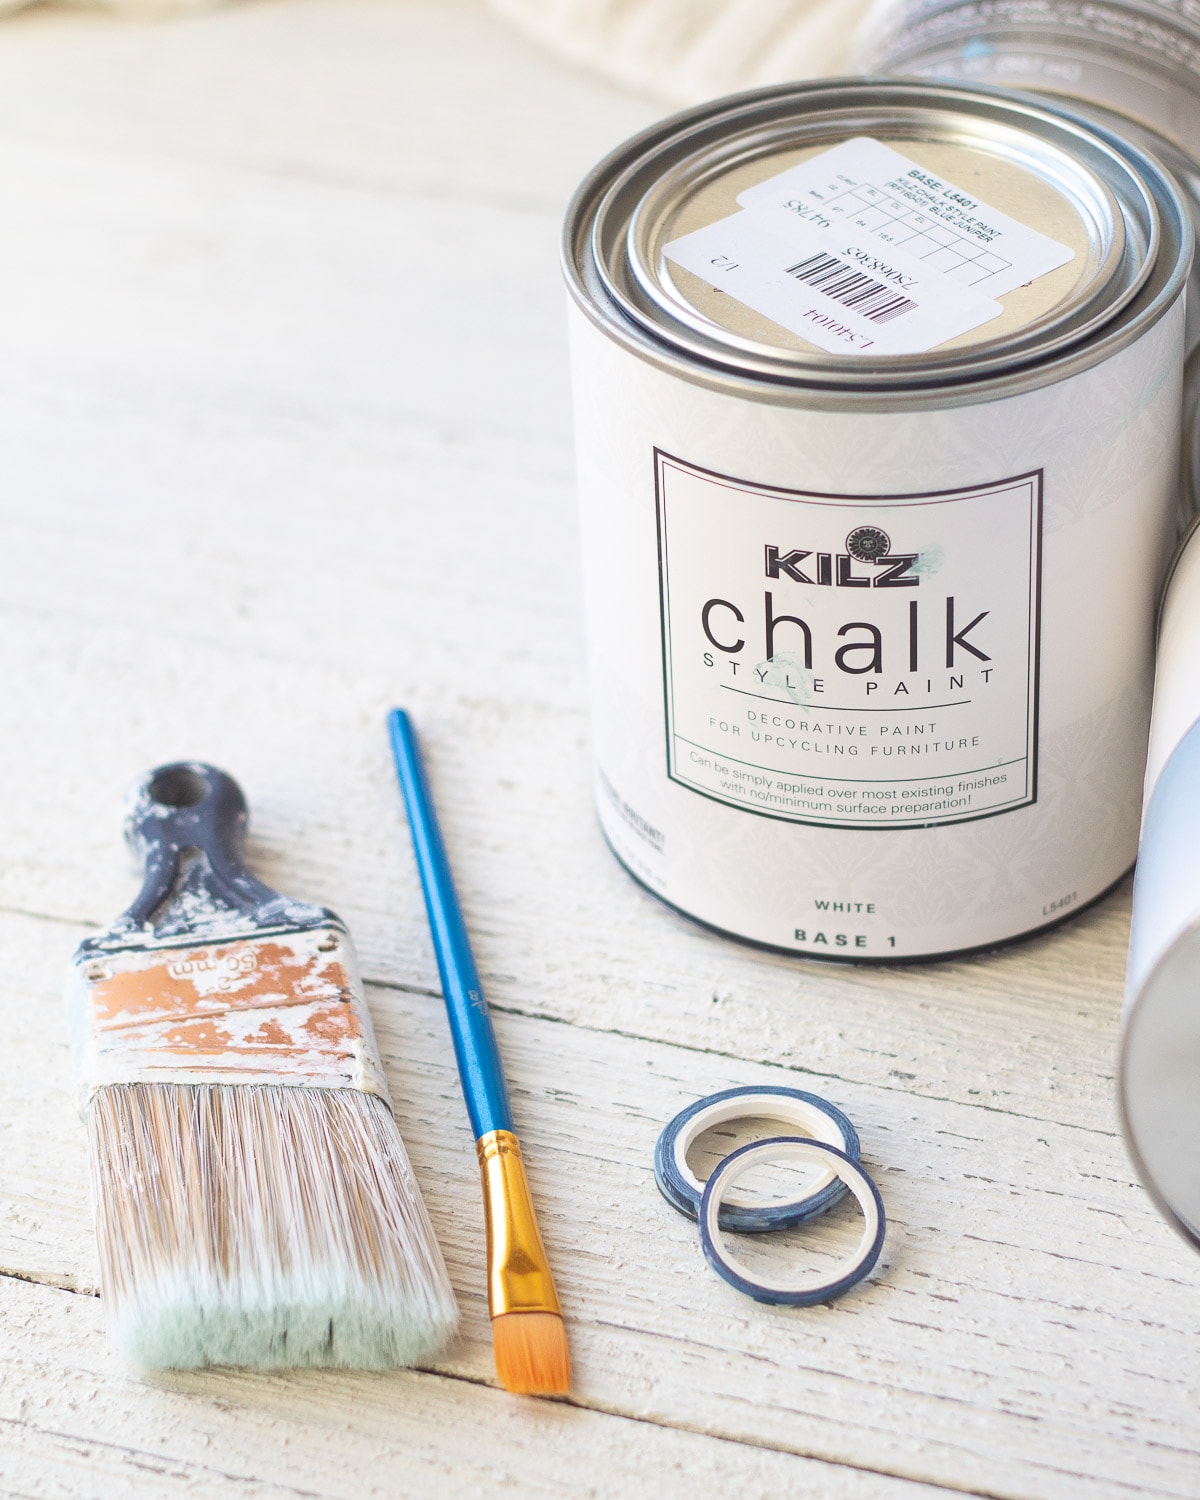
- Chalk style paint (I mixed up Rust-Oleum Chalked in Linen White with some KILZ Chalk Style paint in Blue Juniper and a little bit of Rust-Oleum Smoked Glaze)
- Contrasting color of paint (I used the Linen White)
- a good brush (love using this paint brush with chalk paint)
- washi tape or something similar for marking lines
- a medium or large filbert or comb paintbrush for making decorative swooshes
- clear coat – I used Rust-Oleum Matte Clear
- a glass knob
How to Paint a Pantry Door with Chalk Paint
Choose Your Paint
I wanted this project to be quick. So, I skipped any kind of sanding, priming or prepwork. I painted the back of the door too and actually did get some bleed-through on the back, but the front was just fine, so it worked out.
Chalk style paints are excellent for quick projects like this. If I was painting my kitchen cabinets or something along those lines, I would definitely take the time to prep thoroughly.
I mixed up some Rust-Oleum Chalked in Linen White with a bit of their Smoked Glaze (similar to a stain) and KILZ Chalk Style paint in Blue Juniper. If you mix your own color, be sure to mix up enough for the whole door.
Then I painted two coats of paint (with dry time in between) and let everything rest overnight.
Prep Your Design
You can use a wall stencil, but I just decided to freehand it. What I did to help myself out was to create a measured grid on the door that I could aim for as I painted the swooshes.
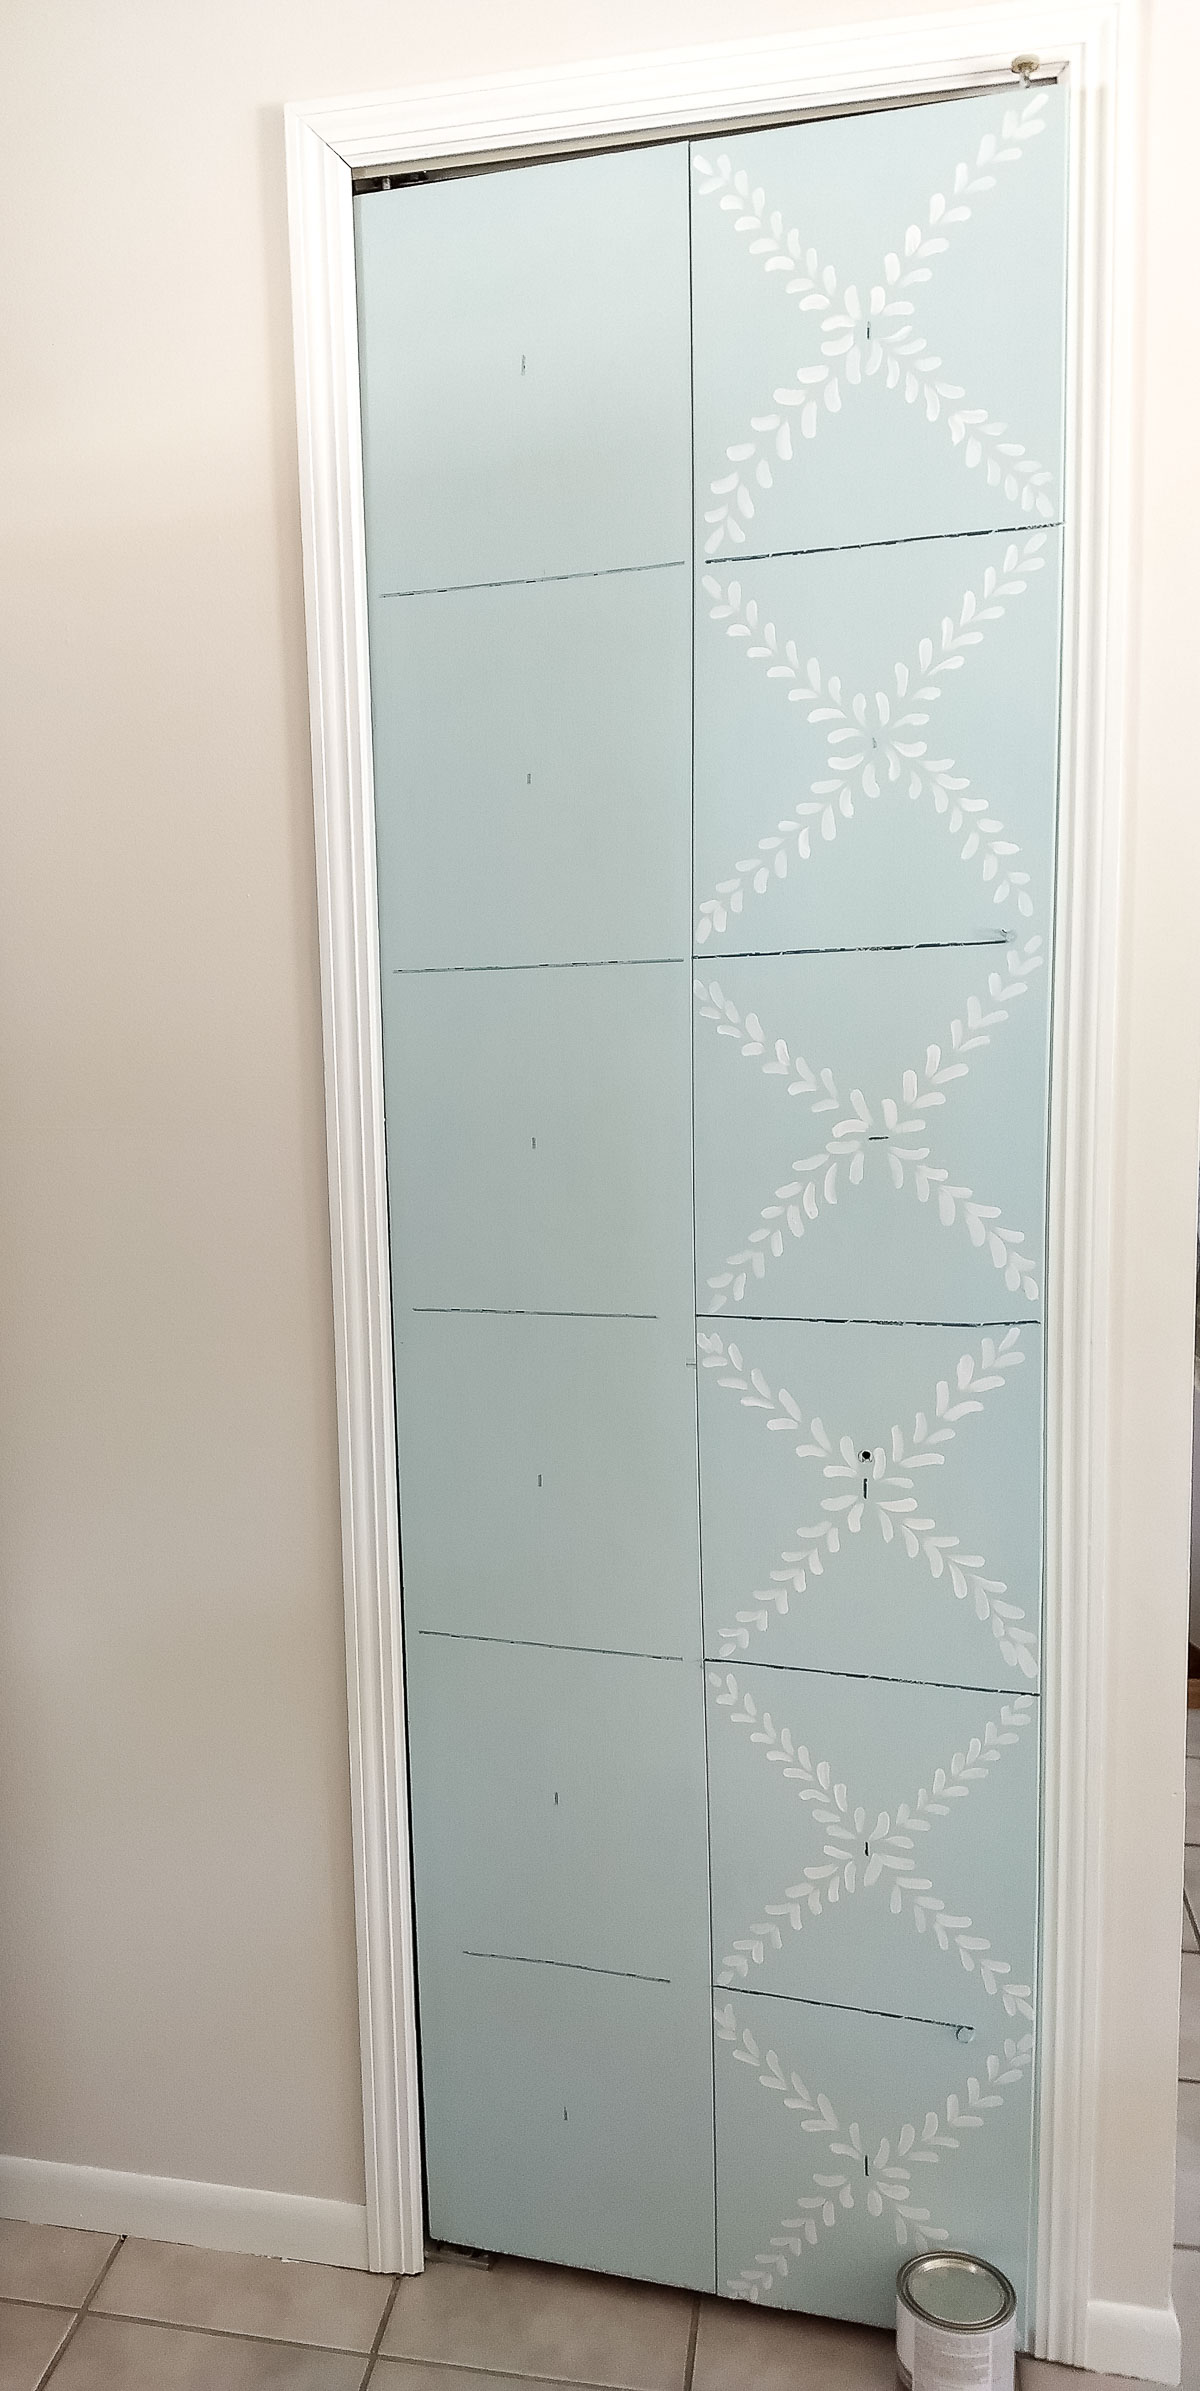
I used washi tape, which is excellent because it is low-tack and removes easily. It’s also much thinner than painter’s tape, so it’s great for a detailed design.
Now, I don’t know anyone who would want to waste spools of beautiful washi tape on a task like this, but actually, what I had on hand were “off-cuts” that were included with this set of washi tape I had purchased from Amazon.
I’d never received the tiny 1/8″ spools before (they are buffer pieces cut between designs to avoid design overlap as the spools are cut) and figured I’d just toss them, until I realized they’d be excellent for crafting.
I marked out a grid and the centers of the motifs I planned to paint. I ignored the knob in the process and just allowed the design to flow as it would.
Paint the Swooshes
Now, my painting job on the motifs is not exemplary. It actually looks a bit more messy in the photos even. I painted the doors one at a time and the second side I painted is much better. However, from a few feet away it looks fine. I’m embracing the rustic handcrafted feel.
If you’d rather have a little more assurance that things will turn out as you paint your pantry door, use stencils to get the desired affect.
I started in the middle of each motif and moved my brush outward staying focused on what would be the corner of each motif. Aiming for the corners helped me keep my swooshes on track and it got easier as I went along.
You could also remove the door completely and paint it while it rests on the floor (or sawhorses or a table top) if that makes it easier.
And, if you have a scrap board to practice on, even better!
Clear Coat
I used my favorite top coat for chalk style paint, Rust-Oleum Matte Clear. Note that I always suggest doing a little test of your chalk paint + top coat before finishing your project.
I’ve used Matte Clear enough times I usually feel comfortable just applying it right away, but it’s best to know if anything is going to get funky before you coat the final project.
Replace the Knob
Replacing the knob was my favorite part of this project. Exchanging that horrible yellowed plastic knob for a fresh glass knob was a gamechanger.
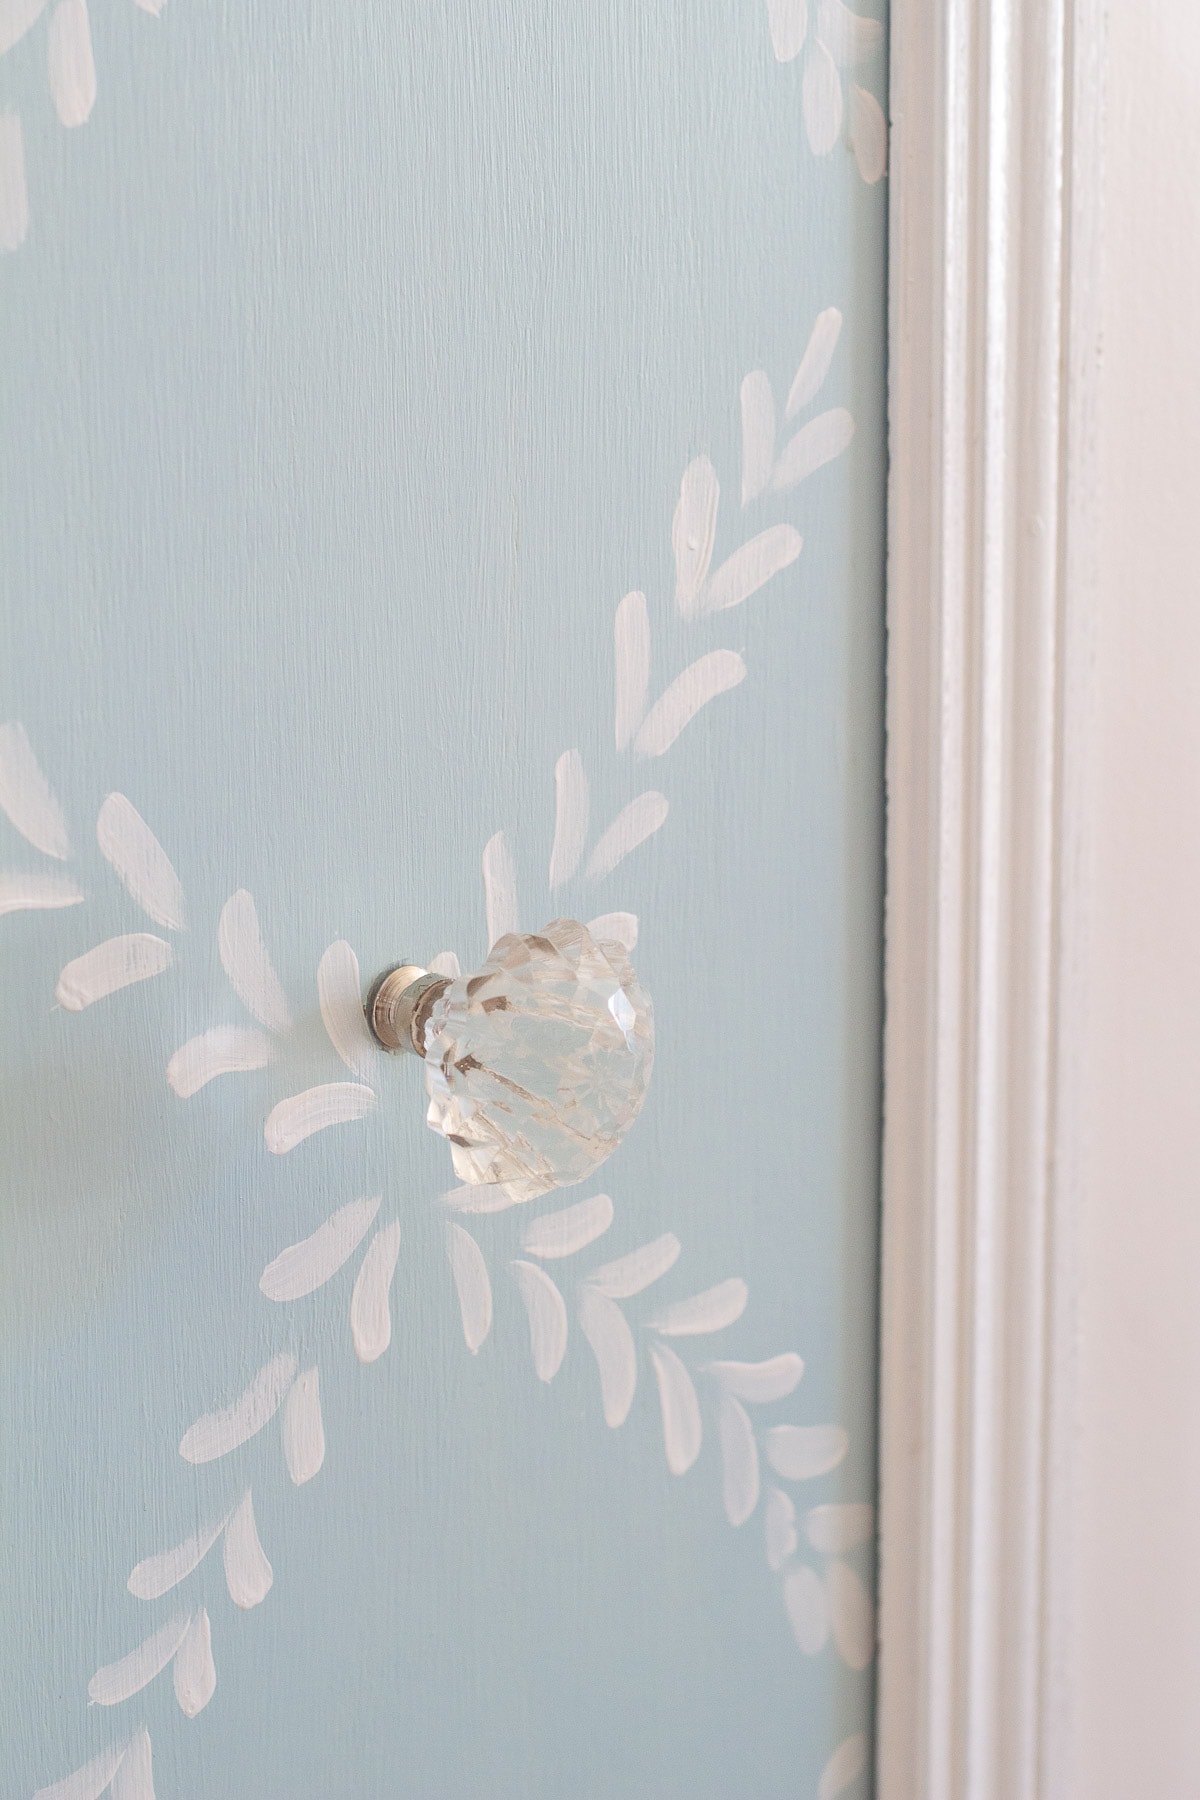
A gamechanger that only cost about $4 I might add. Thank you 50% off knobs at Hobby Lobby!
Total Project Cost of Painting My Pantry Door
What is a budget-friendly tutorial without a quick cost breakdown?
Paint & clear coat – already had on hand, and used maybe 1/4 of a can total…so about $5-6 in paint?
Brushes & other supplies – already had on hand.
Knob – $4.50.
So roughly $10 for a quick pantry door refresh? Yes, please!
Now, you’ll notice that a lot of the reason why this project was so inexpensive was because I already had paint on hand. Be creative with your supplies and stretch them to go further so you can accomplish more in your home. In this case, mixing up my own paint color was a way to save money and get the look I wanted.
What are your favorite DIY projects you have completed in your home? I’d love to hear!


More DIY from Bellewood Cottage
- How to Seal Chalk Paint
- How to Make Drop Cloth Curtains…Everything You Ever Wanted to Know
- How To Bleach Drop Cloths Successfully
- What Is So Great About Chalk Paint?
- Make Your Own DIY Rustic Headboard
Weekly Crafting Fun!
Join my list and get a weekly email with relaxing craft ideas, freebies, sewing tutorials, and more!