Pumpkin Spice Salt Dough Recipe
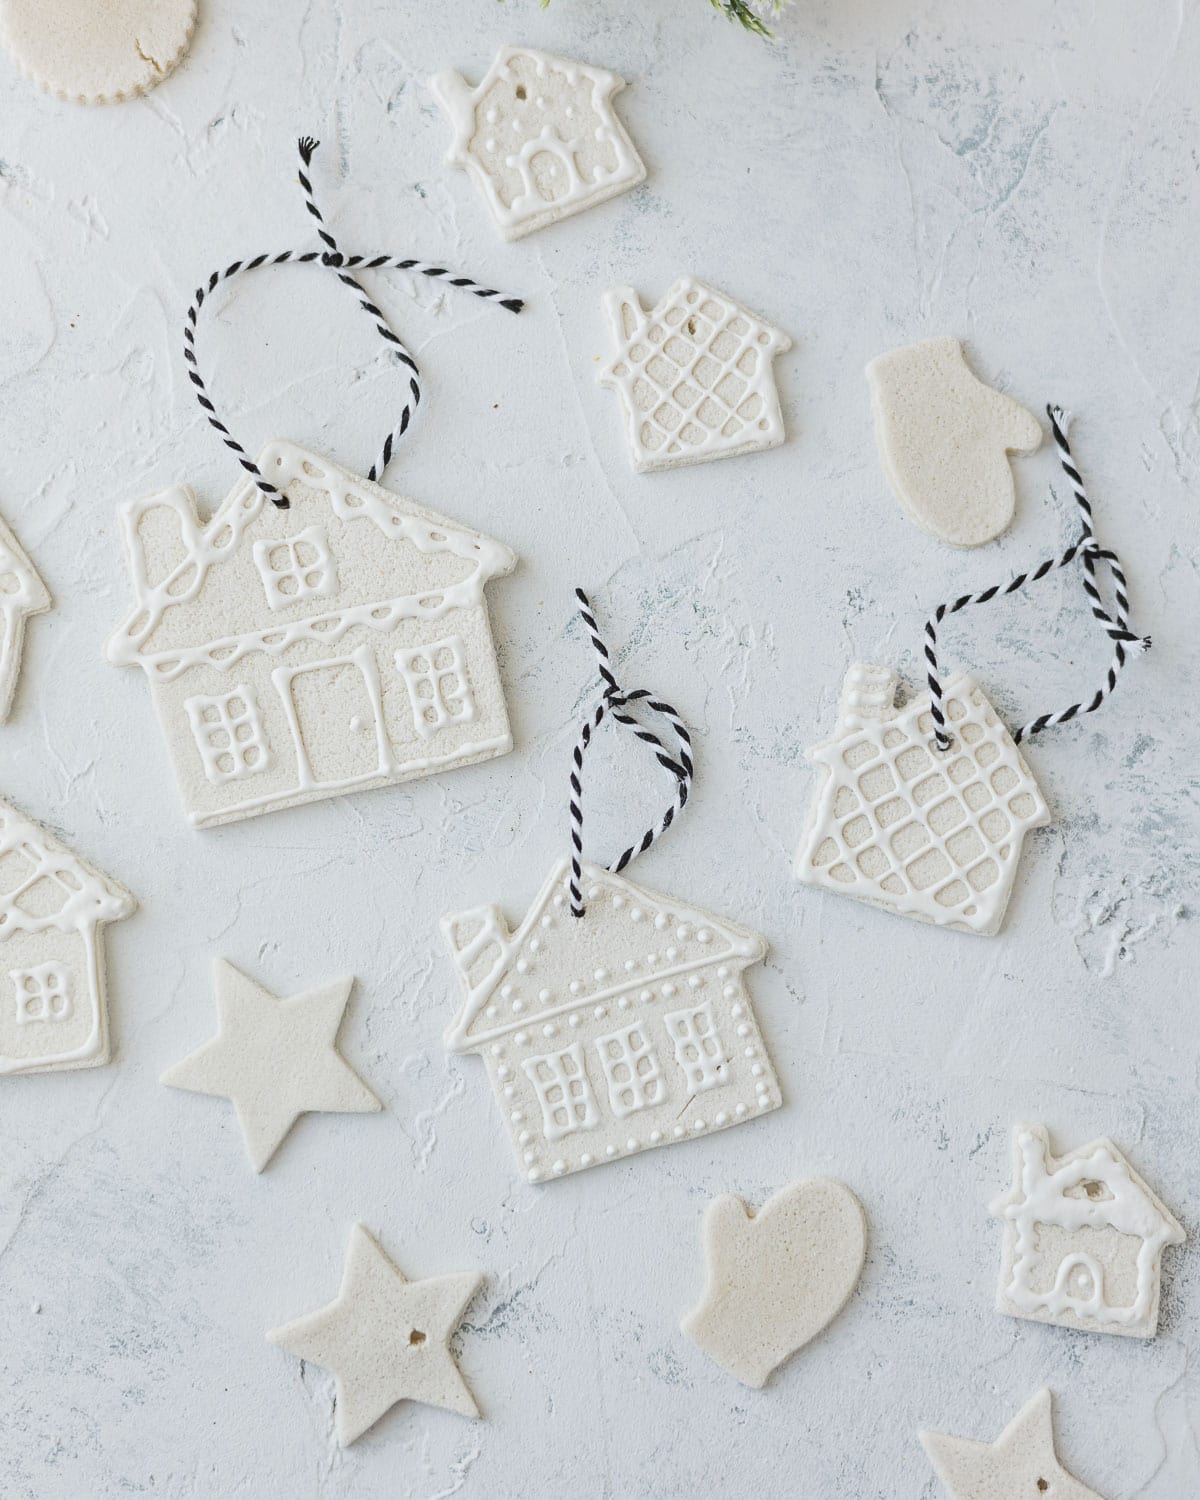
Pumpkin Spice Salt Dough is a spicy twist on the original (and it makes your kitchen smell amazing while baking). Use this (non-edible!) dough for crafting ornaments, gift tags, garlands, and more. All you need is flour, salt, pumpkin pie spice, and water. Bookmark this recipe for an easy fall craft!
Please note that this post contains affiliate links which allow me to earn a small commission when a purchase is made at no additional cost to you. As an Amazon Associate I earn from qualifying purchases. Read more here.

I thought that Pumpkin Spice Salt Dough would be a fun spin on original salt dough and it smells amazing too! Salt dough is perfect for crafting with kids. You can get creative with sculpting, cookie cutters, cookie presses, and more.
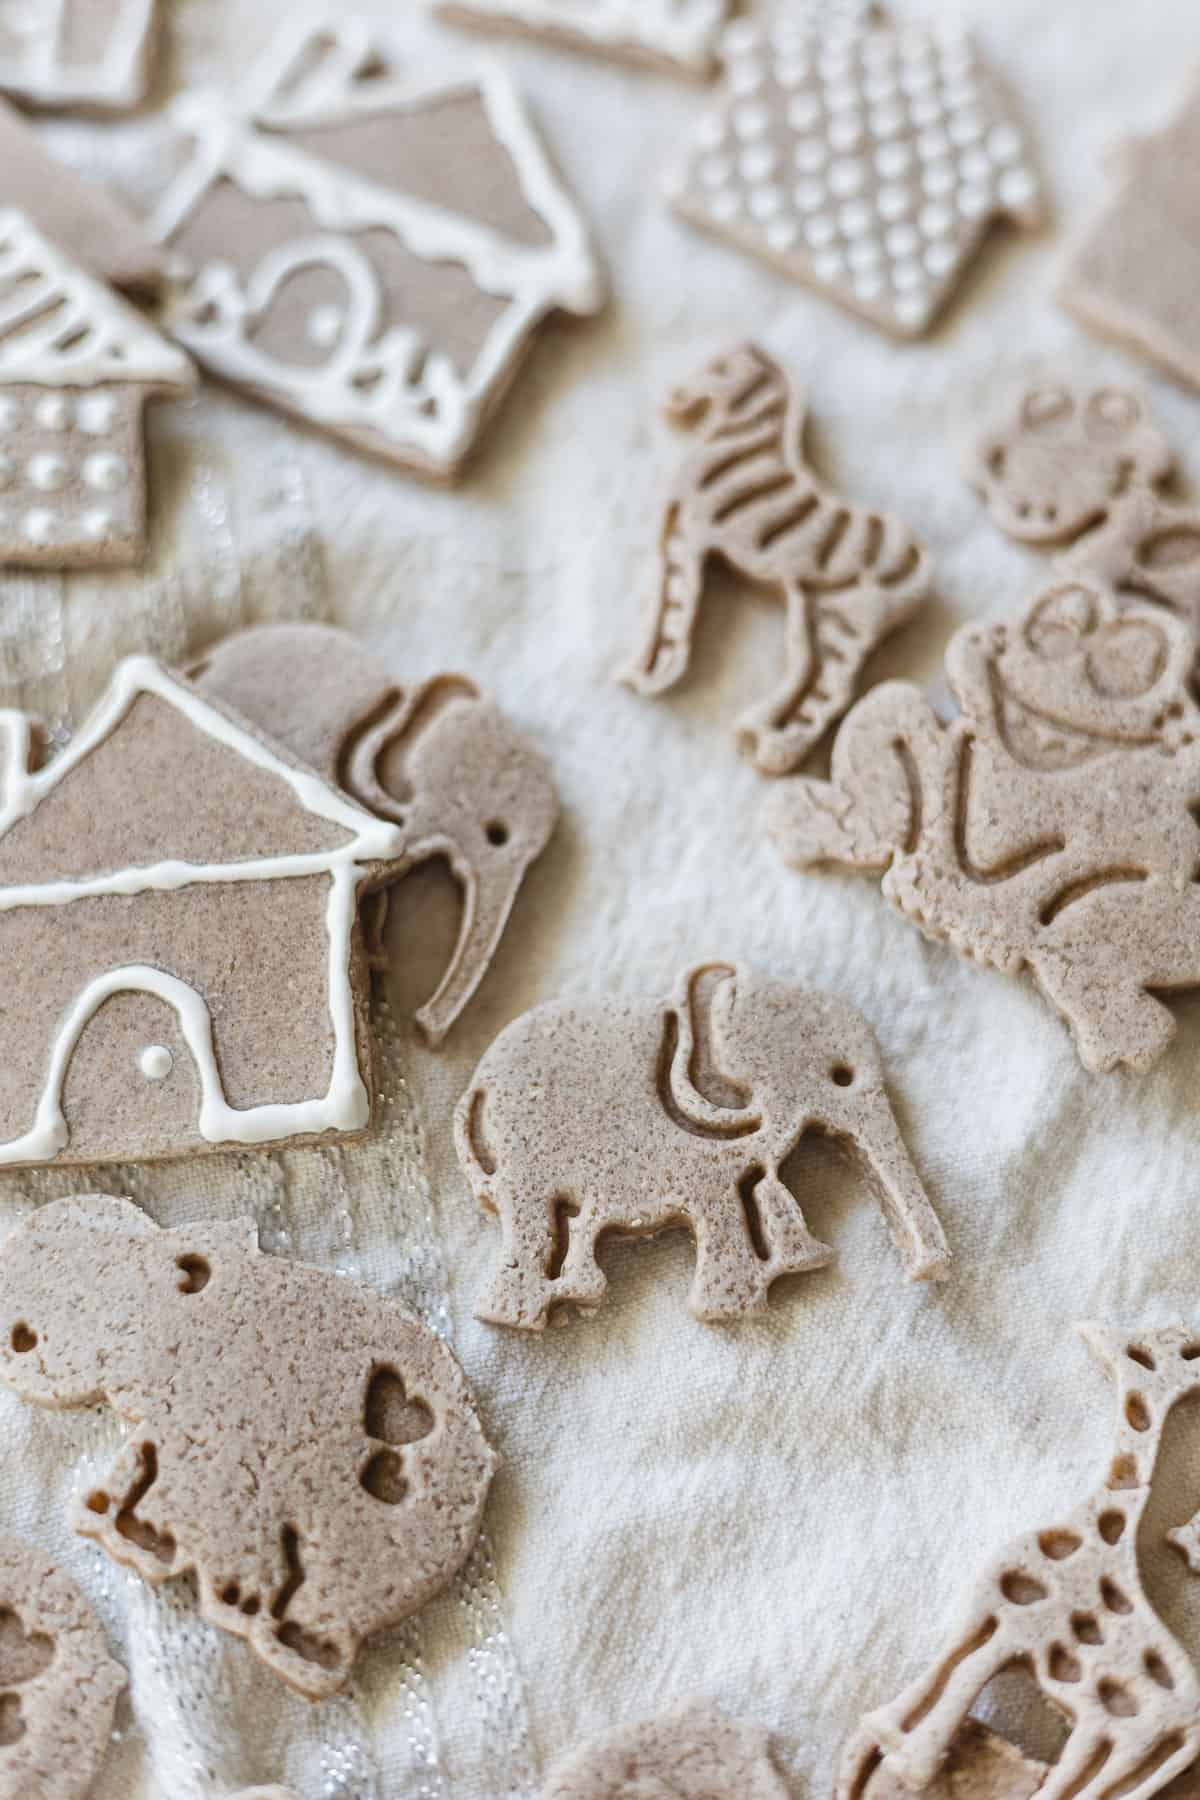
After the salt dough is completely dry (whether you air dry or bake it) the pieces can be decorated with craft paints, glitter glue, puffy paint and more. Have fun with it!
Weekly Crafting Fun!
Join my list and get a weekly email with relaxing craft ideas, freebies, sewing tutorials, and more!
Important reminder that salt dough is not edible! It’s just for crafting. =)
Here’s a quick glance at the difference between the original salt dough recipe and the pumpkin spice version after the ornaments have dried completely.
Supplies You’ll Need
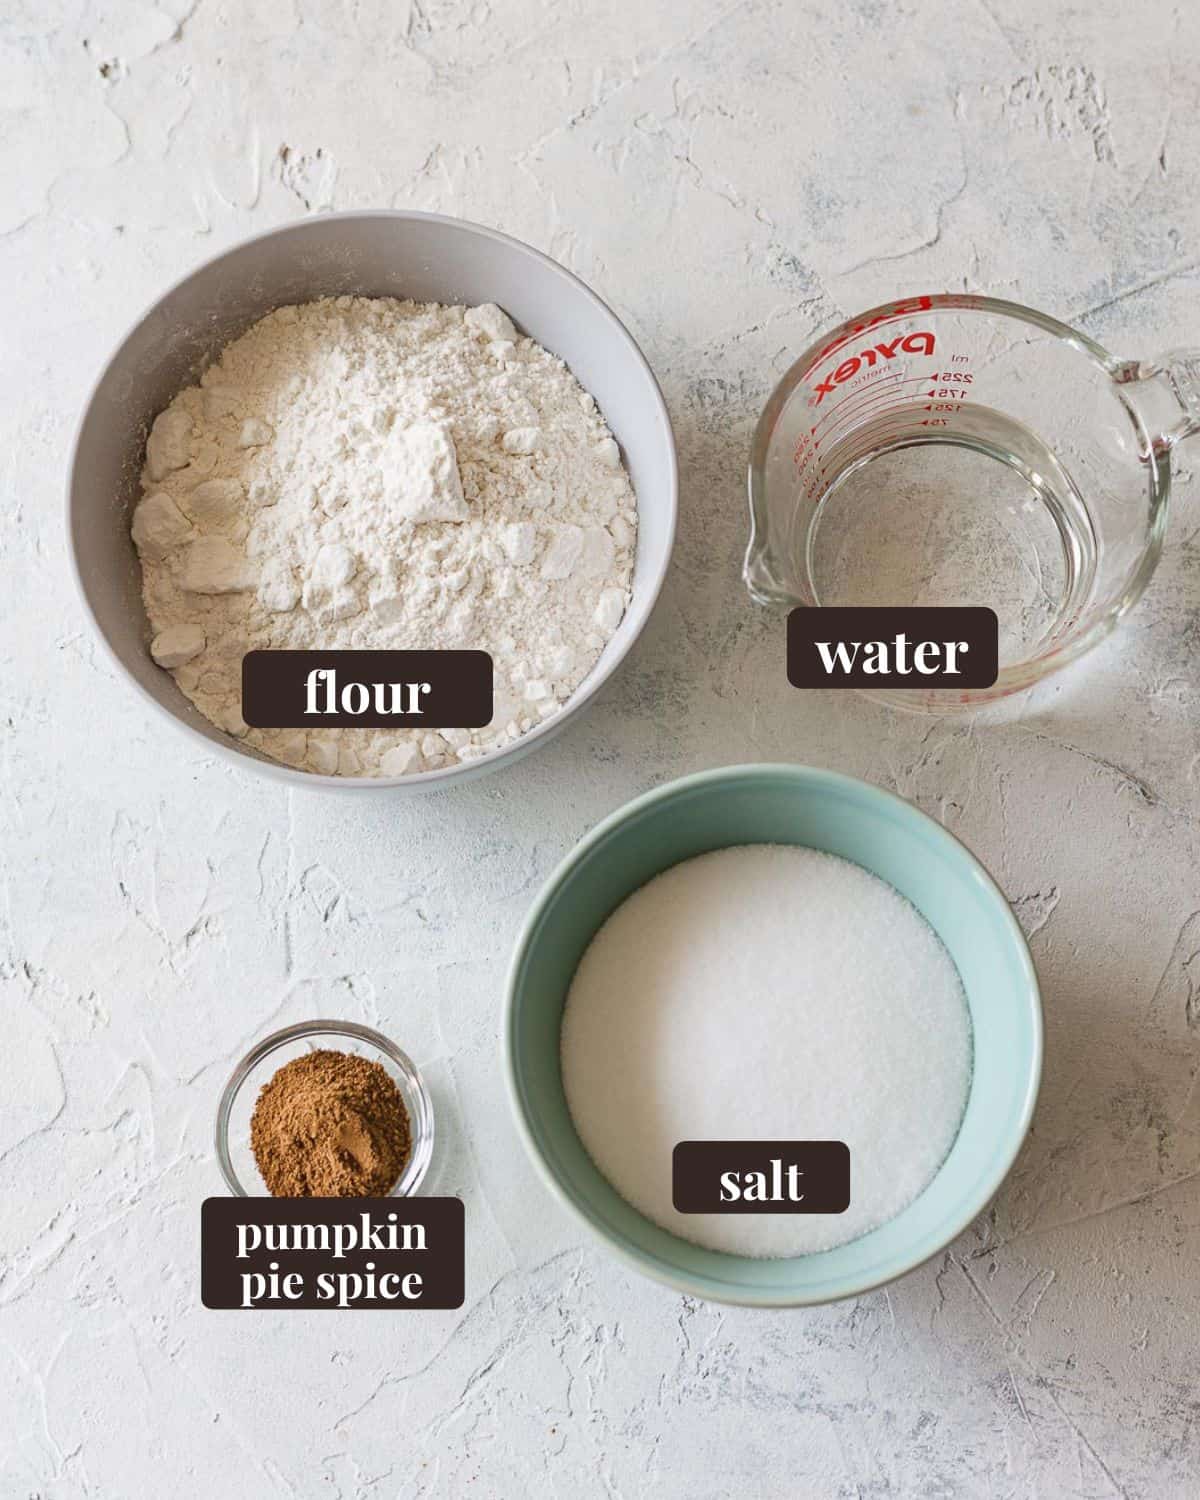
- Flour – regular all-purpose flour
- Table salt
- Pumpkin spice (trying making your own with my Pumpkin Spice recipe)
- Warm water
What Do I Need to Make My Own Pumpkin Spice?
My recipe for homemade pumpkin spice contains ground cinnamon, ginger, nutmeg, allspice, and cloves. You can tailor the blend to your liking (particularly if you don’t enjoy one of those spices).
Of course, pumpkin spice (also known as pumpkin pie spice) is easy to find ready-made too. I purchased some from Aldi last year too and it worked great!

My Favorite Tools and Cookie Cutters for Salt Dough
For shaping and baking salt dough I like having on hand rolling pins, cookie trays, and plenty of fun cookie cutters.

I own a set of animal cutters/fondant stampers and I think they are just so cute. This particular set is a bit small/detailed for younger hands (the penguin and frog are pretty sturdy) so you might need to help kids punch these ones out.
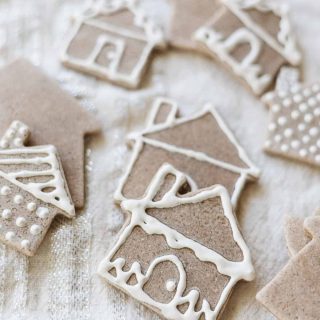
I also love my set of house cutters which I used last year to make salt dough house ornaments with puffy paint accents.
These snowflake cutters/presses are also really sweet and would be lovely for creating holiday decorations.
How to Make Salt Dough
Note: Find the complete printable recipe card at the end of this post!
Mix It Up
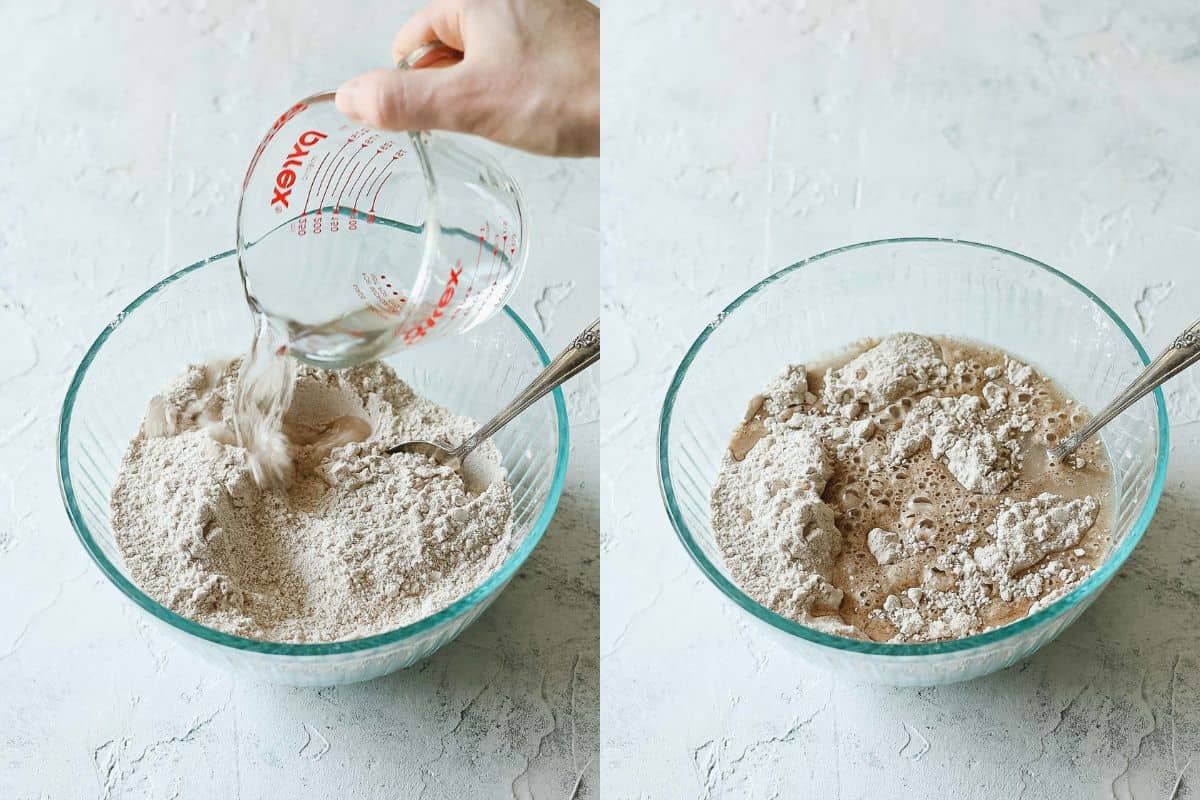
In a medium bowl, add 2 cups flour, 1 cup salt, and 2 tablespoons pumpkin spice.
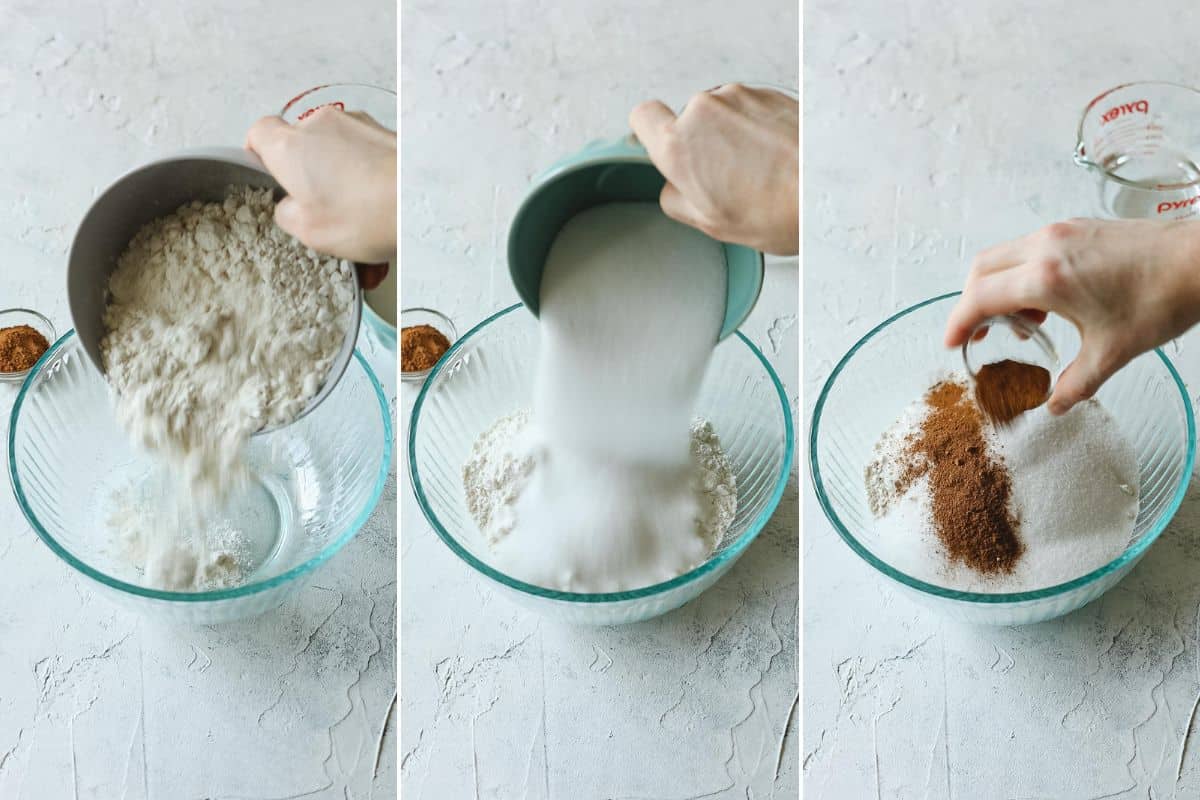
Stir together until combined.
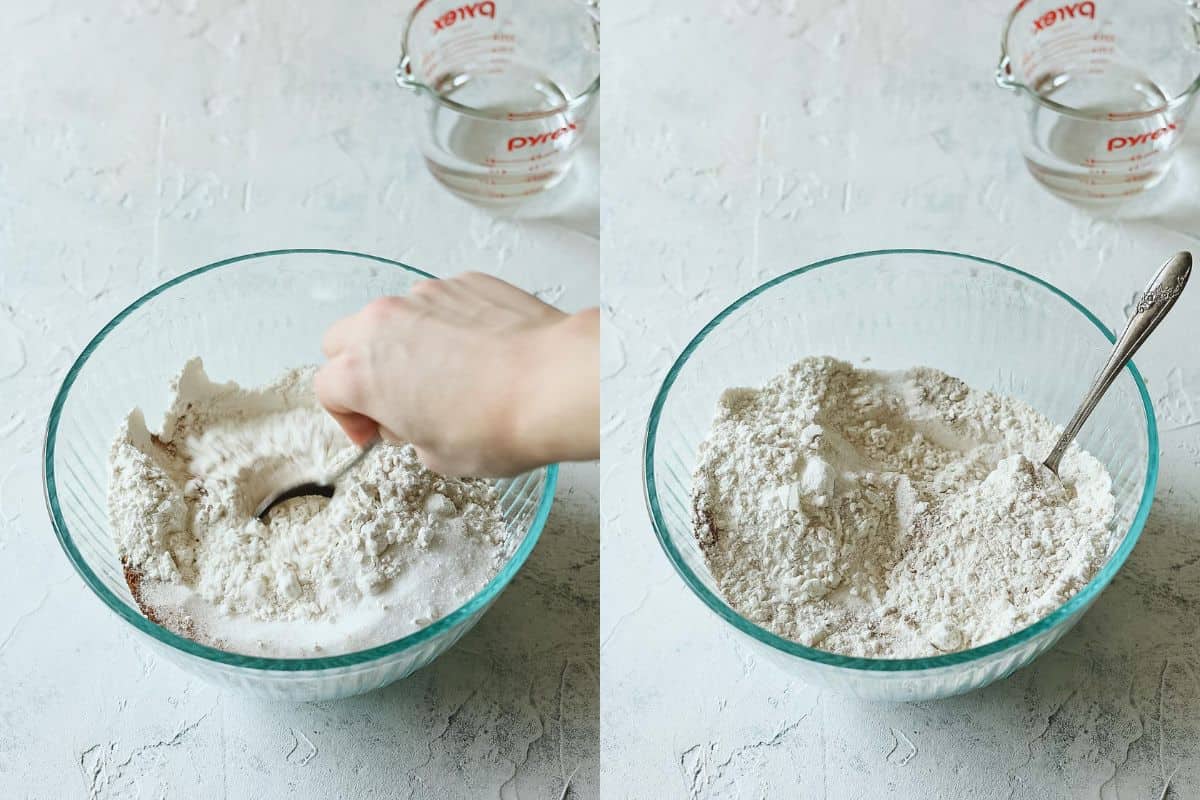
Slowly stir in 3/4 cup of warm water.
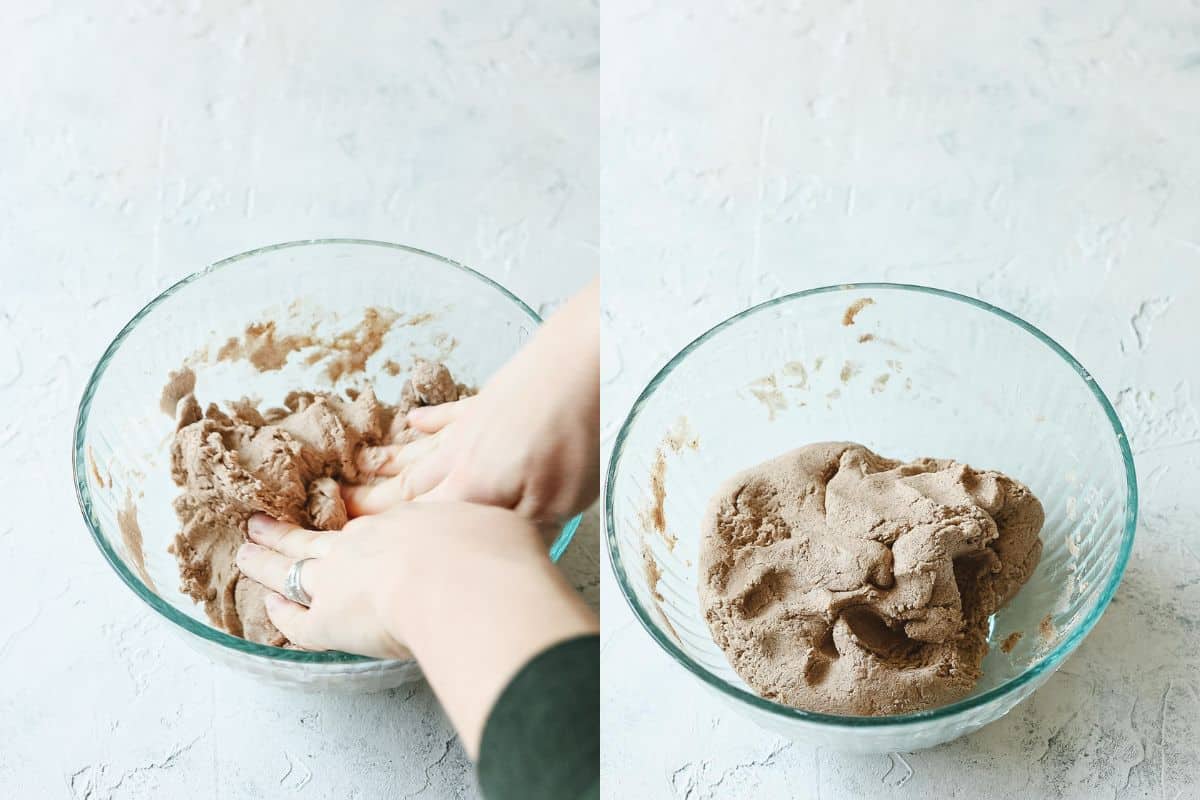
Knead the dough together with your hands until all the water is incorporated.
Adjusting the Consistency
I usually opt for a drier dough as it is less sticky and will air dry or bake a bit faster. If the dough is really crumbly, add more water very slowly (about 1 tablespoon or so at a time) and mix thoroughly.
Creating With the Dough
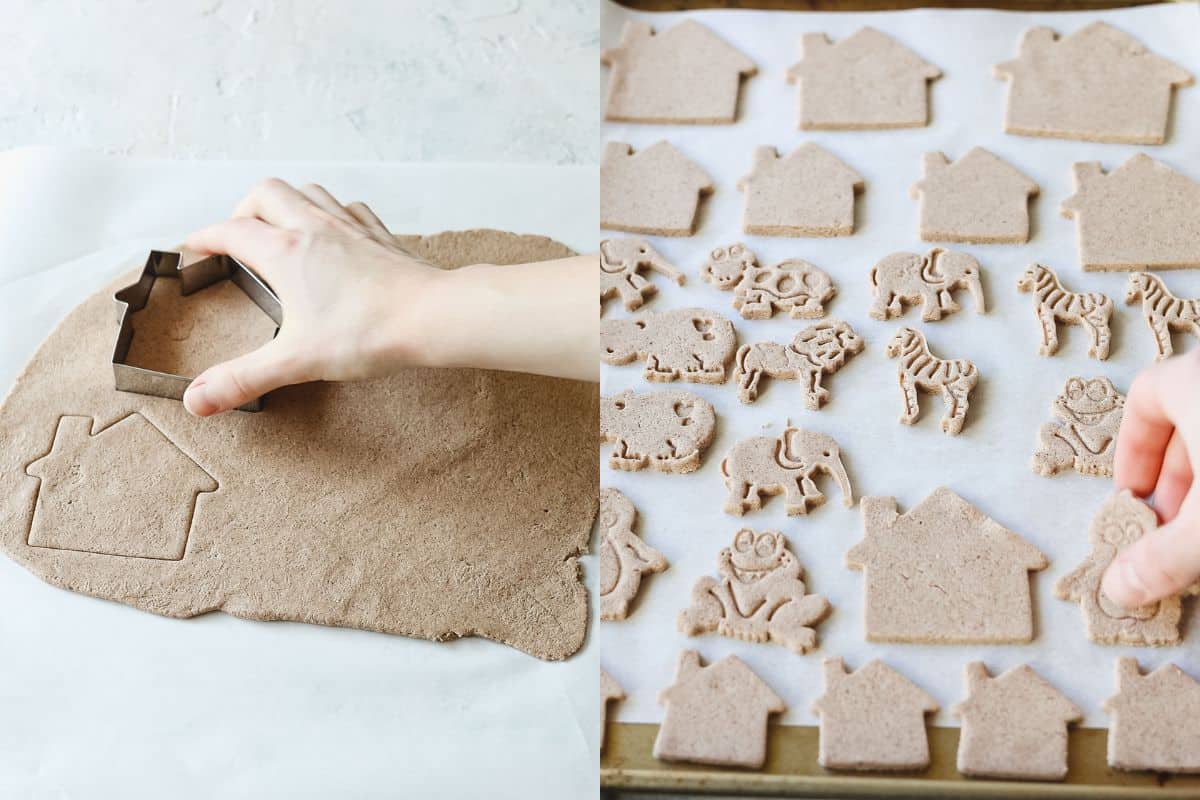
If you’d like to make ornaments or gift tags, sprinkle a work surface with flour and roll out the dough to a 1/4″ thickness. Cut the dough with cookie cutters and cookie stamps and add holes for hanging with a skewer or toothpick.
If you are modelling or sculpting, keep your creations on the smaller side so that they can dry out sufficiently.
How to Air Dry Salt Dough
To air dry your creations, leave them on baking sheets to air-dry overnight. Flip pieces the next day to dry out the other side. Large creations may take quite some time to dry (up to several days).
How to Bake Salt Dough Ornaments
Bake salt dough for 30 minutes at 200°F, flip creations over, and bake for another 30 minutes. Depending on your creations, they may need up to a few hours to dry, but small pieces will be done in about an hour.
How Do I Know the Dough Is Ready?
I suggest kneading the salt dough once you’ve added the water. It’s the fastest way to mix it in and you’ll be surprised how much flour you can incorporate once you use your hands.
If after kneading for a few minutes, the dough is still super dry and crumbly, begin adding more water just 1 tablespoon at a time (and kneading thoroughly in between) until the texture is correct.
Dough that is too wet is often still workable (provided it is not so wet that it is sticky) but it will take longer to dry out and won’t hold imprints as well (if you are using patterned cookie cutters or imprinting anything else).
Popular Questions About Salt Dough
Salt dough is a simple homemade modelling clay that is made with flour, salt, and water. It dries hard (and a bit brittle). It’s cheap to make and toddlers and kids love crafting with it. Use it for small modelling crafts, Christmas ornaments, gift tags, and more.
Preparing salt dough does not require an oven or stovetop. However, if you wish to dry out your creations more quickly, use your oven on very low heat.
I find I do slightly prefer the results of air-drying salt dough creations. The slower evaporation of water tends to keep the ornaments flat (versus sometimes bowing in the oven) and you avoid any puffing too. The salt also slowly rises to the top and creates a more sparkly exterior than baked ornaments.
However, air-drying does take a long time! If you opt to bake instead, keep the oven temperature low at 200°F and flip the ornaments every 30 minutes until dry or mostly dry.
Allow to air-dry overnight if not completely dry after baking.
Yes, you can! I often prepare salt dough up to 5-7 days in advance and store it in the fridge. You can also save leftovers the same way if not all the dough gets used right away.
Definitely! Kids love playing with salt dough and it’s easy to make a huge batch to please the most enthusiastic crafters. Note that some kids might prefer the original recipe to this spicier blend.
More Salt Dough
- Make a Salt Dough Ornament Kit (great gift idea!)
- Original Salt Dough Recipe
- Salt Dough “Gingerbread” Houses
- Salt Dough House Ornaments
Pumpkin Spice Salt Dough
Supplies
- 2 cups flour all-purpose
- 1 cup salt
- 2 tablespoons pumpkin spice
- 3/4 cup warm water
Instructions
Mix It Up
- In a medium bowl, mix together the 2 cups flour, 1 cup salt, and 2 tablespoons pumpkin spice until combined.
- Slowly stir in 3/4 cup of warm water. Knead the dough together with your hands until all the water is incorporated.
Adjusting the Consistency
- I usually opt for a drier dough as it is less sticky and will air dry or bake a bit faster. If the dough is really crumbly, add more water very slowly (about 1 tablespoon or so at a time) and mix thoroughly.
Creating With the Dough
- If you'd like to make ornaments or gift tags, sprinkle a work surface with flour and roll out the dough to a 1/4" thickness. Cut the dough with cookie cutters and cookie stamps and add holes for hanging with a skewer or toothpick.If you are modelling or sculpting, keep your creations on the smaller side so that they can dry out sufficiently.
How to Air Dry Salt Dough
- To air dry your creations, leave them on baking sheets to air-dry overnight. Flip pieces the next day to dry out the other side. Large creations may take quite some time to dry (up to several days).
How to Bake Salt Dough Ornaments
- Bake salt dough for 30 minutes at 200°F, flip creations over, and bake for another 30 minutes. Depending on your creations, they may need up to a few hours to dry, but small pieces will be done in about an hour.
Notes
Weekly Crafting Fun!
Join my list and get a weekly email with relaxing craft ideas, freebies, sewing tutorials, and more!