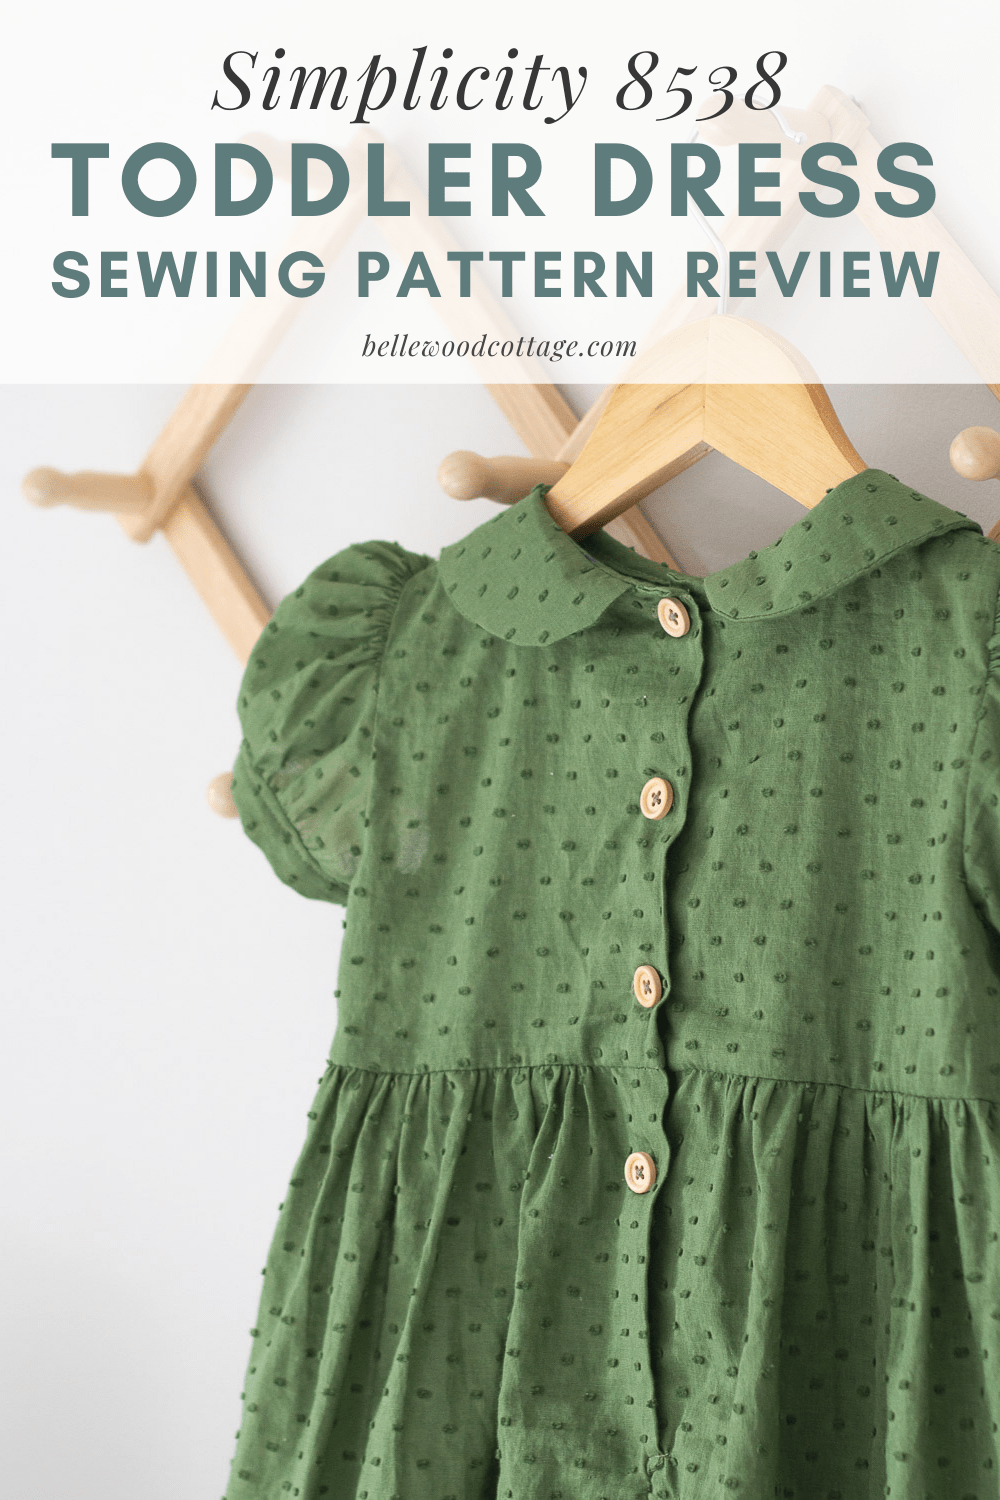
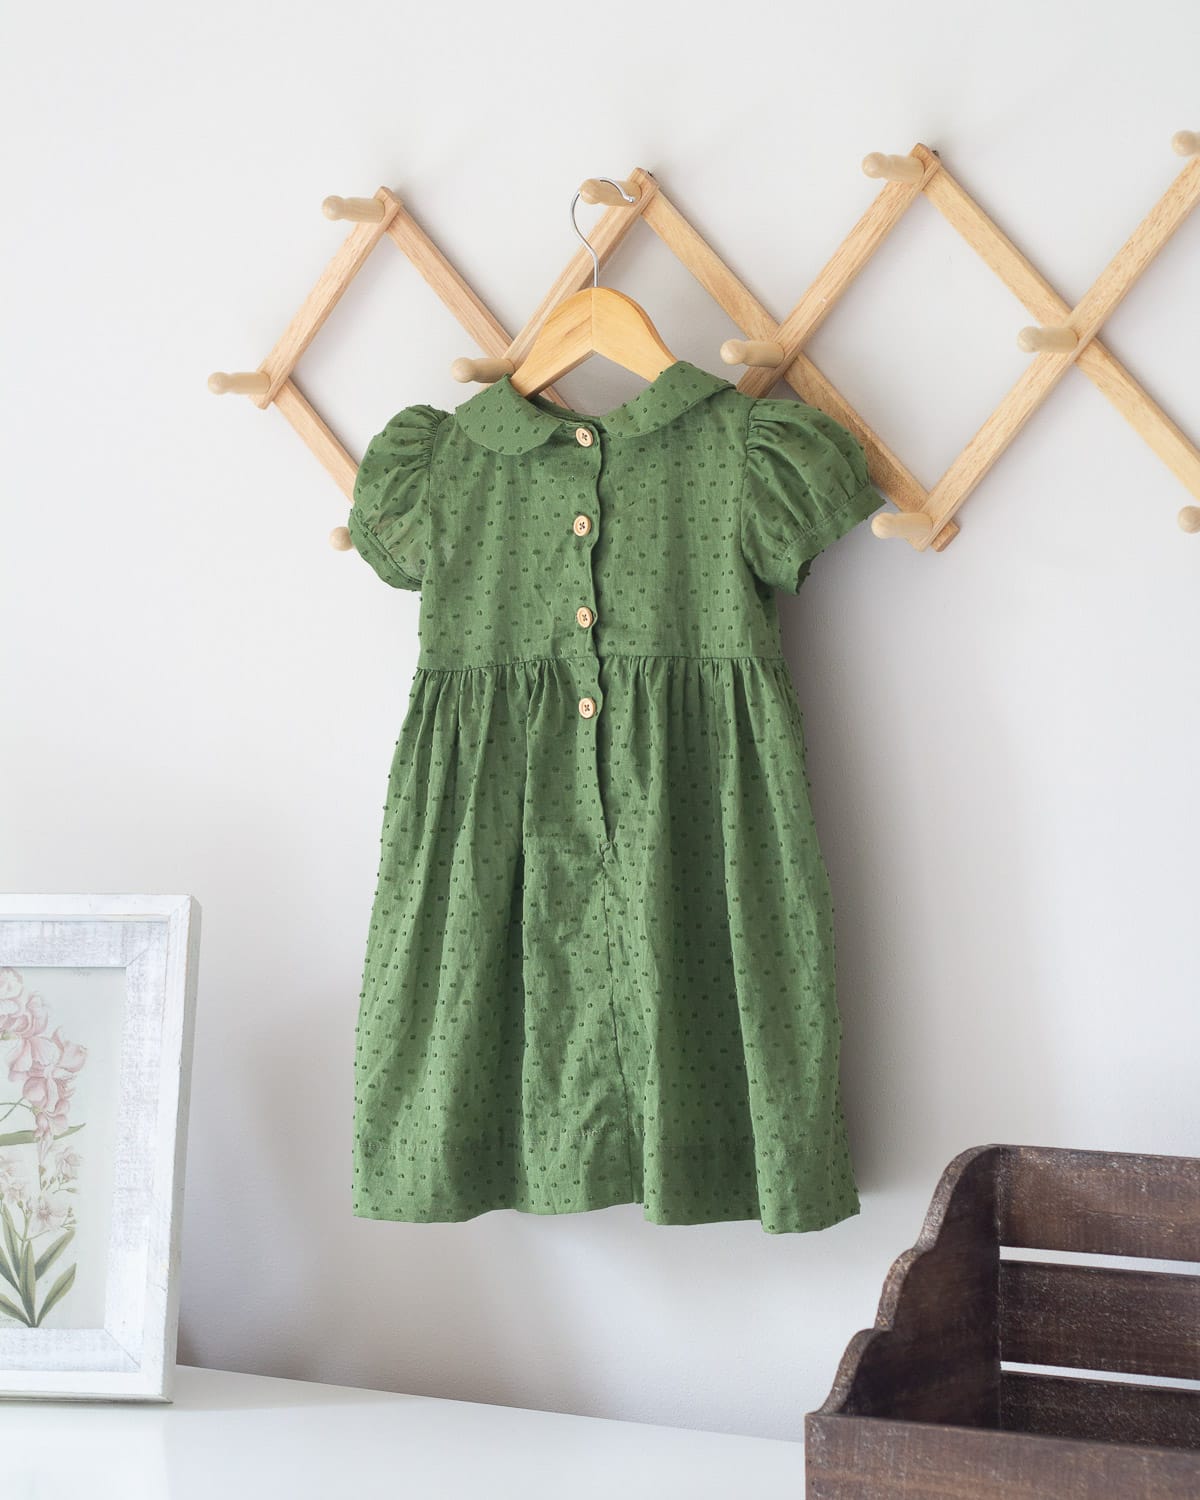
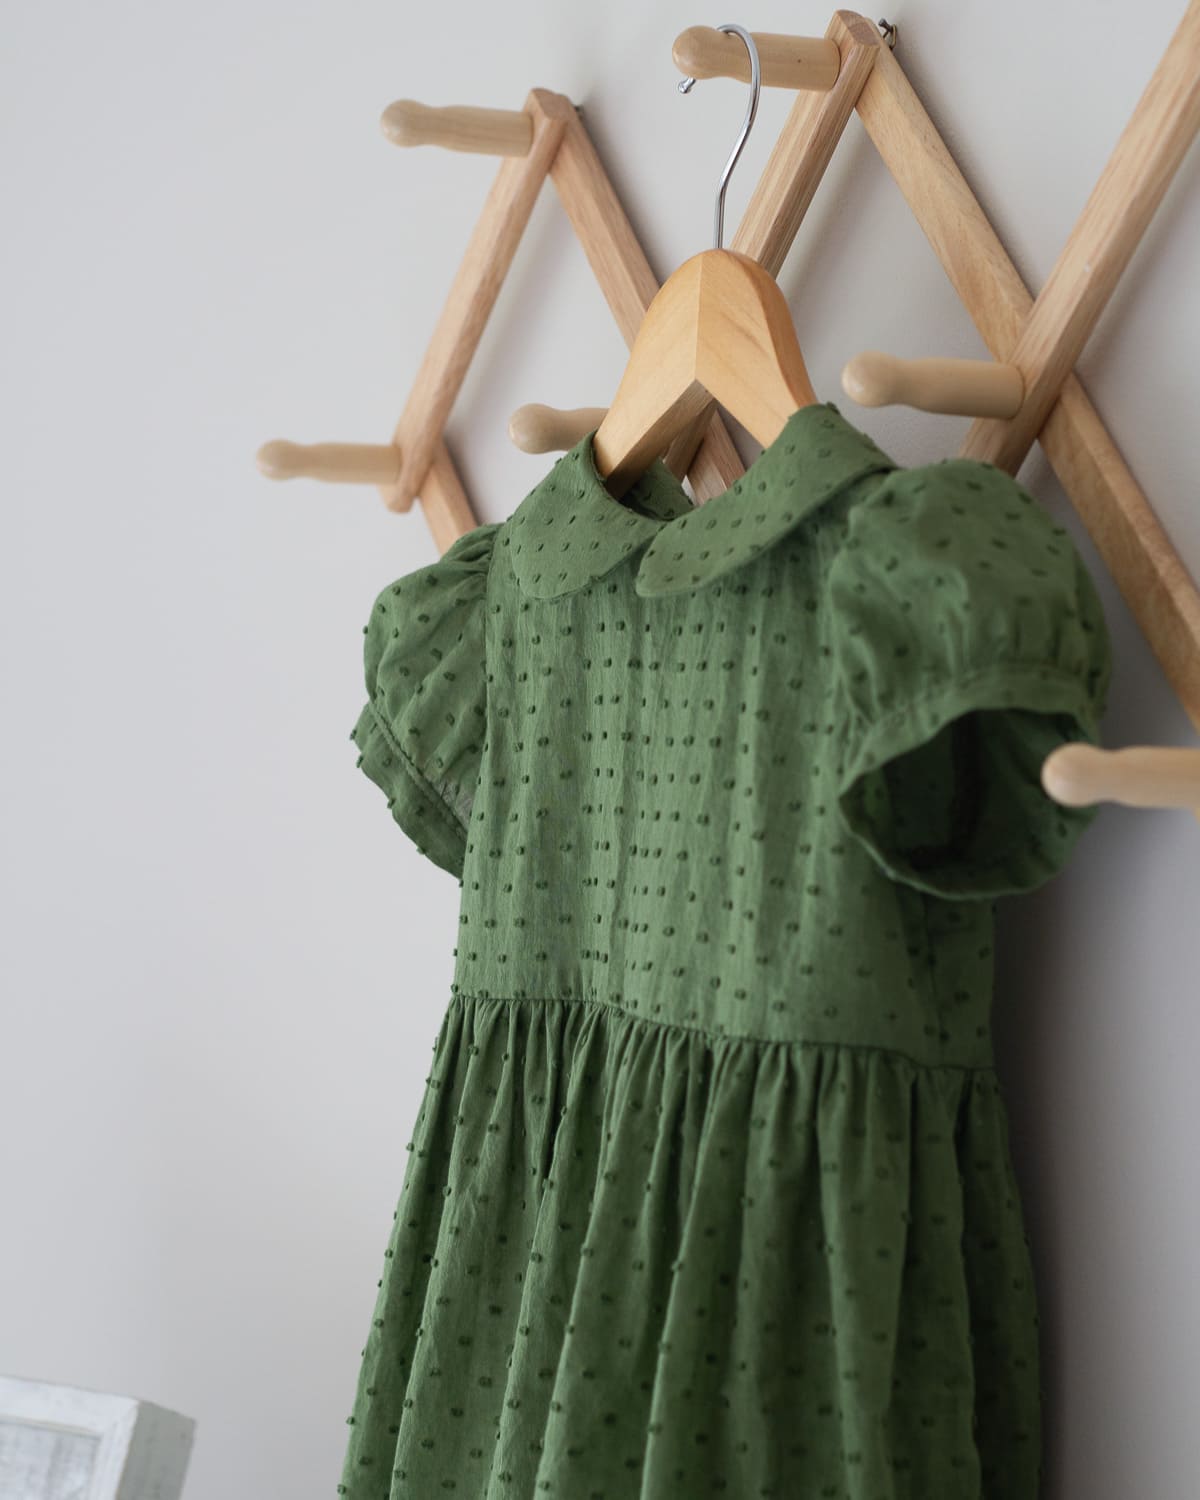
Simplicity 8538 – Toddler Dress in Green Swiss Dot
Wondering how to get started sewing baby clothes? Learn my tips for how I finally got the results I wanted as I sewed this toddler dress.
Sewing can be a wild ride. You think you’ve gotten the hang of simple projects. Now, maybe it’s time to try your hand at a garment or two. And suddenly…
Suddenly we’re setting in sleeves, using a buttonhole foot, and realizing that just because we’ve finished a garment doesn’t mean it’s actually going to fit anyone. Why can’t I just keep sewing zippered makeup bags?!
It seems that SO much depends on fabric choice, pattern designer, skills needed, etc. etc. that by the time all is said and done…a project could turn out infinity of ways. And I’ve learned firsthand, not all of those ways are great! Haha.
Weekly Crafting Fun!
Join my list and get a weekly email with relaxing craft ideas, freebies, sewing tutorials, and more!
Joyful Homeschooling
Join my homeschooling email list to receive homeschooling ideas and encouragement straight to your inbox!
But this dress, I’m actually pleased with. And, in the hopes of helping along another new sewer (sewist? person-who-sews?), I’m sharing a quick pattern review and some sewing tips here.
A Pattern Review of Simplicity 8538
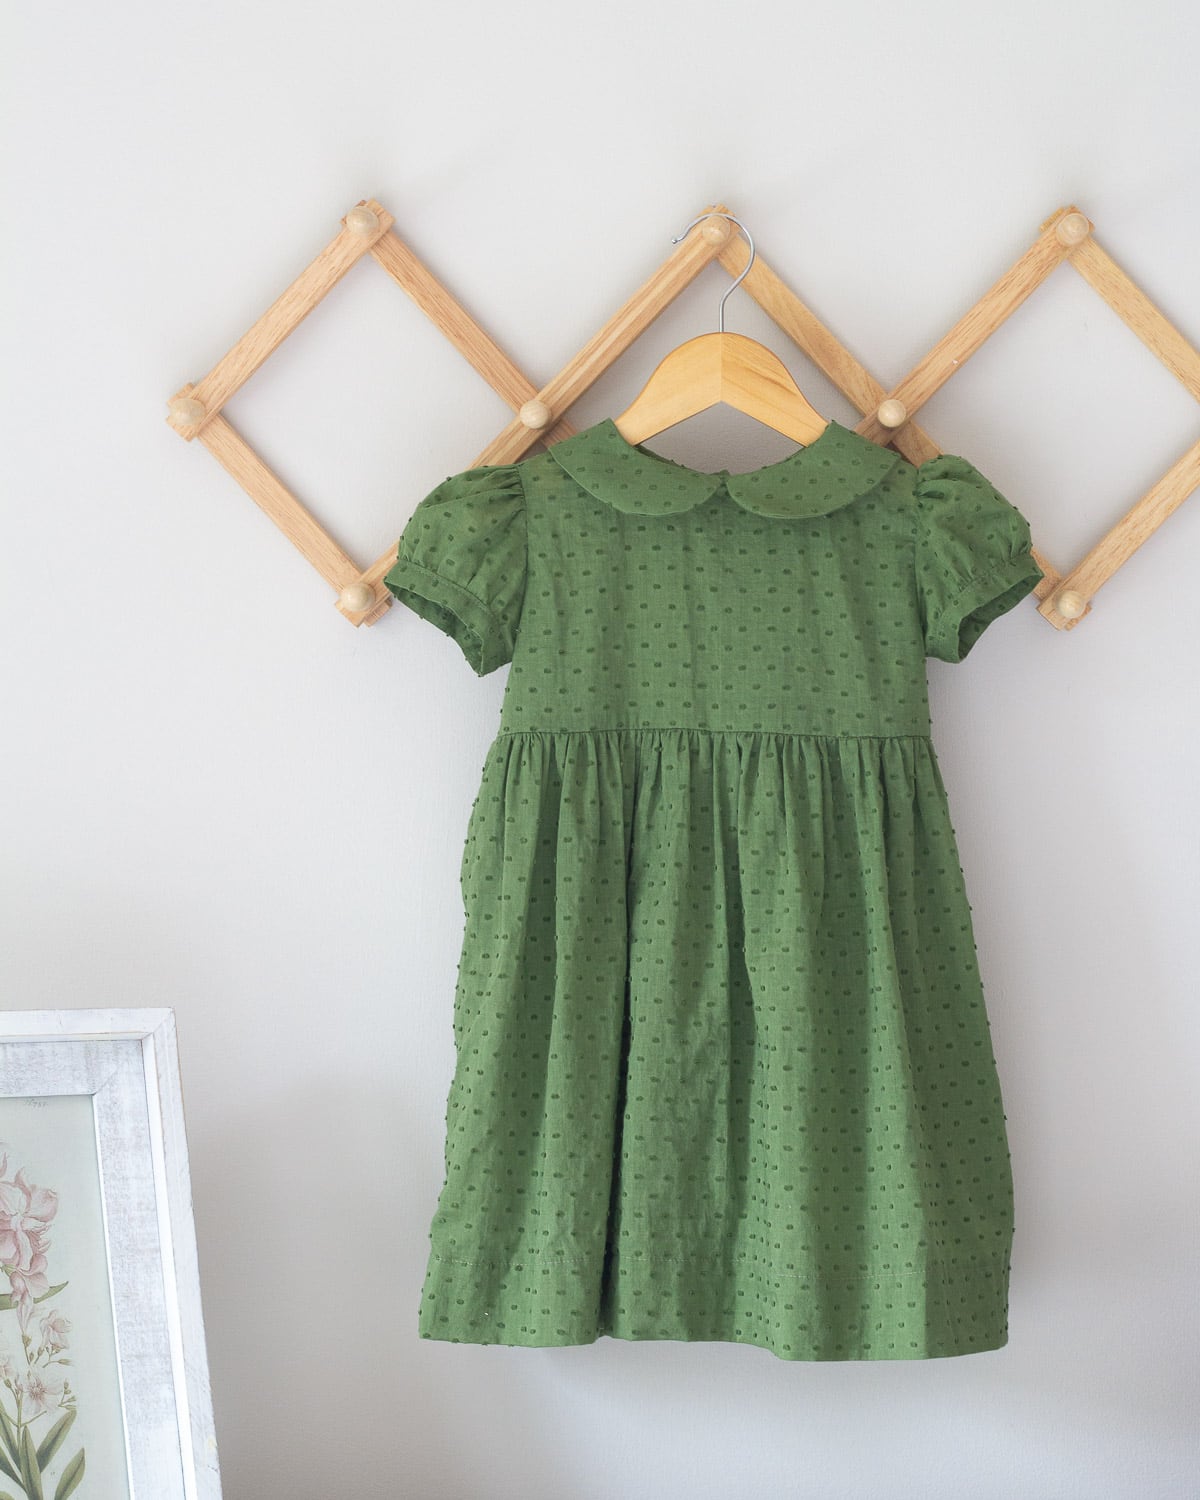
This is an older pattern that I found while thrifting. Overall I thought the construction was good, the instructions relatively easy to follow, and the finished garment was cute and sized appropriately.
You’ll want to make sure you transfer markings correctly as the critical instructions around the back placket and the Peter Pan collar depend on marking these accurately.
I hadn’t made a back placket in this style before and found the instructions a bit tricky. I also wish this dress was lined. I hate messy seams so I used French seams where I could (no serger here yet). The dress skirt is also rather long & full for modern styles, so if I sew this again I would adjust that.
Want to Sew a Toddler Dress?
Here’s a few things I’ve learned along the way that might just save you some trouble!
Choose the Right Fabric for the Pattern
It’s tempting to buy cheap “practice fabric”. While this idea has some merit, it’s really a lot better to start with good fabric. This lightweight cotton swiss dot fabric was a dream. It was under $10 a yard and so.much.better than sewing a garment with say, quilting cotton.
As I learned when I started knitting, if you knit with junk yarn, well, it’s an uphill climb to end up with a non-junk project. Same goes with fabric. Skip the cheap stuff. Yes, this will make a huge difference even if you feel like you still have a lot to learn.
With that said, you can (and probably should) go ahead and avoid patterns that request slippery or delicate fabrics. They may be high-quality, but they are sure tricky to sew!
Choose a Good Pattern
Though you don’t have to choose one of the most familiar names of pattern companies, do choose a pattern from a reputable source. If you can see finished garments and read some reviews, even better.
Early on, I chose patterns that looked beautiful in the samples, but were confusing to sew and didn’t turn out very well. I chalked it up to my inexperience (which was definitely part of the issue), but I also learned that it makes a big difference to choose a well-tested pattern before starting to sew.
As you sew more you’ll get to know things like which patterns tend to run small (or large), have questionable grading from size to size, and which assume that you are an expert seamstress.
Note: You may also enjoy sewing from well-illustrated tutorials or videos. I like tutorials from Dana at Made Everyday, and Rae from Made by Rae.
Don’t Choose a Hard Pattern
How to determine what makes a hard pattern? Here’s some clues that the pattern you are looking at might be tricky (or simply require more skills, knowledge, or tools):
- knit or slippery fabrics required
- a long list of notions
- set-in sleeves (see more on that below)
- lots of pattern pieces
Also note that many companies sell lines of “easy/beginner” patterns, so that’s a great place to start if you are new.
Opt for a Pattern with Gathered Sleeves
I have struggled SO much to get the perfect set-in sleeve. I finally decided it miiiight be the pattern I was working with, but I decided to just skip it this time around and go for a pattern that used set-in gathered/puffed sleeves. So much easier to fit into the armholes and get them looking beautiful! It was still tricky and time-consuming (remember, learning!), but overall, lots easier and a much better result.
If You Are Sewing for Kids/Babies, Size Up
Why? Well, this project might take longer than you think, so sizing up ensures your Little One will actually be able to wear the garment even if they grow while you sew!
Consult Online Tutorials
Don’t just rely on your pattern. If something is confusing, consult the wealth of information that is the internet (and youtube) and learn the skills that you are struggling with. Feel free to even try the new skills on scraps of fabric (especially recommended with buttonholes).
Just Start
I found that I only started to improve at sewing when I actually, get this, sewed. I need to risk wasting time, fabric, and my sanity to move forward. Yes, I’ve had my fair share of seam-ripping in front of the television, but it’s worth it. Embrace the journey, embrace the learning, and get started.
To Wrap It Up
I hope some of these thoughts and ramblings were helpful to you in your own sewing journey! I’m excited to keep moving forward in my own.

More Sewing Posts
- How to Sew Burp Cloths for Baby
- Women’s Blouse to Baby Dress Refashion
- DIY Bias Tape Hair Bows for Babies, 7 Ways
- How to Sew Baby Bibs from Kitchen Towels
- Ticking Stripe Pillow Cover Tutorial
Weekly Crafting Fun!
Join my list and get a weekly email with relaxing craft ideas, freebies, sewing tutorials, and more!