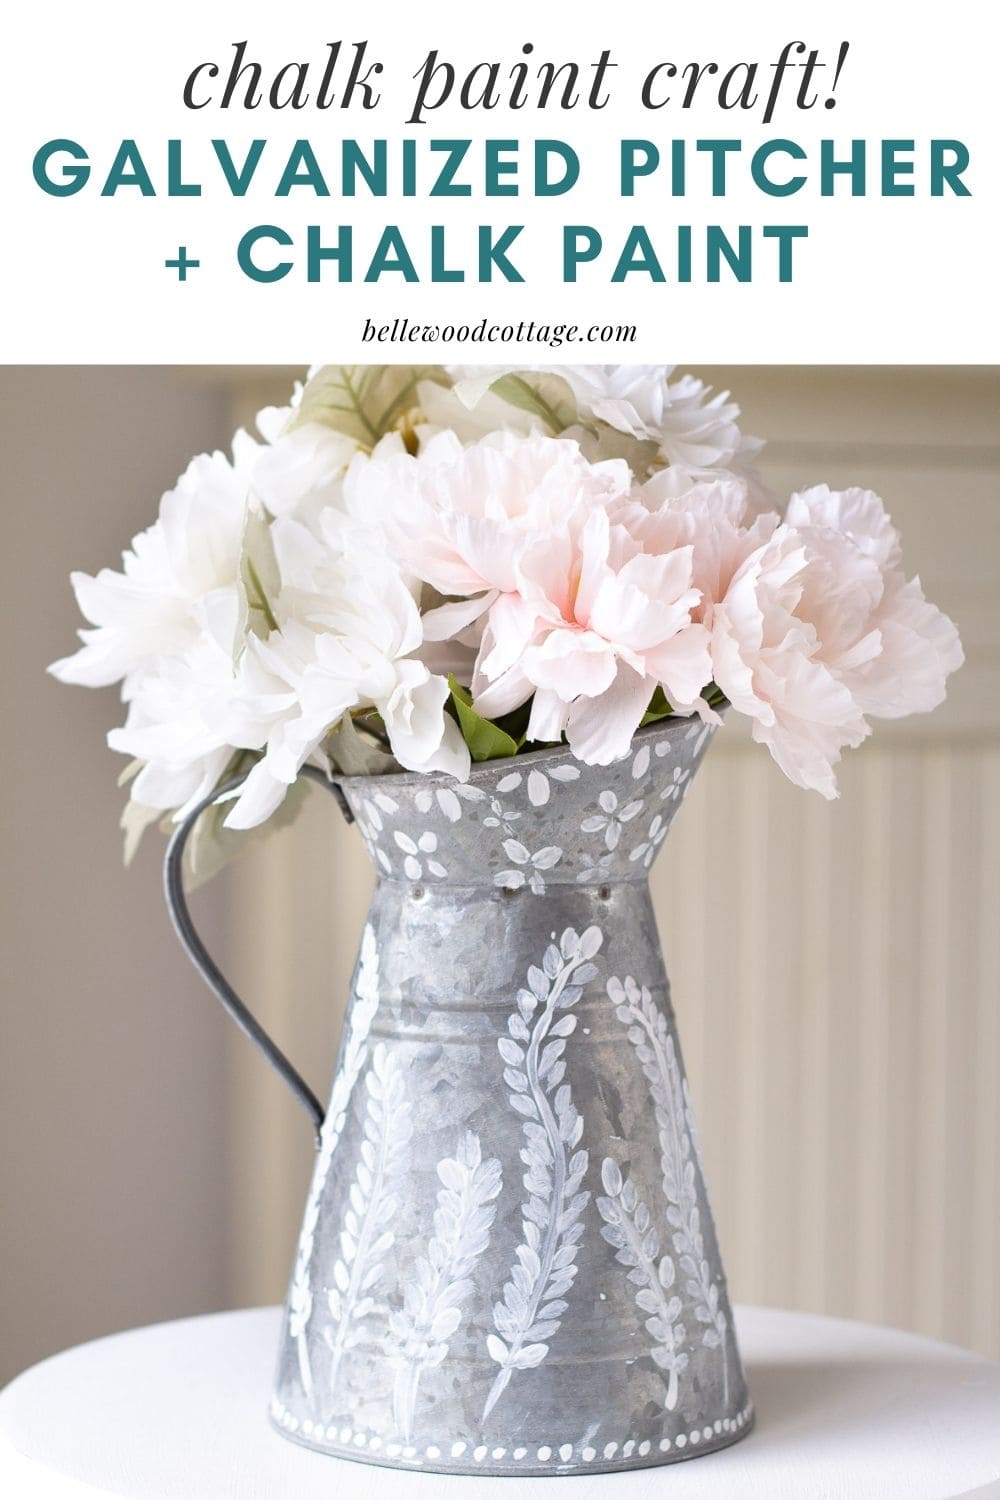
Easy Craft! Galvanized Pitcher + Chalk Paint DIY Home Décor
Use chalk paint to add pretty floral designs to a basic galvanized pitcher or flower pot. This galvanized floral pitcher DIY home décor idea is a quick and relaxing afternoon craft!
Please note that this post contains affiliate links which allow me to earn a small commission when a purchase is made at no additional cost to you. Read more here.
Do you love quick DIY home décor projects that can be accomplished during a free afternoon or evening? Me too! A craft I can complete during a naptime is a major win.
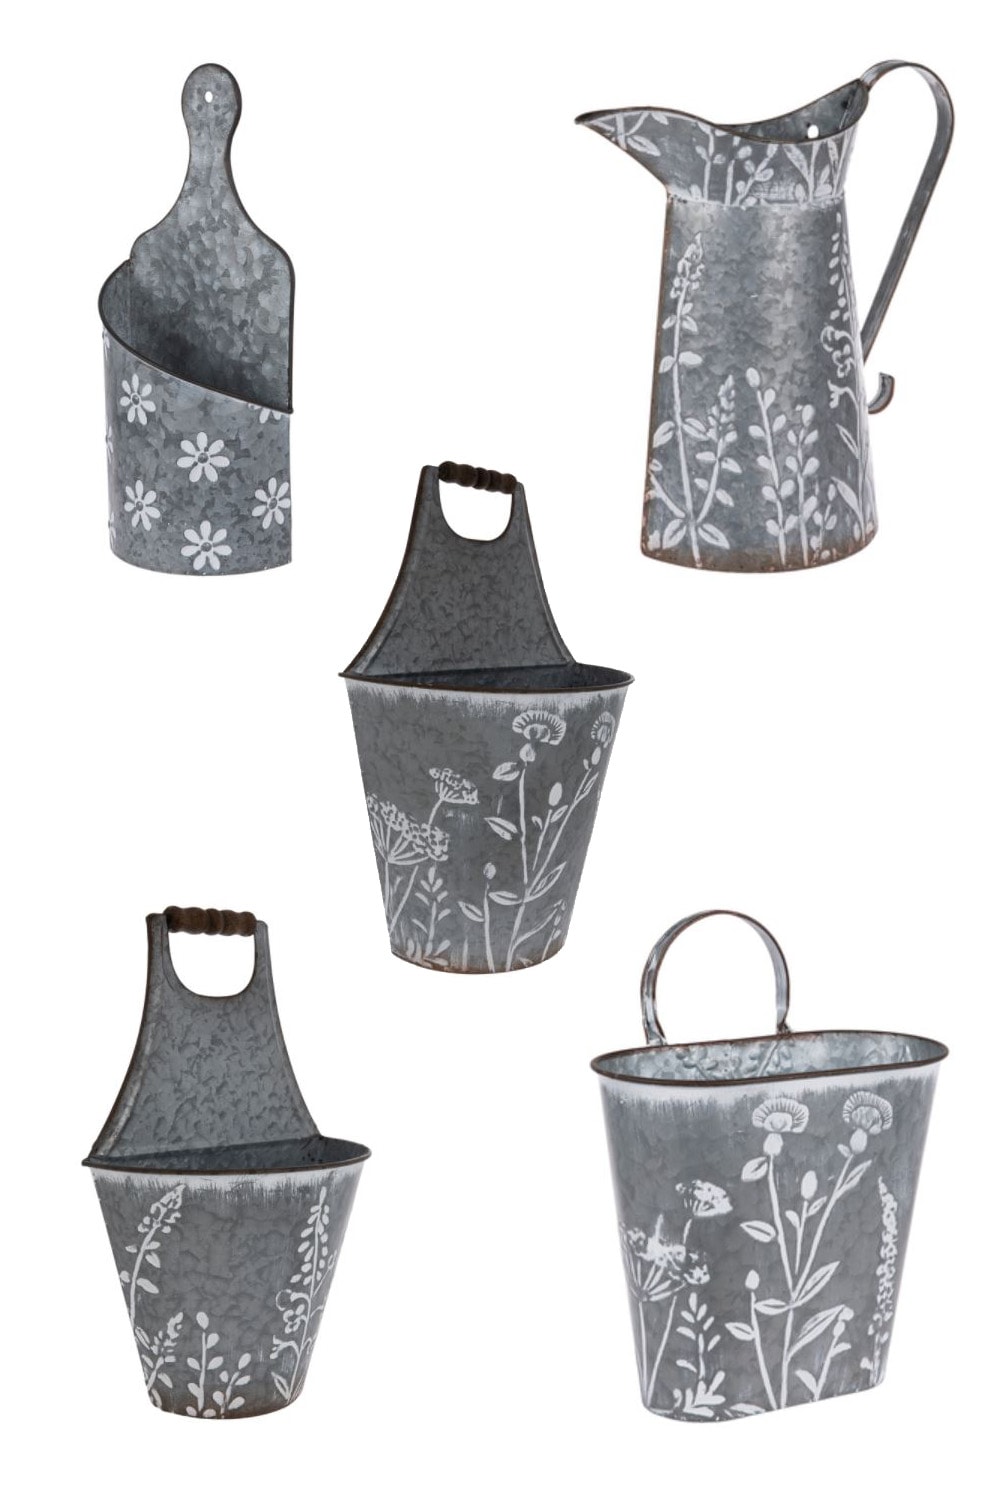
I saw these pretty floral galvanized wall buckets at Hobby Lobby recently and the display was so lovely that I wanted to scoop up all of them.
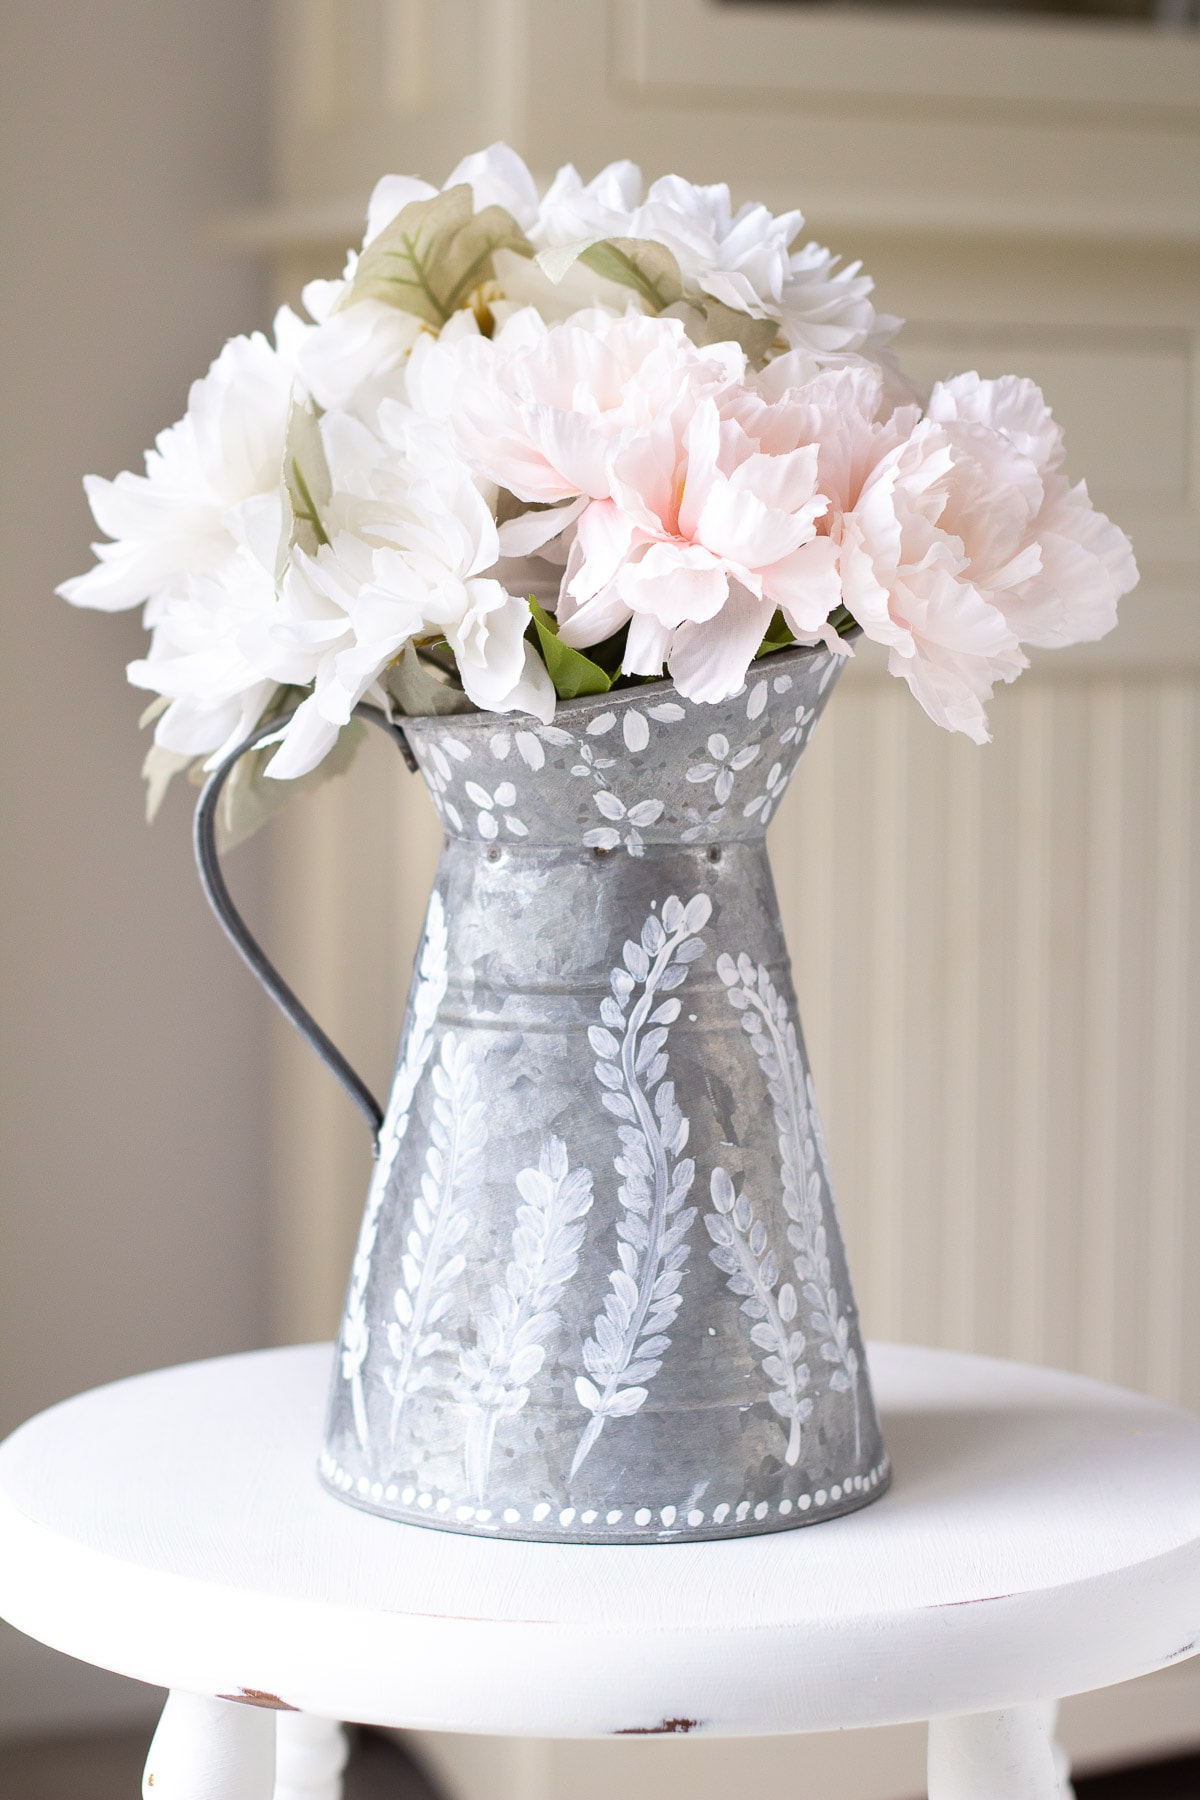
Well, since I’m actually trying to declutter my home, I decided to work with what I had. This old galvanized pitcher (I think it was just a few dollars at Michaels several years back) was the perfect canvas to add some floral paintings of my own.
This pitcher was headed for the donation box, but after giving it a chalk painted floral treatment, I’m excited to continue to use it. If you want to add some spring cheer to a farmhouse pitcher of your own, read on!
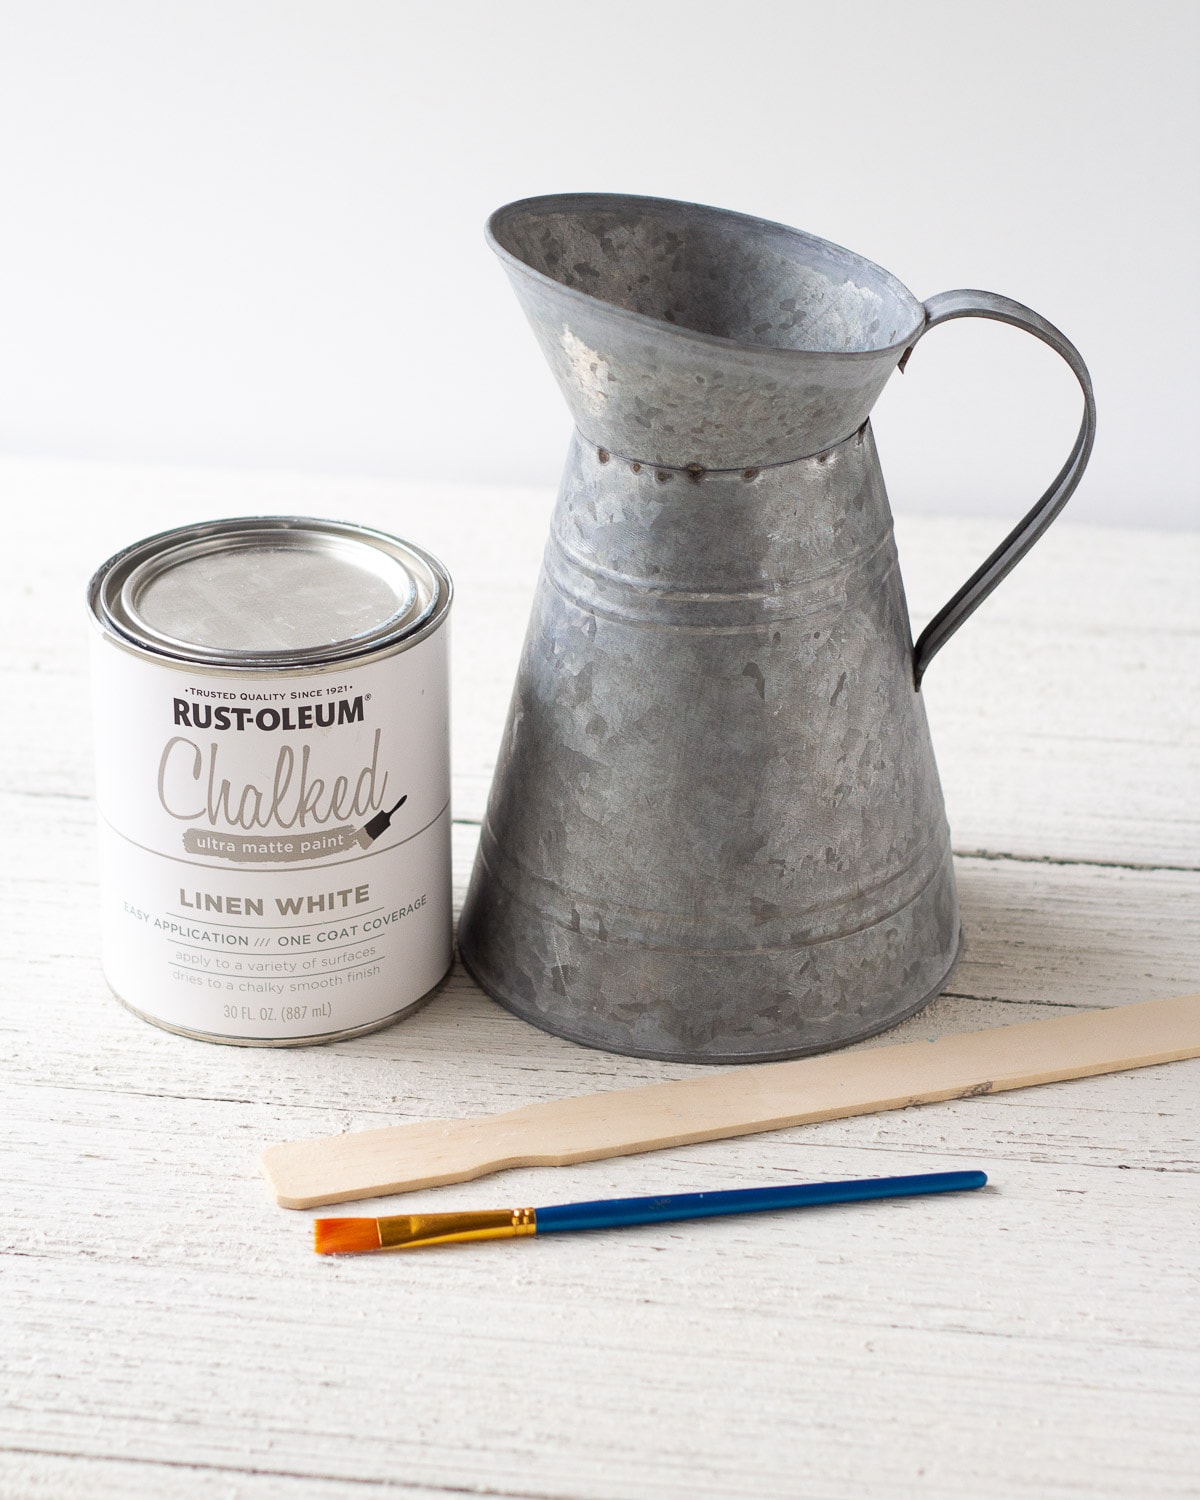
Supplies You Will Need
- galvanized pitcher, flower pot, milk jug etc.
- chalk paint (more on that below)
- paintbrush
- clear coat for sealing the paint (optional)

if you are into farmhouse style home décor you likely already have a galvanized piece or two hanging around. If not, just head to your local craft store and pick up some inexpensive pieces.
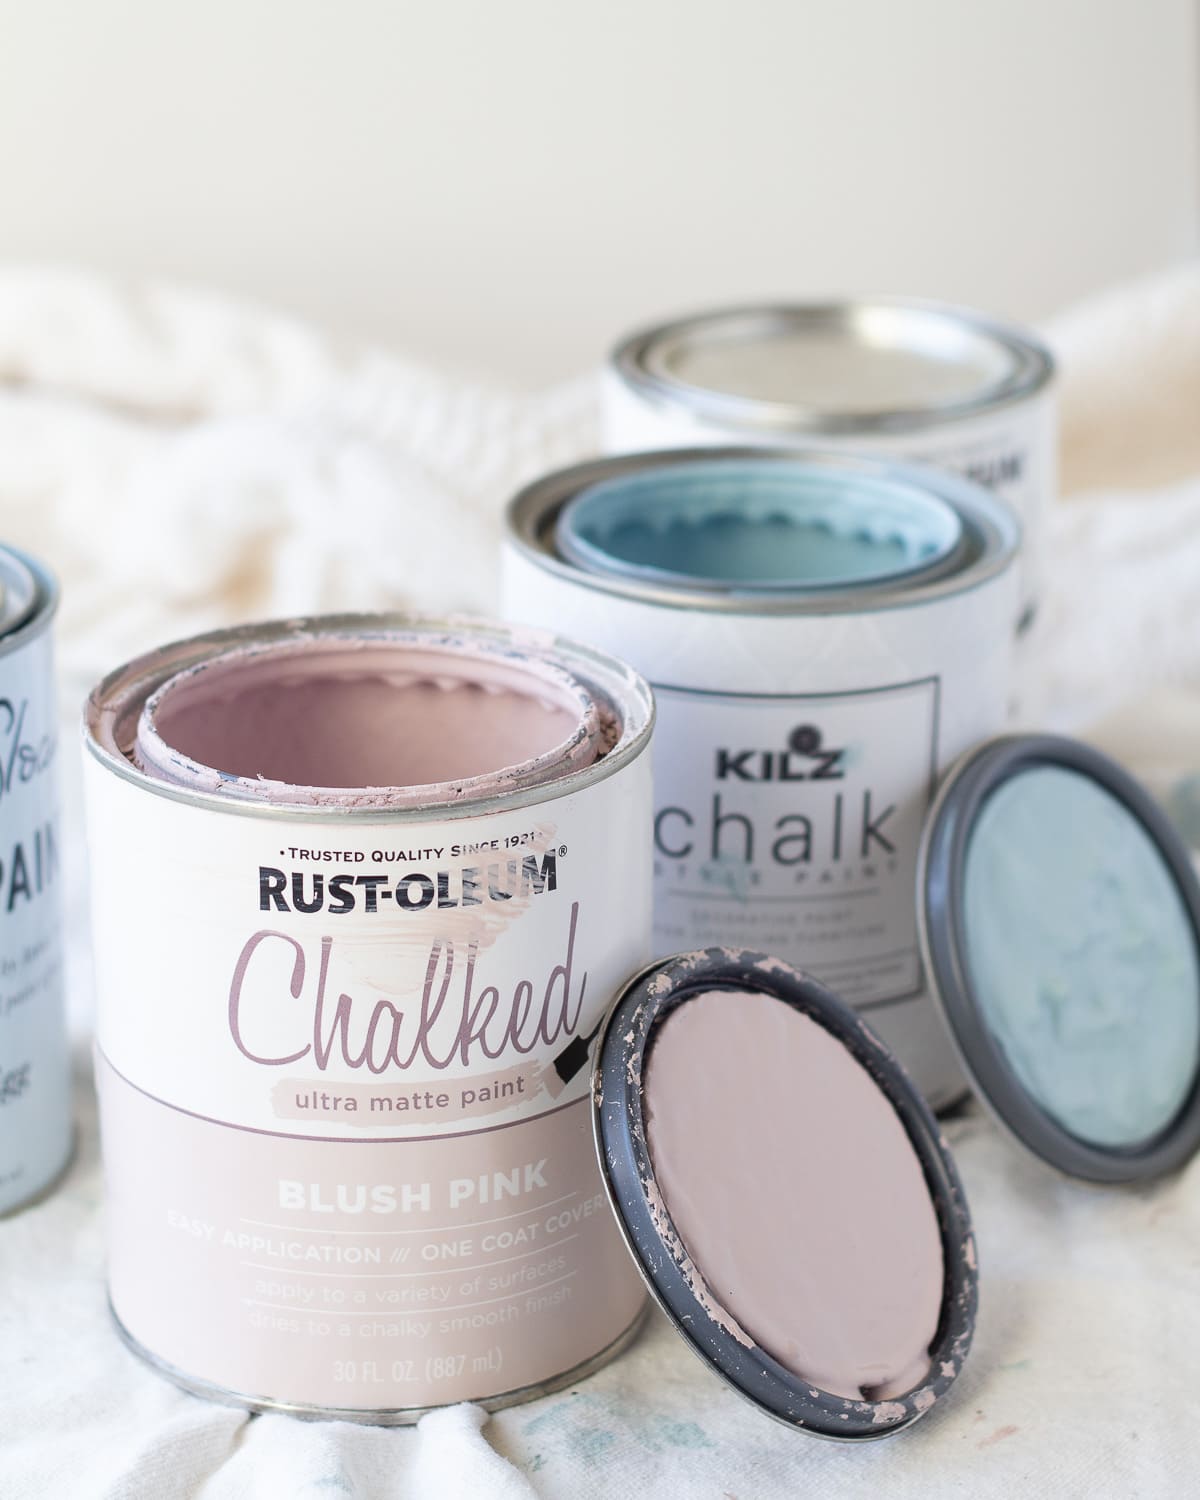
Chalk paint is great for a project like this because it adheres well. If you need to purchase chalk paint, choose a small jar of FolkArt Home Décor Chalk Paint from the craft store. These jars are small so you can spend a few dollars and get the color you need without opening a whole quart of chalk paint for a tiny project.
Otherwise, just use any chalk paint you have on hand. I used my open can of white Rust-Oleum Chalked Paint.
Note that I’m using my container for decorative use only with fake florals. After spraying a clear coat on top, the paint should be pretty stable, but I would be careful about exposing the container to too much water (or the outdoors).
Now, I love to paint (furniture), but decorative painting like this? Not my sweet spot. At all! However, if I can do it, anyone can. This is a rustic piece. It’s meant to be informal and character-filled. You can always paint another if you don’t like your first try (plus, see my tips for getting started below).
Step-by-Step Galvanized Pitcher + Chalk Paint DIY Home Décor
See the tips below for additional guidelines.
Grab your galvanized pitcher, chalk paint, and a small brush. I like a filbert brush or flat brush for making these swooshy teardrop shapes.
Plan out your design and then practice it a bit on some scraps.
On the pitcher I used, I added in my stem line first and then covered it with teardrop shaped leaves. Start a bit away from the stem, gently press the brush down and swoop it towards the stem, releasing pressure as you do to create a teardrop shape and bring the leaf in to meet the stem.
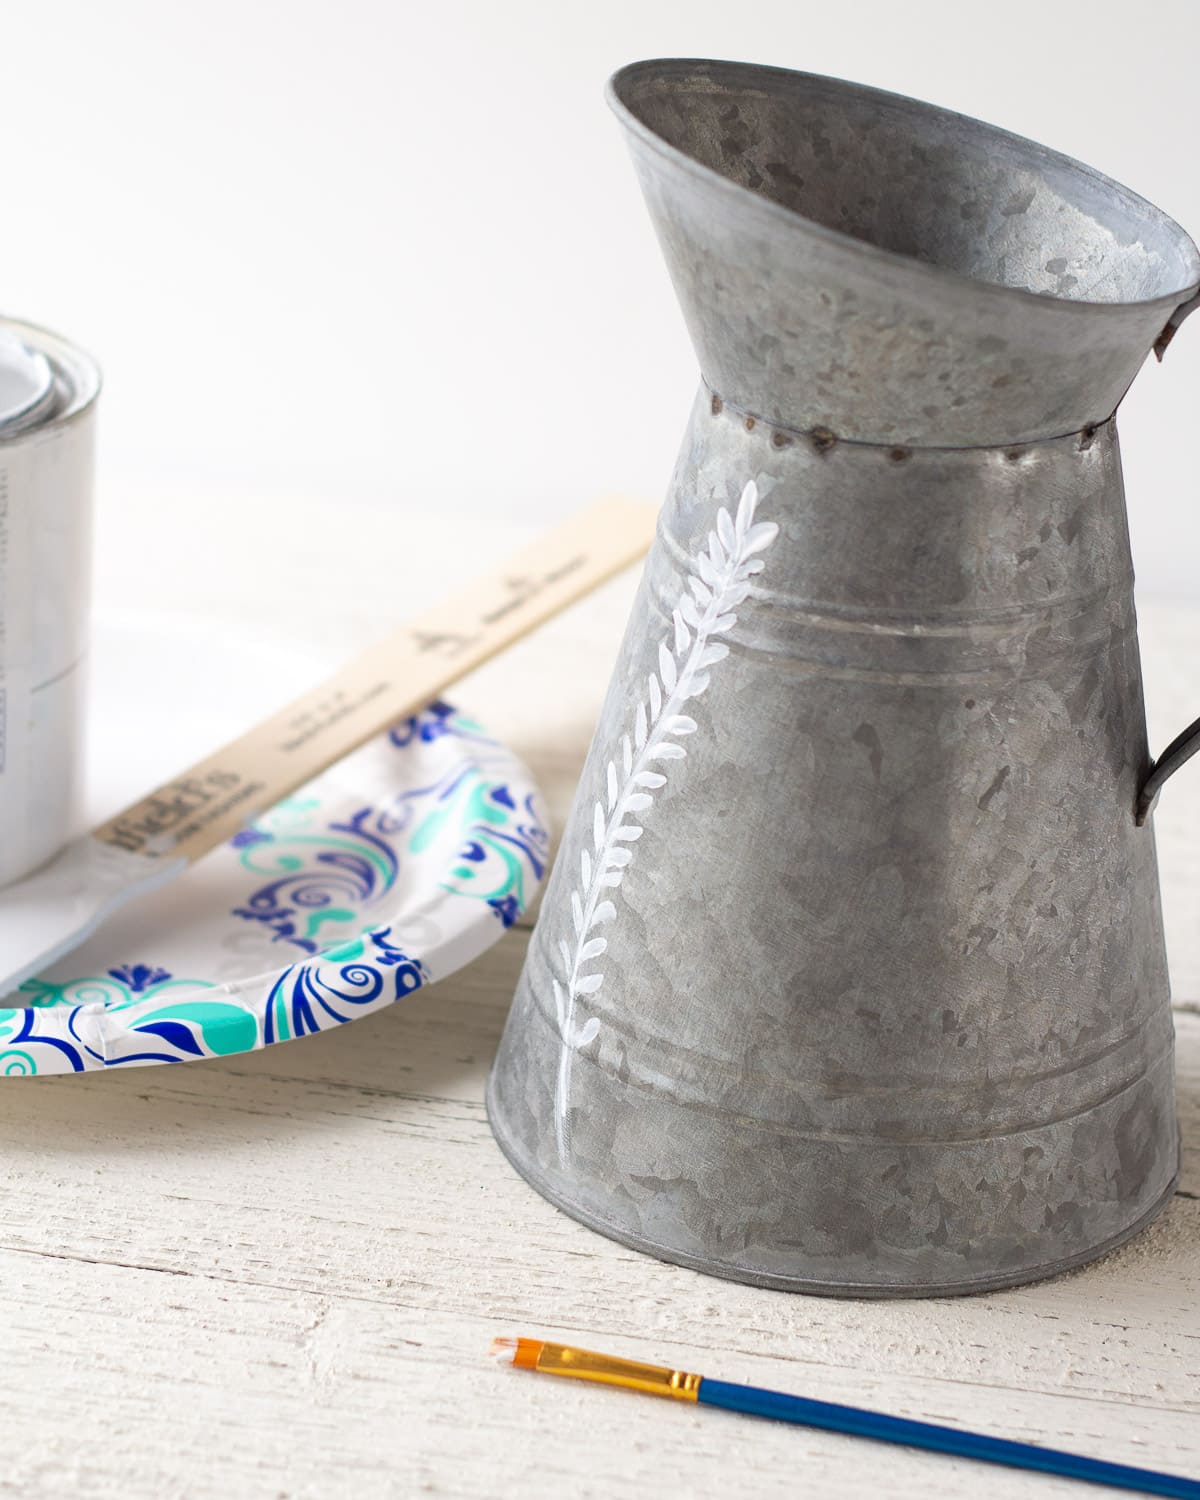
Add additional details like flowers or dots as you like.
When finished, allow everything to dry while you wash out your brush.
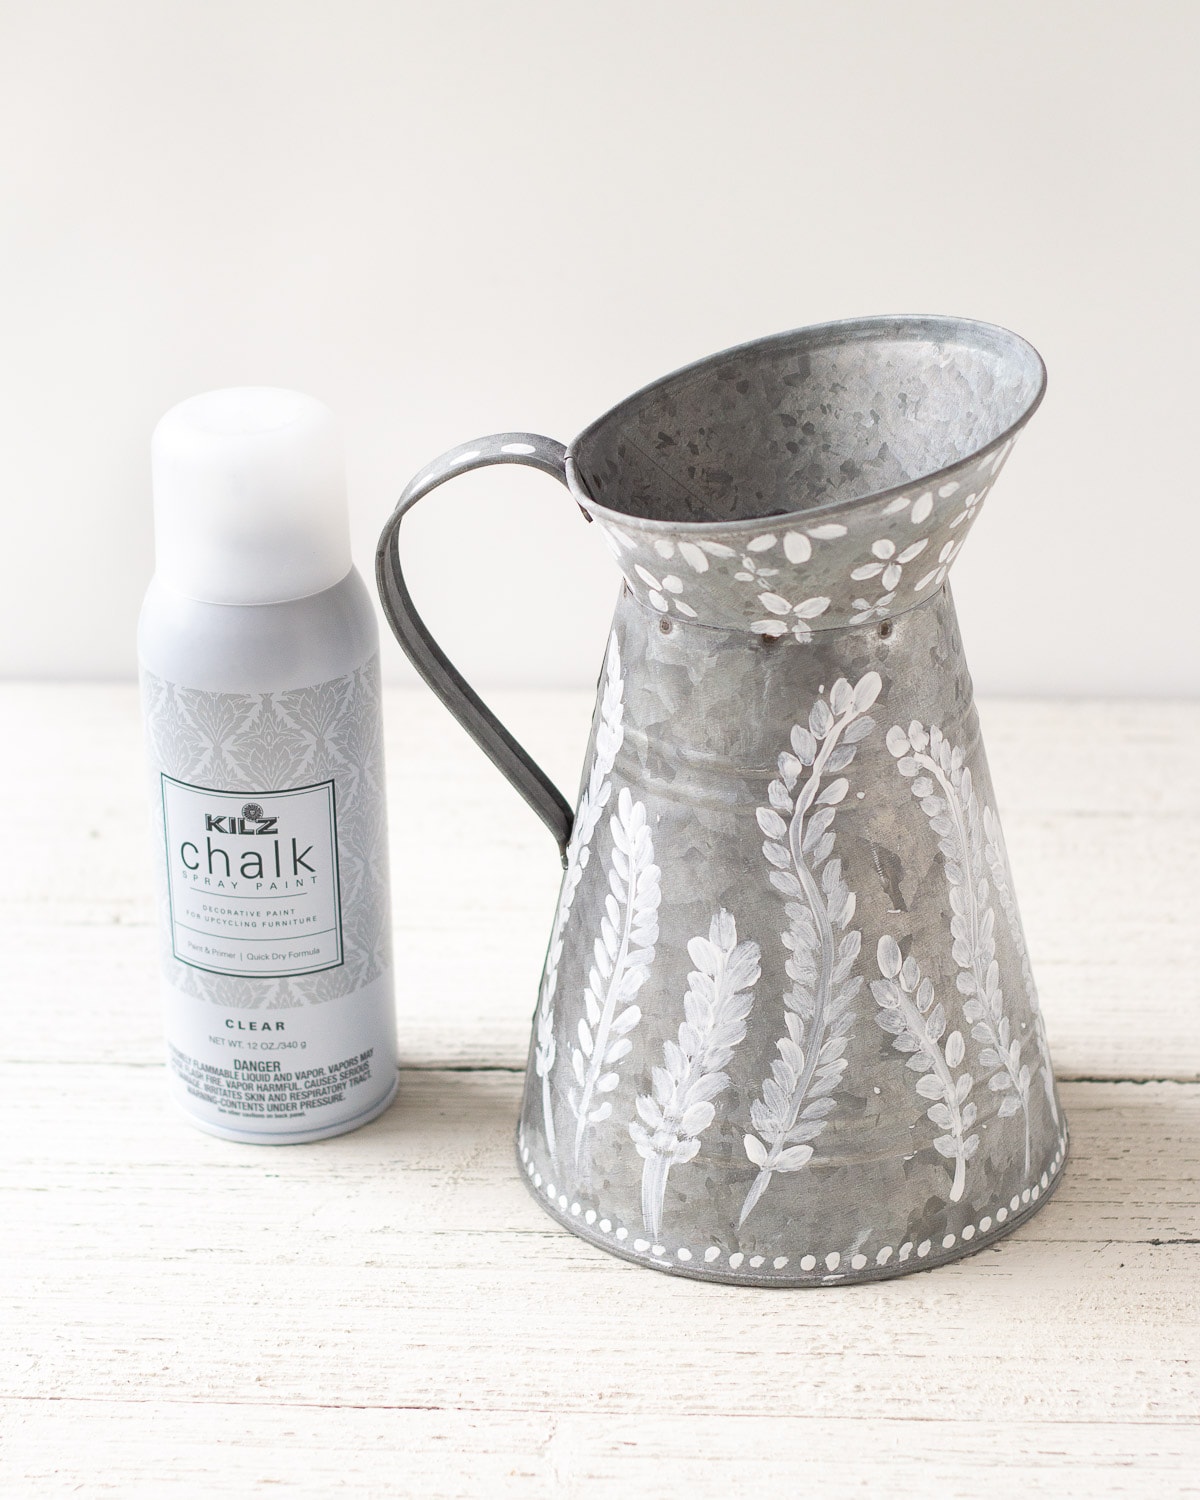
Optional: for a sturdier pitcher (this is decorative, so I personally am not using this pitcher with water or real flowers) spray the finished product with a matte clear coat spray like Rust-Oleum Matte Finish or KILZ Chalk Style Spray Paint in Clear.
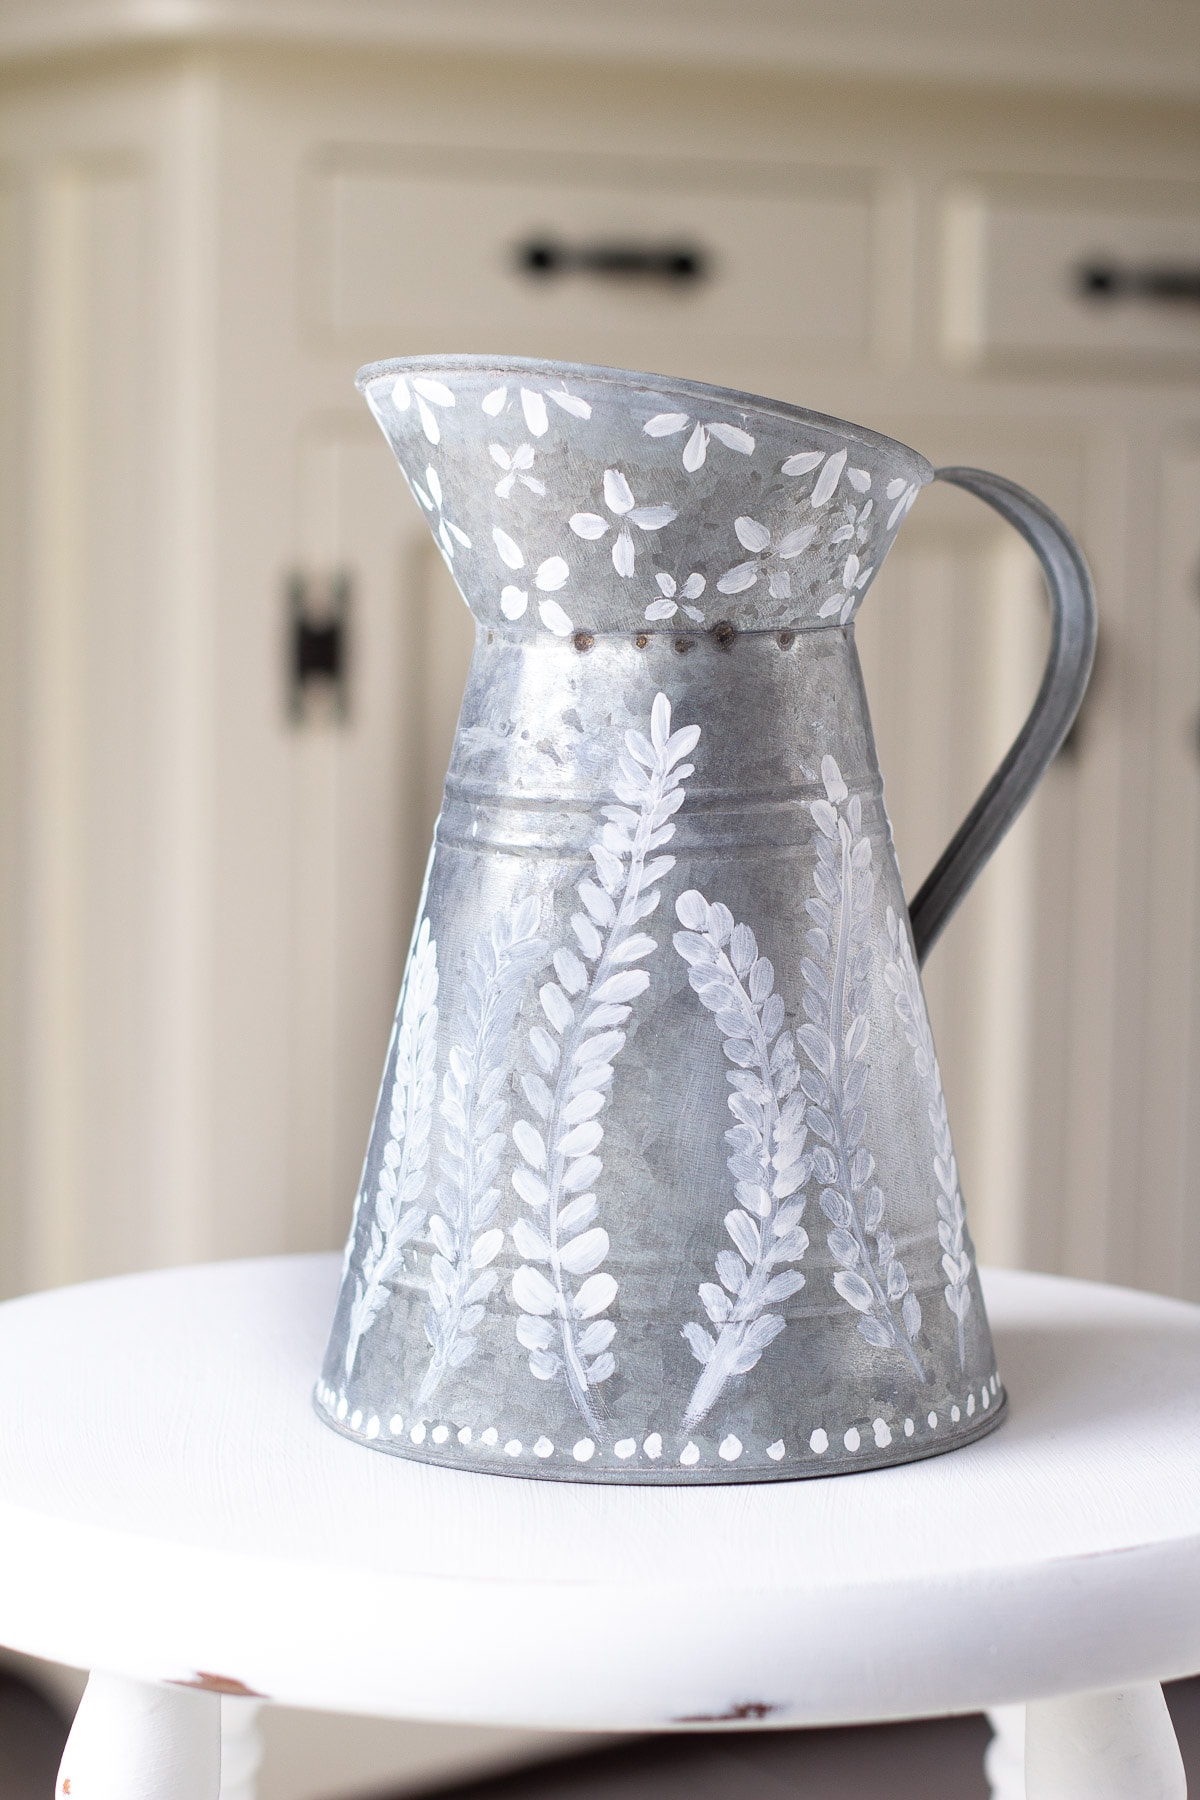
All done!
Tips for Painting Floral Designs
First, practice! Before you begin painting the galvanized pitcher with chalk paint, grab a spare piece of cardboard (something thick enough you can use chalk paint on it), like the inside of a cereal box or something and just practice. Try different ideas and layouts.
Second, choose the right brush. If things just really are not happening, it might be the brush. Good quality brushes make a world of difference and while I’m not an expert on art brushes I do find that spending a bit more and providing myself with a variety of styles is helpful.
For this project I like using a filbert brush (or flat brush) because the shape lends itself to these teardrop shapes.
Third, use a piece for inspiration. Find an image you’re inspired by and display it on your phone (maybe it’s the originals from Hobby Lobby above, for me it was this dresser painted by Marian, aka, Miss Mustard Seed) and consult it as you practice and paint your galvanized piece.
I wasn’t painting a dresser like my painting inspiration came from, but seeing Marian’s clustered florals and bold strokes helped me change styles from my typical painting attempts (that honestly looked a little feeble on this piece).
Fourth, you can have a do-over! After I finished my first attempt I realized that I loved some of the florals I painted and didn’t like others. I think I improved as I went around the pitcher. So, I took a sponge and a little water to the spots I didn’t like and to my surprise they scrubbed off easily!
Note that this method will also remove some of the “galvanized” finish from your piece, so be careful with it and know that the finish might become a bit smudged/shiny in some areas.
And there you have it! A quick way to update some galvanized pieces hanging out around your home. If you give this a try, I’d love to hear about how it goes!